The Geekvape Blade mod is the latest from a brand that has released some great products as of late.

This young brand has been making waves and innovating with every single release, building a huge base of vape fans along the way, fans like me who eagerly await the announcement of every new bit of gear they release.
From the indestructible Geekvape Aegis X mod, to the wildly popular Ammit RTA, the Zeus X RTA and the new, out of this world original Loop RDA which I cannot wait to get my grubby paws on.
Geekvape Blade Kit
Geekvape doesn’t only produce winners in the performance field, their gear is uber sexy looking too, with sleek lines, great balance and top quality finishes.
The subject of today’s review is a symphony of hard hitting dual 21700 performance and trippy, eye catching looks: it’s the GeekVape Blade 235W kit, complete with the smooth hitting Aero Tank and Blade Mod. Looks the part but can it match the best box mods for performance?
Let’s take a closer look.
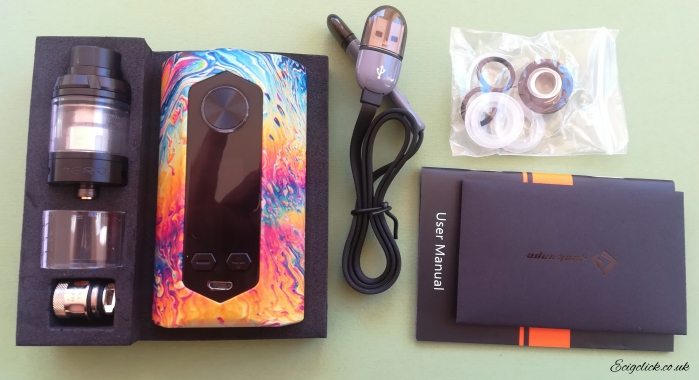
What’s In The Box
- 1 x 235 W Blade Mod
- 1 x Aero Tank
- 1 x IM1 O.4 Ohm Coil Head
- 1 x IM4 0.15 Ohm Coil Head
- Spare Glass
- Micro USB Cable
- 1 x Dual 18650 Battery Adaptor
- User Manual


Features Mod
- Dimensions: 95 x 52 x 38 mm
- Lightweight aircraft grade PPS chassis
- Weight 112g without battery
- Supports dual 18650 (with adaptor), 20700s or 21700s
- Resistance: 0.05-0.3 Ohm
- Wattage: 5 -235 Ohm
- Modes: Power/TC/TCR/VPC and Bypass
- 0.015S Fire speed

Features Tank
- Dimensions: 25 x 45mm
- 4 ml Capacity
- IM1 Coil, 0.4 Ohm (40-60W)
- IM4 Coil. 0.15 Ohm (60-80W)
- 510 Threaded
- Top fill
- Bottom adjustable airflow
Build Quality & Design
Blade Mod
On opening the high quality black and orange, GeekVape box packaging, well…I almost cried, so beautiful was my one-of-a-kind StarryNight mod…the mod is also available in Crytal Sand, Black and a very cool pink and purple cartoon colour, lovingly named “Poppy”.
 Of course, the names of this collection are somewhat reminiscent of Van Gogh paintings, we’ll leave that there.
What I love about the Starry Night is that every one printed is different, with unique rainbow swirls that bring to mind distant galaxies, carpets in Vegas and just about anything that might have killed our braincells back in the 90’s…or 2000’s for that matter.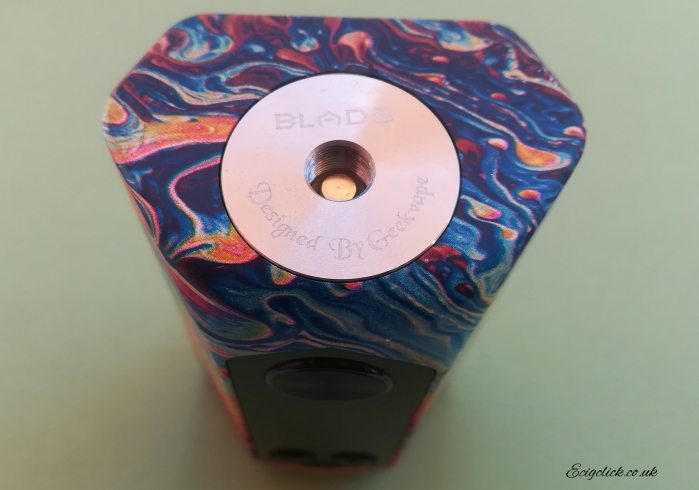
The mod is by no means small, it is, however…extremely light weight, made with aircraft grade PPS, an organic polymer that’s battle tested and stands up like a champion to all kinds of heat and chemical bombardments…in other words, this Geekvape Blade ought to be a durable bugger!
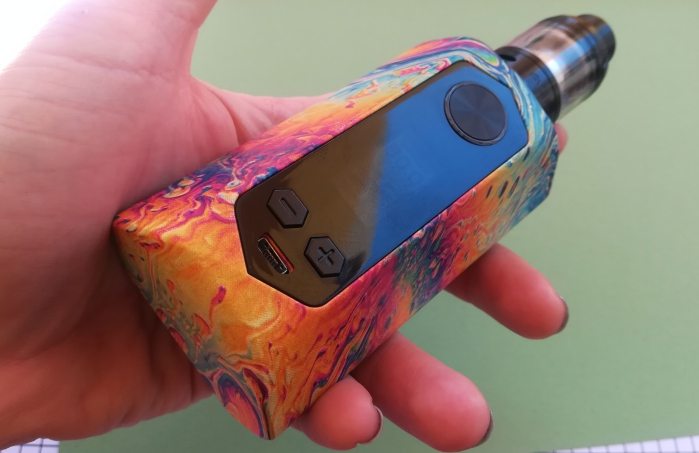
From the top, where a deep, springy 510 connect sits in a disk like SS, tank seating…the Blade is the shape of a somewhat squat shield, 6 sided, with the bottom of the shield being the top of the side that is home to the fire button, screen, adjustment buttons and micro USB port, all in a line, in that order from top to bottom and all on a shiny black, plastic panel.. with top and bottom shaped into points so that the panel is also 6 sided.
The fire button, round and featuring that concentric ring texturing that we all love so much, is surrounded by an LED ring, which will light up slime GREEN around the button when clicked…and it is clicky.
The adjustment buttons, which are just below the 1 inch OLED screen, are hexagonal and have a clear + and – marked on them.
The base has very light silver print branding on it.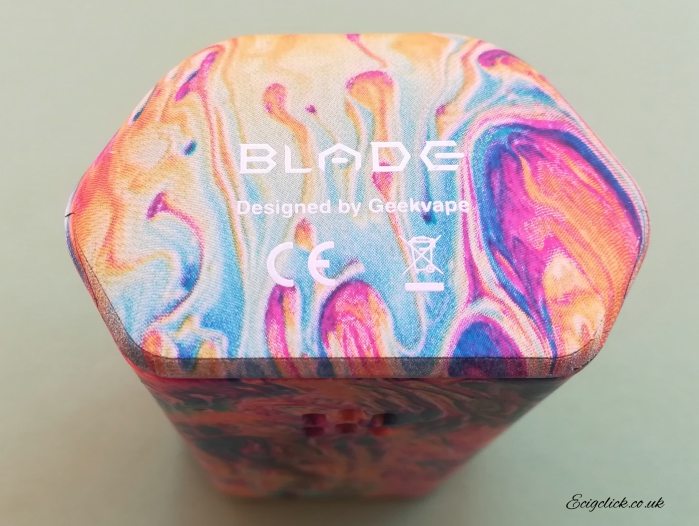
The mod is entirely unadorned, except of course for the magnificent print finish, which feels like the softest velvet and brings tears to your easily pleased eyes.
The top three sides of that shield extend to form the battery cover, which sits inside your palm and is easy to remove with the help of near invisible tabs halfway down the mods length, on either side the door.
The top third of the door has six elongated holes in it, backed with metal, with holes drilled in so that every elongated hole has three holes visible inside it, so there are, essentially 18 small battery ventilation holes.
Inside the battery chamber, which takes dual cells, you’ll find the plastic 18650 adaptor already fitted, take it out and you’ll see the where dual 21700s or 20700s can fit nice and snug.
The mod is beautifully ergonomic, if a little on the wide side, in order to make space for those large 21700 cells, side by side. It does, on the bright side, take even the chunkiest 25mm tank with ease.
Geekvape Aero Tank
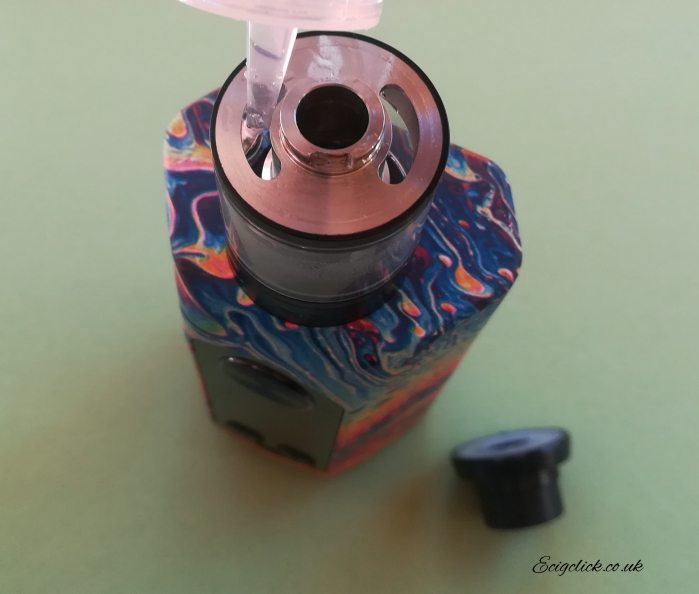
The Aero tank is black and quite beautiful too, very sleek and minimalist, with no knurling on the bottom airflow adjustment ring…where two massive 15mm slots give this tank its breezy name. They are easy to adjust even without knurling so some good machining from GeekVape, as per usual.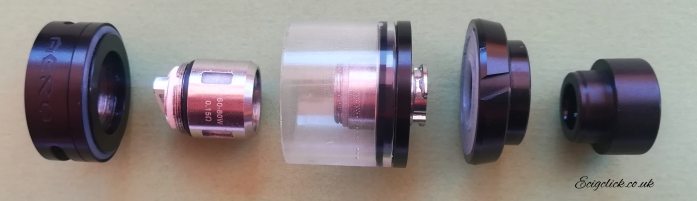
Knurling on the tapered top cap gives away the top fill system, just one small twist to the left and the cap pops off, revealing two huge fill slots. The cap replaces just as easily.
The thick cast, black delrin 810 drip tip sits on a 2mm raised ring, for comfort and heat protection and I had no trouble fitting my other 810 tips, those without 0-rings.
The stainless steel tank breaks down with absolute ease and is excellently machined.
How Does The GeekVape Blade Perform?
The Geekvape Blade mod is not only a looker, it performs like a champion too. I used it with a few of my heavy-loaded RTA’s to test the upper wattage arena and was impressed by the heat distribution and the coolness of this PPS material, even when the mod was being drilled to the max.
With the help of a user manual that’s been printed with rare finesse, I was able to navigate my modes with ease, try out the VPC (variable power curve) mode and navigate the menu system with little confusion.
I found the Temp Control for Ni and SS to be effective and easy to master, as with the VPC mode, which I always like to fiddle with.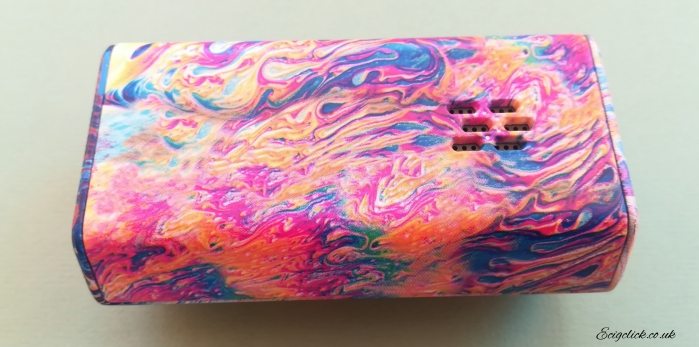
I found the compatibility of the mod to be a huge plus, where battery types are concerned. The fact that you can pop in your 20700s when your 21700s go flat, and your 18650s after that, made for some protracted and very enjoyable vaping on this psychedelic setup.
I really like the fire button, for texture, click and effectiveness and while there’s nothing groundbreaking or different in this mod’s full length list of features, the fact that all features work a charm, the ramp is ultra-fast and the mod insanely gorgeous and rugged at the same time, well…these things are enough to make me a happy reviewer.
I really LOVED the Geekvape Aero tank for the first week, until one of the included coils revealed its low lifespan. The tank has such a smooth airflow, is so easy to open and fill and really, I felt the smoothness of the airflow, even when very restricted, the smooth sound and feel, to be very agreeable.
Flavour was excellent, as was cloud but I’ll cover that in more detail in the coils section.
How To Fill The Aero Tank
- Screw off the top cap
- Fill through a slot

How To Change the Coil
- Unscrew the glass from the tank base
- Unscrew the coil head from its seating
- Replace
Stock Coil Performance
Using Twelve Monkeys vape juice, my first taste on the installed IM1 coil, even at a conservative 40W was mmmmhhmmmm, freaking delicious.
Both coils deliver exceptional flavour and only slightly less exceptional vapour within their given ranges but sadly I found the lifespan of the IM4 coil, the higher wattage coil, to be less than satisfactory, which is a pity.
To be fair though, I would buy these coils again, in spite of the 10 day lifespan, because I know I gave them a run for their money and the flavour was just so excellent!
I later noticed that the IM4 is Ni80, where as the IM1 is Kanthal, so maybe a Kanthal IM4 would have been a better idea, since Ni80 tends to have a slightly diminished lifespan.
While using the IM1- my sweet spot sat around 50W, a rich and flavourful vape with the excellent airflow system on the AERO.
For the IM4, I vaped at a constant 75W…also profound flavour and vapour until, after just more than a week, I started to taste a burn. I intend to give these a thorough rinse and dry, as that often takes care of the burn taste, who knows, maybe I’ll enjoy another week on this IM4 yet.
How To Operate the Menu System
- 5 Clicks on or off
- 3 Clicks to access mode system
- +/- To scroll
- Hold fire to select
- Press and hold fire and + or – to adjust brightness
How To Replace The Batteries
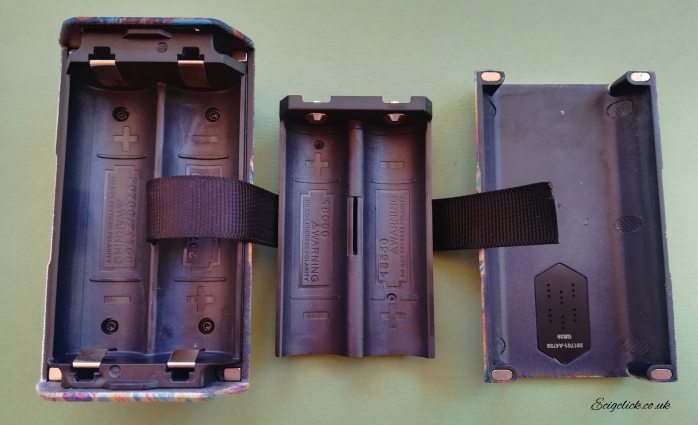
- Pop off the battery cover
- If using 18650s be sure to use the adaptor
- Insert batteries according to the mnarkers in the chamber
Battery Life
The green LED on that fire button, and the screen, which is fairly simple, take very little power and I found the battery life to be excellent for 18650s, 20700s and 21700s.
On a high wattage use, say 80-140W, intermittent, dual 2500’s ran for 7 hours, my 3000mAh 20700s, approximately 1.5 hours more and 4000mAh 21700s, just over 2.5 hours more than that. Not too shabby!
Pros
- Mind-boggling colour options
- Ergonomic hand feel with a velvety finish
- Compatible with 3 battery types
- Totally massive wattage range
- Excellent battery life
- Ultra smooth airflow
- Awesome flavour and cloud on both coil heads
- Easy tank breakdown
Cons
- The IM4 coil didn’t last as long as expected
Final Review Verdict
The Geekvape Blade kit has officially put my flashy Doc Marten collection to shame and I’ve had to rethink my outfits to accommodate the glorious FLASH fest that is the Starry Night blade mod.
I am a flash monster though, so this is not a problem. The fact is, you don’t necessarily have to go for the more ‘Electric Kool-aid’ of the colour options, you can still rest assured, this is performer, with superior ramp time, incredible battery compatibility, serious wattage capacity and a durable chassis that’s not going to overheat, shatter or get freaky when it gets juice on it.
The Blade Kit is a stunning, winning setup for any and all vapers looking for a little bad ass, high powered action and some solid flavour and cloud!


 Preview – Compatible With “N Pod Cartridges”!")