The Aspire 9th Tank review and this one of the latest in Aspire’s Prestige lineup.
These are tanks and mods where Aspire partners with a smaller “high end” mod or tank maker.

In the past we’ve had the Nautilus GT and GT Mini, where they worked with Smokerstore, and the Mixx, that was a Sunbox co-creation.
What Can We Expect From The Aspire 9th Tank?
The most interesting thing about the Aspire 9th Tank is that it has the honour of being (arguably) Aspire’s first RTA.
Now, they have made rebuildable sections before, notably for the Cleito and Cleito 120, as well as the Triton.
But these have all been examples where a tiny deck is crammed into where your coil would normally go, requiring no other adjustments.
They did make the interesting Quad Flex, but this was an RDTA, stock coil tank or RDA.
The Aspire 9th Tank actually requires replacement of both the glass and the chimney section. This should hopefully make it perform well as both a stock coil tank, using Aspire’s AVP Pro range of coils, and an RTA.
They’ve chosen to partner up with NoName, that is an Italian modding group from Italy. Although most well known for some rather iconic mods, they have also produced a variety of tanks over the years.
This was sent over from NewVaping (thank you) as usual, this will not affect my review and I shall report back honestly with what I find.
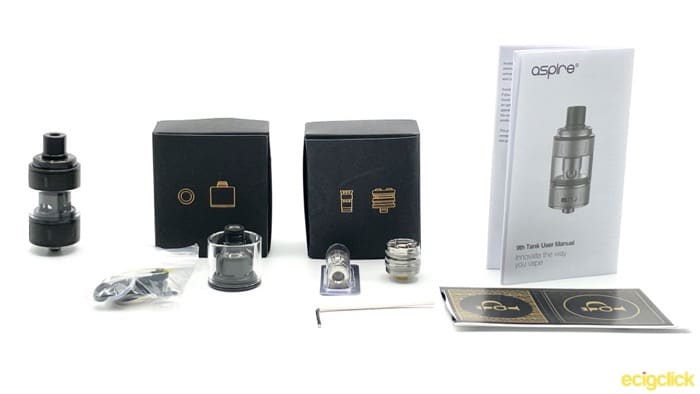
Inside The Box
- 9th Tank
- AVP Pro Mesh Coil 0.65Ω (preinstalled
- AVP Pro Coil 1.15Ω
- RBA Deck
- RBA Chamber
- RBA Glass
- RBA Positive Pin
- Spare o-rings and grub screws
- Manual
- Stickers
Specs
- Dimensions – 52.5 (with AVP Pro Coil) or 57 (with RBA) x 22mm
- Weight – 53.2g (with AVP Pro Coil) or 61.3g (with RBA)
- Capacity – 2ml
- Material – Stainless Steel and Pyrex Glass
- Coil – AVP Pro or single coil RBA
- Fill – Top Fill
Design and Build Quality
The Aspire 9th tank comes in company’s rather lovely Prestige style packaging – black cardboard with foil highlights.
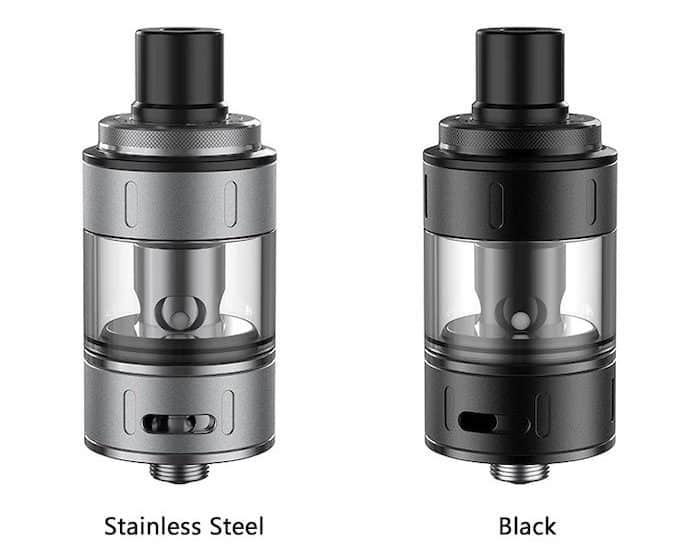
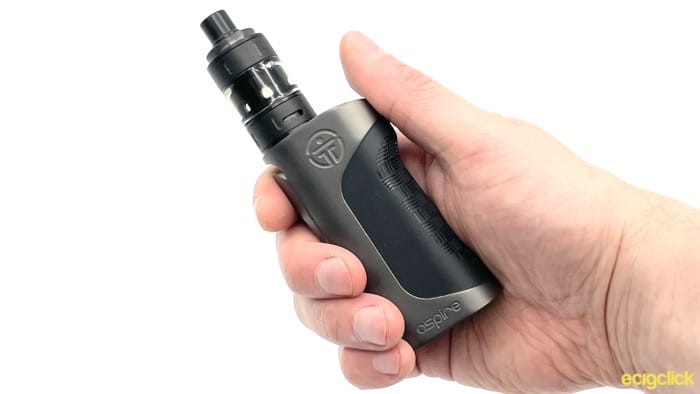
It’s available in a choice of only two colours: Black (that I’m reviewing) or Stainless Steel. The black has a matte finish to it, and based on the pictures, it looks like the Stainless does as well.
What’s unusual is that the RBA section is not a coil head with a couple of screws in it to replace a stock coil. In this case it’s a fully formed deck section with a different evaporation chamber and glass to make switch.
It’s a 22mm diameter tank, with the height varying depending on whether you are using it with stock coils or the rebuildable section.
Aspire 9th Tank Drip Tip
The drip tip is a standard double o-ringed 510 connection, so if you don’t like it, you can easily swap it out.
It’s a fairly chunky drip tip, with thick walls.
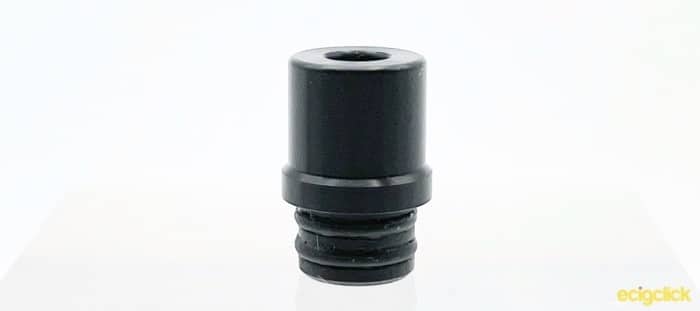
I actually wasn’t the biggest fan of it, I don’t know how to put it except to say it felt clumsy. I think the straight sides and the big walls made me feel like this.
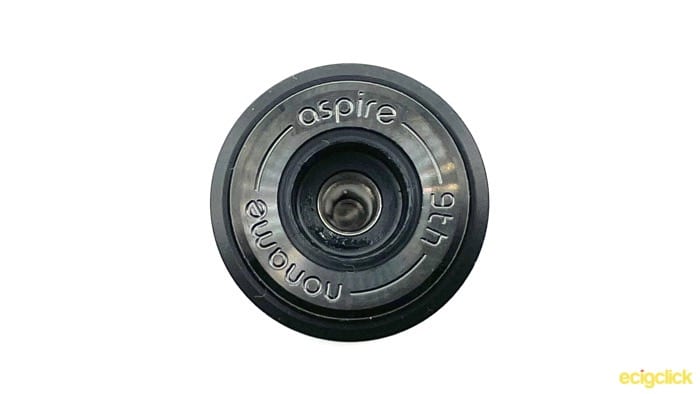
Aspire 9th Tank Top Cap
Unusually the top cap doesn’t have any grip around the outer edge of it, instead it uses a stepped design and the knurling for your grip is on the raised section.
On the plus side, this does mean that you’re never going to accidentally unscrew the whole tank when you’re just trying to open it to fill.
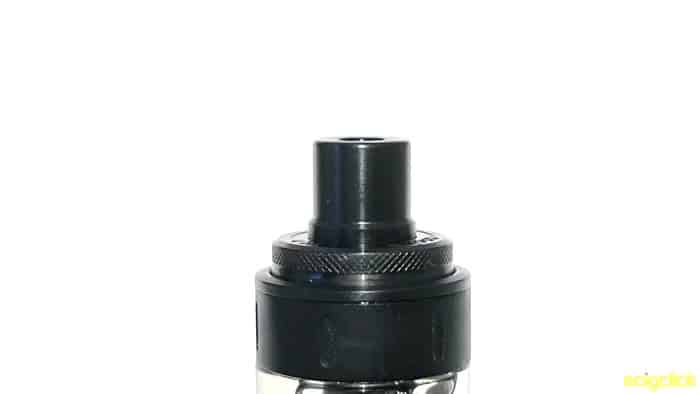
You also have some subtle branding on the top cap. with “aspire”, “9th” and “noname” engrave on top. Be aware that it’s quite a lot of screwing to take off the cap, but the threads are absolutely silky smooth.
With the top cap off you can see there is one, relatively small, kidney shaped fill hole, with silicone surrounding it to ensure a good seal when the top is screwed down.
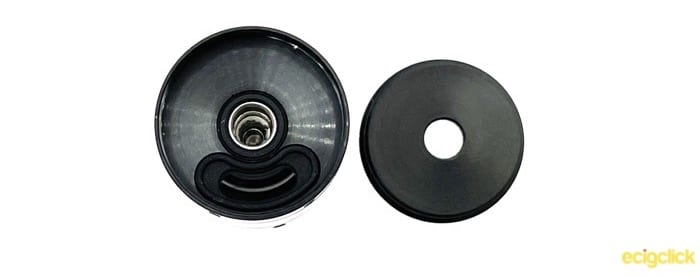
A slight negative here is that only having 1 fill hole, means there’s no hole for air to escape. Because of this you’ve got to be careful not to accidentally form an airlock over the fill hole by filling up too quickly.
Aspire 9th Tank Body
Moving down the body, the top section of the tank has some nice markings on it, that do double duty as giving you more grip to unscrew the tank.
Through the glass you can see what looks to be a domed evaporation chamber, regardless whether it is in RBA mode or stock coil mode.
Aspire 9th Tank Airflow Control
In a change from Aspire’s usual pinhole airflow system on its Nautilus line of tanks, the airflow control ring on this is a single cyclops hole.
It has stops at the fully open and closed positions, and has enough tension that it’s unlikely to be easily knocked out of place.
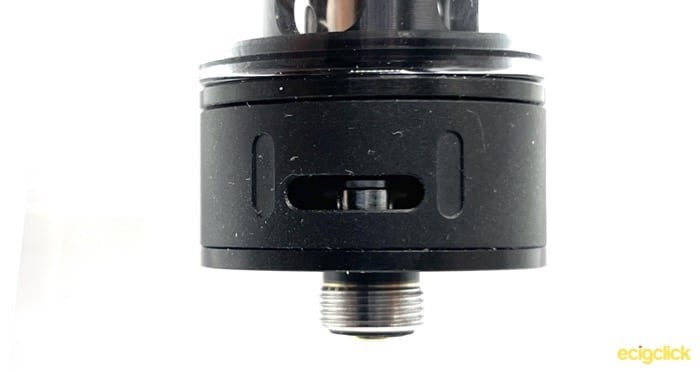
I’m not convinced about what seems to be a relatively large airflow hole for a mouth to lung focused tank, but we shall see how it performs in the review.
Aspire 9th Tank Deck
The deck screws down into the base where the coil normally lives in stock coil mode.
However, it requires a new chimney section and glass, so it’s not something that you can swap out on the fly.
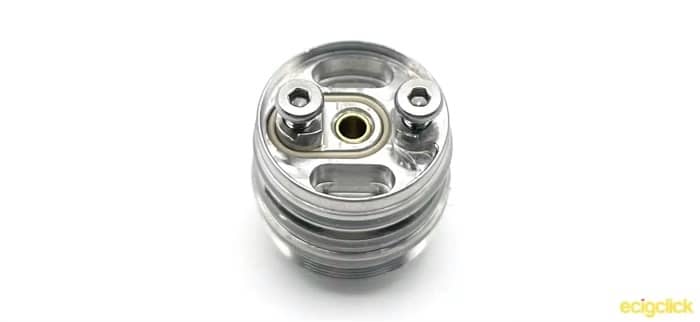
It’s a simple single coil deck, with the airflow coming up from directly beneath the coil, and two hex screws to clamp your coil legs.
There are little lips that help the to keep your coil legs from slipping out as you tighten them up.
How To Fill The Aspire 9th Tank
Filling the tank is nice and easy.
Unscrew the top section, it’s a lot of turns, but very smooth threading, and fill through the single kidney shaped hole.
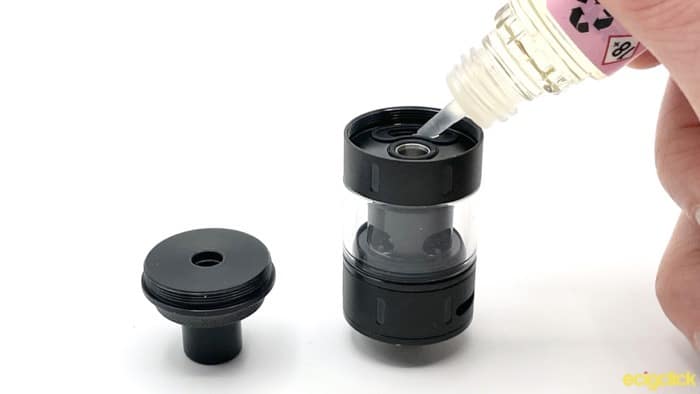
Be aware when you’re filling it that you don’t have a secondary air release hole, so if you fill up to quickly you may form an airlock.
How To Change the Aspire 9th Tank Coil
Turn the tank upside down and unscrew the base.
Pull your coil out and push a new one into place.
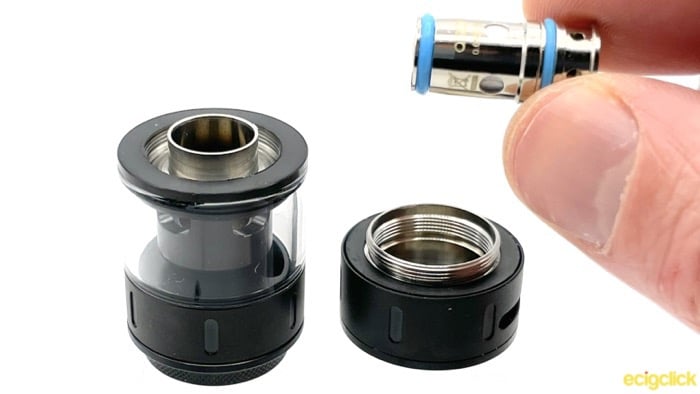
Then screw the base back on and fill up with your preferred e-liquid.
Remember to leave it a few minutes to prime the coil.
How to switch to RBA and how to build it
To switch the Aspire 9th Tank to become an RTA, you need to replace 3 separate piece.
Unscrew the base and remove your coil – the RBA deck screws into the base.
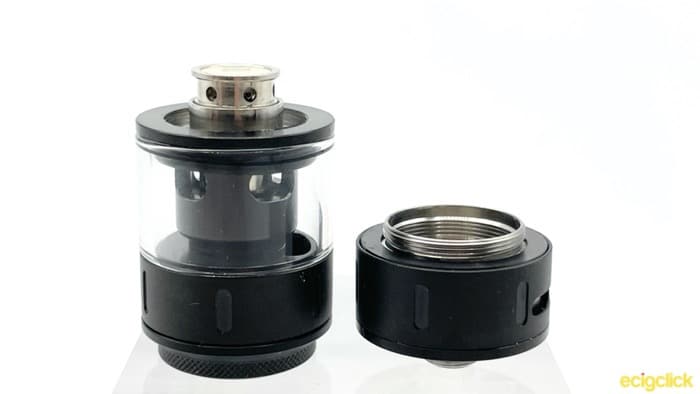
Remove the glass and unscrew the chimney section – the RBA chimney is slightly longer, and has some pronounced doming to improve the flavour.
Replace the chimney, and the longer glass, and you are now ready to build your coil!
- Unscrew the deck screws
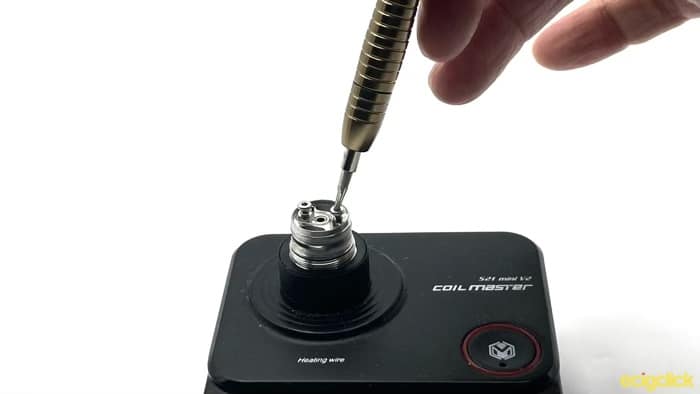
- Place your coil, and tighten the screws down on your coil legs
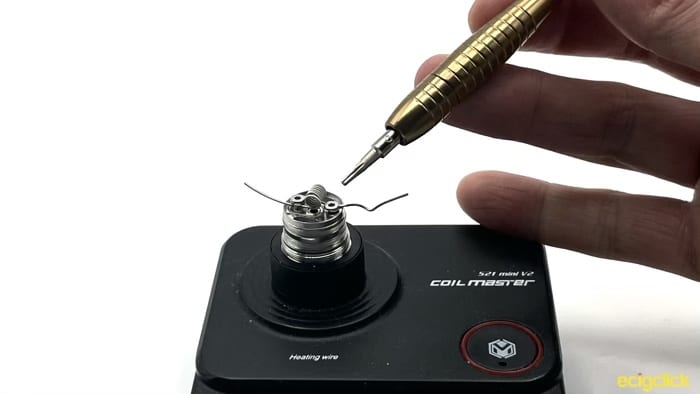
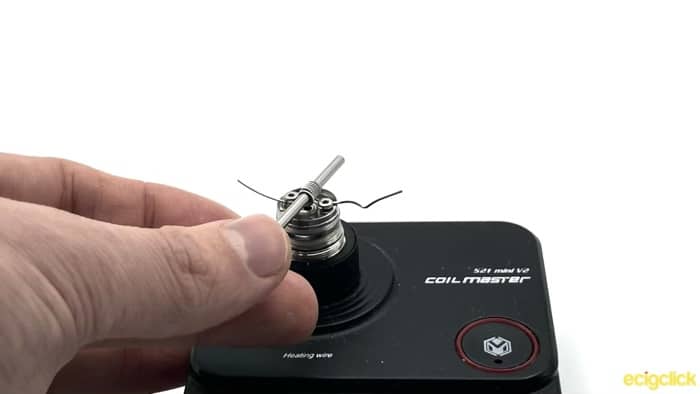
- Straighten your coil with a coiling jig or screwdriver
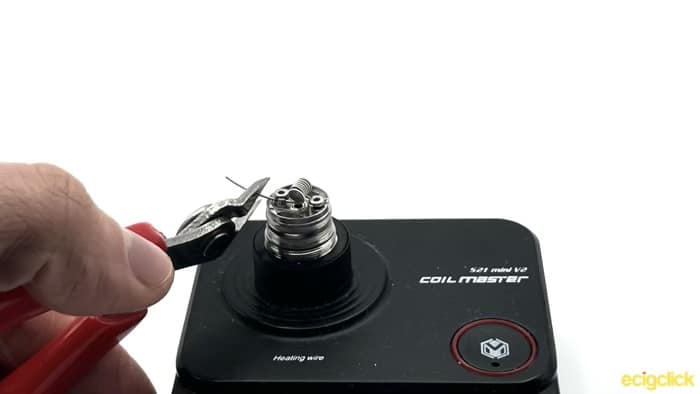
- Snip your coils legs close to the deck
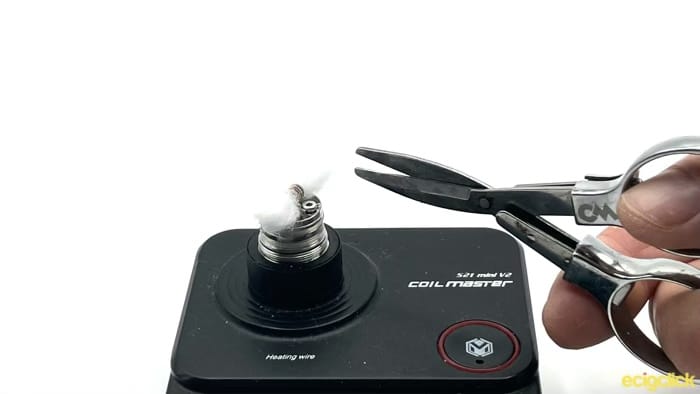
- Dry fire your coil and brush with ceramic tweezers to remove hotspots

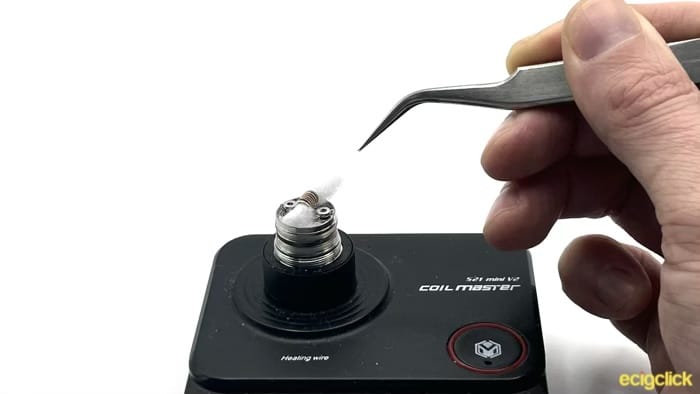
- Feed your cotton through the coil
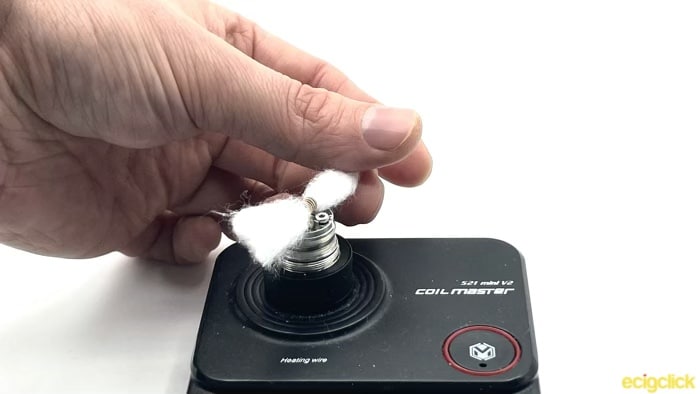
- Trim your wick so that it will fit into the juice wells
- Place your cotton tails into the juice wells
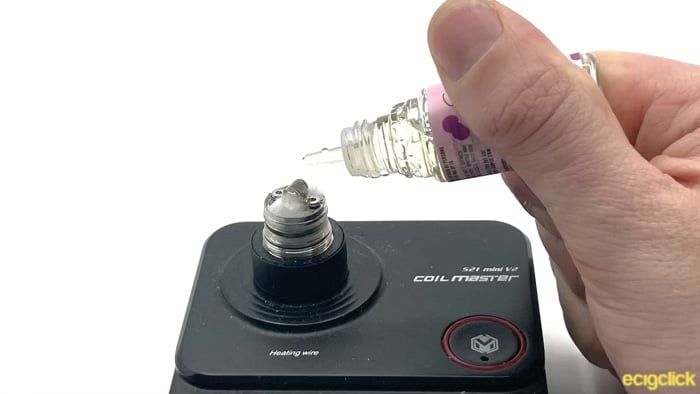
- Prime your coil with e-liquid
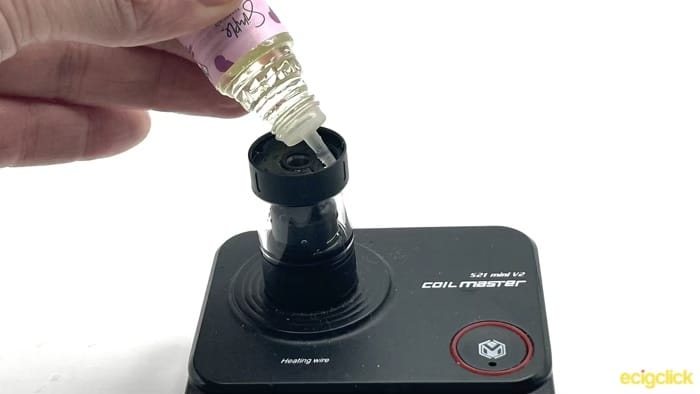
- Reattach your tank section and fill up with e-liquid
How Does the Aspire 9th Tank Perform?
It’s taken me a little time to get this review done, as I had not only two coils to test, but also a rebuildable section that justified putting in a variety of different builds.
Although I had never previously used Aspire’s AVP Pro coils, I’ve been pretty impressed with how they perform. Though I do feel that using something with more options and availability (like the Nautilus coils) might have been the way to go.
Having said that, I can’t see anything to stop Aspire from making new chimney sections to allow the use of other coil ranges, so it could be something that happens in the future!
0.65Ω Coil – Airflow and Cloud Production
Airflow is firmly in the mouth to lung range with this coil.
On a 1-10 scale with 1 being cheek poppingly tight, and 10 being fully open, it’s a 5.
You can do a direct lung inhale, but you’ll probably need to slipstream slightly by letting some air in around the drip tip.
Because it’s already fairly restrictive, I found that closing down the airflow didn’t really take effect until it was at least half closed. For a smooth mouth to lung draw, I would often close it down so that there was much less than a quarter of the airflow showing.
I kinda wish Aspire had used a pinhole design rather than wide cyclops how for airflow, as the two stock coils really don’t need that much air.
0.65Ω Coil – Flavour – Best at 15-18W
Flavour is strong and punchy from these coils.
I tested out this coil with both my standard mouth to lung 50/50 VG/PG e-liquid (Berry Ice from SVC Labs), as well as a range of 70/30 liquids including Psycho by HKD.
Despite the fairly small wick holes, I never experienced any problem with dry hits on the thicker e-liquid, probably in part due to the low wattage I was vaping at.
1.15Ω Coil – Airflow
The airflow on this coil feels a touch more restrictive than the 0.65Ω, but I’m not sure if that’s just confirmation bias of what I’m expecting.
Either way, if you asked me to test the draw on both of them blind, I’d be hard pressed to tell the difference.
As with the 0.65Ω, the airflow control only really starts to come into effect when you’ve shut it down about half way.
And if you want to get a “traditional” mouth to lung vape, you’re going to be playing around in the last 8th (or 9th?!) of it’s range.
1.15Ω Coil – Flavour – Best at 10-16W
It feels like a long time since I used a coil with a resistance over 1Ω, and one of the reasons I’ve moved away from them is I often find they don’t have the flavour output that I’m wanting.
So I was really impressed at the amount of flavour this little coils puts out, even at 10W.
I’ve been using it exclusively with 50/50 e-liquid and it has been really impressive.
Bump the wattage up a little to around 14W and it’s definitely in the sweet spot for this coil.
It doesn’t manage the separation of flavours you tend to get with a mesh coil, but with a good Nic salt e-liquid this is pretty much spot on.
The Aspire 9th Tank As An RTA
The flavour that this little RTA is capable of is incredible.
For a company that is not known for making RTAs, they have knocked it out of the park!
I tested it out with one of my standard MTL e-liquids, Berry Ice by SVC Labs, and it was absolutely spot on.
I also tested it with some 70/30 liquid, at slightly higher wattage, and it performed pretty flawlessly as a loose mouth to lung vape.
My major complain with it as an RTA is to do with the airflow.
Again, the big cyclops hole is way more air than is necessary for mouth to lung.
If this tank had the same sort of airflow pinholes that something like the Nautilus GT mini does (and indeed many of the other Nautilus tanks) it would be pretty much spot on.
Anything Else?
I don’t like the drip tip, at all. But I swapped it out for one of my favourite mouth to lung drip tips and it instantly felt better.
Pros
- Great flavour as either stock coil or RTA
- True RTA rather than a rebuildable coil
- Great build quality
Cons
- Only one juice fill hole, so can causes airlocks
- Airflow is too much for the stock coils or true MTL in RTA mode
- Drip tip is clunky
- No way to switch from stock coil to RTA on the fly
Final Review Verdict
So that was the 9th Tank by Aspire, co designed with NoName.
There has been plenty of tanks that have tried to do the stock coil/RBA section in the past, but too often they don’t end up being very good at either.
The major problem with most tanks that try to do both, is they try to cram the whole of the building section into the same space that the stock coil goes.
Aspire solves this problem by using a totally different chamber and chimney, and indeed a new glass to take account of the taller, wider design this requires.
Of course the down side is that it can’t be easily and quickly swapped over, you’re not often going to be carrying a spare glass tank and chimney section around with you!
But it does give you the option of using the tank in either of those two modes without the sort of compromises you would normally have.
As a stock coil tank, the flavour reproduction from both of the coils is fantastic.
Whilst I wish they had used the far more common Nautilus coils, the AVP Pro coils are at least as good in terms of flavour reproduction (not something I say lightly!).
As an RTA it is honestly one of the best “mainstream” tanks for flavour I’ve had the pleasure of using.
However…and it’s a big however.
The airflow design is not suited to either the coils, or as a mouth to lung RTA at all. There’s very little change to the airflow between full open and half closed, showing that a half size air flow control would have been enough.
But as it also uses a single cyclops style airflow control it is very hard to fine tune the amount of air at the tighter end of the spectrum.
You can get a really good and tight mouth to lung draw from this, but it requires a lot of finessing to get the the airflow control ring in the right place. It also means that if you do manage to knock if slightly (not easy thankfully, as it has decent resistance) it wildly changes the draw on it.
If you can live with this caveat however, or you like a loose mouth to lung, it’s a pretty impeccable tank design.
And if 2ml is too small a capacity for you, Aspire are bringing out a PSU bubble tank to expand it.
So, is this an MTL tank you’re using or looking forward to trying out?
Any thoughts or opinions please let me know in the comments below!


")
Hi, what a helpful response, thank you so much for thinking about this and answering.
I want to build your coil with the Vandy Vape’s microfine fused Clapton in Stainless Steel you mention. I’ve checked the Vandy Vape site & I couldn’t find any microfine wires; only superfine wires. Of the superfine wires, could it be either of these two?
1) SS316L Superfine MTL Fused Clapton Wire 32GAx 2+38ga 10ft, 3.88ohms per ft
2) SS316L Superfine MTL Fused Clapton Wire 30ga X 2(=)+38ga 10ft, 2.37ohms per ft
Thank you again for taking the time for a stranger. It’s inspiring that one day, with perseverance, I might get even better flavour from home made coils like yours than my beloved 1.8 nautilus. Thank you, I was losing hope.
No problem at all! And feel to look me up on social media if that’s easier than leaving comments.
You’re right, it is Superfine, not micro fine! The one I use personally is the 30gax2(=)+38ga but don’t get too hung up on trying to recreate what works for someone else. Vaping is a really personal thing, and what is amazing for me, might not be great for you.
Though I understand wanting to start with some recommendations!
Anyway, I’m happy to continue the conversation. I’m WillJameson1842 on pretty much all the usual suspects (twitter/instagram/facebook). My advice at the moment though, persevere, experiment with different wires/cotton/wattages/e-liquid, don’t buy any new hardware because you think it’ll be the solution.
Best of luck!
Will
Hi, I’ve used the nautilus x MTL for years & now want to move to rta. I bought the ares 2, (useless: little to no flavour) & the svoemesto Kayfun lite plus but seem to have trouble wicking because although my wicks look the same as all the demos I’ve watched & your photos here and I prime the wick overnight, less priming does nothing & the result is again little to no flavour, I find I can’t get flavour. When I compare the flavour with my nautilus x tank & 1.8ohm coils with this MTL dual core fused Clapton premade coils (the best so far which isn’t saying much) it’s useless whisper compared to a foghorn of dreamy rich beautiful nautilus taste.
I read that ‘beginners often have trouble with getting wicks perfect & that having a top airflow helps get past their first less than perfect results which bring muted flavour with bottom airflow.’ I only care about flavour, so can you recommend MTL rtas with top airflow & stunning flavour?
Or am I barking up the wrong tree, is the nautilus more restricted DTL & MTL and that’s why the flavour is so good? I just want the same tank with rta as it seems to beat all else for flavour, which should I try?
Hi and thanks for reading the review!
Moving to an RTA is great *if* you’re prepared to tinker a little to get the flavour that you want. Once you crack it, I would say the flavour potential of an RTA is leaps ahead of a prebuilt coil. Personally I also moved from a Nautilus to RTAs, although my favourite Nautilus coil is the 0.7Ω mesh personally.
What type of coils are you using for your RTAs? I tend to build to a lower resistance with RTAs, usually around 0.5-0.6Ω for MTL. A lot of purists will scoff at that, but for me that’s where I got the best flavour.
As for recommendations, although I’ve not used the Ares 2, I used the original one and was pretty happy with it for the time. The Svoemesto Kayfun Lite (and now the plus version) are my “go-to” MTL tanks, and I always have at least one in circulation. So I don’t think another tank is going to suddenly give you what you’re looking for.
Wicking is definitely the most important part to get right, in my opinion. But the Kayfun at least is pretty forgiving. It’s hard to advise without seeing what you’re working with, but one mistake a lot of people make when they move to an RTA is using too much wick. You’ve got to remember that the wick expands as it gets wet, and if you’ve left no room for it to expand, it will choke off your juice flow. The worst you will get if you use too little wick is a gurgly vape, and possible leaking. So if you’re having to cram your wick down, try thinning it out a little more.
For reference, my current build in my Kayfun is 6 wraps of Vandy Vape’s microfine fused Clapton in Stainless Steel, gives me a resistance 0.6Ω and I vape it at 21 watts.
There’s lots of forums out there, and Facebook has a range of good vaping groups on it with people that will happily take a look at photos of your build and give you some pointers.
Hope you manage to crack it!
Will