The Oxva Arbiter RTA is a chunky top airflow, dual coil tank, so let’s see how it performs..
Top airflow is something you don’t see that often in RTA’s, as it means the air has to come in at the top and then travel down and round to either hit the coil from below or the side.
Obviously this adds significantly to the complexity, but it does mean that they are pretty much leak free.
However it’s not as simple as just slapping a top airflow on an existing RTA, as top airflow can bring all sorts of weirdness like whistling or excessive turbulence.
We shall see if Oxva has managed to avoid these pitfalls down below!
What Can We Expect From the Oxva Arbiter RTA?
Oxva has been on a bit of a social media blitz since they launched, which is understandable for a new company trying to enter the crowded vape market.
The CEO of Oxva is Justin Lai, and if that name is familiar it’s because he was the designer of both the Geekvape Aegis series of mods and the Zeus range of tanks.
I’ve previously reviewed two of their pod mods, the Origin and the Origin X. But this is their first full RTA, though they have had a rebuildable coil head and a dual coil RDTA deck for the Origin X.
They also have a 21700 mod coming out soon called the Velocity, so hopefully that will fit this tank nicely!
This was sent over directly from Oxva for the purpose of review (thank you) as usual this will not affect my review, and I will report back honestly with what I find.
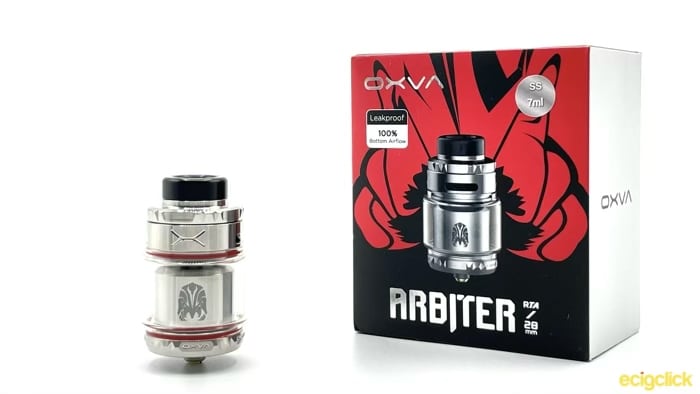
Inside The Box
- Arbiter RTA with 6ml bubble glass
- 4ml straight glass
- 2x fused Clapton coil
- 2x shoelace cotton
- Accessory bag
- User manual

Specs and Features
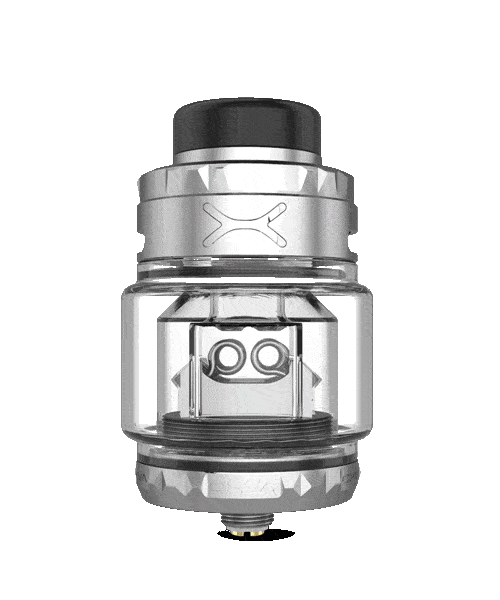
- Size: 28x54mm (straight glass) / 31x54mm (bubble glass)
- Capacity: 4ml (straight glass) / 6ml (bubble glass)
- Coils: Dual or Single Coil
- Top adjustable airflow
- Top fill
Design and Build Quality
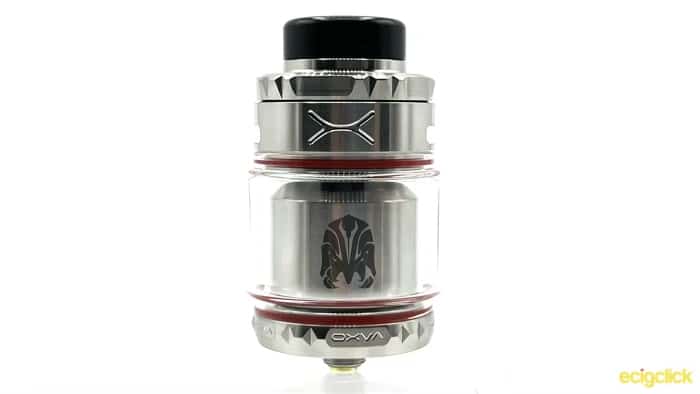
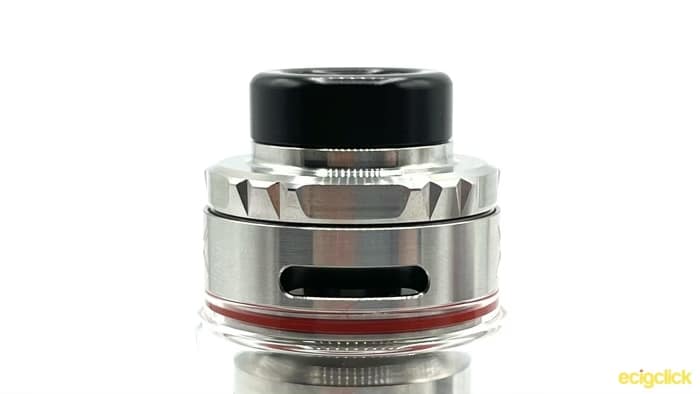
The Oxva Arbiter RTA is available in 5 different colours, Gunmetal, Red, Silver, Rainbow and Black.
I received the Silver rendition. It’s worth noting that all of them come with the red o-rings pictured in the first batch.
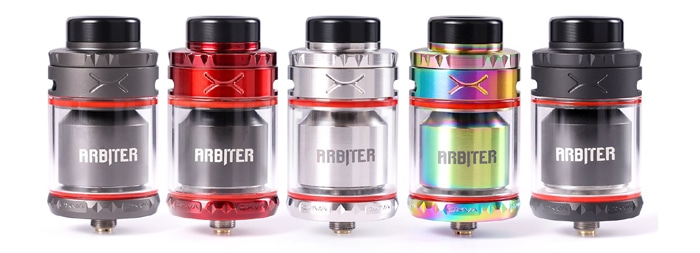
Happily Oxva has listened to the people that found this ugly, and will be including a spare set of black ones in the second batch of releases.
Unfortunately there’s no way of telling from the outside which you will get. But seriously, red o-rings with red metal? Who ever thought that was going to be good idea…
One thing to note is that the packaging for mine says that it has 7ml capacity with the bubble glass.
However checking their website it now says 6ml. So I’m going to assume that 6ml is what you actually get.
Oxva Arbiter RTA Branding
It’s rare that I devote any time talking about the branding in a review, but for me this is one of the big factors on whether you will like this tank or not.
Branding is… not subtle here. Like a lot of tanks, it has the name of the tank on the chimney section, I personally don’t like this, but it’s not a big deal.
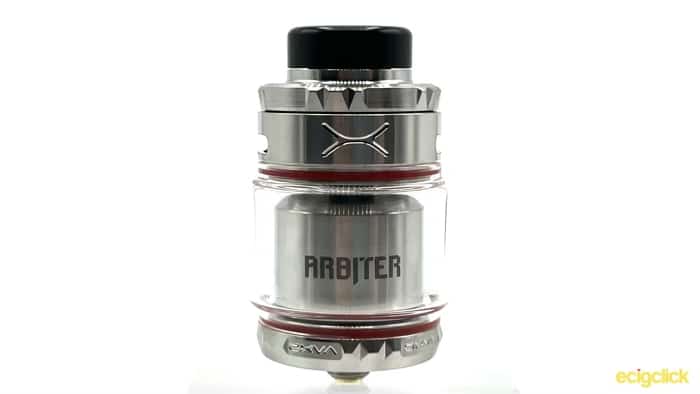
On the other side of the chimney is a weird picture that looks like a cross between a crustacean and a helmet.
Some quick googling tells me that this is in fact a picture of an Arbiter from the Halo franchise of games (I was always a PlayStation guy!).
I’m a little amazed that no one has worried about getting angry letters from Microsoft’s legal team!
Honestly this feels kind of ridiculous, and whilst I like gaming as much as the next 35 year old, I don’t feel a need to cover my vape gear in pictures.
The branding doesn’t end there either, on the AFC ring you have Oxva’s big stylised “X” on either side of the airflow slots, and at the bottom of the tank you have “Oxva” engraved no less than 5 times!
So possibly a little overkill on the branding.
Oxva Arbiter RTA Drip Tip
The drip tip is a standard wide bore 810 connection with the o-rings on the inside of the cap.
There’s a little ridge to the top of the tank, so your own drip tips might not look totally seamless depending on their external diameter.
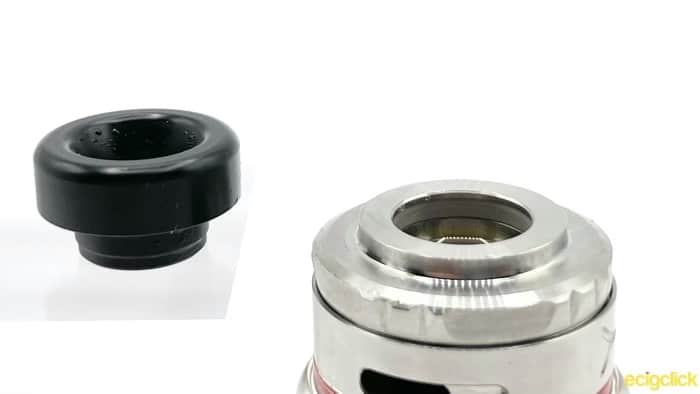
Special shout out to the fact that they supply a 510 Drip Tip adapter.
It’s not something I would ever use on a tank like this, but it’s always nice to have the option!
Oxva Arbiter RTA Top Cap
Filling is nice and easy with a simple quarter turn to the top cap to open it.
Two big juice holes give you ample room to fit most bottle types. Special mention has to go to the fact that underneath the top cap, the section with your juice holes is quite concave.
This means that when you inevitably end up filling too fast and having e-liquid coming up out of the juice ports, it just collects and pools at the top, rather than overflowing and running down the outside.
It’s a small thing, but a neat bit of design.
You also get a little tool in the tools bag which I think is designed to allow you to remove the top section more easily.
It has two prongs that fit into the fill holes, and give you a bit more grip when you’re trying to disassemble it totally for cleaning.
To be honest I never found this was necessary, as the tank has plenty of grip that makes it easy to disassemble.
On the tank section you have the option of either a 6ml bubble glass which I used for most of my testing, as well as a 4ml straight glass.
Oxva Arbiter RTA Airflow Control
The airflow control ring is at the top of the tank, it’s a HUGE dual cyclops airflow ring, with stops at fully closed and fully open.
The “X” branding does have some use here, as it gives you a little bit more grip to allow you to adjust your airflow.
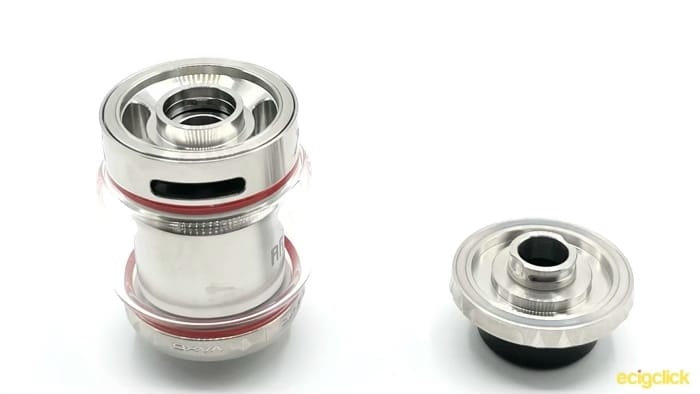
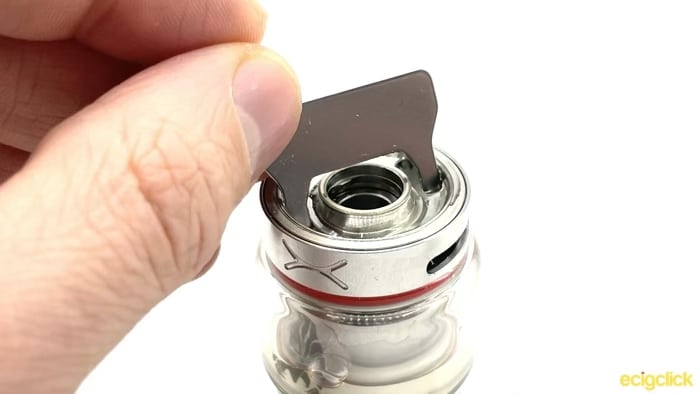
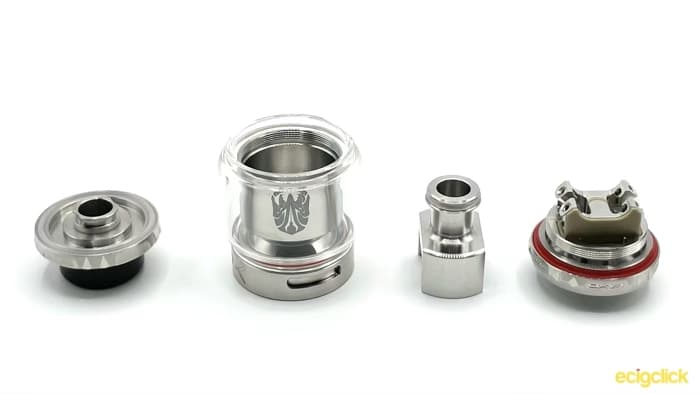
The air comes in these two holes, and then immediately hits the chimney section. This is the rather strange “hat” that sits on top of the deck.
This acts as a way of directing the airflow under the coils, and also reducing the chamber size which should hopefully concentrate the flavour.
I actually really like the fact this pieces comes out, as it minimises the chance of anything getting gunked up.
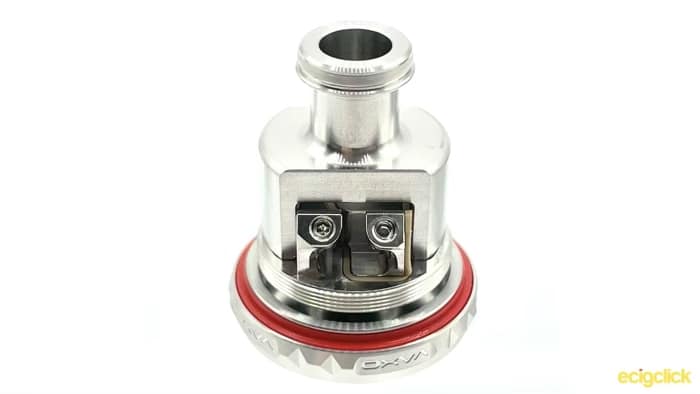
It’s sealed at the top with o-rings, so this forces the air to go down and hit the deck.
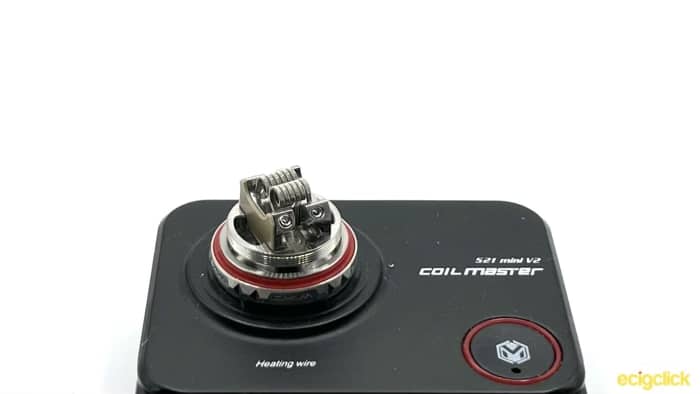
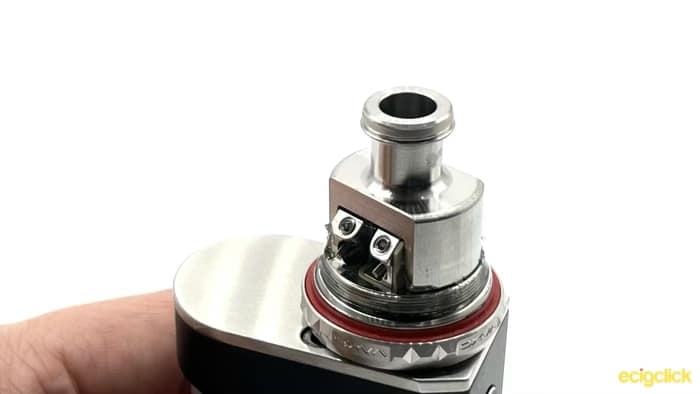
Oxva Arbiter RTA Deck
Speaking of the deck it’s set up as a dual coil deck, though you can run a single coil as well.
The legs of your coils go in at an angle, which allows you to trim them once you’ve put your coils in.
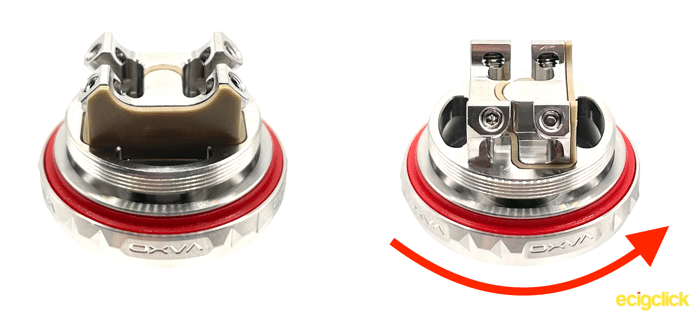
The grub screws are use an Allen key to unscrew, and you’ll get one in the spares bag. You’ll see coil placement more in the build section.
Oxva Arbiter RTA Base
You have all your expected branding and regulatory marks on the bottom, and a nicely protruding 510 pin.

How To Build The Oxva Arbiter RTA
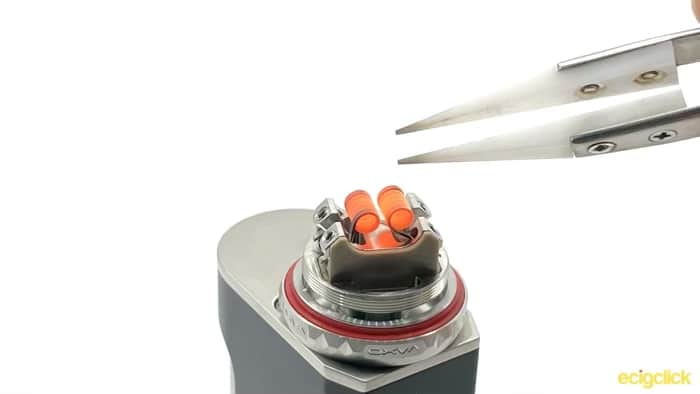
- Unscrew the deck from the tank and place it on a build station or mod. Then unscrew the 4 grub screws in the posts.

- Place your coil legs through the holes, and then tighten up the screws to hold them in place
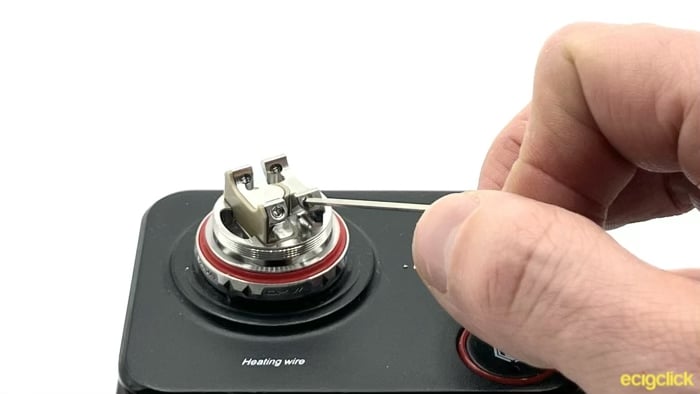
- Using a coiling tool or screwdriver, straighten up your coils and make sure they’re not touching
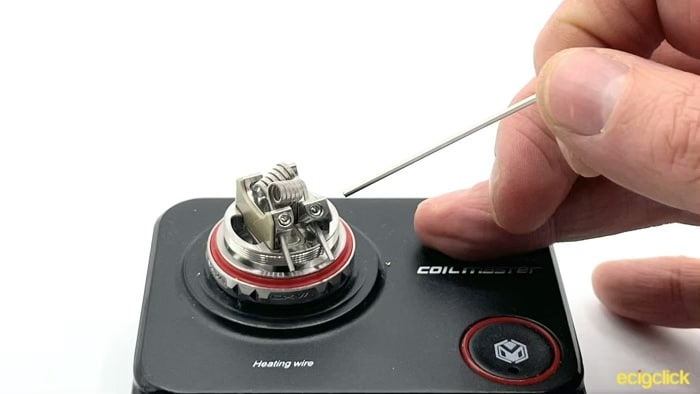
- Trim your coil legs, which you can do by snipping directly underneath the posts where they stick out
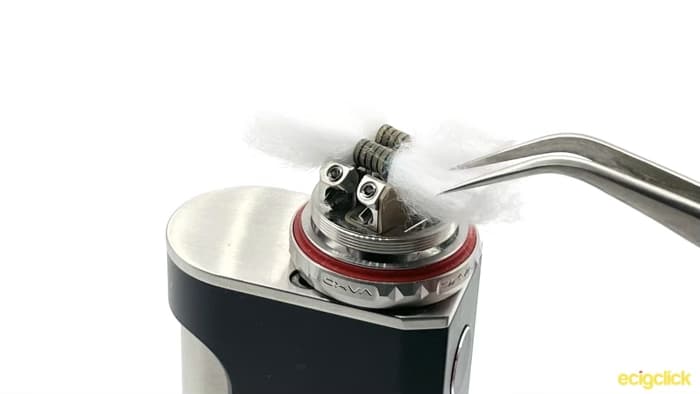
- Your coils should look like this
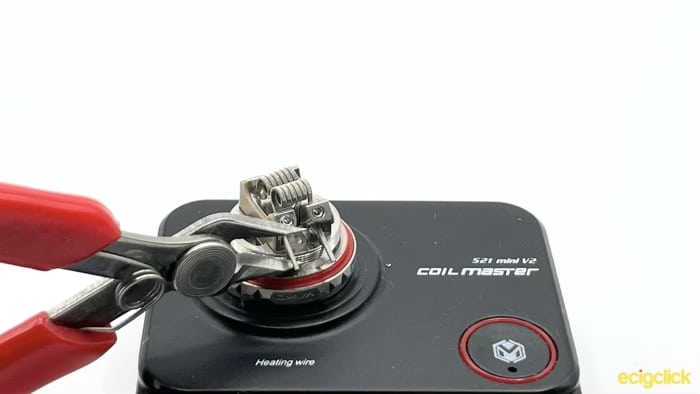
- Glow your coils, and strum with a pair of ceramic tweezers to remove any hotspots. Make sure they’re glowing evenly
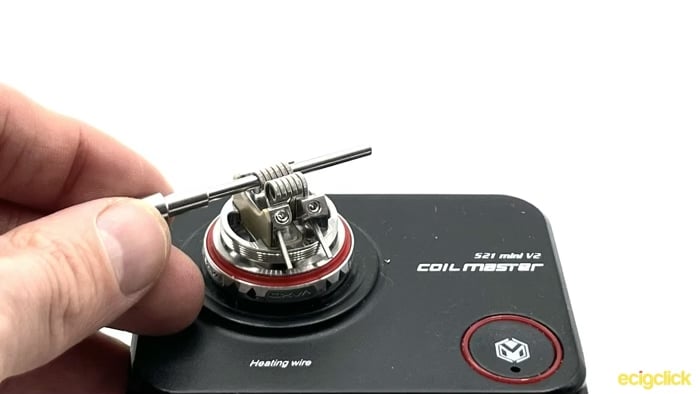
- Insert your cotton through the coils
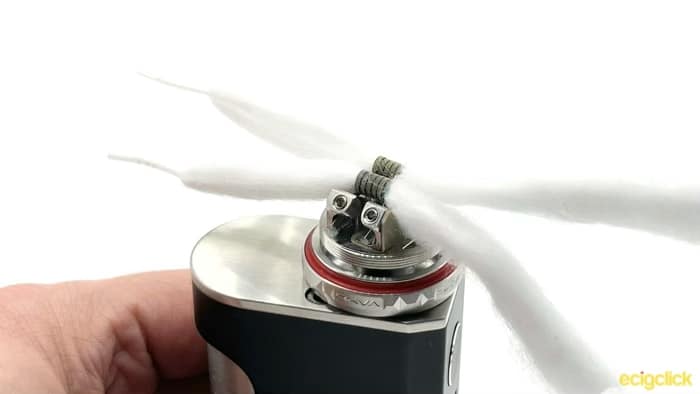
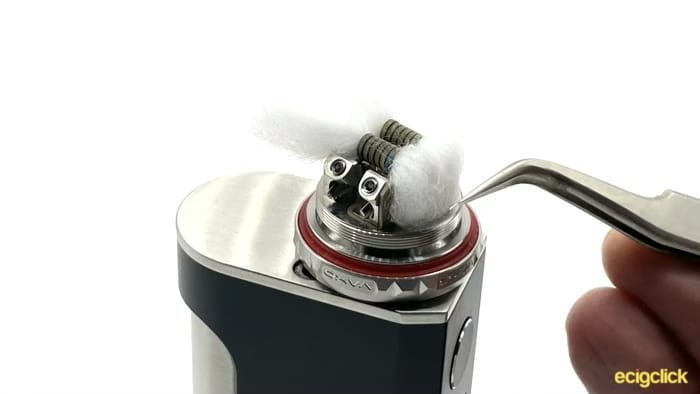
- Trim your wicks so that they will reach down to the juice ports on the deck. Remember, always feel free to start longer (as I have in this photos) as you can always trim it more later
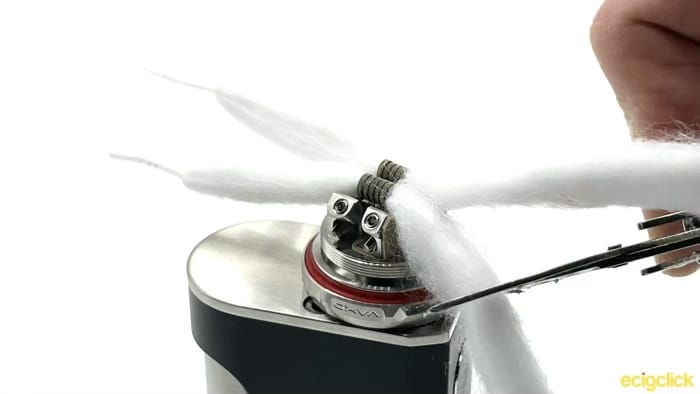
- I would definitely recommend that if you’re using the coils and cotton it comes with, to rake out the cotton quite thoroughly. Although the juice ports are fairly large, you don’t want it to have to stuff it in choking off the liquid supply
- You should be able to place the cotton so it’s gets caught by juice ports, without having to force it in and so that the ends of your cotton are within the ports without hanging down too far. If you find that the ends are hanging too low, just remove the cotton from the ports, and trim the ends again
- Prime your coil by getting it nicely saturated with e-liquid
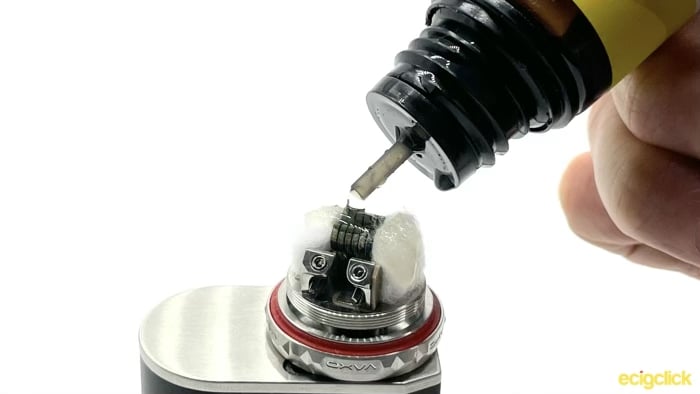
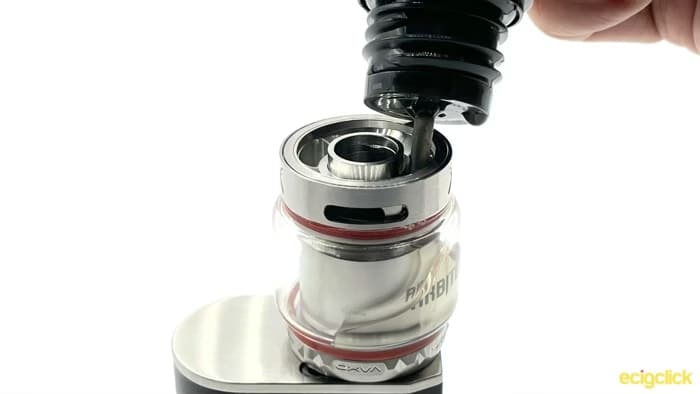
- Place your chimney section over the coils. The cotton should not be so big that you need to force this on, but there will be a little bit of resistance once it’s expanded and saturated with e-liquid
- Replace the tank section by screwing it on to the base, and you’re ready to fill it up!
How To Fill The Oxva Arbiter RTA
Once you’ve reassembled your tank it’s easy to fill up.
Just give a quarter turn to remove the top cap, and fill up through one of the large juice holes with your preferred e-liquid.
How Does the Oxva Arbiter RTA Perform?
I have been testing the Arbiter for a few weeks now and I have been very pleased with it.
I’ve mostly been vaping Bule Bolu by Coilturd at 70/30 VG/PG.

I’ve stripped it down totally, as well as rebuilt and re-wicked several times and it’s always been very easy to live with, with no leaking or unexpected hiccups along the way.
Airflow and Cloud Production
As I mentioned in my build section it is absolutely vital that you remember to put in the inner chamber.
Because it’s top airflow, without this what will happen is that you’ll just be taking air in from the top of the tank straight up, and it’s not going to hit the coil at all.
Using the coils it came supplied with the airflow is spot on, it’s really loose and unrestricted fully open.
On a 1 to 10 scale from totally closed to fully unrestricted, this has just the tiniest amount of restriction, so a 9.
One thing I was worried about was that the up and down that the air has to do to reach your mouth was going to create some turbulence, but I’m really impressed with how smooth the airflow is.
It’s not the quietest RTA on the market, but equally the noise doesn’t have any annoying whistle, so I don’t really mind.
You can actually close the airflow down quite a long way and still get a very nice open direct lung inhale. I tended to keep mine closed so that only about 1/2 of the airflow hole was showing.
Cloud production is similarly impressive, and if you’re chain vaping on it, you can quickly fog out a whole room. The vapour production is smooth and creamy, with plenty of body. Very pleased with this.
Coil – Flavour
Flavour from this RTA is going to depend on a lot of different factors, but even using the supplied coils it is very impressive.
I was worried that due to having your airflow ring at the top, your vapour has further to travel before it hits your mouth.
But I can’t say that I noticed this at all during testing. It’s maybe not quite as good as an RDA where you’re directly above your coils, but very good nonetheless.
For reference, the coils that it came with ohmed out to 0.16Ω, and at 70W it provided a lovely flavourful vape.
I did switch it over to a dual battery mod capable of pushing a bit more power through it, but once I got beyond 80W I had to be careful to slow down to avoid a dry hit.
Obviously wicking is going to be key on this to make sure your coils are well supplied with e-liquid.
This is probably one of the most flavourful dual coil tanks I’ve tried, so very impressive work.
Single Coil
Yes you can run this as a single coil, but I’m not sure it’s something I would bother with. The reason being is the way the deck is constructed your air is going to hit the wall underneath your coils and then come straight up at them.
If you put a single coil in, what ends up happening is that a lot of the air will whizz by on either side of your coil, just glancing across it.
You can mitigate this by using a really big coil so it sticks out further each side, but to be honest I’d say that a dual coil is the ideal way to run this.
When I did test it out with a single coil, I was using a 2.5mm ID coil, and to be honest that’s just way too small to get decent flavour from it.
I would suggest you’re looking at something like a 3 or 3.5mm to overcome the design of the deck and make sure plenty of the coil gets hit by the airflow coming up from underneath.
Pros
- Really flavourful
- Top airflow, so no leaking
- Big capacity
- Great build quality
Cons
- Branding is a little over the top (subjective con)
- Red o-rings are garish (fixed for batch 2)
Final Review Verdict
As I said at the start of this review, it’s a chunky little tank!
It’s extremely well put together, all the threads are nice and smooth, and the tank comes to pieces easily and goes back together again just as nicely.
I’ve always been a fan of top to bottom airflow tanks, as it means that leaking is pretty much impossible. With previous tanks I’ve sometimes found this introduces some weirdness to the airflow, turbulence, unexpected whistling, or similar.
The Oxva Arbiter RTA never seemed to be afflicted by any of these, it was always a surprisingly smooth airflow, that produced lovely creamy clouds.
Flavour is similarly up there with some of the best RTA’s I’ve tested.
Oxva have done a great job with their first RTA.
With a lot of tanks you tend to get either really good vapour production or really good flavour.
With the Arbiter they managed pull off both.
Is this an RTA you’re using or planning to buy?
Let me know your thoughts and opinions in the comments below…


Agreed. It’s a fantastic RTA
Glad you like it! And thanks for reading the review!
Will
Love this tank, so easy to build on and it’s very well made it’s like a high-end RTA at an affordable price. Thank you Oxva for a great product.