The Steam Crave Hadron Plus Combo Kit is from a brand that are well known for their large tanks, devices and kits and this one is no different.
The original Hadron was a towering dual 21700 device that when bought in kit form, came with a monstrous 35mm Ragnar RDTA
But it seems Steam Crave wanted another shot at the Hadron, completely changing the style, shape and even the chipset and this time around they’ve included the Aromamizer Plus V2 RDTA to make this kit, perhaps a little more of a daily carry?
 What Can We Expect From The Hadron Plus Combo Kit by Steam Crave?
 What Can We Expect From The Hadron Plus Combo Kit by Steam Crave?
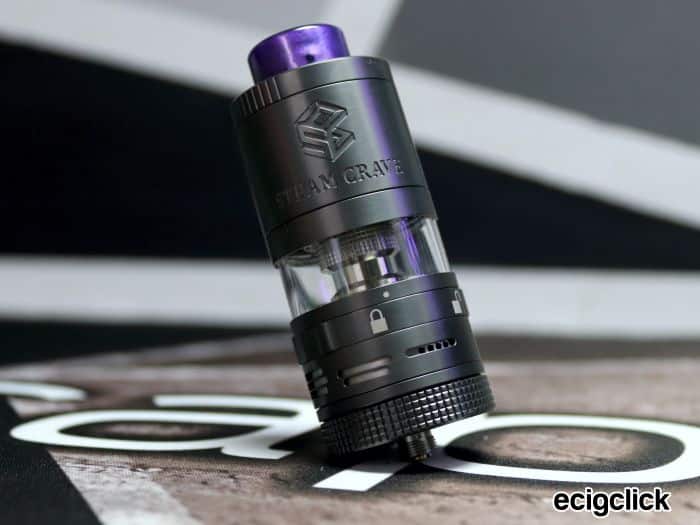
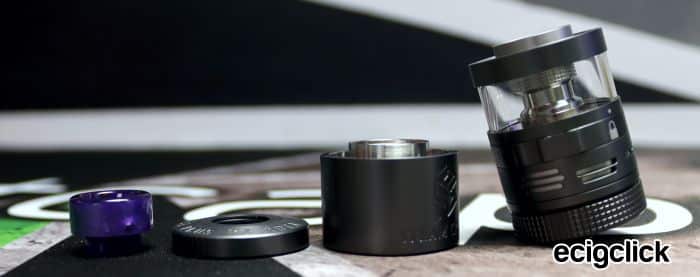
Starting off with the Aromamizer Plus V2 RDTA, a 30mm RDTA which you could argue is actually an RTA – with a tank above the deck (much like an RTA) but with the juice actually filling a reservoir below the deck.
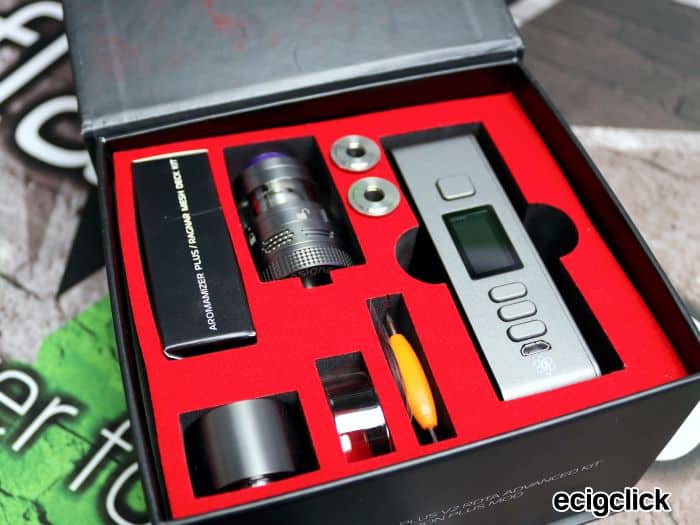
 The Combo kit comes with two decks, a 4-terminal post-less deck designed for regular coils, and a Mesh Deck as well. Along with this there are also three other decks available. A Single Coil Deck, Series Deck and a Velocity Style Deck!
The Aromamizer itself has a capacity of 8ml and with the included extension section, you can double this to 16ml!
 The Hadron Plus is a Dual 21700 device which is powered by a DNA250c chip meaning Steam Crave are really going for top marks with this one.
The DNA250c chipset features accurate temperature control, Watts boost modes and a Replay mode and also includes a Pass-Thru charge option.
 Furthermore the Hadron Plus can hold up to a 34mm diameter atomiser on top and can obviously be upgraded and updated via the Escribe software.
What’s In The Box
- 1 x Hadron Plus DNA250c Box Mod
- 1 x Aromamizer Plus V2 RDTA
- 1 x USB Cable
- 1 x User Guide
- 2 x Battery Wraps
- 2 x 18650 Adaptors
- 1 x Spare Glass
- 1 x Metal Extension Tube
- 2 x 6mm Chimney Reducers
- 1 x Spares Bag
- 1 x Allen Key
- 2 x Cotton
- 1 x Manual
- 1 x Mesh Deck Kit
- 1 x Vape Band
- 1 x Steam Crave Sticker.
 Features
 Features
Mod
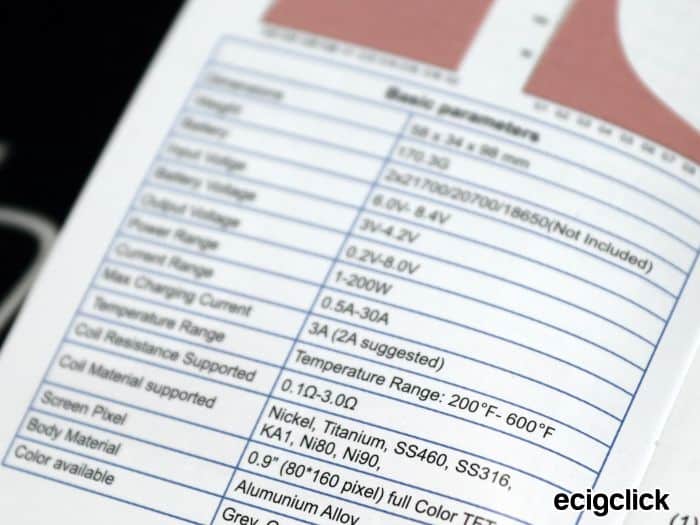
- Product Size: 58.0×34.0x98.0mm
- Material – Aluminium Alloy
- Temperature Range: 200f – 600f
- Output Modes: VW/TC-Ni/TC-Ti/TC-SS/TCR
- Charging: Via Micro USB Port up to 3A (Recommended 2A)
- Output Voltage: 0.2v – 8.0v
- Display: Full Colour TFT
- Battery: Dual 18650/20700/21700
Tank
 Tank
Tank- Standard Height: 50mm
- Extended Height – 70mm
- RDA Mode Height – 35mm
- Diameter: 30mm
- Airflow: Adjustable via AFC
- To Fill: Top-Fill
- Capacity: 8ml/16ml
 Colours
 Colours
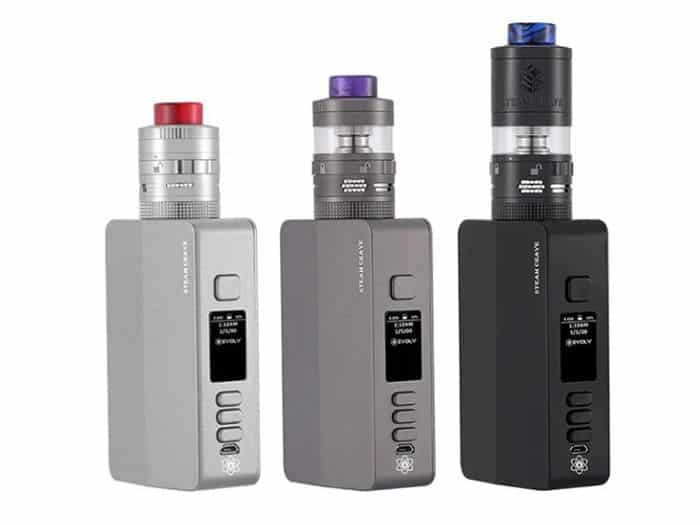
The Steam Crave Hadron Plus Combo kit is available in Black, Gunmetal and Grey, but if you’re just interested in the RDTA there is also a Gold anniversary edition available as well.
Design and Build Quality
 Design and Build Quality
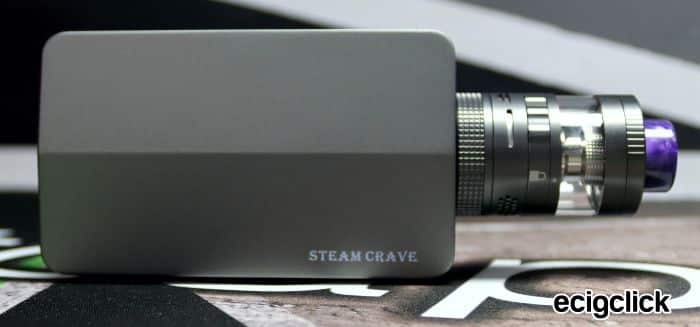
I received the Gunmetal variant of the Hadron Plus Combo Kit which although I’m more into black devices, I actually quite like how well the Aromamizer and Hadron Plus mod go together in Gunmetal – Looking very industrial!
The Tank
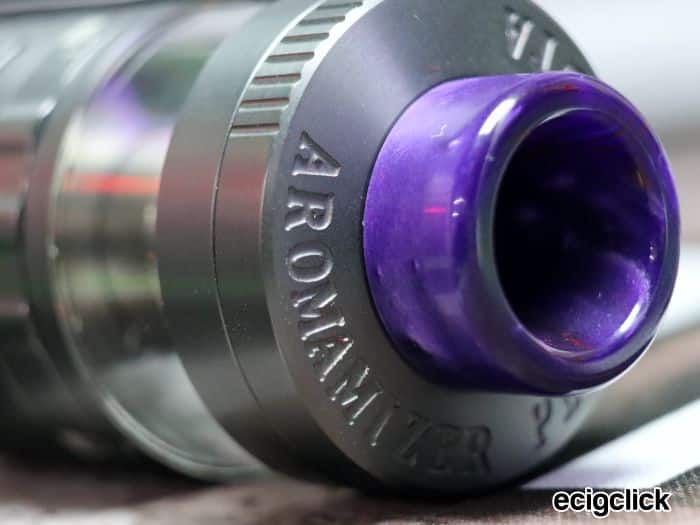
Drip Tip &Top Cap:
The Aromamizer V2 RDTA makes use of a wide-bore 810 drip tip and the top-cap itself is nicely engraved, the engraving is clear and well manufactured, if not a little bit of a juice/dirt trap.
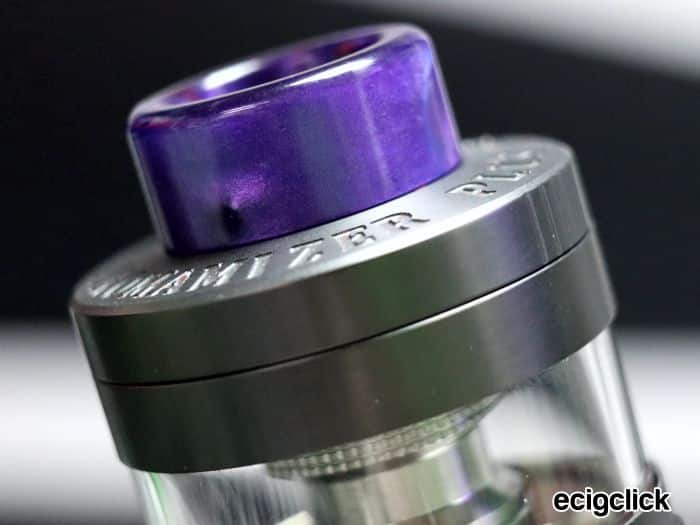 The top-cap includes slotted sections on either side for additional grip in order twist the top-cap anti-clockwise to access the fill port.
Top Fill Port:
Once the top-cap is removed, you expose two giant kidney shaped fill ports and also a wide central bore that’ll look right into the deck – this is where you may want to consider using one of the 6mm reducers if you find the airflow too much, or you just prefer a tighter draw.
 Glass Tube & Extension Tube:
 Glass Tube & Extension Tube:
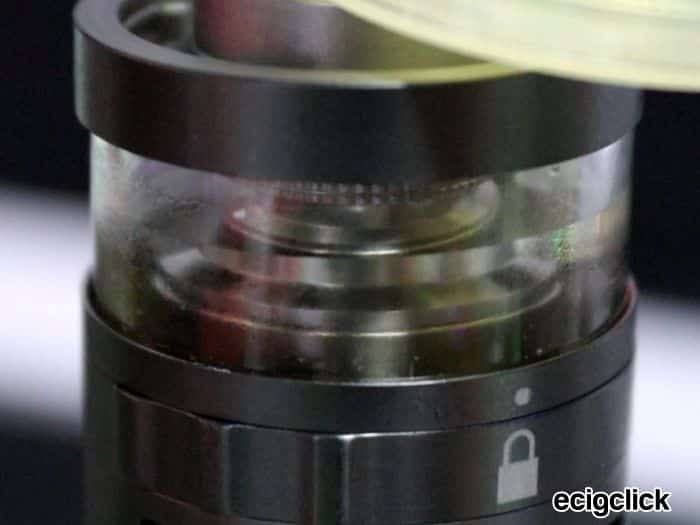
The Combo kit comes with a spare glass tube along with an extension tube, which when installed, increases the capacity to 16ml. Granted it also makes the tank a lot taller, but if a lack of capacity is a problem with you current tank – The Aromamizer V2 might be an option.
 Installing the extension tank is barely a chore, remove the Top-Cap is all that’s required before screwing down the extension piece,
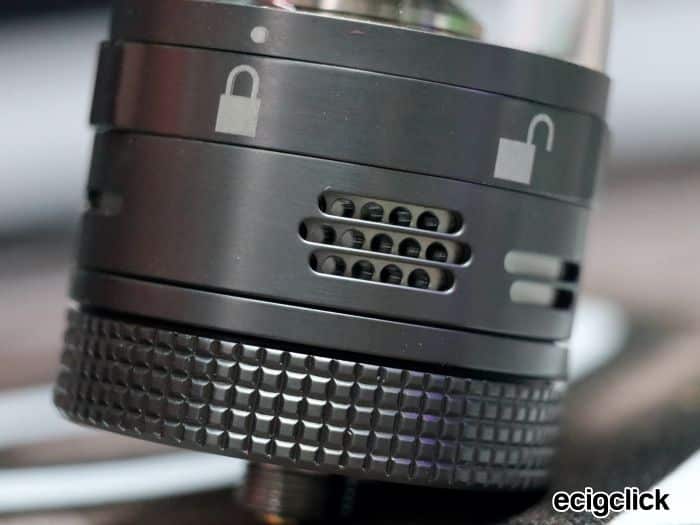
Juice-Flow Control:
JFC (Juice-Flow Control) is a lovely little feature, especially handy on larger capacity devices.
With all that capacity, there is every chance pouring 16ml of e-liquid into a tank could flood the deck – So that’s where juice-flow control comes in handy.
Firstly when filling, you can easily close the JFC and then once filled, slowly open the JFC allowing the e-liquid to slowly hit the cotton.
Secondly, in some instances you may find the pure weight of e-liquid is just too much for the cotton and deck to handle, so being able to limit the amount of juice to flow to the deck may come in handy.
 Personally – Once filled, I open the JCF all the way up and I’ve never had an issue. But either way the option is there and the feature works well.
Airflow Control:
The AFC on the Aromamizer Plus V2 is similar to a number of other Steam Crave atomisers, but it works well and allows for plenty of options when it comes to restriction, or a lack of restriction if that’s your bag.
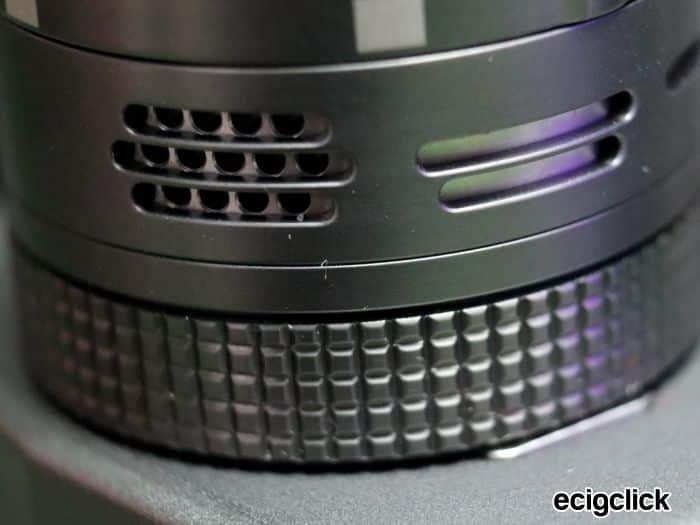 The AFC ring itself is removable and adjusts nice and smoothly.
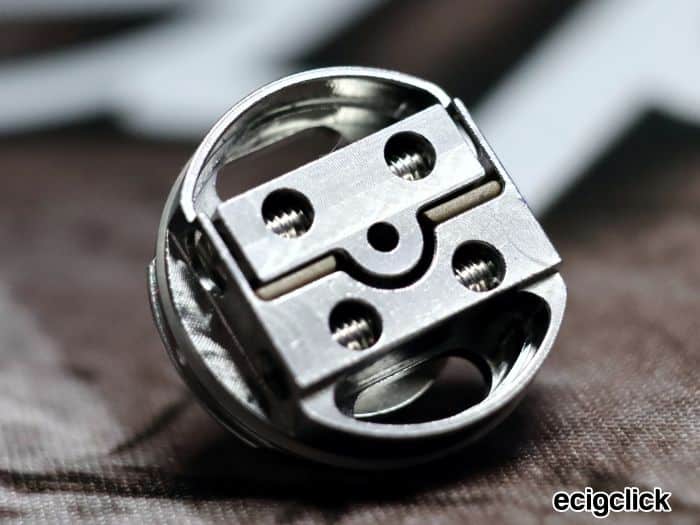
Build Decks:
The Combo kit comes with two decks. The first is a Post-less deck which can be used for a single, or dual coil build.
However it could be said, due to the size of this deck, the space between the positive and negative posts aren’t very wide, meaning your larger/wider coils might be a bit of a squeeze.
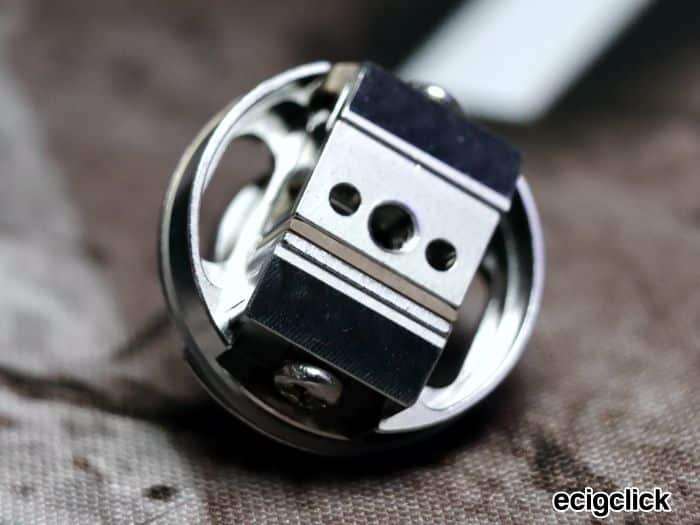
The Mesh Deck included allows for a single mesh strip and Steam Crave kindly include 2 mesh strips in the box, along with some chunky cotton strips.
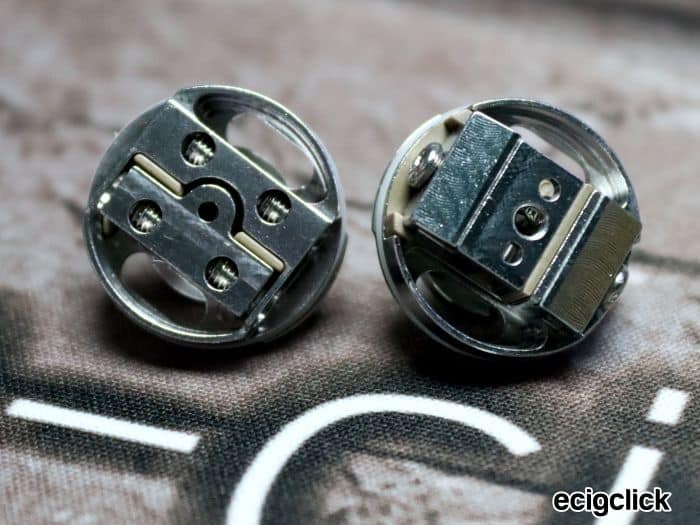 Both decks are push-fitted from the base and have slots on either side to ensure they’re fitted correctly.
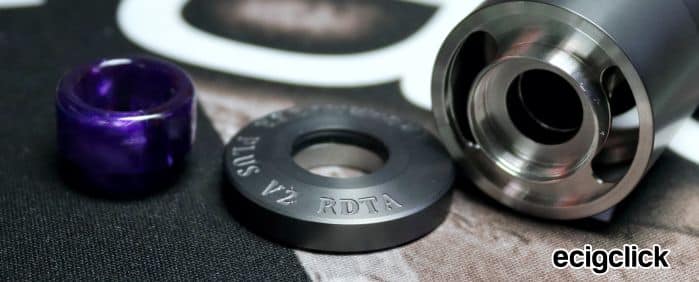
By removing the base of the RDTA, you can pull out the deck and thanks to the 510 connector, you can screw the deck directly onto an atomiser or building block for building and firing etc.
The Base:
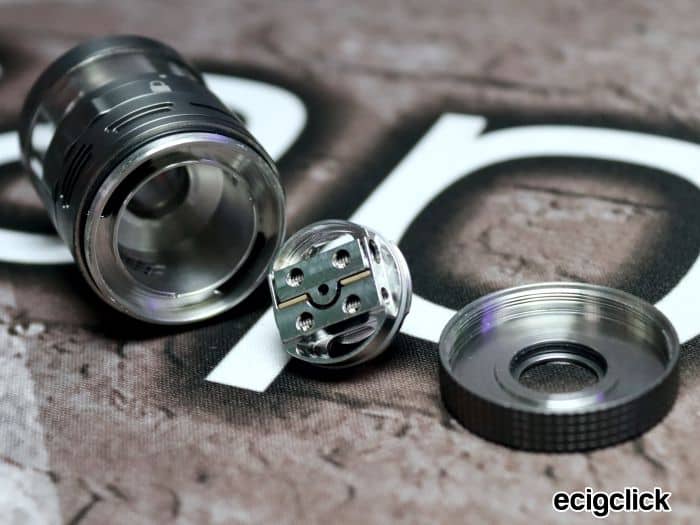 The Base:
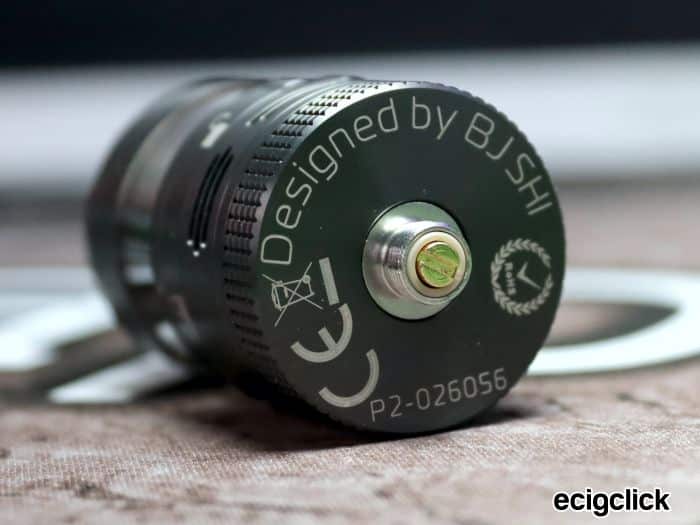
The base has the expected 510 connector with slightly protruding 510 pin and a decent looking peak insulator. Also stated is ‘Designed by BJ Shi’ who, correct me if I’m wrong, is responsible for a number of successful Steam Crave atomisers and kits.
Tank – Overall:
 Tank – Overall:
Overall the general build quality, construction and options on the Aromamizer Plus V2 RDTA are diverse and high quality.
Granted its not a simple plug and play tank, it perhaps requires a little more of your time and patience but if a larger atomiser is your thing, I think you’ll be happy with the quality of the Aromamizer V2 RDTA.
The Hadron Plus Box Mod:
510 Connector:
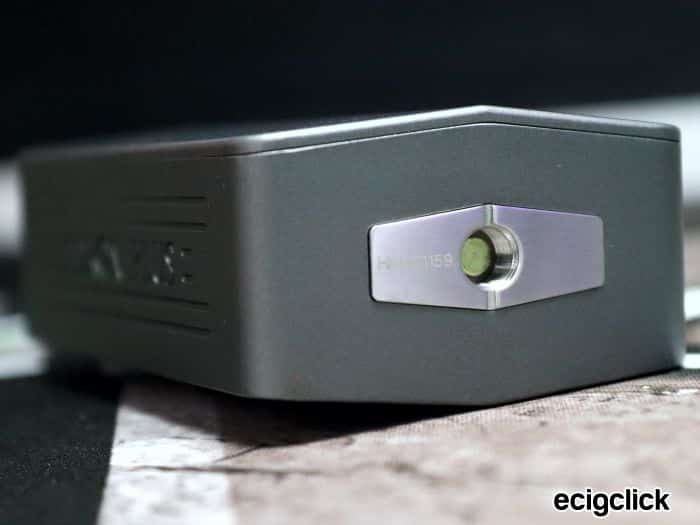
At the top of the device is a spring-mounted 510 connector and rather than your usual rounded cover plate, is an oddly rectangular shaped plate which actually looks quite nice, there’s some weird engraved print on the plate, but once a tank is fitted, you don’t see it so its not a problem.
 Due to the shape of the Hadron Plus, the widest point of the top is 34mm meaning if you fancy a larger atomiser, the device has the space for it without overhang.
Having said that, even with the 35mm Ragnar RDTA on top, the over-hang is so small, its barely noticeable and wouldn’t bother me personally.
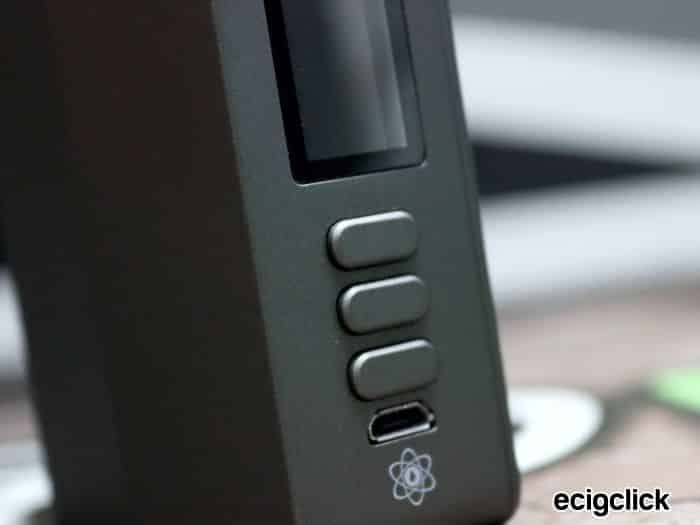
Micro USB Port:
If you’re familiar with the Evolv and the DNA chips, you’ll know that the DNA75c and the DNA250c make use of a Micro-USB port for charging, now sure a Micro-USB port is now somewhat outdated due to USB-C now being the way to go.
The new Evolv DNA100c has a USB-C port so I assume in future, we may see the 75c and 250c variant will also be upgraded to USB-C. But for now, we’re left with the Micro-USB.
 Nonetheless, the device still offers a 3 Amp charge if you need it, but personally I recommend not charging above 2 amp or better still, charge the batteries externally.
Of course the Micro USB port is where the magic happens and by connecting to a PC and the Escribe software, you can make many changes to the Theme, power output and even track how your device performs when firing.
Its a fairly simple bit of software but can make huge changes to how your device performs and looks. Well worth tinkering with if you’re into those kind of things.
The Front of the Device
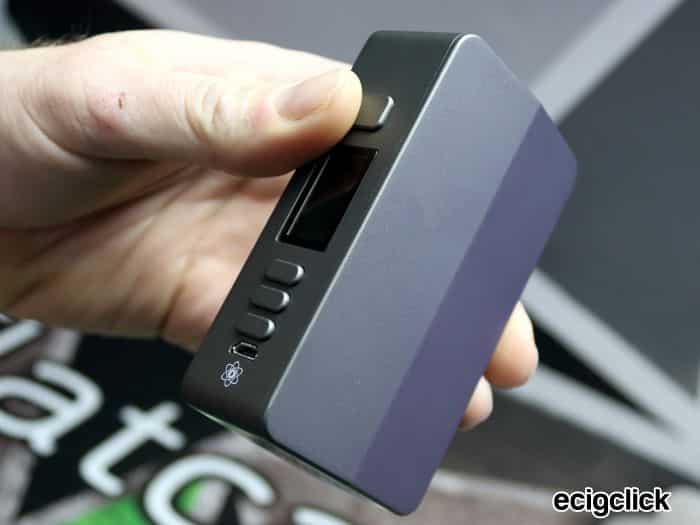
The front of the device, is actually really the side of the device, at least that’s where the display, fire button, adjustment buttons and USB port is.
 The first thing I notice about the Hadron Plus is how low the fire button is in comparison to the height of the device. I guess this is due to the design of the DNA250c chipset but looking at this side, the fire button just seems too low.
The Battery Door
The battery door fits almost seamlessly onto the side of the device and is held in place magnetically. There is a small notch in the base of the device that allows you to lift/remove the battery door, exposing your battery housing.
 Installing two batterie isn’t a problem, and I know some people aren’t fans of Battery removal ribbons, but I really feel the Hadron Plus could do with one as removing the batteries can be a little bit of a pain.
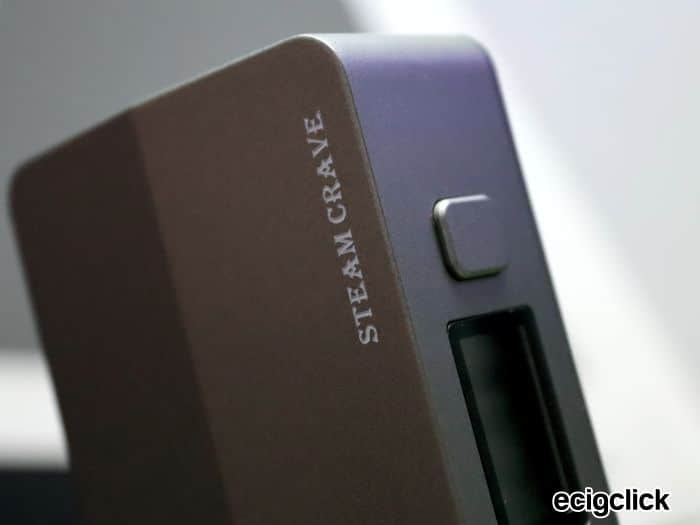
Externals:
The Hadron Plus doesn’t really have many external features to really talk about. It’s a rectangular boxy shape with all the fun buttons on one side and some engraving on the other. Apart from that, its just a big box really!
 At the base of the device is a large amount of holes for battery venting should the the worse happen.
The Hadron Plus – Overall:
Aesthetically – The Hadron Plus isn’t the most glamorous of devices. It’s big, boxy and fairly heavy with two 21700 batteries installed. Yes for some reason, I like it!
Firstly quality wise its very good, decent smooth paint finish with some nice engraving on one side and obviously the chipset included really toots my trumpet. But the position of the fire button kind of annoys me.
 What I like about the Hadron Plus, especially in comparison to the original Hadron and the Titan, is this rectangular shape. It’s a shape I really like in devices like the Lost Vape Centaurus or Thelema. Or for that matter, devices like the Geekvape Aegis Legend or Voopoo Drag Max.
Regardless of the size of the Hadron Plus, its still fairly comfortable to hold. Just a little on the large side.
In The Hand
The Hadron Plus, loaded up with two 21700 batteries and the Aromamizer Plus V2, filled with 16ml of e-liquid makes you feel like a bricklayer.
Not only that, you’ll look like you’re about to clobber someone round the loaf of bread! Ok enough Cockney Slang for one day. Blame watching Snatch whilst typing this.
 Its a big mod, with a large tank and with that in mind you have to consider this isn’t the type of kit you can carry in your pocket. For sure you’ll get decent battery life and great performance from the DNA chipset but is that enough to sacrifice for portability?
How Does the Hadron Plus Combo Kit perform?
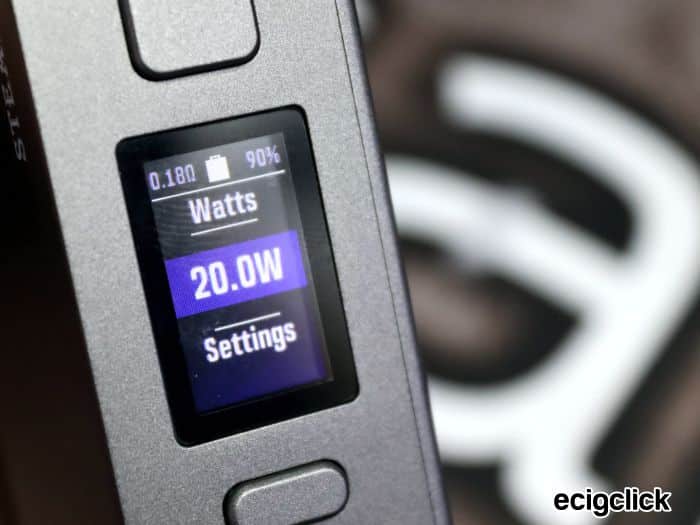
Hadron Plus DNA250c Display
If you’re familiar with the DNA250c or DNa75c, there is nothing new to see here.
Steam Crave didn’t even go to the extent of adding their own custom theme, it’s just the default Evolv screen, and that carries on to the other menu pages and profiles.
 If you’re not familiar with the DNA chip and how they operated, here are the basics.
Hadron Plus DNA250c Basic Operation
All DNA Colour screens come with 3, yes 3 buttons. Simply put, these are Up, Select and Down from top to bottom.
When you first put your batteries into the Hadron Plus, you’ll be greeted with what we’ll call the ‘Lock Screen’.
Like most devices, it’ll show the usual Battery Level, Coil resistance etc, but you cant vape it just yet, nope.
One thing you’ll discover with any DNA device is that you cant switch it off as such, only lock it, which eventually will put it to sleep – that might be a bit annoying to some of you?
 Five clicks of the fire button and you enter the main page, what they call the ‘Profile’ page – now you can start vaping.
At first you’ll get a page asking if you’re using a new coil, which will display the resistance, and if you’re happy, click yes.
Pressing the Up or down buttons will highlight the different options, and which ever one you want to adjust, simply click the adjust buttons and you’re off.
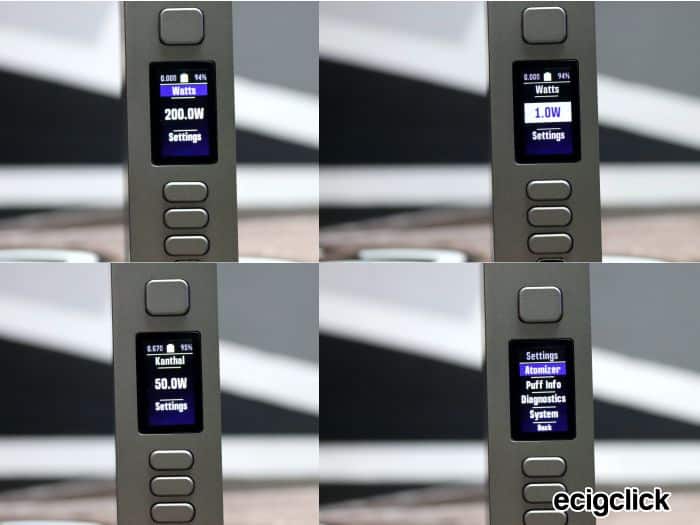
Hadron Plus DNA250c Main Menu
Within the main menu is a plethora of options:
Atomizer
Anything to do with your tank or dripper will be stated in here, right down to the temperature.
You can also adjust the punch from 0-11 which will give you a boost of power at the initial start of your vape to help with coil ramp-up times.
Puff Info
If you’re into fancy graphs and statistics, Puff Info will be right up your street. You can browse through your vaping history to see the length of each of your previous vapes, the wattage it reached and voltage information.
Diagnostics
 Diagnostics
A load of information is listed on this page which will state almost everything you need to know about the device, the RTA/RDA/Tank along with the temperature of the Chipset and USB voltage.
Loads of information for those who like that kind of thing.
System
In System you can make the necessary changes to the brightness of the display, the time and date and which unit the device will measure in.
Building The Post-less Deck
I went for a pair of Aliens from Proper Coils for the build on the post-less Deck. Here’s how I built it:
- Loosen the deck grub screws, the holes are quite small so I found opening the terminals fully made it easy enough to fit the coils.
 2. I cut my coil at 5.5mm as I that gave me some space between the deck whilst keeping my coils in line with the central airflow. Fit the coils and make sure the terminals are tight before lining the coils up straight with the deck
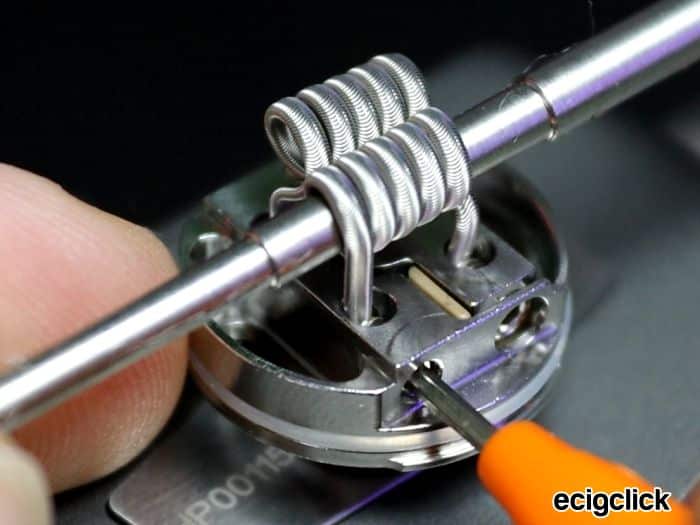
3. Pulse the coils at a low wattage and strum gently with a ceramic tool to ensure an even glow.
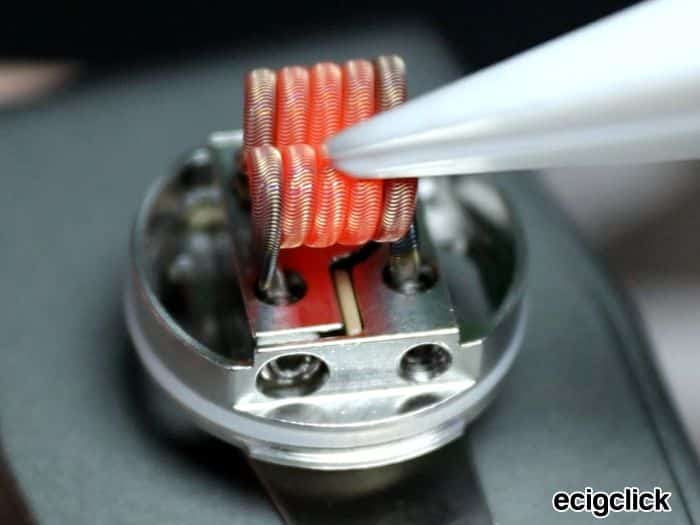
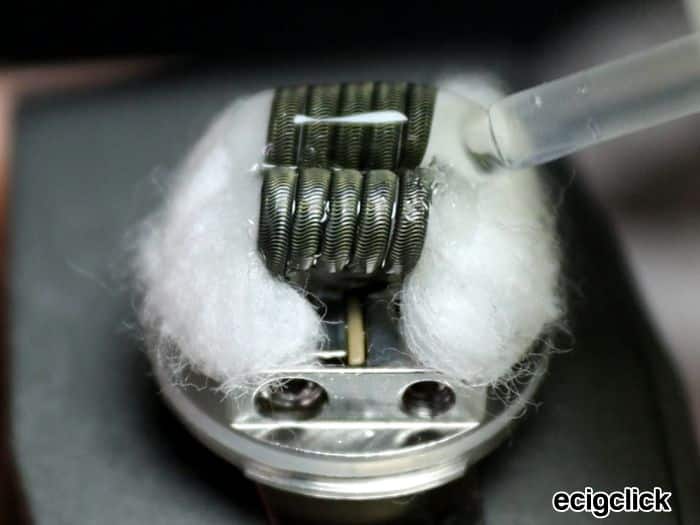
4. Once cooled, feed your cotton through the coils. I found trimming the cotton just past the edge of the deck worked well and be sure to thin out the ends of the cotton to ensure better wicking.
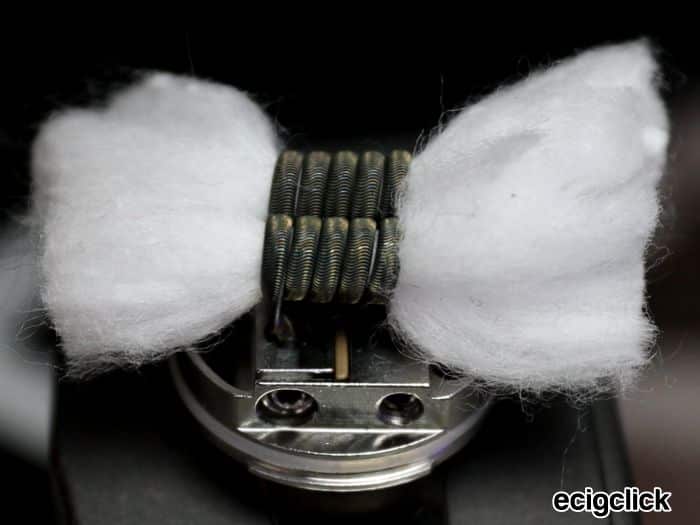 5. Gently position the cotton into the ports, making sure the cotton fills the gaps but doesn’t block them up too tightly.
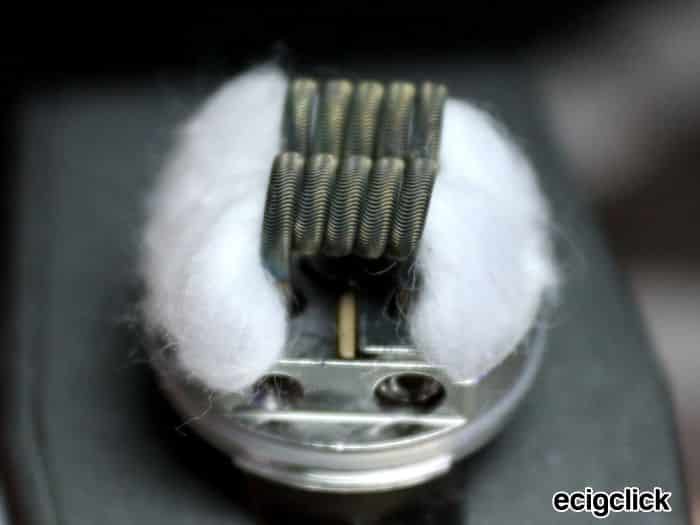 6. Saturate the cotton with e-liquid and make sure its nice and wet before fitting the deck into the atomiser.
 Generally speaking, building on this deck is fairly painless, however it must be said the terminals are quite close together, and fairly small – So you could have the option of using one single large coil.
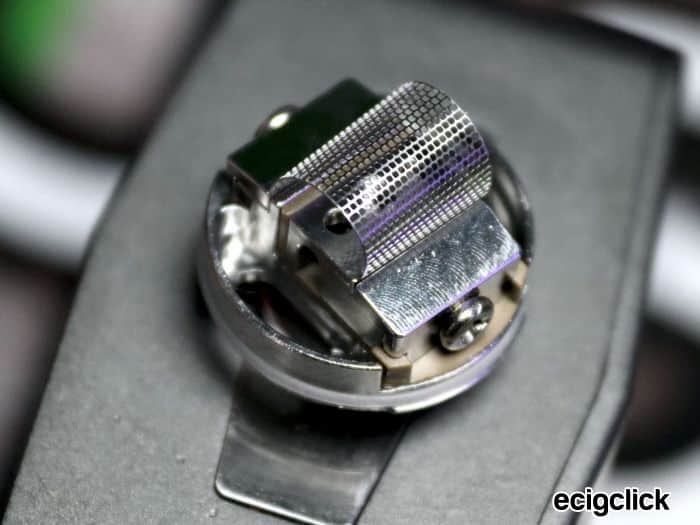
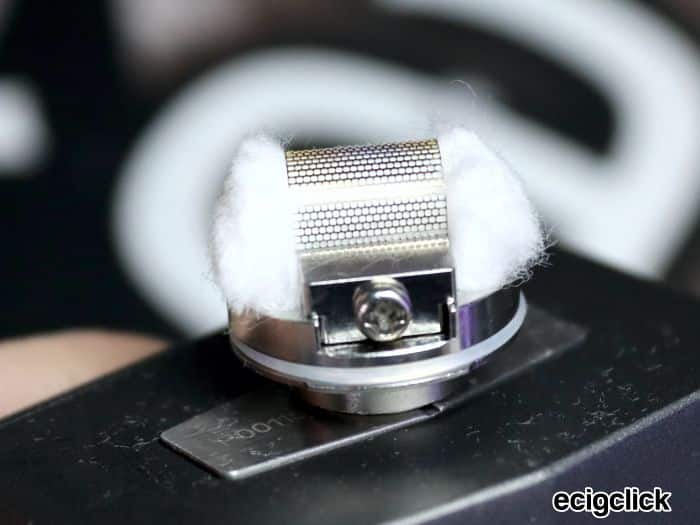
Building the Mesh Deck
Steam Crave include two Mesh strips in the kit along with a Mesh forming tool. Here’s how I built it:
- Loosen the two Philips head screws which will open up the mesh clamps.
2. Form one of the Mesh strips around the supplied forming tool. Make sure to form the mesh strip nice and straight, you’ll be surprised how easy it is to kink or damage the mesh by slightly twisting it.
 3. Fit the mesh into the deck, ensuring its fitted straight and carefully tighten the screws. Once done, ensure the mesh is straight in the terminals.
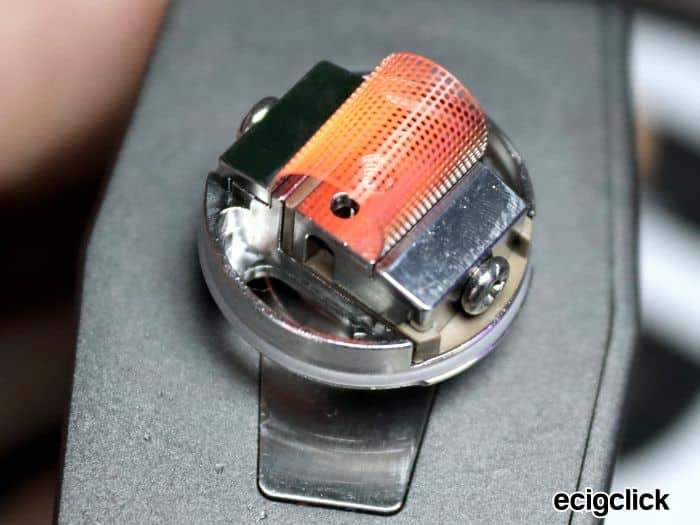
 4. Pulse the mesh at a low wattage to remove any grease or machine oil and you should get an even glow across the mesh
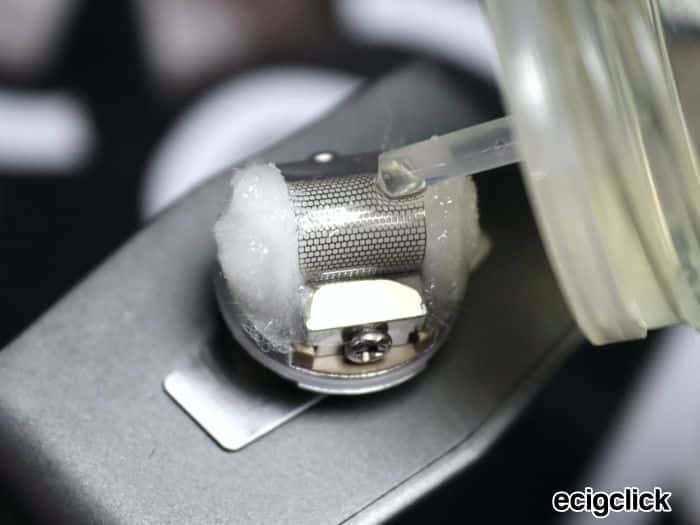
 5. Pull the large cotton strip through the mesh strip, a little push and pull will leave the cotton snug under the mesh.
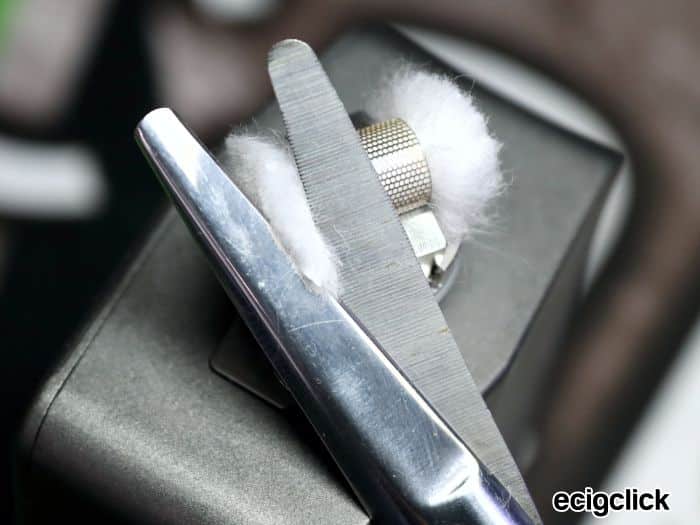
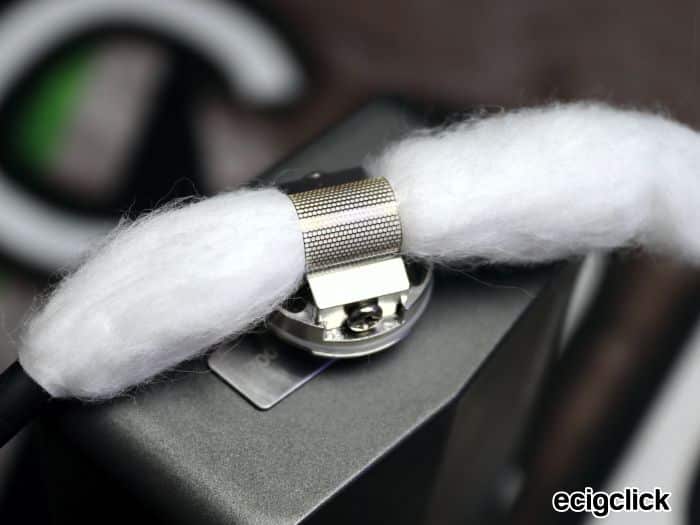 6. Cut the mesh at an angle, just past the deck.
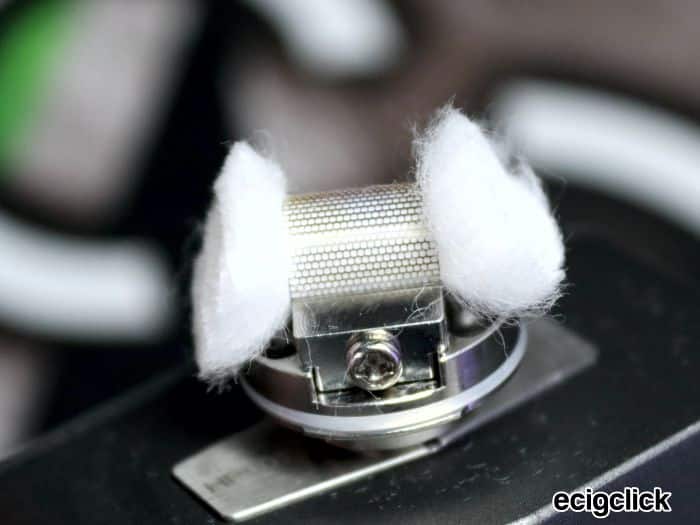 7.After a light fluff out of the cotton, gently form the cotton into the wicking ports.
 8. Spend the next 10 minutes saturating the cotton with e-liquid and fit the deck inside the atomiser.
 Generally speaking, the Mesh deck is a breeze to build on, much like the majority of mesh build decks.
Of course the juggling act is the amount of cotton you use, and just how much excess cotton you leave to cram into the ports.
It took me a few builds to get it right and the truth is, the large capacity e-liquid helps to push the liquid through the cotton so in essence you have more room to play with than with most standard capacity Mesh RTA’s and RDTA’s.
Flavour & Clouds
For the duration of my testing, I was vaping on Code Red by Darkstar that I mix to 80VG 20PG at 3mg.
The Post-Less Deck
The dual alien build came out at 0.1Ω which on the majority of devices may not fire, but fortunately the DNA250c chipset in the Hadron Plus fires down to 0.05Ω so no problems there.
 At 100 watts with the airflow set at two full rows open, the draw is surprisingly smooth and the flavour is very good indeed.
100w isn’t a crazy wattage to put through a 0.1Ω build so the vape is tepid/warm at best but nonetheless you get excellent vapour production and considering the size of this tank, the draw is super smooth and a wonderful vape.
The Mesh Deck
The Mesh build comes out at 0.16Ω and is recommended between 35 and 70 watts. After a bit of tinkering, I found the sweet spot at 65 watts with two airflow slots opened.
 Granted, Its still not the most stellar vape I’ve experienced from a Mesh Deck but it certainly produces clouds of vapour and is also very smooth. But in my honest opinion, I’ve had more flavourful vapes from other Mesh tanks.
Pros
Hadron Plus Mod
- Great performer thanks to the chipset
- Seem-less battery door cover
- Can fit large atomiser
Aromamizer Plus V2 Tank
 Aromamizer Plus V2 Tank
- Excellent build quality
- Smooth airflow
- Extendable to 16ml capacity
- Forgiving with regards to wicking the post-less deck
- Juice-Flow control a winner for me
Cons
 Cons
ConsHadron Plus Mod
- Very large and bulky
- Fire button is positioned too low
Aromamizer Plus V2 Tank
- Build deck is massively limited by its width
- Mesh Deck doesn’t produce enough flavour.
Final Review Verdict
First things first. This kit won’t be for everyone.
If, like me, you’ve always been intrigued by Steam Crave’s large variants, then I genuinely think this may be their best option yet.
Why you might ask?
Well first of all the Hadron Plus carries the ever popular, trustworthy DNA250c chipset which gives this device the full beans it truly needs.
Sure the looks of the device might not be everyone’s cup of tea, it’s a bulky, fairly plain dual 21700 mod but regardless of its looks, it functions well and the battery door makes for a solid fit, even if I do feel like the battery housing could do with the addition of a battery removal ribbon.
 What really sets this off against previous Steam Crave kits, is the Aromamizer Plus V2 RDTA. Sure, the larger Ragnar and Titan RDTA’s are nice and certainly an experience to use a massive tank, but the Aromamizer V2 scales things down just enough to be practical yet keeping the things that we love so much about Steam Crave tanks.
So the 3 big questions I ask when testing a product are:
Would this kit be long lasting and still work 3, 6 or even 12 months from now?
The company generally make very good quality tanks and devices and the Steam Crave Hadron Plus Combo Kit is no different.
If you plan on using this kit as a daily carry, I’m sure you can expect the odd scratch and bump to the Hadron Plus, but I’ve no doubts the chipset and the high build quality of the Aromamizer Plus V2 will take you way into 2023.
Does this device deliver the flavour, vapour and general experience I require, in order to be enjoyed?
 Does this device deliver the flavour, vapour and general experience I require, in order to be enjoyed?
I wasn’t the biggest fan of the Mesh Deck in all honesty, and as a self confessed Mesh fan I’m a little disappointed. However when it comes to my experiences with the post-less deck its pretty difficult to really pick out any cons with regards to performance.
The main thing you notice when vaping on this tank is just how smooth the vape is, with the airflow dialled down slightly the draw is so smooth and enjoyable and the flavour is excellent with the right build.
 Did you buy the Steam Crave Hadron Plus Combo kit? Or have you tried it? Let us know what you thought in the comments below.


it’s not a “imho” but a “iirc”
RTDA is a term Steam Crave initially came up with …
also, it is, techically a dripper tank … opening the juice flow control ring does indeed drip onto the actual tank which is the bottom part which hold around 4-5ml, the top tank is just a juice reserve until you feel a hint of dry hit, since in RDA mode that role is filled (no pun intended) by the bottle you carry around (although given the massive bottom part, you’d have to drip less than, let say, on a 27mm Suicide Mods Nightmare (which can go for long draw before hitting dry )