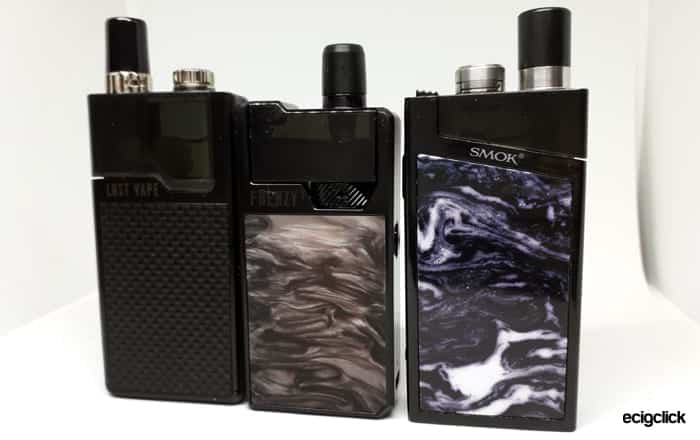
The Geekvape Frenzy is another pod kit in the form of a little box – like quite a few others that are on the market right now.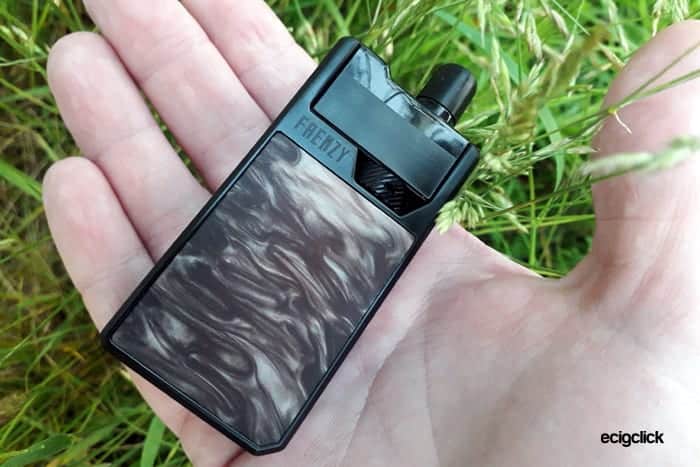
I have owned a few devices from Geekvape including the Aegis Mini, the Ammit MTL RDA and the Alpha Tank and have always been very impressed with the quality. Let’s see if the Frenzy can live up to my expectations?
What Can We Expect From The Geekvape Frenzy Kit?
The Frenzy may have a little body but that conceals a great 950mAh capacity internal battery.
Also inside is the AS Chip – similar to what is used on the larger Geekvape kits such as the Aegis Legend and the Nova.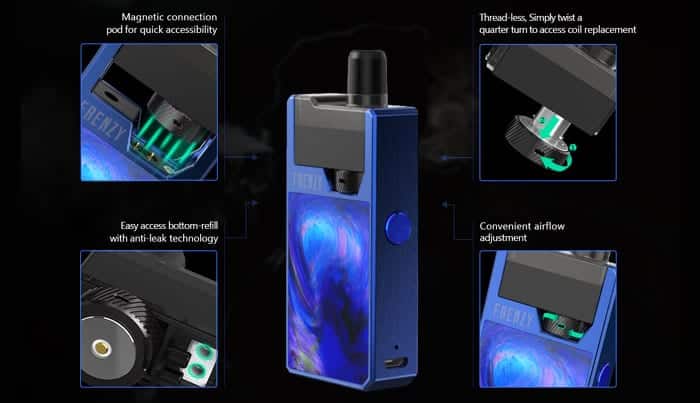
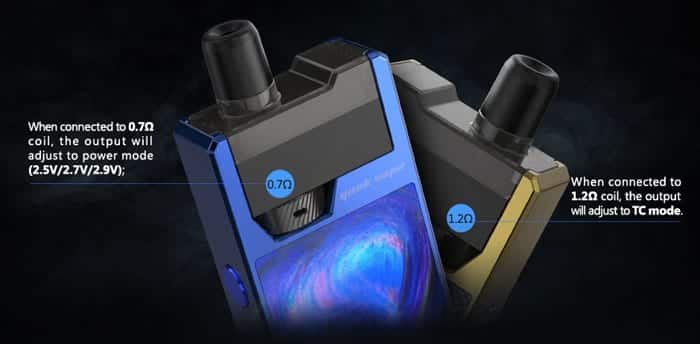
There are different power modes and user modes which depend on which coil you install.
- Using the 0.7ohm Mesh coil (included in kit) you can chose from 2.5V, 2.7V or 2.9V.
- Using the 1.2ohm Coil (included in kit) the mod will switch over automatically to Temperature Control to prevent burning the coil out when e-liquid is low or during heavy use.
The pod is removable and holds 2ml of your own e-liquid filled through a port in the coil base. Plus you have an adjustable airflow ring.
The other great feature is that you can just change the coil on its own without having to discard the whole pod. Oh and it is compatible with the Geekvape Flint coil range.
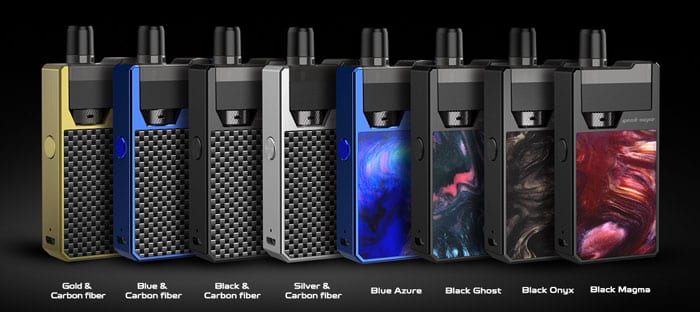
There are 8 colours to choose from – Gold and Carbon Fibre, Blue and Carbon Fibre, Black and Carbon Fibre, Silver and Carbon Fibre, Blue Azure, Black Ghost, Black Onyx and Black Magma.
I received the Geekvape Frenzy Kit free of charge for review purposes but as always I will report back honestly on my findings. Let’s see what this pod system is all about.
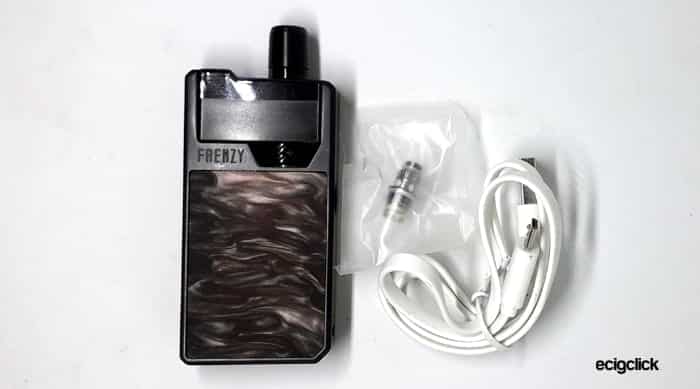
What’s In The Box
- Geekvape Frenzy Battery
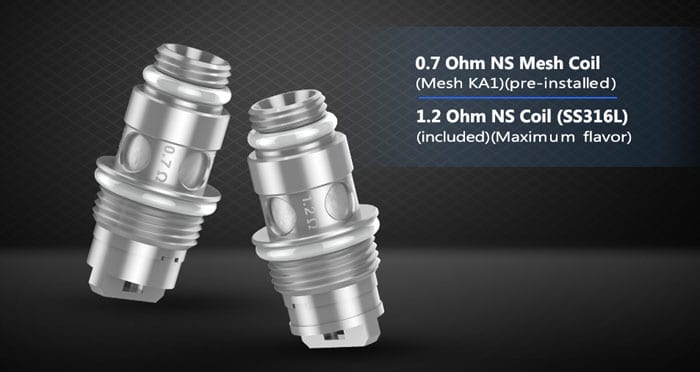
- Pod – 0.7ohm NS mesh coil installed
- 1.2ohm NS coil
- USB cable
- User manual
 As I was sent the review version of the kit I didn’t get a user manual and my packaging will be different to the final retail version.
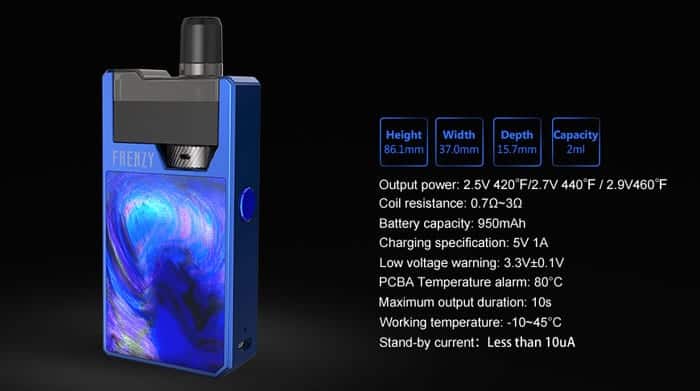
Geekvape Frenzy Kit Features
- Size: 86x37x15.7mm
- Output: 2.5V (420°F) / 2.7V (440°F) / 2.9V (460°F)
- Battery: 950mAh (Internal)
- LED battery indicator
- Coils: 0.7ohm Mesh / 1.2ohm NS Coil
- E-liquid capacity: 2ml
- User modes: with 1.2ohm coil – TC mode / with 0.7ohm coil – Variable Voltage
- Adjustable airflow
- Magnetic pod connection
- AS Micro chipset
Build Quality & Design
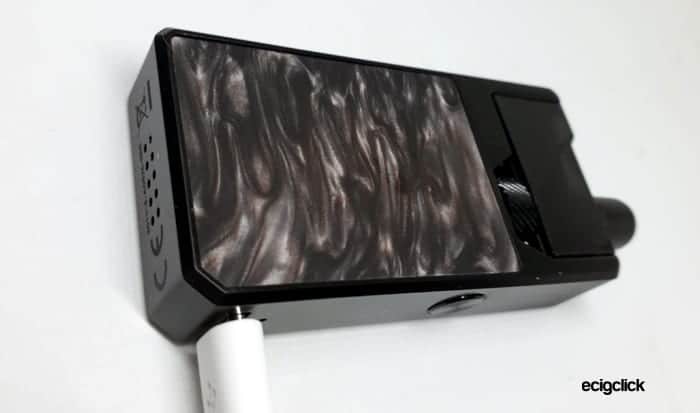
I received the Geekvape Frenzy in the Black Onyx version. The panels do feel and look like real resin the way it catches the light. It also has a lovely texture.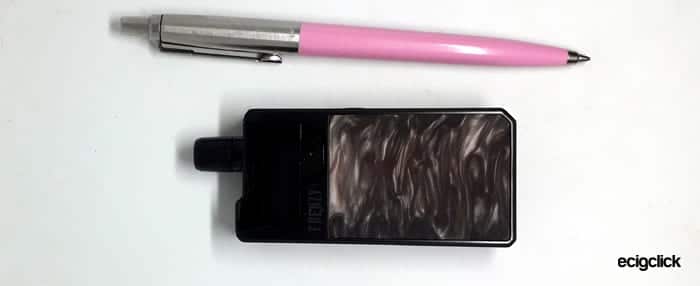
As for packaging as I received a review sample it doesn’t have the normal retail packaging so I have no views on that sorry!
Device
The body of the device is made from metal and feels high quality. As mentioned above the resin panels have a lovely feel and catch the light beautifully.
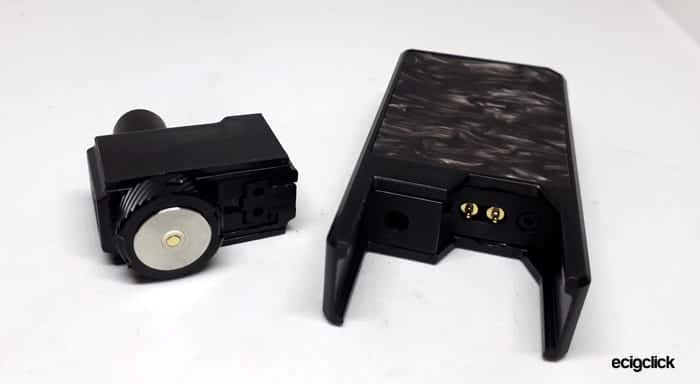
The pod slides into the side guides at the top of the device and is pulled fully in by a strong magnet. There is no pod wobble either!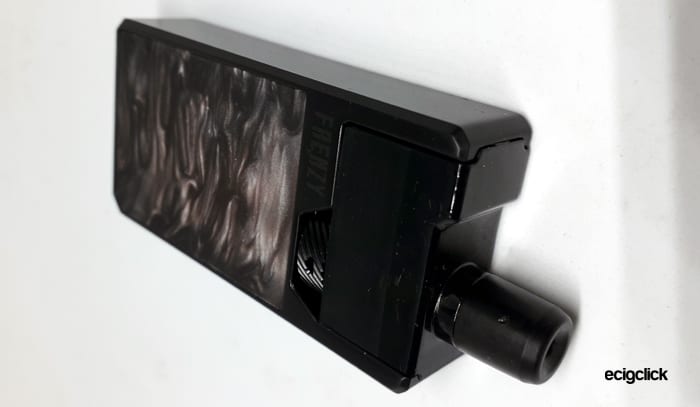
The front and back of the Frenzy are identical apart from one side having the Geekvape text and the other having the Frenzy text.
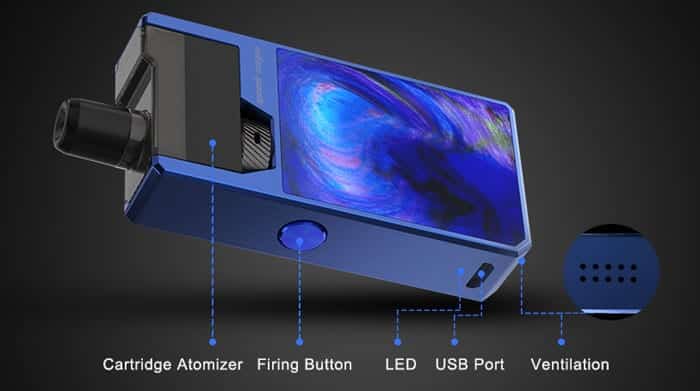
The side has a small but clicky fire button and the micro USB port is below.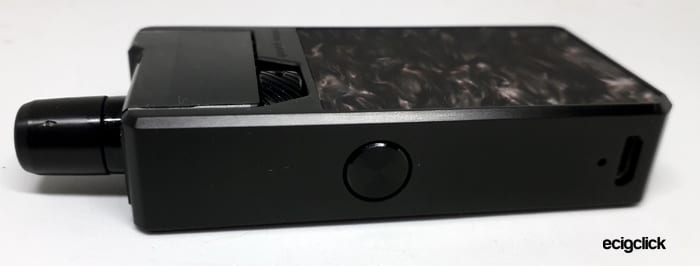
The opposite side is completely blank.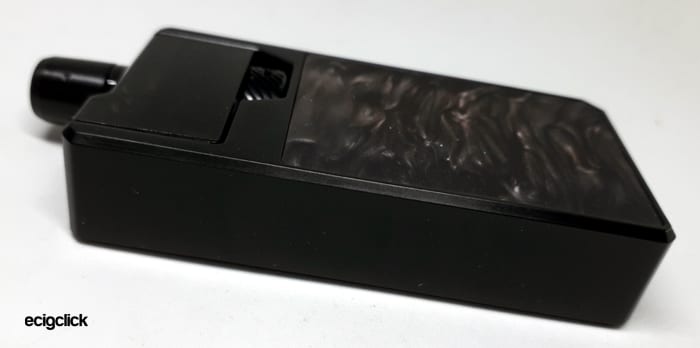
On the base are 10 vent holes and the legal logos.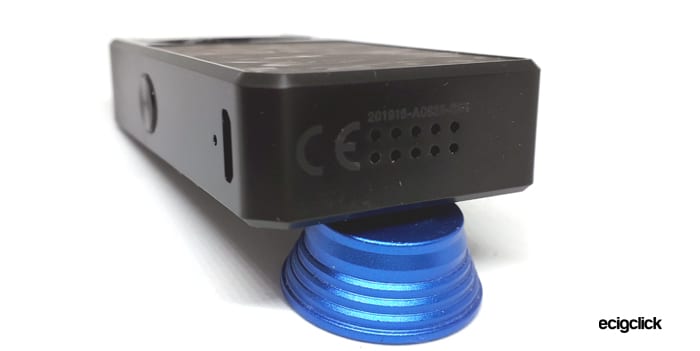
This just feels so lovely in your hand and is a good weight.
LED Indicators
There is a single LED above the USB port and this illuminates in different colours to display the power level selected and battery capacity remaining.
Pod
This is easy to remove but is a very dark colour meaning you have to hold the pod up to the light to check the vape juice level.
The drip tip appears to be fixed in place – well I can’t seem to remove it anyway!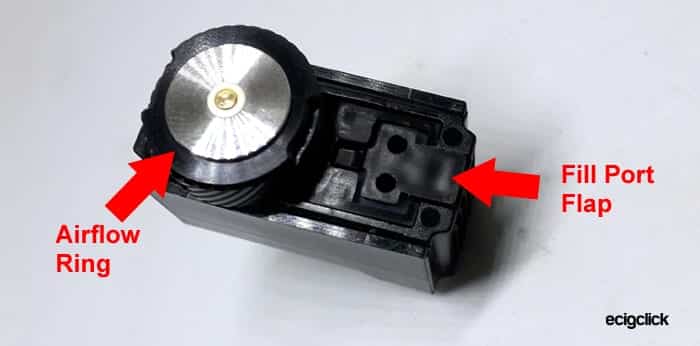
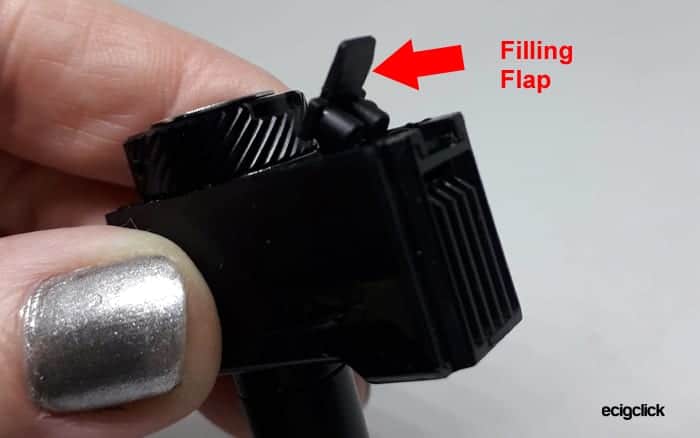
On the base of the pod is the flap which you open to expose the refill ports. This is a bit flimsy and I am wondering if it will at some point fall off? Also make sure to push it fully closed.
There are 2 refill ports – perhaps so that you don’t get an airlock when refilling. I use only one and the liquid fills up perfectly with no airlocks – so there you go they are working!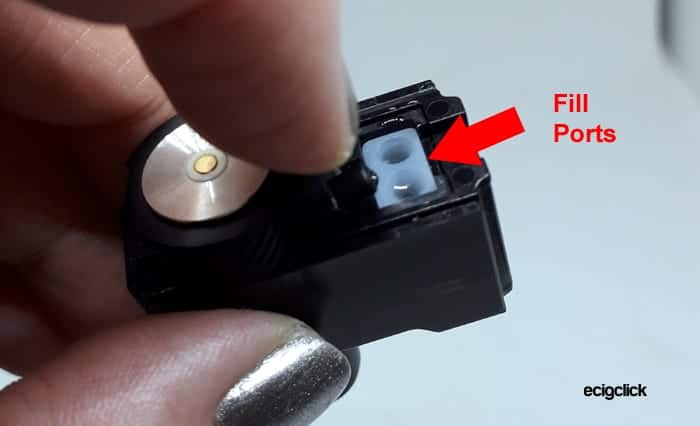
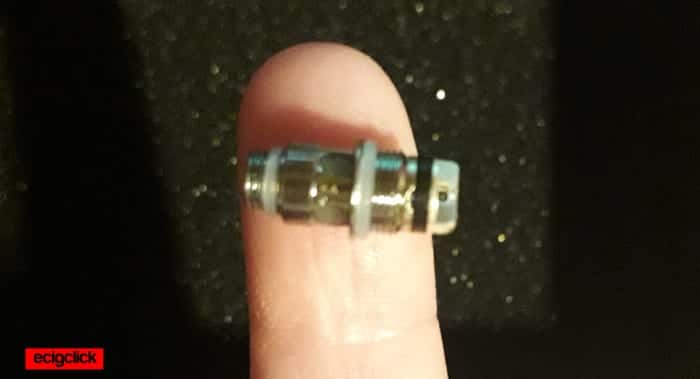
One other slight gripe is the size of the bloody coils – they are tiny. Minuscule. You can’t read the info on them very easily – I had to take a photo and then zoom in so I could tell the coils apart.
Plus trying to grip them for me was difficult as I do have joint issues and my hands are a bit manky!
Airflow
On the other side of the base to the filling port is the airflow adjustment ring which is smooth to turn. One small niggle is that you can’t actually see the airflow inlet so you have to turn and inhale to check if it is open or closed.
With regular use you will get used to which way to turn to open or close the airflow.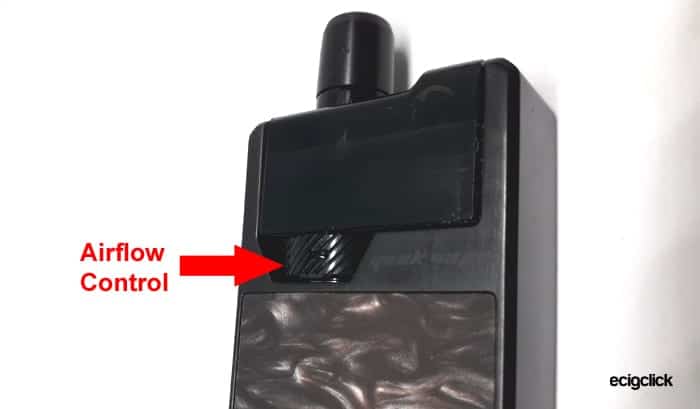
You can adjust the airflow with the pod installed which makes life a lot easier as the ring sits just proud of the side of the mod.
Quick Set-up Guide
Right as I mentioned above I didn’t get an instruction manual as I got a reviewers sample.
I also did check on the Geekvape website to see if I could download a manual but sadly nothing there yet.
So as for all the controls etc. I have had to figure it out from what I can find on the Geekvape website and having a play myself.
This video did prove to be really helpful I found so have a watch of it.
The kit arrives with the pod installed but DO NOT turn on until you have filled the pod with liquid and left it to stand for 10-15 mins – or else you could burn the coil out, not nice.
There is an isolator strip installed between the pod and device electrical connector so this should help prevent accidental firing. I would only remove that once you have filled up the pod.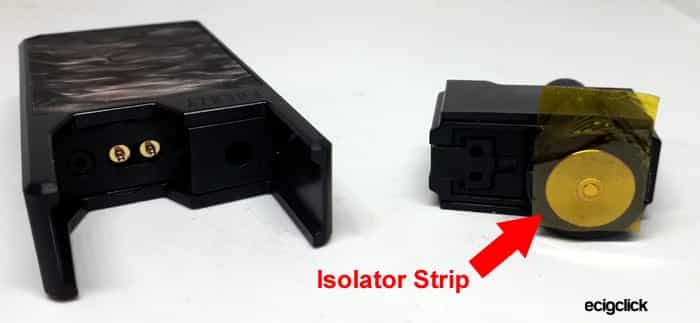
So you will need to fill up and charge and then you can get stuck into the important business of vaping!
Basic operation
- Turn On/Off = 5 clicks of the fire button
- To vape = press the fire button
- Airflow adjustment = turn the little knob on the base of the pod. You do not need to remove the pod to adjust this yay!
Battery capacity remaining
- Press the fire button twice and the LED will display the following:
- Red light = 0-30% charge left
- Blue light = 31-69% charge left
- Green light = 70-100% charge left.

Power Modes
- Using the 0.7ohm coil you can select the power output.
- Using the 1.2ohm coil you select the temperature.
Change Power / Temperature:
- Press the fire button 3 times the mode will be displayed according to the colour of the LED.
- White light = 2.5V or 420°F
- Blue light = 2.7V or 440°F
- Green light = 2.9V or 460°F
- If you want to change the mode press the fire button 3 times until the colour you require is displayed.
Protections
Hmm I am not sure what protections there are sadly. The only info I could see is Low Voltage Warning: 3.3V±0.1V and PCBA Temperature alarm at 80℃. Hopefully your kit will contain instructions so you know what certain fault conditions to look out for.
How To Remove The Pod
- This is so simple – pull the pod out of the device!

- It is held in magnetically and when you install new pod it will be pulled into position by the magnet.
- You can only install the pod one way around!
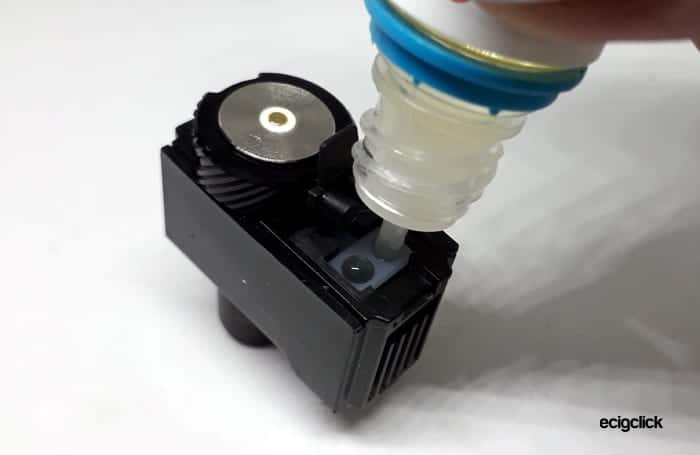
How To Fill The Geekvape Frenzy Pod
- Remove the pod as described above.
- Turn the pod upside down.

- Lift the edge of the filling flap and open it to reveal the fill ports.
- Add e-liquid through either port whilst observing the level through the side of the pod.

- Replace the filling flap and make sure it is fully closed.
How To Change The Coil on the Frenzy Kit
I did remove the coil with the pod still full, if you position it as shown in the photos you should be OK. I did find a bit of liquid oozed out of the drip tip and there was a bit of flooding when I took a vape after.
If you get flooding open the airflow up fully. Remove the pod and put a tissue around the airflow ring. Blow down the drip tip until the liquid clears out of the airflow.
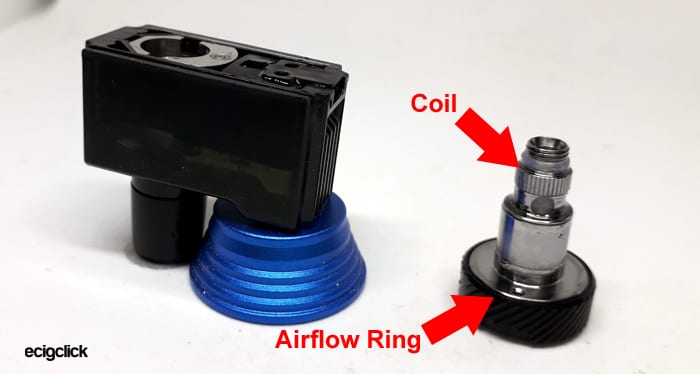
- Remove the pod as described above.
- Turn the airflow control ring 90° in an anti-clockwise direction.

- Pull the airflow ring away from the pod and the coil will come out with it. This can be a bit stiff.
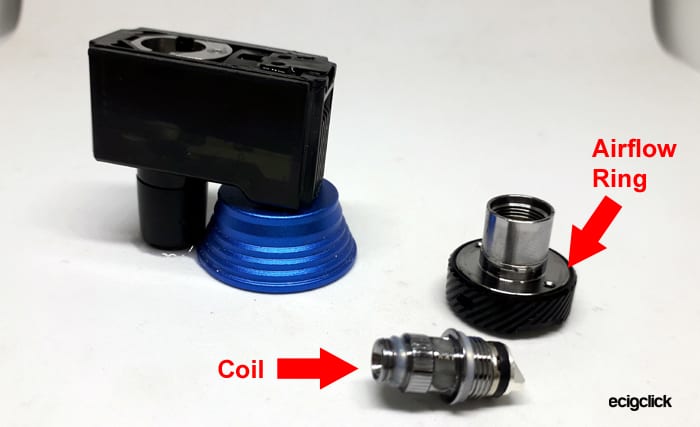
- Unscrew the coil from the airflow ring.

- Screw a new coil onto the airflow ring.
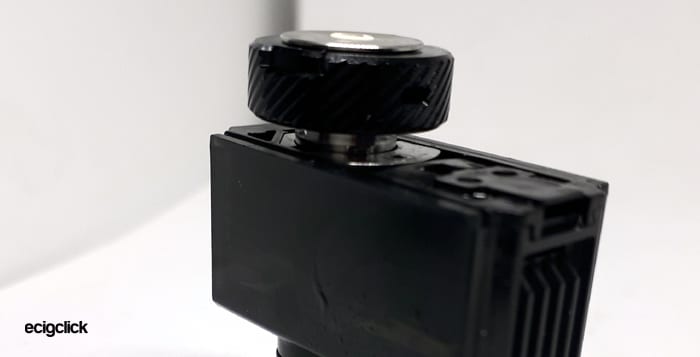
- Push the airflow ring into the pod and turn 90% clockwise to make sure it is secure.

- If the coil and airflow ring won’t push into the pod just rotate the airflow ring and coil assembly until it aligns and push in fully. Then you can turn 90° clockwise to lock it in position.
- Fill the pod and make sure to leave to stand for at least 10 minutes to prime the coil.
How To Charge The Battery
- Install the included USB cable into the micro USB port on the device.

- Attach the large end of the USB to a suitable USB outlet.
- During charging the light will pulse through the colours – when fully charged the green light stays on solidly.

I found it was fully charged from empty within an hour on my old 0.5A PC USB port – excellent!
How Does the Geekvape Frenzy Kit Perform?
As the Geekvape Frenzy kit uses the NS range of coils – which are also compatible with the Geekvape Flint Kit – I will be using a 50/50 VG/PG nicotine salt e-liquid from the Apollo nic salt range. The liquid is 20mg strength.
 The coils with the NS prefix are designed for Nic salts!
Further reading:
The coils are that tiny with minute wicking holes so I didn’t even attempt thicker liquid in here. When I buy some more coils I will give that a bash and update the review.
Airflow wise you can close the airflow off completely and when fully open it is quite restricted.
0.7ohm NS Mesh Coil
You can adjust the power level when using this coil so I will test it in all the power settings.
White light = 2.5V
This is already a decent vape – with a slight throat hit.
I have put the airflow in the mid position for a quite restricted vape and it feels smooth – it is already quite warm with a decent throat hit. The flavour is coming through lovely too!
Even at this low power there is a lovely little crackle of the liquid warming up – I like that!
Blue light = 2.7V
This is slightly warmer but the throat hit is a lot more noticeable now. I had to open the airflow up slightly more on this setting.
The flavour is pretty much the same as on the lower power level. This was the best setting for me as nice and smooth on the throat but still getting good flavour and a great nic hit with salts.
Green light = 2.9V
This really crackles away nicely now – I left the airflow in the fully open position.
I am taking a lot shorter vapes on this setting as I am getting a massive throat hit. Should be good for liquid economy and battery life though!
0.7ohm coil conclusion
This is throat hit central with a lovely warm vape and a great flavour! No massive clouds but this is not designed for that. The throat hit is enough to satisfy any smoker / ex-smoker if you ask me!
The mid power level was the best for me as it was a bit harsh vaping regularly on the high setting.
1.2ohm NS SS316L Temperature Control Coil
This coil being made of Stainless Steel is suitable for temperature control so the power level option is automatically disabled and TC mode is automatically enabled.
The TC is to prevent the coil from burning – so if the coil resistance is giving an unexpected reading such as it overheating from lack of e-liquid it will prevent the device firing.
I will try to test it with only a small amount of e-liquid left and see if it kicks in after I have done the taste and vapour tests. If the TC doesn’t kick in it will kill the coil and I won’t be able to review it hehe!
As with the 0.7ohm I preferred this in the wide open airflow position and it is still quite restricted.
Weirdly with this coil installed the Frenzy still allowed me to select power levels – which I didn’t think it did – so the power levels must convert to the temperature levels – so with that in mind…
White light = 420°F
This is a very cool vape and not as good a throat hit as the 0.7ohm.
But saying that the flavour is definitely coming through and it is very smooth!
Also a lot more vapour on this coil already! I just feel this is a bit weaker than I am used to even with 20mg nic salt liquid.
Ideal for days when you have a sore throat or feeling a bit chesty!
Blue light = 440°F
This does feel a lot warmer and the vapour feels drier – if that makes sense.
It is crackling away nicely too when you press the fire button.
Flavour wise this isn’t much different from the white light setting.
Green light = 460°F
Again slightly warmer – a lot drier. I am taking quite long vapes with this coil which I couldn’t do with the 0.7ohm so it does feel a lot less powerful.
But it is very smooth. Again not much difference flavour wise and still plenty of vapour.
Dry Burn – TC Test
I set this to the lowest temperature setting with the white light.
Basically I just kept vaping until the pod was empty. In theory when there is no e-liquid left the coil will overheat. This will change the resistance outside of the limits the device would normally expect it to be. Therefore outside of these limits the device should prevent firing or ramp down the power to accommodate.
The basic test is that I should get no burnt taste, the device should stop the coil from burning. However it must be noted you could damage your coil doing this test plus it tastes like Satan’s arse if you do get a dry hit!
It has taken bloody hours to get this pod empty with the 1.2ohm coil so it definitely is economical on e-liquid!
The pod is finally empty! It is still crackling a bit so must be some residual liquid still in the wicking.
I got another 12 vapes and then the burnt taste kicked in however the device did stop firing. Pressing fire again allowed the coil to heat up slightly but it cut out again within a second.
The TC is definitely working however I did still get a dry hit which was rank.
I removed the coil to replace it with the 0.7ohm and the 1.2ohm coil did look bone dry but the cotton on view was still white and it didn’t smell burnt.
1.2ohm coil conclusion:
This is extremely smooth but I do miss the throat hit you get with the 0.7ohm. As I am quitting smoking the 0.7ohm suits me a lot better. I am ordering more coils for this as I love it and the 0.7ohm are the ones I will buy.
Battery Life
The battery life will depend on many variables such as your own vaping habits plus the coil and power mode / TC setting.
To give you a guide using the 0.7ohm coil on the middle setting (Blue light – 2.7V) I got 6.5 hours of vaping. Bear in mind this is with nicotine salts so shorter and less frequent vapes than you would with low nicotine e-liquid.
Pros
- Metal body and resin finish are both lovely with a quality feel
- Power level and airflow adjustment options
- Can change airflow setting without removing the pod
- Smooth super quick firing
- 0.7ohm coil surprisingly smooth and flavourful even with 20mg nic salts
- No need to discard the whole pod when the coil has worn out – simply change the coil
- Coils also compatible with the Flint kit
- No leaks, faults or malfunctions
- 3 power levels available on the 0.7ohm set up to tailor the vape to your e-liquid strength
- Economic on battery and e-liquid usage
- Super quick charging – an hour on my old PC USB port
Cons
- Coils are absolutely tiny – hard to read which coil it is and hard to grip!
- Bottom fill – it is pretty easy but a lot of devices in a similar class to this have a top fill.
- Dark pod makes it hard to see liquid level easily
- TC does work – but a bit late to kick in for my liking – didn’t prevent revolting dry hit!
Final Review Verdict
So as some of you may know I am fighting against tobacco again – started smoking recently after a horrible bereavement. I decided that this packet of tobacco is my last.
Now down to the last crumbs of my backy I have been using the Geekvape Frenzy Kit and the Innokin Z-Biip to try and eek that last bit of tobacco out so it lasts.
I have to say using the 0.7ohm coil with nic salt liquid is beautiful. The Z-Biip is amazing but it does make me cough sometimes as it feels really powerful.
Whereas this Frenzy on the mid setting is just so smooth and is a pleasure to vape on! I wasn’t expecting much when you see how tiny those coils are – but wow they are deceptive little monsters!
It isn’t perfect the tiny coils are a nightmare to work with and the bottom fill pod is slightly disappointing compared to similar devices in this sector of the market – but even then it isn’t enough to stop me liking using this!
The Frenzy is classy looking, well made and more importantly vapes beautifully!
Less of a Frenzy more Classy, Calm and Collected in my eyes! Nice one Geekvape this deserves to be up there with the better pod devices around right now!
Have you used the Geekvape Frenzy pod system? Let us know your thoughts in the comments below.


Thanks for the review, this was very helpful! One question – what coil/power setting would you recommend for higher nic juices like 50mg? I just ordered a kit can’t wait!
Hi . Can you please reccomend a pod style just like the frenzy but with bigger coil. I like the air flow control and option to have mtl or dtl and the smart chip that changes from watts to temperature. But the real annoying is the Coils doest last long. I want a coil to last a 10ml bottle . I think that’s a good ratio.
Please can you suggest another one similar to frenzy
Hmm wonder why the coils are not lasting – which coil are you using? I found the 0.7ohm with nic salts lasted well?
Any of the pod systems which use the Smok Nord coils – such as the Trinity or the RPM 40 might be a good shout as the 1.4ohm Nord coils last me quite a while.
Another consideration is if the e-liquid is very sweet and sometimes if it has “cooling” it can burn out coils quicker?
Shell
I have been using the Frenzy for the last 3 weeks. It was the first Pod style device I have used and now I never leave home without it. I use the .7 coil only, so no mix ups. Be careful when the tank gets down to 1/4 full as I fried a coil because the juice was on other side of the tank. I love the portability and the only problem I have found is small pieces of debris can get into the air holes.