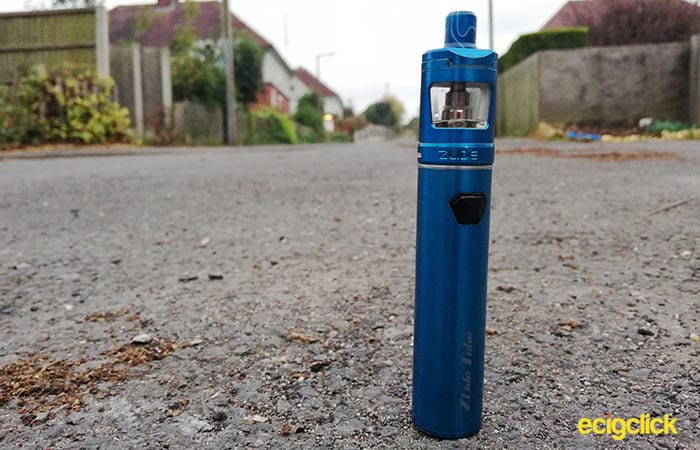
The Innokin Zlide Tube is a simple to use vape kit and one of the latest editions to an impressive range of vape kits aimed at the beginner and intermediate vape crowd.
 In that range, are some really popular choices, for example without doing any research, I know the Endura T18 II, T18E and T20 kits are very popular among first time vapers or those that are looking for a very good mouth to lung (MTL) vape.
Read More: What is Mouth to Lung Vaping?
We have reviewed most products Innokin have released since their inception in 2011. The Innokin EQ and DV Pod Systems as well the Proton Mod have all impressed.
What Can We Expect From The Innokin Zlide Tube?
The tube is hosting a 3000mah battery, which is really cool, but what does impress is how light the battery is minus the tank. Very easy on the pocket.
It comes equipped with a 24mm diameter Zlide tank (obviously) which has a 4ml liquid capacity.
It’s “Designed for affordability, easy of use, amazing battery life, and outstanding vape quality and flavor”, what more can we ask for?
It doesn’t have variable power settings, according to Innokin if you use a Zlide coil that is less than 1.0 Ohms it will fire at 16W. Using a Zlide coil over 1.0 Ohms will fire at 13W.
Lets see if it’s as good as it sounds…
See The Zlide Tube Kit In Action
In The Box
- 1 x Zlide Tube Mod
- 1 x Zlide Tube Tank
- 1 x 1.2ohm coil (pre-installed)
- 1 x 0.8ohm coil
- 1 x Extra Drip tip
- 1 x spare glass
- 1 x spare O ring set (6 orings)
- 1 x micro USB Charging cable
- 1 x quick start guide
- 1 x warning booklet
Features
- Kit Dimensions: 135 x 25 mm
- Tank Diameter: 24mm
- E-liquid Capacity: 4ml
- battery Size: 3000mAH
- Resistance Range : 0.4 – 3 Ohms
- 10 second cut off protection
- Body material: Stainless Steel
- Thread: 510
- 1A charging
- Top Filling tank
- Child Lock (tank filling)
Design and Build Quality
Tube / Battery
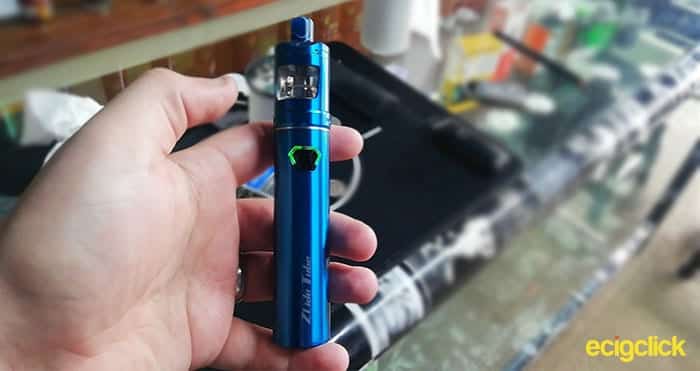
The Innokin Zlide Tube Kit comes in 6 colours (Stainless Steel, Spiral, Pink, Blue, Forest Camo and Black as seen above), I was lucky enough to receive a blue one.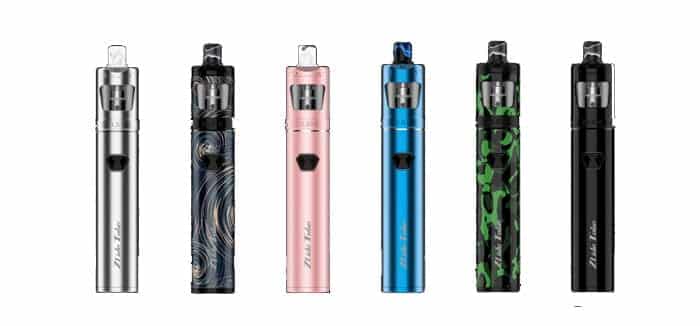
As I said in the intro, the tube (battery part) is super light, it weighs in at 84grams.
There’s not really much else to say about it, the battery section on vape pen type mods are usually very similar. Although at 24mm across, it is a little bit thicker than I expected it to be.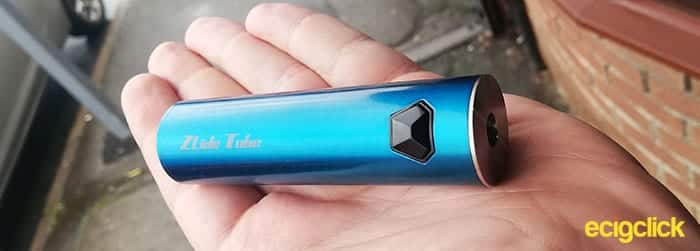
The button is diamond shaped and has an LED light that runs around it which indicates the battery level.
The tube doesn’t host any special functionality like variable power settings, it’s very much a simple plug and play.
Connection
The tank and the mod connect with a 510 Pin. The threads are really smooth and they connect quite nicely. 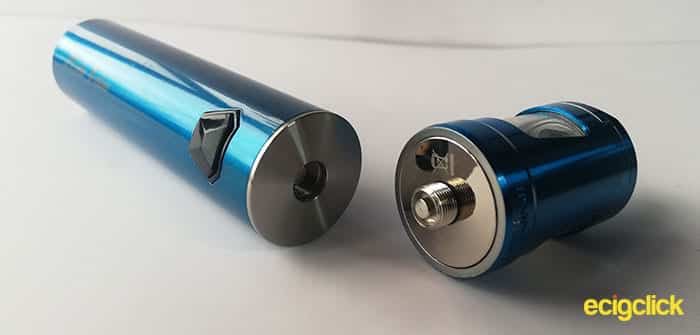 With exception to the adjustable airflow ring (which meets the tube), the tank and tube are the same width.
Charging Port
The MICRO-USB (not USB-C) is on the back of the device (opposite side to the button), which is quite typical for a Tube style device.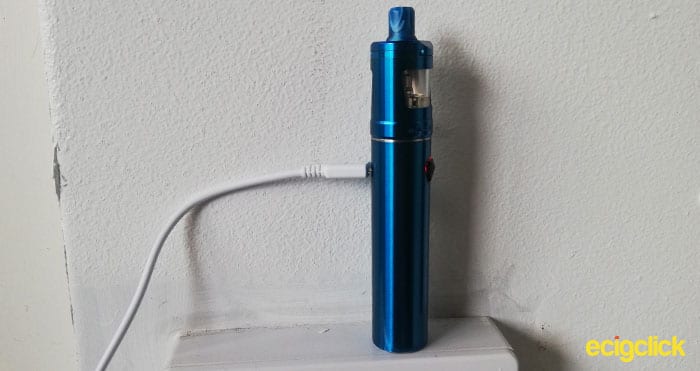
I really annoys me when new devices still use Micro-USB.
The Zlide Tank
The Zlide tank looks pretty. Instead of the glass being fully exposed, the metal structure goes down either side of the tank. I always think this makes the glass safer, less exposure, less chance of it being broken, right?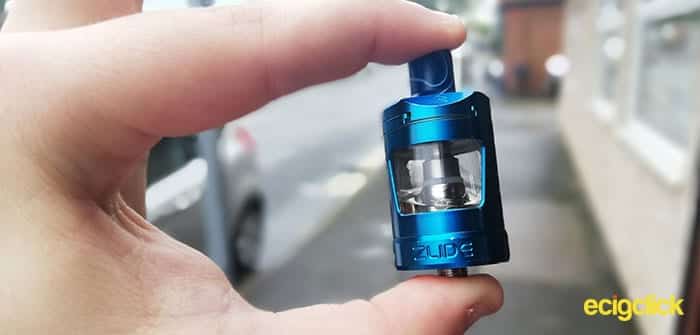
The glass is also removable, which is good, it means if you do break the glass, It can be repaired, obviously. That may sound obvious, but it is not true for all tanks. It also makes it easier to give the tank a thorough clean.
I usually, play with the device before I even touch the manual. That’s why it took me a good few minutes, to realise how to fill it…
Looking at the top of the device, it has 2 notches missing out of the otherwise perfect cylinder/circle. On one of the notches it has an arrow (two arrows) that suggest it pushes in that direction. But it wouldn’t budge.
I finally realised, you have to remove the drip Tip which has an extra lip/stage, that wedges the fill cap shut. Quite ingeniously simple, I like it.
After removing the drip tip the top slides open, quite elegantly. It’s not too loose nor too tight.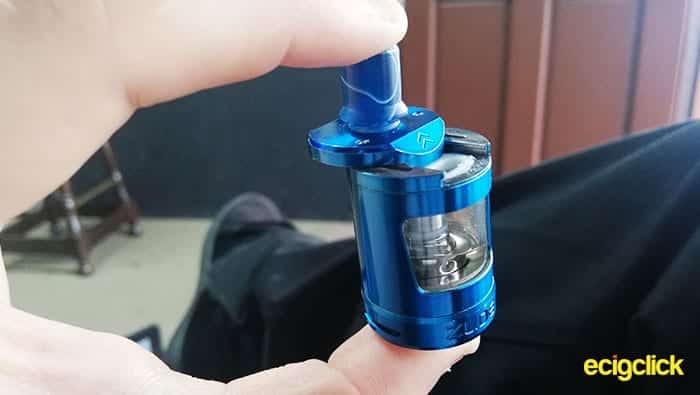
Airflow
The Zlide Tank provides variable airflow and although it doesn’t offer an ‘obvious’ Direct to Lung (DTL) airflow (larger hole), the airflow is pretty generous.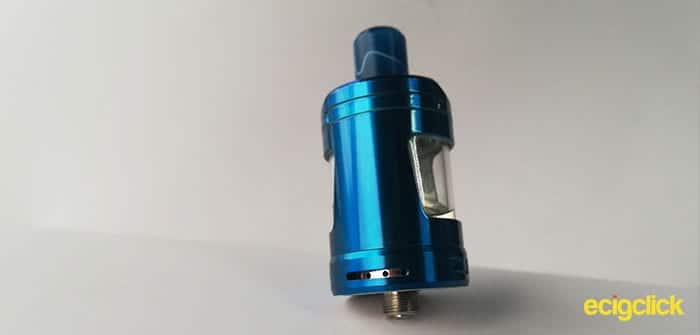
There are 4 decently sized circle holes, it can be set to fully off, 1, 2 , 3 or 4 holes.
Durability
The device feels really durable, which is great. However I have noticed after carrying around in my pocket (probably with keys and change) the colour has worn/chipped off in places.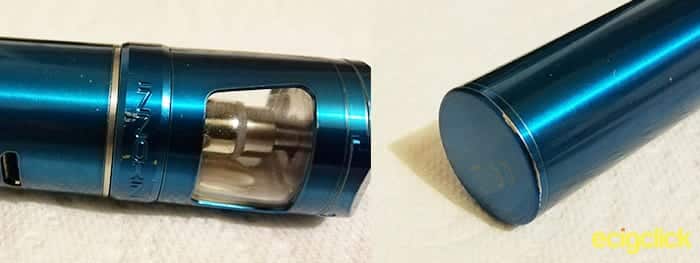
OK, that’s to be expected when you put it in your pocket with keys, but I think it’s a bit too easily done.
Quick Start
It’s all pretty standard, but don’t worry, we’ll still go though it 🙂
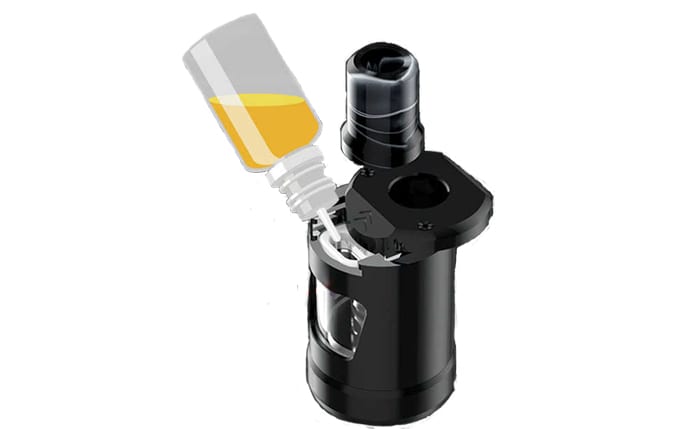
How To Fill The Innokin Zlide Tank
- Lift the drip tip/mouthpiece out (partially or fully)
- Press the two arrows on top of the tank to open the cap
- Pour e-liquid into the filling hole.
- Push the cap closed and press the drip tip back in
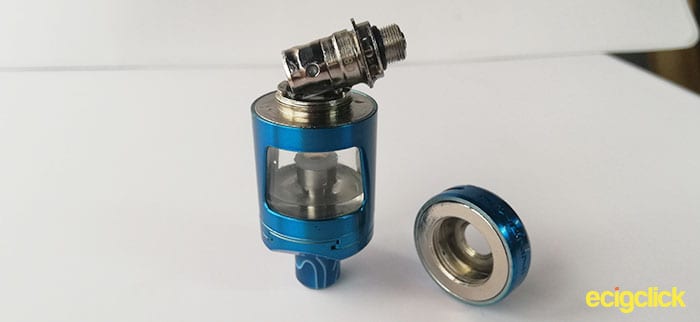
How to Change the Innokin Zlide Coil
To avoid leaking turn the tank upside down, look into the tank, you will seen a white O ring halfway up the inside.
Whatever liquid is above that O ring (while upside down) will leak when you remove the coil. If there is no liquid above the O ring, there will be minimal to no leakage.
- Remove the tank from the battery.
- Holding it upside down, Unscrew the bottom of the tank (where the adjustable airflow is)
- Lift the coil out of the tank
- Prime your coil by dripping 3-4 drops of e-liquid into the cotton to saturate. This is optional.
- Place the new coil in
- Screw the base of the tank back on.
 After changing the coil leave the tank upright (on or off the tube) for 5 minutes, to let the e-liquid soak fully into the cotton. If you don’t wait you run the risk of burning your cotton and ruining your coil.
On/Off
Really Simple. To turn the device on press the fire button 3 times consecutively. When turning on, the LED indicator will flash 3 times (1 red flash, 1 blue, 1 green).
To turn the device off press the button 3 times consecutively. When the turning off, the LED indicator will flash green twice.
LED Indicator
While vaping the LED Indicator will light up, with a colour that represents the current battery charge.
- Green = 100% – 40%
- Blue = 40% – 10%
- Red = 10% – 1%
- Flashing Red = Battery is dead and needs recharging.
 While charging the colour of the LED Indicator signifies the current battery charge.
- Red= Less the 90% fully changed
- Green= 90% or above
- No LED = Fully Charged (…or not connected to the charger)
How Does the Innokin Zlide Tube Kit Perform?
Before anything else, I want to express how poor I think the battery indicator is.
OK, it’s got one and that’s better than some systems I’ve used but I think it could do with better ‘tuning’, for lack of a better word.
The usual indication levels are 0%, 30% and 70% (for usage and charging) and I just think, 1%, 10% and 40% (90% and 100% while charging) is pretty useless.
Onwards and upward…
For this review I used Got Salts Blood Orange (I’m pretty obsessed with got salt at the minute).
It is a Blood Orange and Grapefruit 20mg Nic-Salt mixed at 50PG-50VG.
1.2 Ohm Z Coil
This coil is recommended to be used at 10-14W. Which is spot on, as the kit will fire at 13W (as it is above 1 Ohm).
I used this coil Mouth To Lung.
The vapour production is plenty full, quite a bit more than a cigarette but not really a cloud.
The flavour is really impressive, it doesn’t “flood your mouth” like an 80W tank would, but be fair, we’re using 13W here.
You get a nice hit of the flavour at the back of your throat as you inhale and on exhaling the flavour is a really nice, full mouth flavour.
A very nice, blend of orange-y grapefruit goodness!
The flavour production seems to be persistent, which is good, obviously.
I did try vaping Direct to lung (DTL) not long after I started using it and it didn’t go well, tasted rather dry.
Not so good for the higher VG liquids though which isn’t too much of a surprise.
For the purpose of testing, I chucked some Juccier Double Lemon Fizz in. It is a great liquid mixed at 70VG/30PG.
Filled it up, left it for about 10-15 minutes, dry hit. I closed the hair flow a sucked on it (without firing) to pull the liquid in faster, left it for another 5 minutes.
Although I didn’t get another dry hit per-say, it is definitely burning the coil and providing absolutely no intended flavour.
0.8 Ohm Z Coil
This coil is recommended to be used at 15-18W, which is perfect because the kit will fire at 16W (as it is below 1ohm).
The flavour production seems to be about the same as the 1.2ohm coil, a nice decent output but not quite a cloud.
The flavour seems to be about the same, although it fluctuates a little bit, one puff you seem to get a little bit more flavour than you do on the 1.2ohm coil, the next puff you seem to get less. That’s a bit annoying.
It seems to handle DTL vaping quite well but the flavour production suffers, you still get a hint of the flavour, but not a great deal.
It handles 70VG/30PG Liquid a lot better, I vaped one full tanks of the Juccier Double Lemon fizz without a dry hit.
The flavour production was just as good as the 50PG/50VG Liquid. Although it did taste a little burnt with very little flavour when trying to use the 70/30 DTL.
Airflow
As I mentioned above, the adjustable airflow doesn’t have a “fully open” setting, like some vape tanks have. However, when you set the airflow to all 4 holes, the airflow is enough to pull Direct To Lung.
Cutting the airflow down to just one hole is quite restrictive but I think its just a little bit looser than the pull of a cigarette.
I think that’s a good thing, cutting the airflow off any more, would probably cause the coils to burn.
Battery Life And Charging
The battery life is where things get really impressive, powered by a 3000mAh battery, the kit can provide approximately 1,200 x 2 second puffs on the highest power output, using the 0.8 ohm coil at 16W.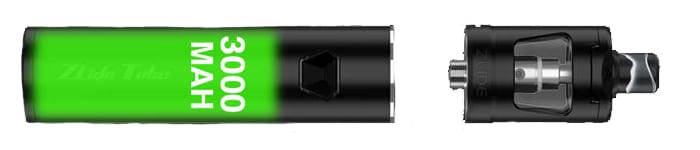
To put that in to context you can get more than 2 seconds of puff time per minute, for every minute of an 18 hour day, before the battery dies. That’s impressive.
Using the 1.2ohm coil (13W) you’d get just under 3seconds of puff time, every minute of an 18 hour day before the battery dies.
In reality, with the 1.2ohm coil, the fully charged battery lasted me the best part of 2 days (about 30 hours excluding sleep time).
Using 0.8ohm coil a full charge lasted me about a day and half (about 26 hours).
The charging isn’t as impressive. It only takes a 1amp change, so to fully charge the 3000mAH battery you’re looking at about 3 hours.
I did try to time it but I failed each time, I know it definitely takes between 2.5 hours and 3.5 hours.
Coil life
I can tell you that I’ve used the 0.8ohms for 10 days and the 1.2ohm coil for 3 days and they’re both still going strong.
Leaking
What leaking?
Pros
- Simple for new vapers to use
- Great Adjustable airflow
- Great Flavour Production
- Decent Vapour Production
- Locking Top Fill
- Bottom changing coils
Cons
- Does’t have variable power settings
- Battery Indicator levels could be better
- The colour finish of the mod isn’t very durable
Final Verdict
The Innokin Zlide Tube kit is a great starter kit for the vaper that wants a simple but plentiful mouth to lung kit.
Sure, colour/outer coating of the mod could be more durable, the battery indicator could be tuned a bit better and it would be better with variable power.
BUT it works really well, it provides plenty of smooth vapour and flavour. And let’s not forget it has a huge battery that should get any ex smoker through the day.
If we recap to the ‘what to expect’ section I quoted Innokin saying the kit is “Designed for affordability, easy of use, amazing battery life, and outstanding vape quality and flavor”, that’s exactly what we got.
Did you buy the Innokin Zlide Tube kit? What did you think? Let us know your thoughts and questions in the comments below.


 Vaping")

Just started using the device
From the shop I used it almost a week before I needed to charge it
One question though, whilst charging, how do I know it’s fully charged, how long does it take to fully charge device?
It’s bit heavy but it’s the best one I’ve used so far
Hey Georgie, both of your questions are answered in the review.
While charging the indicator works as follows:
Red= Less the 90% fully changed
Green= 90% or above
No LED = Fully Charged (…or not connected to the charger)
And It takes about 3 hours to fully charge from flat.