
Tips On Cleaning You Vape Tanks and Coils
So…you finally made the big swap from cancer sticks and purchased your first mod and tank, complete with 2 extra coil heads to keep you vaping, hopefully, for a good few months. You’ve got juice stocked up and you’re keen to prove to the rest of your friends who are still stinking you out at gatherings, that vaping is not only the healthy way to go…it’s also the economical one.
The trouble is, you’re 3 weeks in and already your second coil head is tasting like it’s reaching the end of its lifespan… the cotton visible through the slits in the side of your coil head is looking discoloured and you’re not chuffed about the fact that you’re going to have to install your final spare.
The fact is, If you want to prolong the lifespan of your coil heads or coils and your vape tank or atomiser, you need to start treating it less like a refillable cigarette and more like a piece of machinery.
That means regular maintenance, with regular cleaning of both the tank and coil head components.
Now, you may be surprised at the fact that coil heads can be cleaned but this is a trick that experienced vapers use, not only to as much as double the lifespan of their coil heads but also to make sure that those flavour nuances can be fully appreciated, when they swap from say, a fruity flavour to a dessert one…
Why Should I Clean My Vape Tank?
Think of how your vape tank works, constantly having air cycled through the airflow, into the coils and out through the mouthpiece.
Now besides the various germs and nasty residuals that might build up in the mouthpiece as you go about your daily business of eating, talking and, from time to time, even letting someone else have a hit of your vape, particles are being sucked into that airflow, where they basically sit, either in the space under your tank next to the airflow slots or in your coil.
Beyond that, even your favourite vape juice can sometimes contain sweeteners and other components which, while not harmful to your health, will build up on the glass and inner walls of the device, dampening or changing your flavours or making your vape taste burnt and generally naff.
If you’ve used a heady flavour like menthol, tobacco or chocolate, those flavours are likely to linger until you clean the inside of your vape and your coils, ruining your experience of subtler flavours like fruit.
Here are some simple to follow steps on cleaning your vape tanks.
Step 1: Disassembling Your Vape Tank or Atomiser
Now, while you’ll probably know how to unscrew the glass and top components of your tank from its base, in order to change your coils, you may need a little help actually breaking the tank down to the point where you can clean it component by component.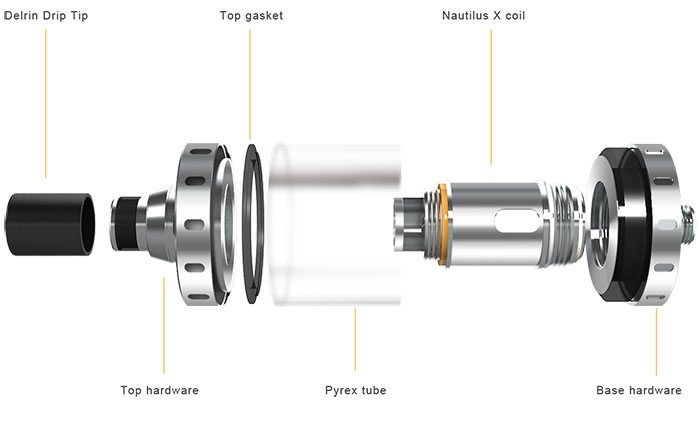 The good news is that sub ohm tanks these days are made with easy disassembly and reassembly in mind, provided you keep track of what you’re doing and don’t mislay any of those components.
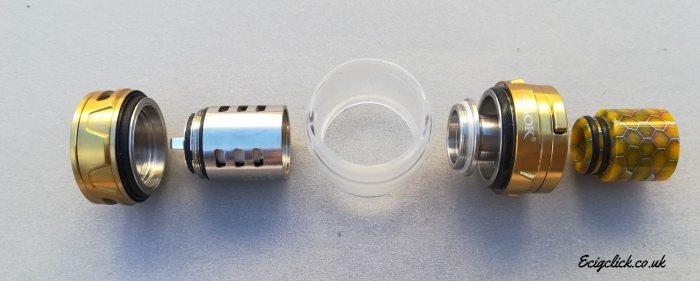
Once broken down, you should be sitting with the following components in front of you (may differ slightly from tank to tank):
- Base (including the airflow ring, if your tank has a bottom adjustable airflow)
- Coil head
- Glass or pyrex tube or bulb
- Top cap which either features a hinged or sliding fill mechanism or breaks down further into two parts, one being the tank side with fill slots, the other being the actual cap)
- The drip tip or mouthpiece
The glass tube of your tank is held in place by rubber or silicon o-shaped seals which create a vacuum that can be broken with a little extra pressure. When you’ve broken your tank down, be sure not to lose those seals, keep them safe because when you reassemble, they are essential to having a non-leaky, functioning vape tank.
- Grip the base of your tank in one hand and gip the pyrex in the other
- Twist the pyrex down and the base up, separating these components
- You will now have exposed either a base with the coil head screwed into it, which you can now remove, or a coil head that is screwed into the top cap
- Grip the pyrex in one hand and the top cap in the other
- Twist the pyrex up and the top cap down
- Now, if your coil head is screwed into the top cap, unscrew it and lay it aside
- If your top cap consists of two pieces (if it is not a hinged or sliding cap) then separate the two
- Remove your drip tip by twisting it out, keep in mind there might be a small o-ring on your drip tip which you need to keep track of
Step 2: Cleaning Your Vape Tank With Hot Water
Your tank is now officially broken down, well done! Put the coil head aside, we are going to clean that component separately.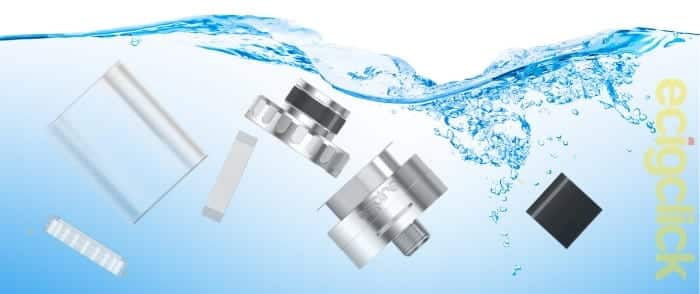
- Remove all seals and o-rings, keeping thorough note of where they fit (take a few photos as you go), it is essential that you replace these just so, once your tank is clean…if you find these too difficult to remove, just ensure that when heat is applied to your components later (hot water and blow dryer), your seals are kept intact
- Place all tank components in a bowl of very hot but not boiling water and leave to soak until that water is room temperature
- Remove from the water and, using a small pipe cleaning brush/toothbrush, hold the components under a fast running tap, while scrubbing off any stubborn residue that might remain
- You might want to repeat the soaking process and the scrub one more time
Step 3: Secondary Agents for Cleaning Vape Tanks
At this stage you might notice that there is still discolouration or a lingering smell of whatever juice you’ve been using, in which case you will have to employ a secondary cleaning agent.
Take note that while all of the following are suitable for cleaning vape tanks, your tank will require a thorough hot water soak and rinse after the fact to ensure no cleaning product remains on the device.
- Lemon juice or vinegar
- Propylene glycol
- Ethanol alcohol or vodka
- Baking soda in solution
Any of these can be used following the same steps from the water clean, leaving components to soak in the chosen cleaning agent for 2-3 hours…followed by a regular water clean and fast running rinse afterwards.
Step 5: Drying Your Vape Tank
- Pat dry the components with a paper towel and leave to evapo-dry or gently dry off with a hairdryer on a cool setting so as not to damage o-rings which might still be in place.
- Clean your coils following the steps in the next section
- Reassemble your tank, ensuring that all seals and o-rings are replaced just so
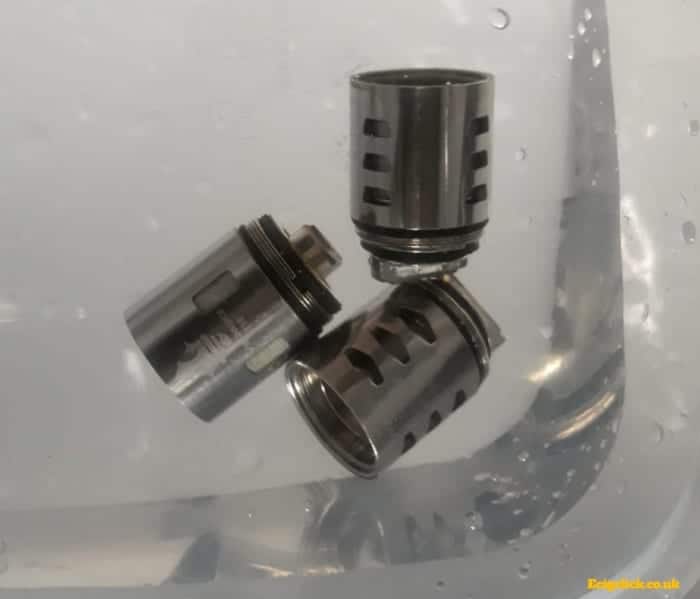
Step 6: Cleaning Your Coil Heads
First of all, I must mention that while the following cleaning methods are good for coil heads which have become saturated with stubborn juice residue or have briefly been over fired, resulting in a burned flavour…they will not work for coil heads wherein the wick has been thoroughly scorched or coils that have well and truly completed their lifespan.
Also, while it may be worth trying this method it’s by no means guaranteed to work, most of the time it’s recommended to buy a new completely new coil.
A good way to check whether your coils are even worth wasting your beloved vodka or time on is to hold the coil head under a fast running tap for a minute, to see whether the discolouration on the wick actually lessens a bit.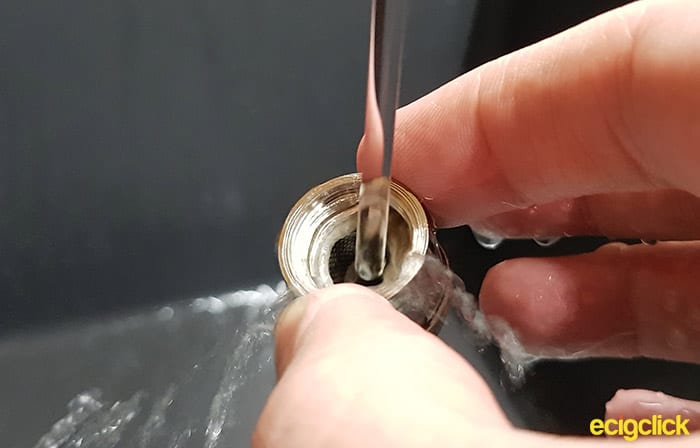
If you see a slight improvement, then it is well worth the soak and long haul…if the wick is black as the night, you may as well call it a day.
- Grip the coil with something like a needle pliers and hold it for about two minutes under a very fast running hot tap
- Fill a bowl with one of the cleaning agents used to clean your tank in the previous section and allow it to soak, preferably overnight…covering with a towel to avoid evaporation
- After the soak, you should notice a marked discolouration of the cleaning agent in the bowl
- Hold under a fast running tap of hot water for 2-3 minutes
- Rinse in a bowl of distilled water
- Blow through the coil head to get rid of excess water
- Allow to stand until the wick has dried
Cleaning The Coils On Your RBA:
The same way that a thorough clean can prolong the lifespan of your remade coils or the coils from your sub-ohm tank, the coils you install in your rebuildable atomiser can benefit from a cleaning too. 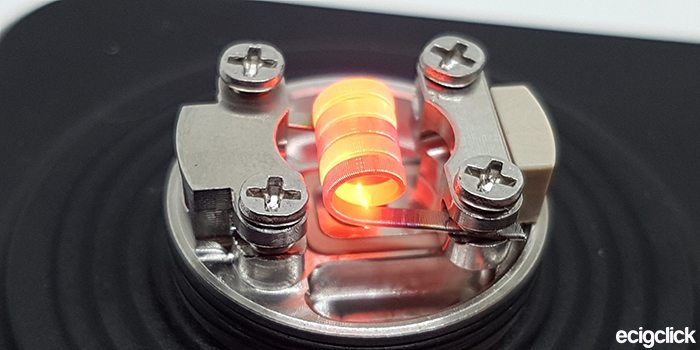 You may notice that the wick in your RBA is developing an orange colour and your juice just isn’t tasting right.
You may also notice that your coils are looking brown and unsightly but before you simply chuck them out, it’s worth trying the following coil cleaning technique too try and squeeze some extra vaping time out of those big boys.
- Remove the wick from your build
- Dry burnt your coils at a low heat to get rid of all excess liquid
- Remove your atomiser from the mod
- Remove the coils from the deck
- Rinse them under fast running hot water
- Brush them softly with a toothbrush or a coil brush
- Hold them under a fast flowing tap to see whether that brown residue rinses away
- Reinstall your rinsed coils
- Dry burn to remove water and check for hotspots
- Reinstall wick
- Soak and vape
In Conclusion:
These methods for tank and coil cleaning are not only recommended for when you taste a nasty burned taste or your tank looks like a dog’s breakfast.
Regular maintenance of your vape gear is an essential part of vaping and cleans like this should be undertaken on a regular basis…I would say once every 2-3 weeks or whenever you change juices.
Enjoy and vape on!


Anyone that says to wash your coils underwater is full of complete garbage. Anytime I have done that it’s absolutely ruined the coil you cannot get your coil wet with water I have owned over 20tanks and over 10 mods over the last I don’t know how many years -AND NEVER HAS THIS METHOD EVER WORKED . All that it has done was make a somewhat usable coil and turned it into absolute garbage . I have seeked out several websites and you tube and this has never ever worked. What has it done . Most times it turns into and unreadable coil . On the times it can actual read the coil -it tastes like straight burning in my throat and have been extra cautious at following every single step to the tee. Don’t do this .
This guide on how to clean vape coils and tanks is amazing. I have tried many ways to clean vape coils, but somehow residue remains. This time I’m gonna try out the baking soda in the solution. Let’s see how it works. Thanks