Today I’m taking a look at the Aspire Flexus Q Pod Kit.
 Aspire have been innovating in the vaping industry since 2013. In fact their motto has always been to ‘Innovate the way you vape’.
They constantly aim to help people quit the cigs and improve their overall health by offering an easy, reliable and affordable way in which to switch.
Over the years they’ve built up a bulging portfolio of reliable and affordable devices. No paragraph could ever be complete without mentioning the hugely successful Nautilus series.
Vapers of old (including myself) will identify the Nautilus tank as being one of the first purchased to make that switch.
Plenty of vapour has passed through the atmosphere since then with releases such as the Aspire Pockex, Zelos X and Minican range.
Today I’m taking a look at one of three products currently found in the newer Flexus series – The Aspire Flexus Q pod kit.
What Can We Expect From The Aspire Flexus Q Pod Kit?
I think one of the most innovative things we can expect is super fast type C USB charging. Aspire are using Q-Quick technology to recharge the integrated 700mAh battery to 80% in ten minutes.
That’s something I’m looking forwards to testing because how long will it take to charge the remaining 20%? We’ll find out soon enough.
The Aspire Flexus Q has not only been designed with cool aesthetics in mind but also for comfort during use. The auto draw feature will certainly help with this but the device can also be button activated.
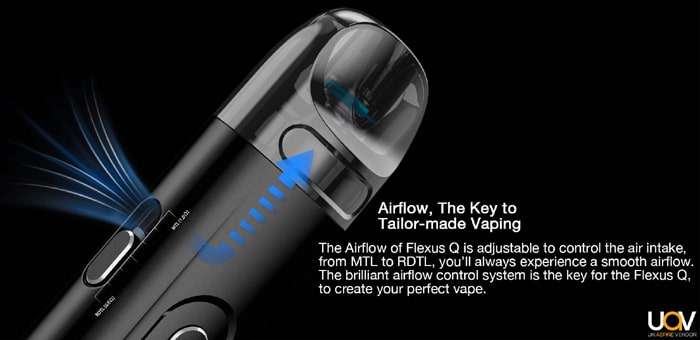
The sliding adjustable airflow on the side of the battery section will provide either a mouth to lung (MTL) or restrictive direct lung (RDL) vape, depending on which AF (Aspire Flexus) Kanthal mesh coil is being used.
We tell you all about the meaning of MTL and DTL in our Guide To Vape Styles.
A three level power system is incorporated which will output power as Low, Medium or High. So in a roundabout way we’re still getting variable wattage.
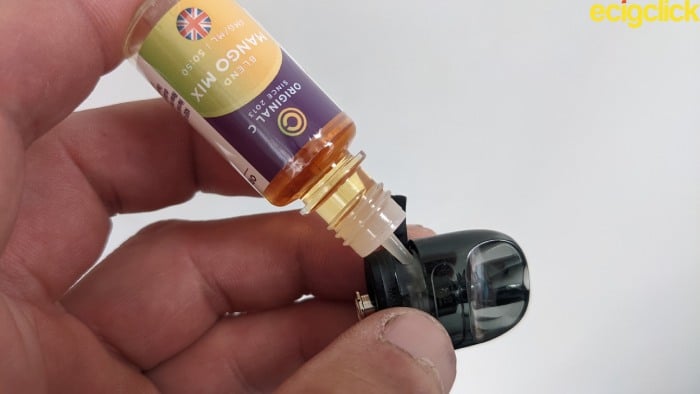
Refilling the pod is easily achieved by way of removing the silicone stopper from the side of the pod. I also noticed there’s an anti-leak version available on the official website. It makes the task of topping up even easier!
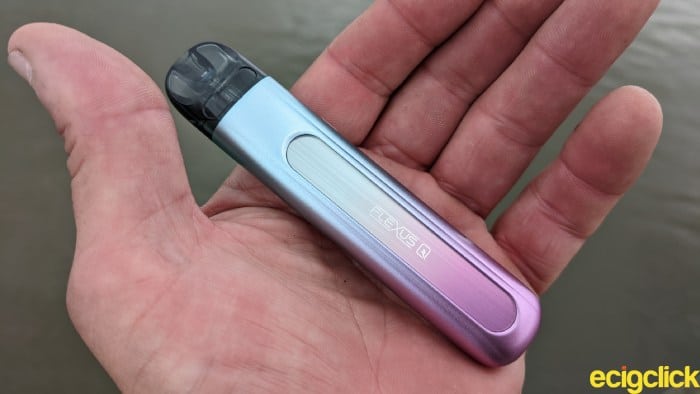
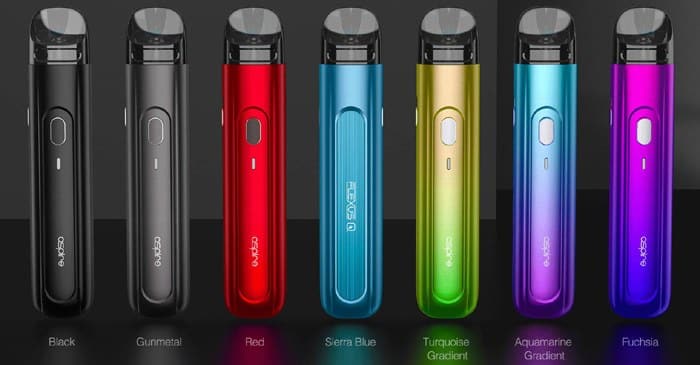
Being Zinc Alloy the device is extremely light weight and contains striking streamlines across its body. The Aspire Flexus Q pod kit is available in 7 colour schemes.
Choose from Black, Gunmetal, Red, Sierra Blue, Turquoise Gradient, Aquamarine Gradient (under review) and Fuchsia.
Thank you to Vape Club for sending this over for review!
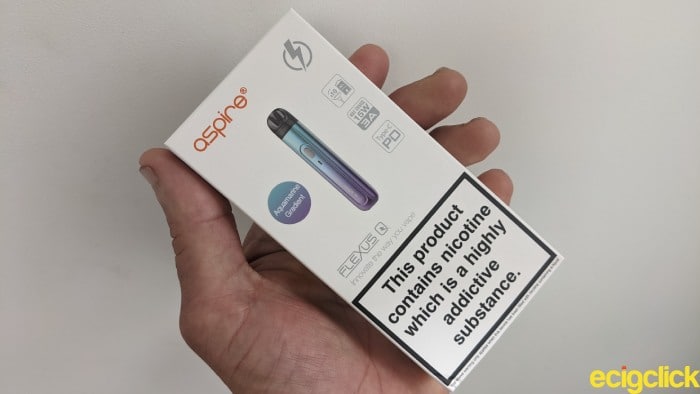
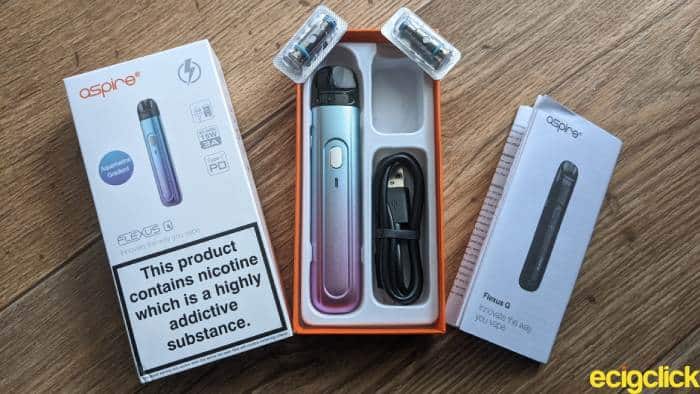
What’s In The Box?
It’s the usual Aspire slip carton revealing their trademark dazzling Orange inner case. Placed on the top is an instruction manual the size of a road map! (Multi, multi lingual and then some!) and underneath is the kit itself in a plastic moulded tray.
- Flexus Q device (700mAh)
- Flexus Q pod (2ml)
- AF mesh coil (0.6ohm)
- AF mesh coil (1.0ohm)
- 3A type C USB charging cable
- User manual
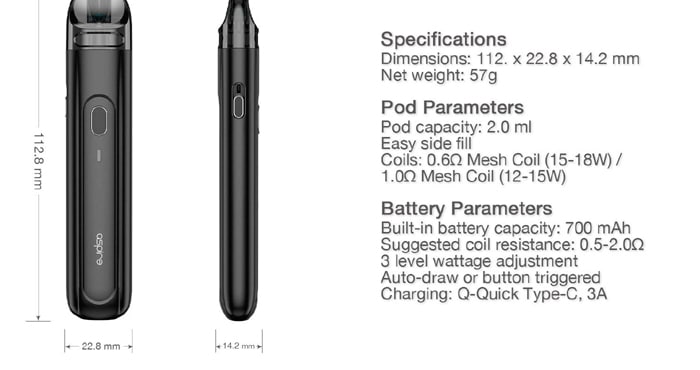
Aspire Flexus Q Pod Kit – Specifications
- Size: 112.8 x 22.8 x 14.2mm
- Output: 3 output levels. Low, Medium or High
- Battery capacity: 700mAh integrated
- Display: LED indicator
- Resistance range: 0.5 – 2.0ohm
- Juice capacity: 2ml
- Charging: Type C USB Q-Quick 3A charge rate – 80% charge in ten minutes
- Pod: Refillable, replaceable coils
- Coils: AF (Aspire Flexus) coil range. 1.0ohm mesh, 0.6ohm mesh
- Activation: Auto draw or button
- Side fill port
- Adjustable airflow
- ASP chipset
Aspire Flexus Q Pod Kit – Design and Build Quality
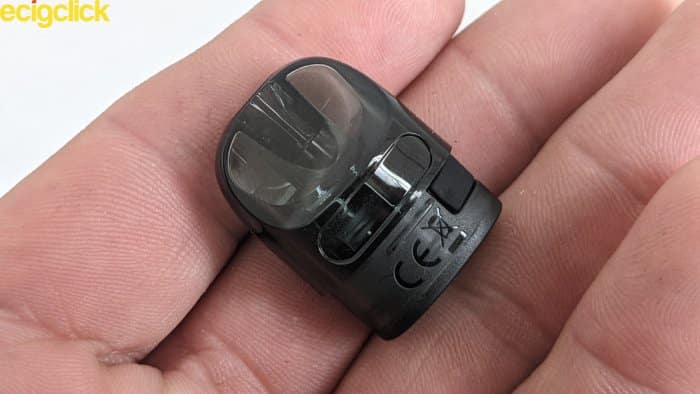
The pod is made from the usual PCTG toughened plastic material. It’s also see-through so viewing the remaining juice level won’t be an issue.
 It clips into the battery either way round and doesn’t rely on magnets. It’s a rock solid connection and didn’t budge when dropped from a 2 metre height.
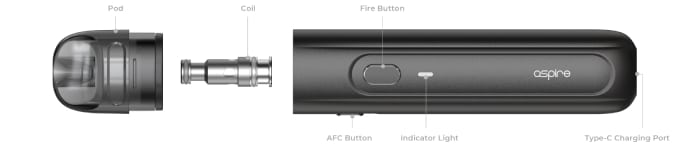
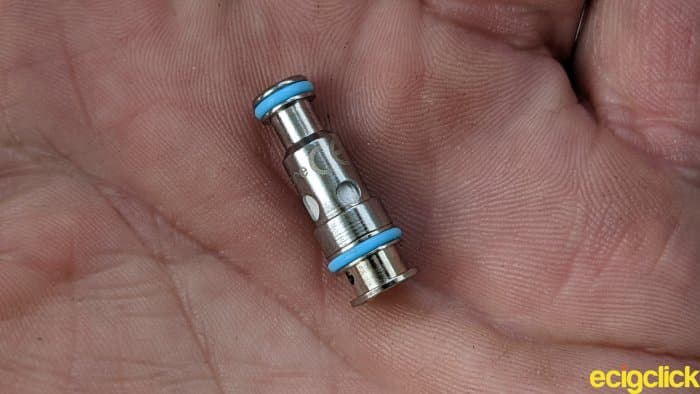
The included coils are of the “plug and play” variety. It’s a fool proof arrangement. Just make sure they’re pushed all the way inside the chamber and that none of the O rings are visible.
 Filling is achieved by pulling open the silicone bung on the side of the pod. The fill port opening is wide enough to accommodate larger bottle nozzles but just be aware there’s no air escape opening.
Fill slowly and fill carefully.
Battery Section
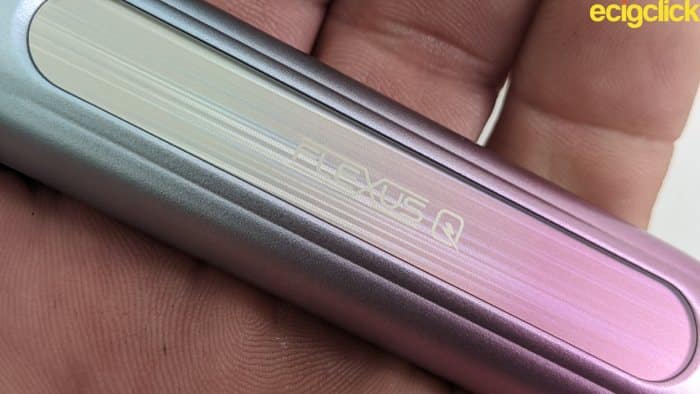
It’s comprised of Zinc Alloy and really doesn’t carry much weight making it a contender for the trouser pocket. The height of the kit may be an issue for a shirt pocket though as it may stick out.
It looks solidly built and the linear refractions inside the panels are quite cool. So is the colour gradient of the Aquamarine version.
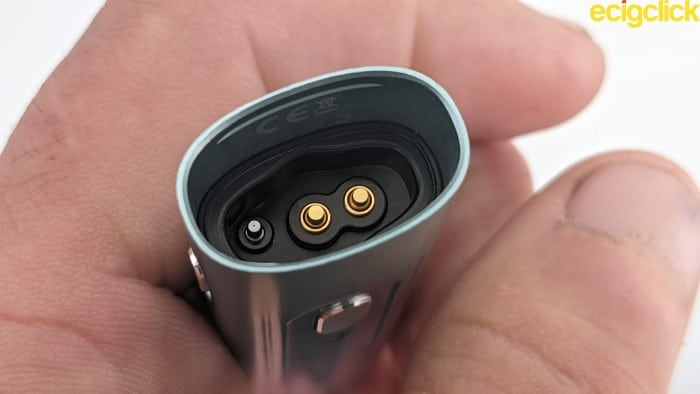
There are two gold plated spring loaded coil contacts inside where the pod meets the battery. A fixed pin makes sure that airflow can always hit the plug and play coil from beneath.
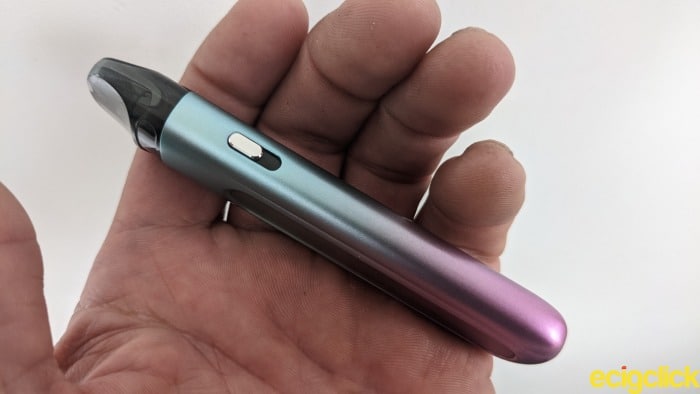
The Aspire Flexus Q pod kit makes use of a single adjustable airflow slider on the side of the battery. It’s raised just enough to be able to adjust for precision tuning.
Since both direct lung and mouth to lung coils are compatible, it’s going to be put to the test.
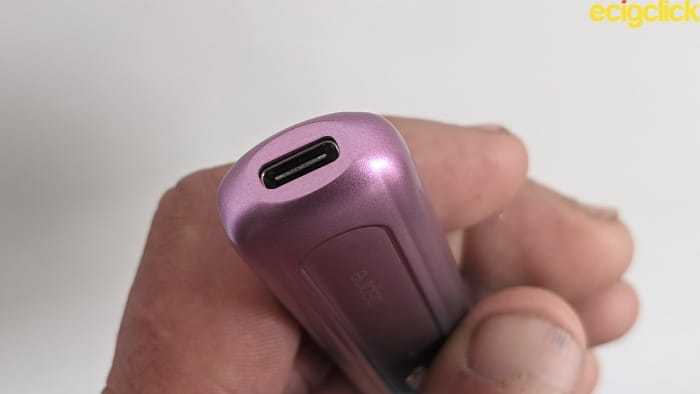
The type C USB charging port is on the base so that obviously means horizontal charging. It may be a good idea to remove the pod at this point to prevent possible leakage.
Is the Aspire Flexus Q pod kit freestanding? Yes, it will stand on a surface but won’t take much to knock over.
 A fire button is located on the front of the battery with a single LED indicator underneath. The fire button takes care of the business end of things while the LED displays the results.

Functionality
- Press the fire button five times to turn the device on or off
- Press the fire button three times to switch between Low, Medium or High wattage settings.
The LED will flash Red for Low, Blue for Medium or Green for High wattage.
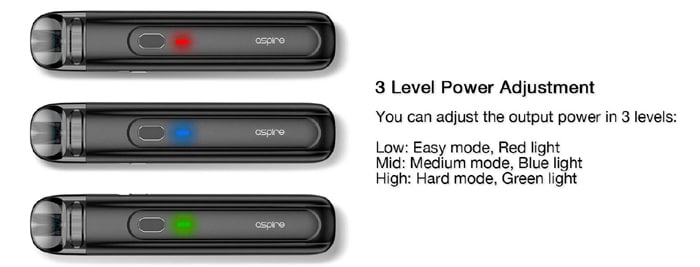
The LED will also advise of the current battery status while vaping.

- Green – 3.8 – 4.2V (60 – 100%)
- Blue – 3.5 – 3.8V (30 – 60%)
- Red – < 3.5V (0 – 30%)
When removing or replacing the pod the LED will briefly flash white.
The device will go into locked mode if vaped for longer than 6 seconds. When this happens you’ll need to remove the pod then re-attach it before vaping again.
That’s one of the built in safety features of the ASP chip. Others include short circuit and low voltage protection as well as overcharge, overheat and over voltage protection.
How Does The Aspire Flexus Q Pod Kit Perform?
I started by using the 1.0ohm AF mesh coil which has a rating of between 12-15W. With a resistance value suited to a MTL vape I would suggest using juice ratios of either 50VG/50PG or 60VG/40PG.
We tell you all about e-liquid ratios here in our Guide to VG and PG.
I used 50VG/50PG with Original C’s Mango Mix. What were the results?
 The test was carried out using the most powerful (Green) setting at all times in order to gauge the lifespan of a single charge.
With airflow wide open it’s possible to get a restrictive direct lung vape or a very loose mouth to lung equivalent. I favoured the former and it was a surprisingly powerful, flavoursome vape with more than enough vapour production.
I only had to knock the slider down a touch to notice a significant change in airflow restriction. Quite impressive stuff..
The coil was now behaving in a MTL capacity although still slightly on the slack side. Vapour production became much thinner and wispy while the fruit content of the e-liquid was more intense than before, leaving its mark on the palate post vape.
I found I could fine tune the airflow slider to find pretty much the perfect mouth to lung experience. It did take a short while but once found, worked extremely well.
So overall, the airflow slider worked a treat in providing the flexibility to vape between a restrictive lung style, loose or tight (classic) mouth to lung.
Flavour quality is good to very good depending on the setting applied and because the coil is tailor made for a MTL vape, that’s where the best results can be found.
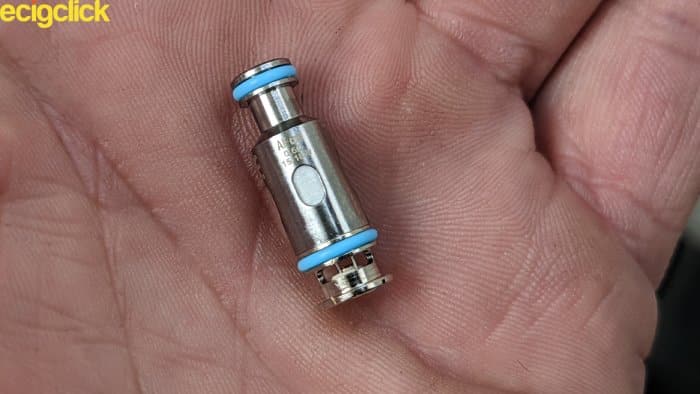
0.6ohm AF Mesh Coil
I used Cosmic Fog Sonset to test the coil. It has a juice ratio of 70VG/30PG. Time to see how this lower resistance coil fared.
 With the airflow slider in a wide open position the flavour instantly trounces that of the 1.0ohm AF coil. The cooked Pear tasted succulent, sweet and with plenty of vanilla back notes.
Since the entire test was run on the highest wattage setting the additional power (15-18W) also made itself felt.
This was still a relatively cool vape but the sheer flavour intensity meant that it never ruined the vape experience.
It’s a semi restrictive direct lung vape with a quiet, smooth and turbulent free inhale. More than enough vapour is produced although it soon dissipates.
Closing off the airflow slider to around mid way produces a noticeable difference to the restriction. It works as a restrictive direct lung hit but some may find it a little uncomfortable.
On the higher (Green LED) power setting there’s a tendency for the mouthpiece to sting the lips during longer inhales.
The flavour does become a bit more concentrated and generally the quality is the same as that of an unrestricted airflow. The sweetness of the Pear leaves its mark on the tongue and the palate while vapour production is once again very satisfying.
Overall this was my favourite airflow setting for both flavour and cloud production.
Yes, in case you were wondering it is still possible to achieve a good MTL vape. What’s more the flavour quality remains as impressive as before. Vapour production is suitably stealthy and isn’t likely to annoy any passer-by.
However, due to that continuous lip stinging effect I suggest a worthwhile workaround.
- Airflow wide open – Green LED (High power output)
- Airflow mid way – Blue LED (Medium power output)
- Airflow max restriction – Red LED (Low power output)
This drastically reduces the chance of the mouthpiece stinging the lips.
The mesh coil had no problem handling the 70VG/30PG juice ratio so I would suggest using this or 60VG/40PG.
Pros
- Great flavour from both coils with the 0.6ohm AF mesh coil edging it.
- No leaking from either coil.
- Easy top fill system with adequate space for most bottle nozzle sizes
- The option of either auto draw or button activation
- Versatile and effective airflow slider assisting both MTL and RDL vape styles
- Incredible charging time. Thirty minutes to fully revive the battery!
Cons
- Won’t take much to knock over if stood vertically
- Airflow restrictions can cause the mouthpiece to sting the lips (subjective)
- Below average battery life using the 0.6ohm AF mesh coil
Coil Performance
When it comes to the coils the differences are glaringly apparent. The 1.0ohm AF mesh coil produced a decent classic MTL vape and the 0.6ohm equivalent performed its RDL duties admirably.
Vapour production reflects this too with either a light wispy output or thicker clouds usually reserved for higher powered pod kits. Yes – the coils impressed me!
The airflow slider was the lynch pin between both coils, adding variety and versatility to a range of airflow options. The inhale was smooth and turbulent free at all times.
Remember that slider’s there to be tweaked and it shouldn’t take too long to find a sweet spot.
Battery Performance
Here’s how the battery fared with the coils. I managed six hours continuous use with the 1.0ohm AF mesh coil. It was more of a juice guzzler than I expected because during this time I vaped over 5ml of e-liquid.
To break things down it took 90 minutes for the Green LED to turn Blue. A further 4 hours before it switched to Red. The Red LED gave me a mere 30 minutes of vaping time.
However I never really noticed any flavour degradation during the last phase of discharge. I found that quite impressive.
This also applied to the 0.6ohm AF mesh coil.
However, up time was sliced in half. Three hours was a bit short of what I was expecting. The pod was refilled twice and I vaped around 5.5ml of e-liquid.
It took only an hour for the Green LED to turn Blue. The battery gave me a further 2 hours before switching to a Red LED and this time there was no warning. Within a few minutes the battery failed.
Testing the 80% Charge After Ten Minutes
During recharge it took literally seconds for the Red LED to turn Blue and within a few more minutes it was illuminating Green! The battery was fully charged after just 30 minutes, slicing usual fast Type C charging time in half.
That was mega impressive but I wanted to see how long the 80% charge would last. It was tested with the 0.6ohm AF mesh coil and based on a few mathematics I could expect around two and a half hours use.
What did I discover?
Well I got around 2 hours continuous use so that would suggest around a 60% initial charge which does fall short of claims but it’s the kind of test that needs to be carried out repeatedly and over time.
Either way, 2 hours use after a ten minutes charge is still pretty good. I’m certainly not grumbling.
Aspire Flexus Q Final Review Verdict
The Aspire Flexus Q is a slim, light weight device of sheer convenience. I never noticed it in the pocket and having the option to auto draw adds to that convenience. I would still say the fire button provides added oomph and will come in handy for those with weaker lungs.
It’s easy to fill on the go and the clear pod window makes viewing juice levels an easy task.
As for functionality? It’s been stripped back to bare essentials and a few button presses are all that’s needed to adjust power settings. Ideal for the newer vaper.
In fact the Aspire Flexus Q Pod Kit is a cracking little device when all’s said and done. It has the flexibility to appeal to both new and seasoned vapers alike.


Hiya I bought this only a month ago and for some reason its stopped smoking? My I inhale all I can hear is a bubbling noise and all I can taste is the liquid ??? I’ve changed the coil but still the same can you advise because I’m not impressed
Great review – so my question is – I have a Aspire BP80 using 0.3ohm coils – I like the look of the flexus q but will the 0.6 coil give me the same vaping experience on a 70/30 liquid with 4.5 nic?