Aspire is a huge brand and their “K” range, is probably one of the most popular mouth to lung ranges there is. Despite this I didn’t have any high expectations for the Aspire K Lite as the newest addition to the range.
 When I received the kit, I expected it to be designed like the K2, K3 and K4; a standard everyday vape-pen. I have never been so wrong.
This little kit has resorted my faith in the Mouth to Lung (MTL) category of vapes.
What Can We Expect From The Aspire K Lite Kit?
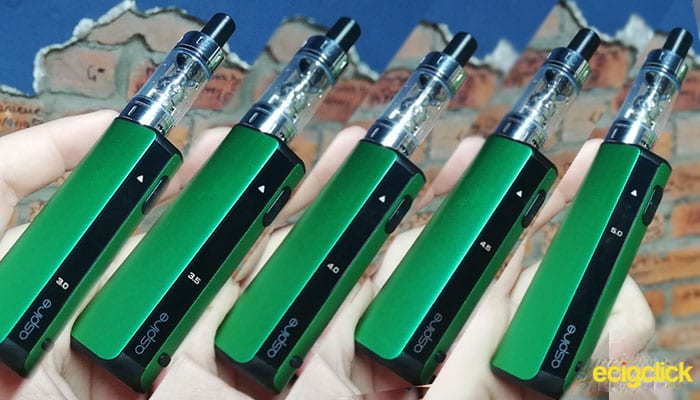
The K Lite is a slick little device available in five well suited colours.
Weighing in at just 75g, it carries a 2ml tank and a 900mah battery with variable Voltage.
The kit is designed for mouth to lung vapers, using the very popular BVC coils, which means the kit is also compatible with Aspire original BVC coils and Spryte coils.
We’re off to a good start for this little starter kit, and with relet’s see what it can do.
See The K Lite Kit in Action
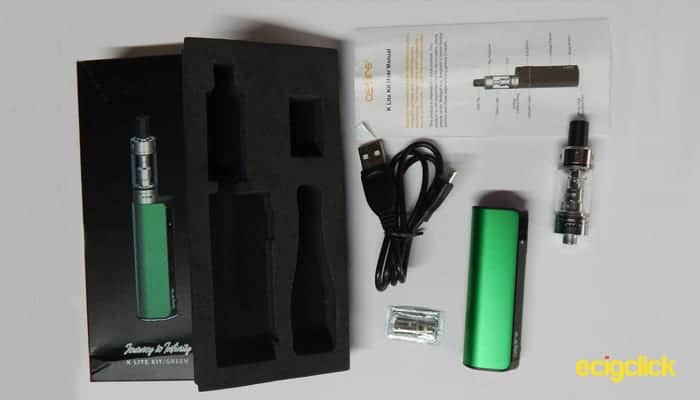
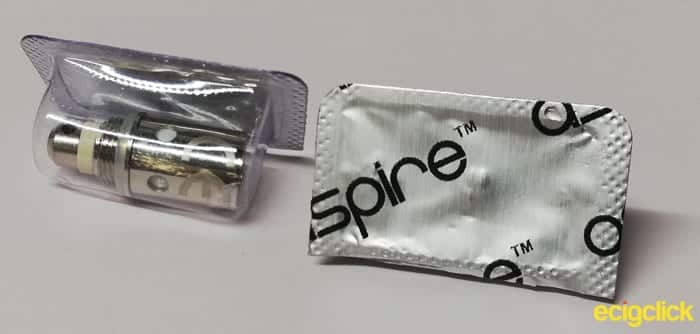
In The Box
- 1 x K Lite Mod
- 1 x K Lite Tank
- 1 x 1.6ohm coil (Nichrome)
- 1 x 1.8ohm coil (Nichrome- Pre-installed)
- 1 x USB Cable
- 1 x User Manuel
- 1 x Warranty Card
Specs
- Kit Size: 130 x 26.5mm
- Tank Size: 57 16mm
- Mod Size: 73 x 26.5mm
- E-liquid Capacity: 2ml
- Battery: 900mAH
- Coils: BVC coils (compatible with Original BVC coils and Spryte mod)
- 510 connector
Features
- Top Fill
- Adjustable airflow
- Bottom coil changing
- Variable Voltage
- 1amp charging
- Automatic cut-off (10 Seconds)
- Short Circuit Protection
- Low Voltage and Over Charging Protection
- Heat Protection
Design and Build Quality
Mod (Battery)
I was lucky enough to receive the kit in green, but it also comes in Slate Grey, Navy Blue, Orange and Black.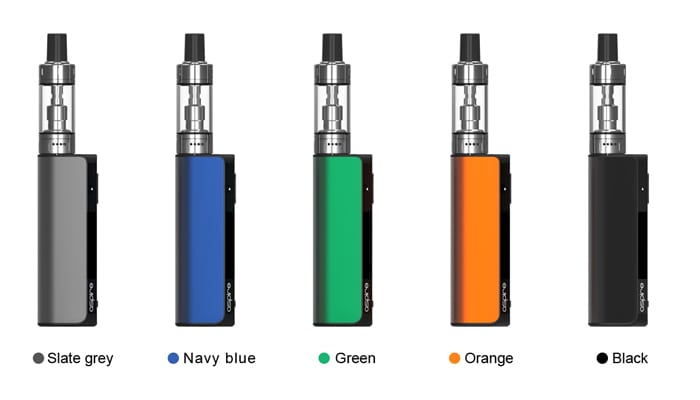 Again, I love how Aspire have designed this kit, not only does it look super slick, it feels really good in hand. It’s a similar design to the Innokin Jem kit, being a perfect mix between a pen styled vape and a typical mouth to lung mod.
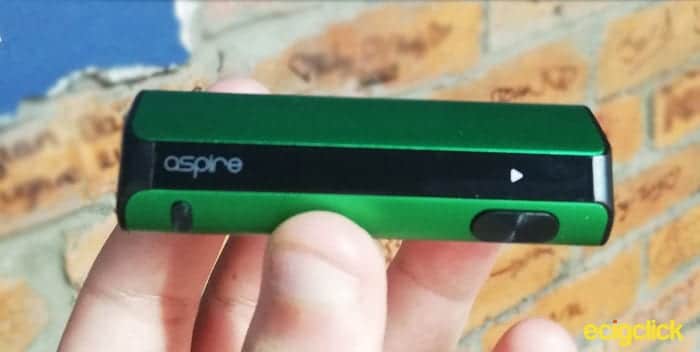 It is quite impressive that this little device is holding a 900mAh battery.
Variable Voltage
Aspire have done an awesome job at elegantly implementing variable voltage. Instead of wasting space with a screen and two buttons.
There is just one settings button that toggles between the voltages; while there is a hidden indicator in the black strip on the side of the device.

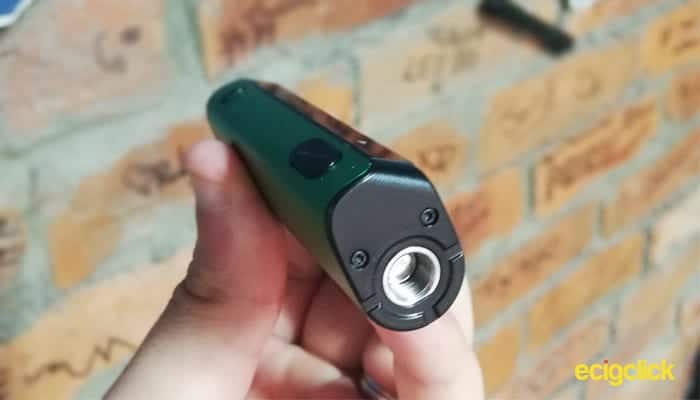
510 Connector
The 510 connector is placed off center, to one side of the mod. Which makes sense, considering the shape of the mod.
I also notice the outer side of the connector has a flat edge, this should help keep it in place, and reduce the changes of it becoming loose and breaking.
Charging port
The charging port (which is Micro USB) is on the base. This always worries me as, (surely) it is more prone to damage? I don’t know, I’ve had bottom chargers before and they’ve never broke.
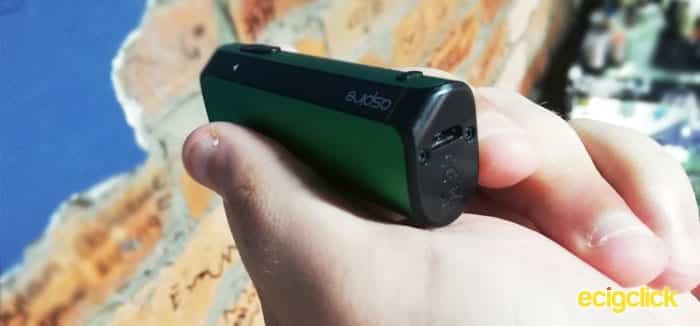
Besides the kit wouldn’t look as streamlined with the charging port on the side.
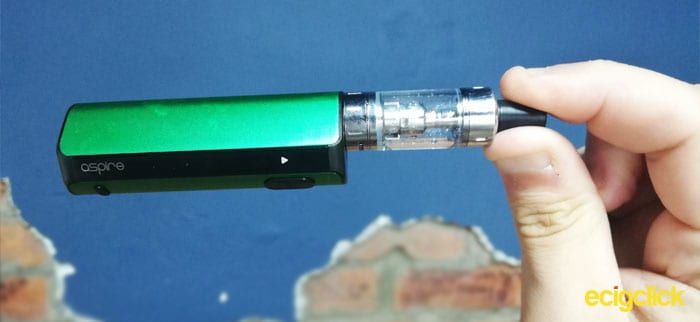
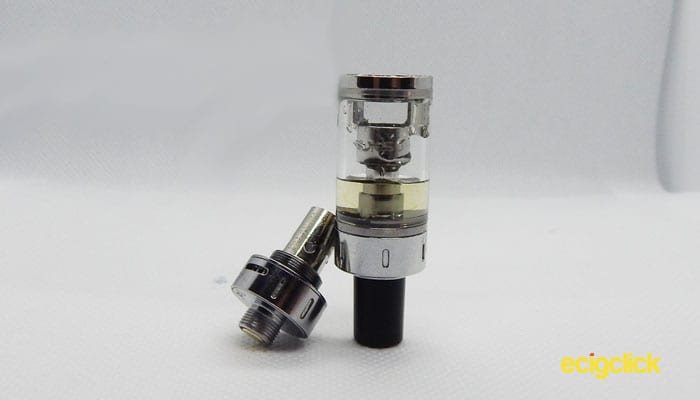
Tank
The K Lite tank is styled very similar to the other tanks in the K range. Why fix what isn’t broken? Right?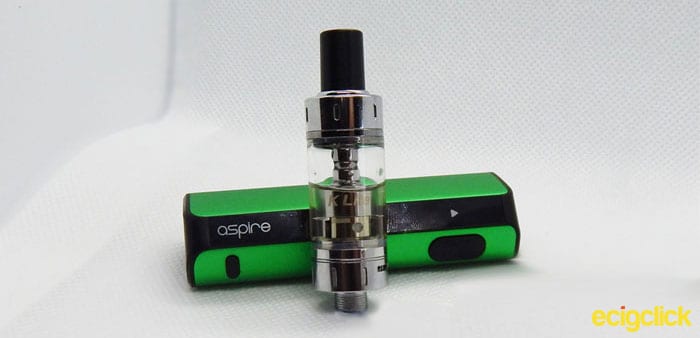
Its rather thin and a little tall, so it’s quite well suited to the mod.
It has a removable drip-tip (mouth piece), which I always like to see, it leaves room for repairs and customisation.
The threads are very smooth which is great for filling the tank, changing the coil and connecting/removing the tank.
Airflow
The air flow is very generous, maybe a little too generous.
Quite typically, the airflow holes are at the bottom of the tank. There are 4 equally small holes at either side that mirror each other when adjusted.
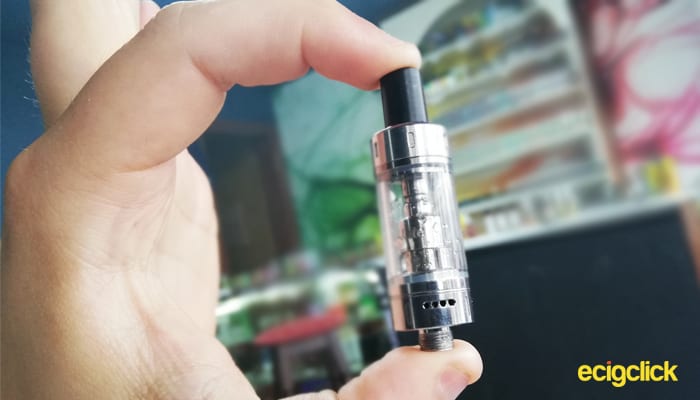 It is very easy to change the airflow between 8, 6, 4 and 2 holes (and obviously 0 holes) by twisting the airflow ring.
On the lowest setting (2 holes), the airflow isn’t as tight as I’d expect but its decently loose at 8 holes.
Coil Placement
Above all that, my favourite feature of the K Lite tank design is the coil placement. It’s designed in such a way that you can remove the coil without having to fully empty the tank first. More on that below.
It is also quite reassuring that the tank uses the popular BVC coils that have been a go to for many Aspire MTL kits in the past.
Quick Start
The K Lite Kit couldn’t be easier to use and maintain.
How to Fill The Aspire K Lite Tank
- Unscrew the silver cap at the top of the tank.
- Pour your liquid into the outer hole (not the airflow hole, in the center).
- If you’re using a new coil, allow the liquid to sit for 10 minutes while the juice soaks into the cotton.
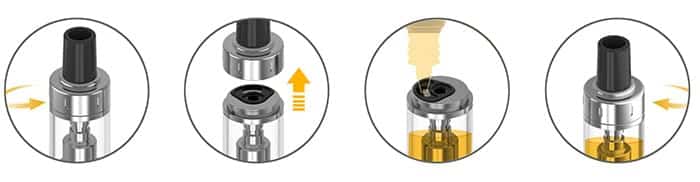
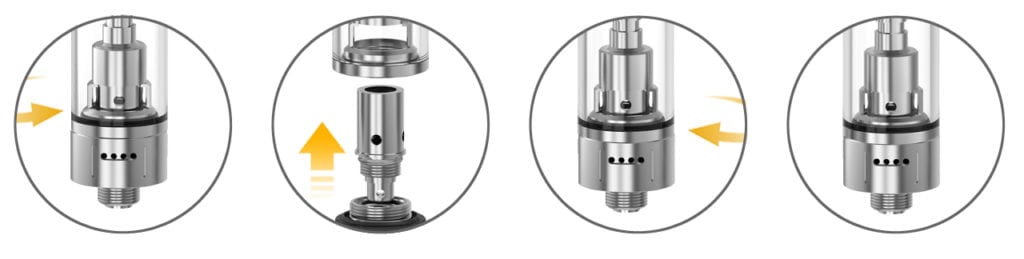
How To Change The Coil
- Remove the tank from the mod, holding the tank upside down through out, to minimise leaking
- Unscrew the base of the tank
- Unscrew coil from the base
- Screw in replacement coi
- Replace the base. It doesn’t need to be super tight, but it wants to be firm to make ensure it doesn’t leak
Mod Functions
Just like the tank, the K Lite mod is super easy to use.
Press the “Fire” button 5 times (within 2 seconds) to turn the device on or off.
The indicator light will flash white 3 times to indicate the mod has been turned on or off successfully.
To change the output voltage
- Press the “mode” button.
- The “voltage display” will turn on for 3 seconds, displaying the set voltage.
- Press the “mode” button again within the 3 seconds to change the voltage setting.
- The setting will “save automatically”.
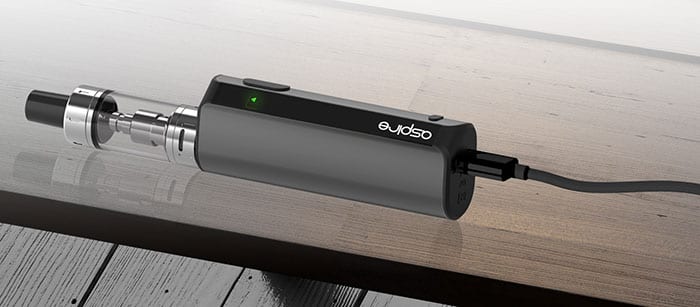
Charging The Mod
The maximum charging current is 1amp (however aspire recommend 0.5amp).
When the charger is connected the indicator light will flash red 3 times. The indicator then continues to flash a colour which corresponds to its current status.
- Red = 3.5 volts (0-30%)
- Blue = 3.8 volts (30%-60%)
- Green= 3.8+ volts (60%-100%)
- When the device is fully charged, the indicator will flash green 20 times then turn off.
- When you unplug the device, the indicator will flash green 3 times.
Note: The battery status inductor, works the same while using the device.
How Does the Aspire K Lite Kit Perform
For this review I decided to use a Got Salt – Peachy Promise (Peach and passion fruit, 20mg Nic Salt – 50PG/50VG) and it’s great!
- Read more about Nicotine Salt e juice
Flavour and vapour Production
1.8Ohm Coil
The 1.8ohm coil is my favourite of the two, it is designed to be used between 4.2 – 5.0 volts.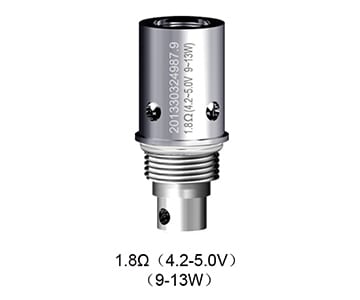
Starting at the lowest setting, 3 volts. While it does produce a little vapour it’s barley noticeable.
Moving up to 4 volts provided you with enough cloud to know you’re vaping, but not too much you’d stand out indoors.
You can taste the flavour at a satisfying level, but it doesn’t flood your senses.
At 5 volts it provides you with a decent amount of vapour and a surprisingly good flavour bringing the sweet peachy flavour to life.
Throughout using the coil, I didn’t have a single dry hit. Once or twice it lost flavour, due to being used vigorously but didn’t once give a dry hit.
Testing with 70VG E Liquid
To test how the coil could handle higher VG liquids I filled some Juicier – Strawberry Mango Crush (70VG/30PG) e-liquid.
At 3 and 3.5 volts the coil produces a small but surprising amount of vaper but next to no flavour.
4 volts is pretty impressive in regards to vapour and flavour output.
At 5volts the coil seemed to struggle at times but to my surprise the 1.8ohm coil handled it pretty well. The flavour was impressively good and naturally the vapour production was heightened.
I did get a few dry hits when using heavily.
For this coil I recommend sticking to the 50PG/50VG e-juice. Either Nic Salt or standard e juice with a higher nic strength.
This is what it was designed for and it seemed to struggle to pull the liquid through every couple of drags, causing it be a little harsh, (not to mention it will drastically decrease the coil like).
1.6Ohm Coil
The 1.6ohm coil is designed to be used between 3 – 4.2volts.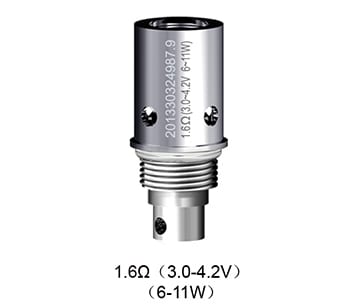
Again, starting low at 3 volts produces plenty of vapour and a satisfying taste.
Firing at 4 volts, provides a surprising amount of vapour (for 4 volts) and a fulfilling flavour at the back of your throat, that leaves you wanting more.
Testing with 70VG E Liquid
Again I chucked some high VG (70/30) liquid in, for the purpose of testing.
To my surprise the 1.6ohm coil handled it amazingly well. In fact the flavour was incredible. And again the vapour production was naturally a little higher.
Unfortunately after half an hour or so, I started getting dry hits at 5 volts BUT there was no dry hits at 4 (or less) volts!
At 3 volts it kicks out a fair bit of vapour but not much flavour.
Although both coils handled the 70VG liquids pretty well, high VG will destroy your coils much faster. So, for me a 50/50 liquid is best for overall performance.
Airflow
In my opinion the fully open airflow (8 holes) is perfect for 4 – 5 volts.
With the airflow fully open, you can easily use it for a restrictive direct to lung (DTL) vape. Although I don’t suggest it, as it will burn your coil out a lot quicker and increase the chances of dry hits.
On the lowest setting (2 holes) it’s a little too loose for 3 volts. It doesn’t create the pull and resistance that some users look for.
You can still pull a restrictive direct to lung vape, which I think is quite bad for a mouth to lung device on its lowest setting.
Battery any Charging
As previously stated; the maximum charging current is 1amp (0.5amp is recommended).
Charging at 1amp takes about an hour (obviously 0.5amp would take twice as long).
 The battery will last the least amount of time using the 1.8ohm coil at 5 volts (unless you use the 1.6 coil at 5 volts but this isn’t recommendation).
And by doing so the battery frequently lasted pretty much all day (about 15 hours) with regular use.
So it goes without saying I had no problem using the 1.6 coil all day (I didn’t use it above the recommend 4.2 volts very much).
Mathematically speaking the 1.8ohm coil at 5 volts should provide you with 420 x 2 second puffs (roughly a puff every 2 minutes for 16 hours). Wow.
Coil Life
After using one coil for 10 days and the other for 3 days they’re both going strong. In fact the 1.8ohm (the one I use for 10 days) is on my windowsill, I will continue to use it when the 1.6ohm coil finally dies.
 What I can tell you is, the general consensus in regards to the life span of BVC coils is 2-3 weeks. BUT this all depends on the liquid you use and how high your volts are set at.
Using a thick sugary liquid or high VG liquid would reduce your coil life span.
Leaking
It didn’t happen. Seriously, I haven’t wasted a drop of liquid.
General use? Not at all!
Refilling? Nope, not a drop spilt.
Surely a bit spilt or leaked while changing coil? Not a drop, with exception to the coil that is being removed, which is obviously wet.
Pros
- Great Taste
- Great flavour production
- Easy Top Fill
- Decent battery
- Good loose adjustable airflow
- Looks really cool
- Simple/Easy to use
- No Leaking
- Can change coil without empty tank
- Really light
- Variable Voltage
Cons
- Airflow doesn’t get tight enough
- Charging port is on the bottom
Final Verdict
The Aspire K Lite kit is amazing. That’s it, it’s ‘simply’ amazing!
“Starter Kit” is a tag line that comes to mind when you say “mouth to lung kit” but with the Aspire K Lite, that’s not the case.
A lot of sub-ohm vapers and cloud chasers have a pod system for “travelling light”. I didn’t expect to finish the review saying this, but… this device is a great competitor for some of the best pod systems out there.
It is also great as a starter kit, however if you’re looking for a really tight draw, this device probably isn’t for you. It doesn’t quite replicate the tightness of a cigarette.
So.. Would I buy the Aspire K Lite Kit again if I lost it? I’m already thinking of getting a backup, just in case!
Have you used this kit? Considering a purchase but have a question? Let us know your thoughts below!


Well said Harley!
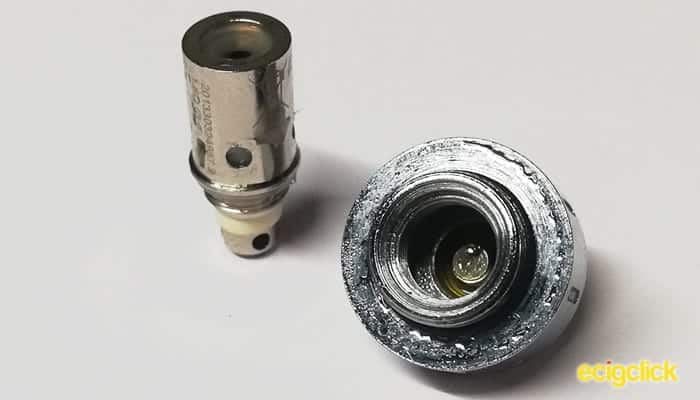
Good review however Im gonna nitpick just one bit…you DID have a leak…per your picture, it leaked through the coil down into the base and is all over the connector the coil screws into/touches. I normally see this happen when…tank goes from a cold to hot or hot to cold environment…like if you leave in car thats 100 degrees F…or when one thinks its dry hitting and they prime prime prime…leaks into base, through the bottom of the coil. Sorry to nitpick on such a thorough review but you went on and on about it NOT leaking whether filling/general use/changing coil/etc…and the picture shows leaking.
Hi RM, Thanks for the comment.
I think due to the nature of vaping, there is always going to be a trace of liquid in certain places, other than inside the tank, and usually (more often on Pod reviews) I state that there were no leaking, and then go onto mention the common condensation under the pod, if necessary.
However with the K Lite, I have to stand by what I said in the review.
I have a terrible habit of leaving all of the pictures till after the review. Obviously more often than not, doing it this way means you are messing around with it a lot (removing and replacing the coils, trying to balance the open tank for a picture and so on) and it’s quite common for me to end up spilling the e-liquid.
I genuinely believe that the liquid seen in the picture, is more than likely caused by me, especially with it being one of the last pictures I took. I should also point out I usually end up taking tons of pictures, not just the few that get uploaded.
Also, I usually use the device for the 2 weeks that I’m reviewing it for then give it away but my Mrs claimed the K Lite and it’s her go to device, which is another reason I’m so confident with my answer.
I’ve been meaning to take the pictures ‘as I go’, because I believe it will give a truer look at the device as the weeks go on and the reason the liquid is on the picture is because i don’t ‘set up’ the pictures, I just take them as they are, so you have given me the push that I needed, to take the pictures at appropriate time and not at the end of the week.
Thanks again for the comment, I don’t mind nitpicking, if there is an inaccuracy it should be address, so thank you 🙂
Sorry my reply is so long, I wanted to fully explain and not seem like I’m just disregarding your comment.
After thought: I’ve gone all paranoid now (hehe), I’ve changed the line
“Surely a bit spilt or leaked while changing coil? Not a drop. Incredible!”
to
“Surely a bit spilt or leaked while changing coil? Not a drop, with exception to the coil that is being removed, which is obviously wet.”
Just to make it more technically correct.🙂