In for review is the Dynavap M Plus vaporizer.
I have been very excited about this! The reason being – that I actually own and regularly use an older Dynavap model!
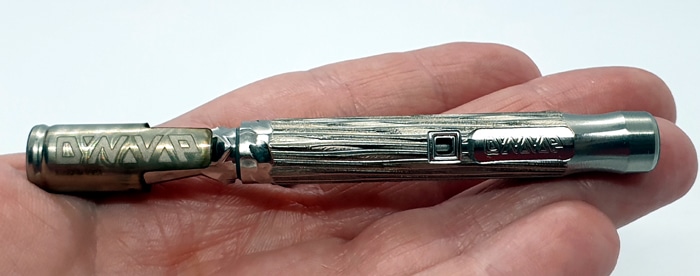
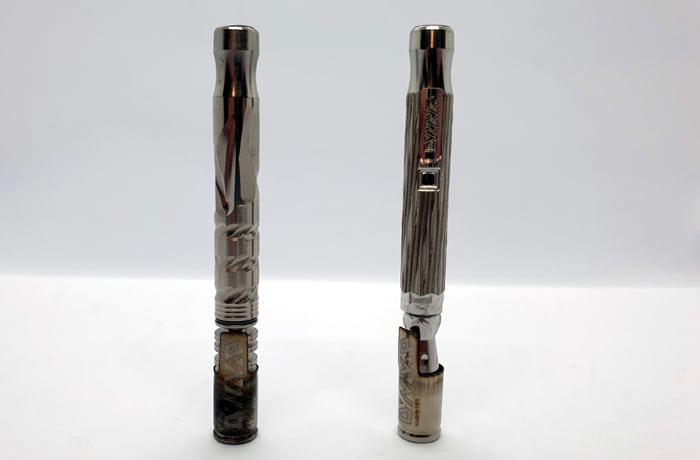
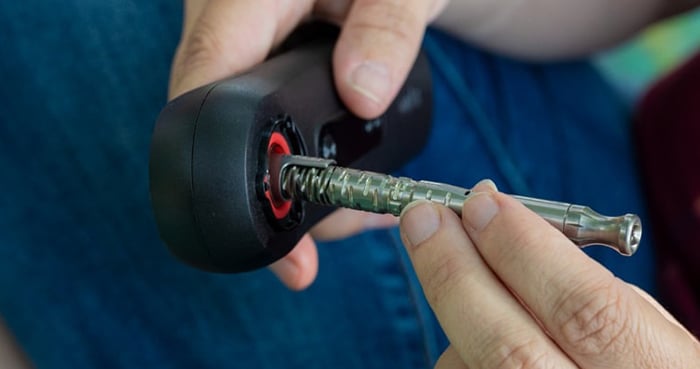
Mine is the Dynavap M 2020 – which I am including in some of the images in this review so you can see the differences between this and the upgraded M Plus.
Sorry for the state of my M 2020 – I have had to resort to using a standard cigarette lighter on it in the past so there is some soot accumulation.
I will explain a lot more as the review progresses!
![]()
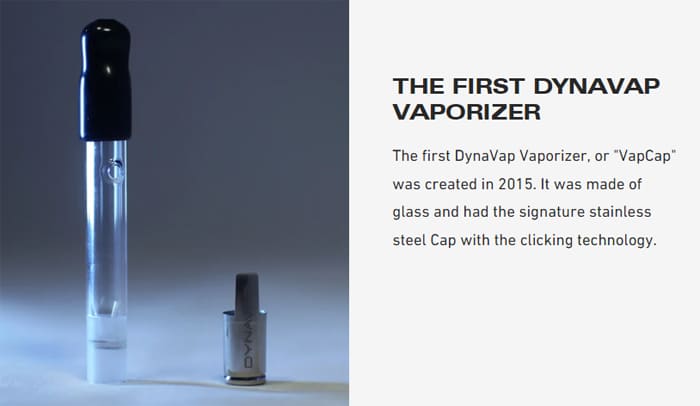
Dynavap were founded by George Breiwa and the first Dynavap vaporizer was released in 2015 – called the “VapCap”.
They state on their website…
“DynaVap proudly designs, engineers, and manufactures all of our vaporizers in-house using the highest quality materials available.”
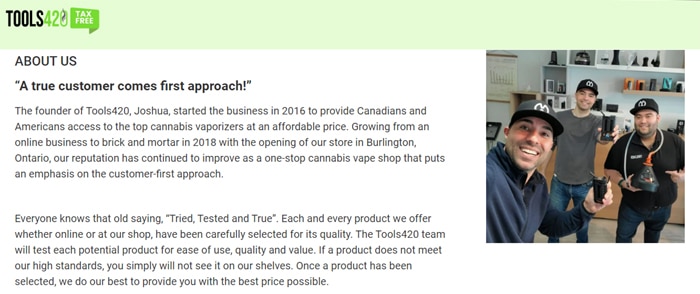
I would like to thank Joshua Seraj from Tools420 who sent this over to me for review, he is an absolute star!
I will record my findings on the device in my possession. Your experiences may vary!
Let’s get going then hey!
What To Expect From The Dynavap M Plus …
Introduction
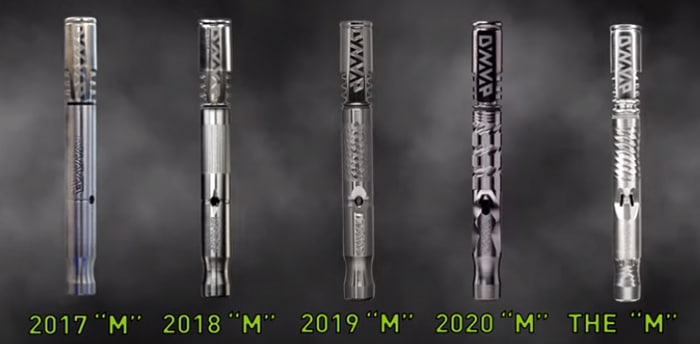
The design has evolved from the original Dynavap M up to this model the M Plus in 2023.
This is a dry herb vaporizer for herbs (not just the stuff that’s illegal here in the UK!) Many people swear by using ‘legal’ herbs such as Mint, Lavender and even Catnip for aromatherapy purposes. Have a search online to see what benefits vaping on certain herbs may have 😉
Myself nor anyone at EcigClick is suggesting you vape on anything that may be illegal in your country…
If you would like to know more about dry herb vaporizers and how they work read our guide.
In case you are wondering what on earth this device is – well it is basically a type of pipe – but you do not burn any material. You actually just heat it to the right temperature for the herbs to release the vapour – the flame never touches the actual material, it just heats the surroundings. Therefore you are not inhaling toxic burnt matter and the taste and vapour is much purer.
Think of it as putting your food in a pan and heating it, rather than directly on top of a flame where it would burn.
Also this is far more efficient meaning you use less material yet still get the same effects.
Design
The main components are the stem, tip and the cap.
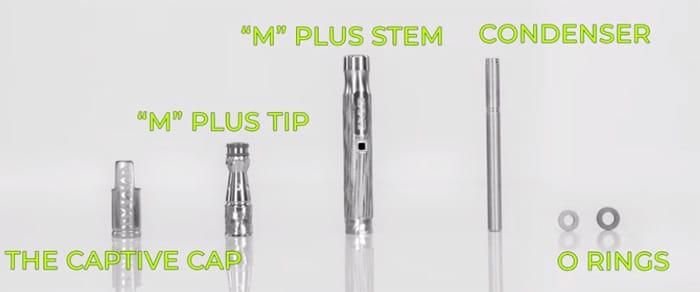
However it can be dismantled further.
The main stem is made from Stainless Steel with an internal tube structure (condenser) and tip which can be removed for cleaning. The components are secured in position using O-rings.
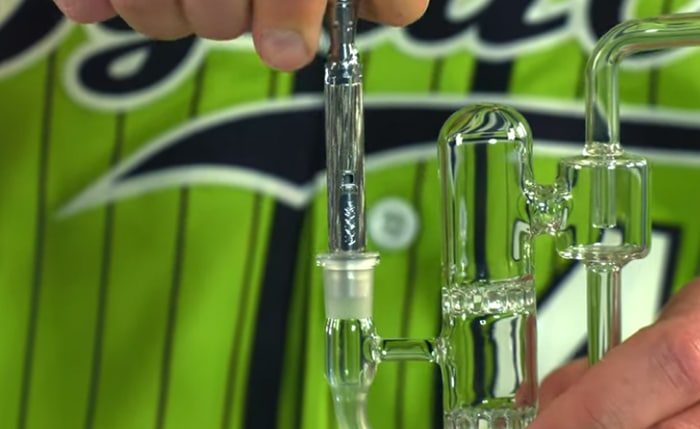
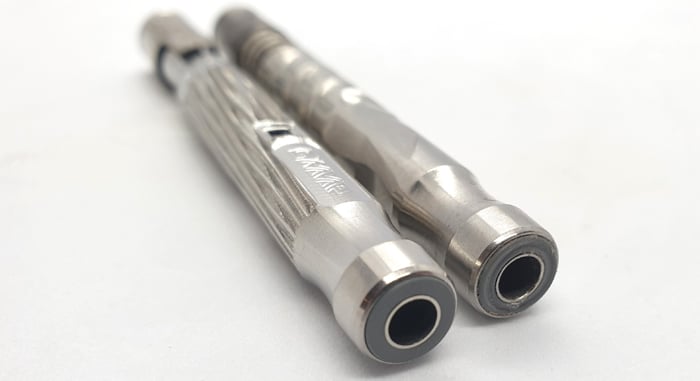
Part of the stem is a mouthpiece which is tapered so it can be used with adaptors for adding to bubbler or bong style assemblies.
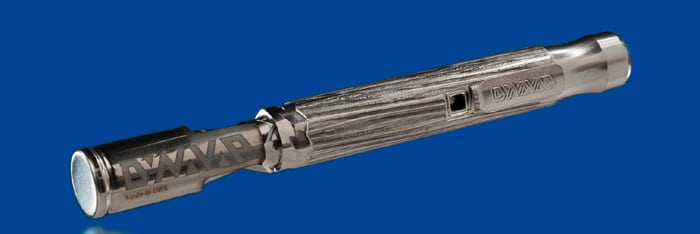
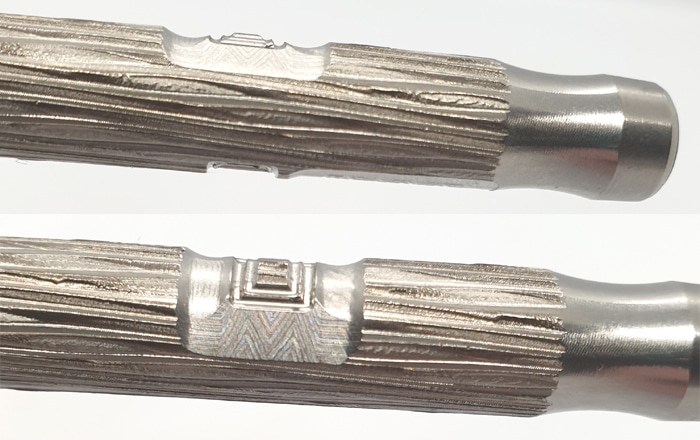
On the top face is the square airflow inlet – which you can cover to open or restrict the airflow as you please.
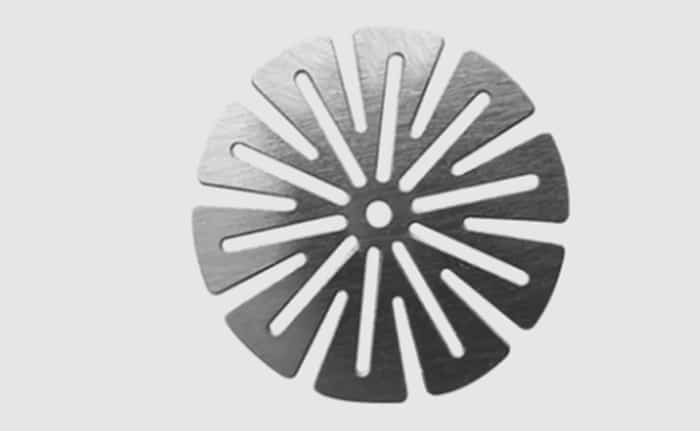
At the base of the tip is the chamber. You add your dry herbs into here and they sit on the CCD (Circumferential Compression Diffuser) mesh screen.
A serrated edge is provided around the chamber to help grind up the material as you replace the cap.
Then you install the cap to the tip of the device. Here you will then use a flame or induction heater to heat up the cap section. This will click when the correct temperature has been reached. It is a case of inhaling the vapour until the cap clicks again and it is time for reheating!
The click occurs at 350°F / 177°C but you can buy a cap for lower temperatures. Plus there are “Armoured Caps” available which take longer to heat but will retain the heat longer.
Here is an introduction video from Dynavap which covers the design aspects and updates.
Further Information
In fact there is a whole playlist of videos for you to watch which details the whole evolution of the “M” range. You can find it on the DynaVap channel on YouTube here.
Plus there are plenty of video tutorials on their channel too – check them out here.
There are many accessories you can purchase to customise the M Plus including the Dynacoil (to convert for concentrate use) and alternative mouthpieces.
Also you can buy all the spares you will need! Starting from replacement CCD screens (in Titanium or Stainless Steel), O-rings and Cleaning kits to all the main components of the device. So you could keep it going for years in theory – just replacing parts as required. Just like “Triggers Broom” or the “Ship of Theseus“.
Let’s see if this device can sit with some of the best vaporizers for dry herb.
Kit Includes
- Dynavap M Plus
Dynavap M Plus Specs
- Size: 9x90mm
- Body material: Medical Grade Stainless Steel
- Temperature of “click”: 350°F / 177°C (A lower temperature cap is available)
- Heat up time: 4-10 seconds (dependent on heating method)
- Bowl size: 0.1g
- Tapered 10mm mouthpiece is compatible with any 10mm bubbler or bong using adaptor.
- Designed for dry herb use
- Compatible with Dynacoil (available separately) for use with concentrates
- Airflow inlet which you can cover to tailor the airflow to your preference
- Use with a torch lighter or induction heater
- More efficient use of material
- Cap will indicate with a loud “Snap” noise when the optimum temperature is reached
- Finless design means quicker heating and longer heat retention
- Faster heat up times – the redesigned tip and lack of fins means this heats up quicker.
- Heat indication markers for those who want a single hit and intense experience!
- Larger capacity – it has a 15% larger chamber
- Textured finish – to give enhanced grip and a more tactile feel.
Dynavap M Plus Design and Build Quality
The kit only contains the device itself and its components. There are no spares or instructions included. However as covered above in the “Further Information” section there are plenty of instructional videos to help get you started.
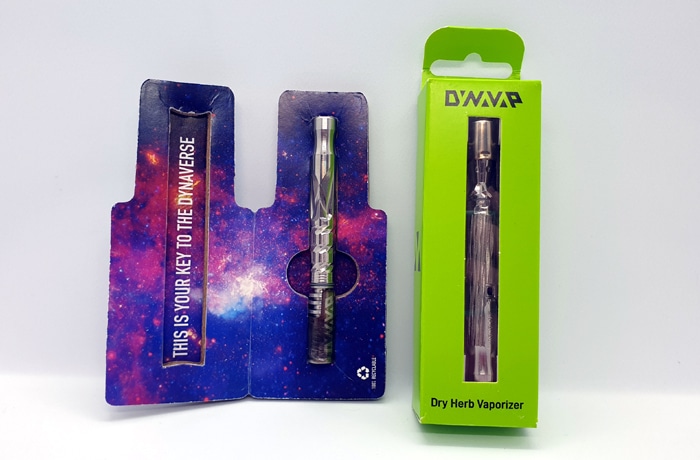
The packaging is extremely minimal – compare it with the packaging of the 2020 version. I do prefer the 2020 version. But it is what it is, it protects the device during transit and works in the way it should!
This is a solid but very lightweight device and it fits in the hand nicely.
It is a similar size to a standard cigarette but is obviously a bit heavier!
Everything feels extremely well made and if it is anywhere near as good as my trusty M 2020 – you should have no quality issues at all.
Plus the fact there is so very little to go wrong – you will only be really performing standard maintenance such as cleaning!
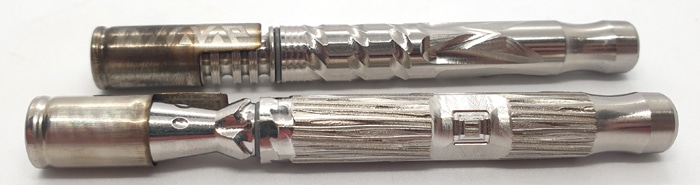
As described above the main stem has a “Bark like” texture to aid with grip.
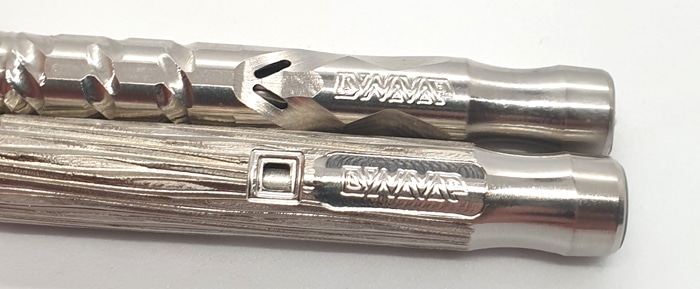
There has been a modification to the mouthpiece to enable it to connect to other devices, but at a glance there is not much to notice.
As you can see the airflow inlet has had a big redesign from the spooky eye inlets on the 2020 to the Square window on the Plus.
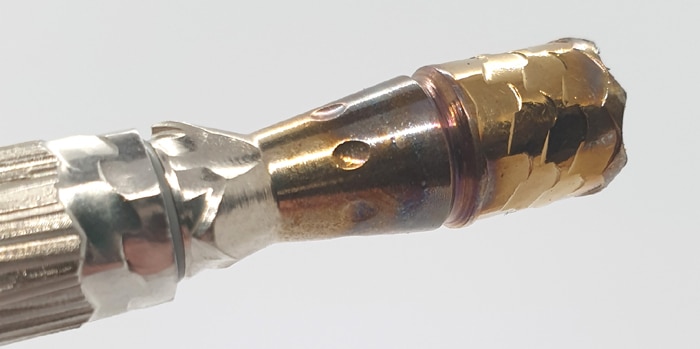
Looking at the tip design, as you can see this no longer has the fins you see on the 2020 version, plus there are more serrations to help grind up the material.
You will also notice the punched markings which denote the area to aim the heat for the strongest performance.
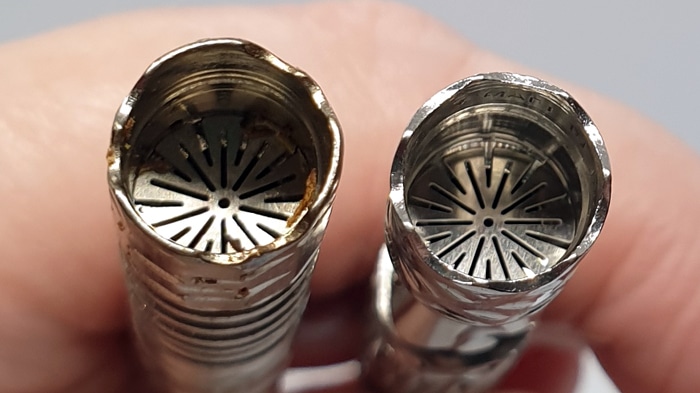
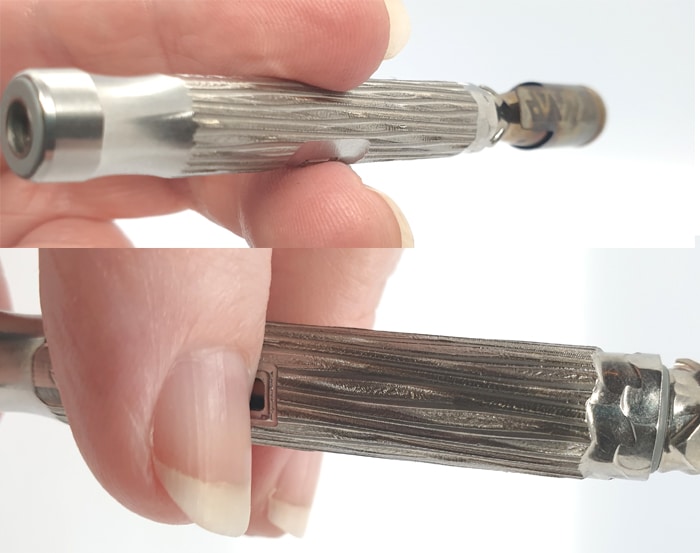
Inside the tip is the chamber. This has increased in size for the M Plus. Looking inside the chamber you can see the CCD screen.
The weird protrusion on the rear of the device is actually a kind of pivot. It is worth noting the “M” machining marks around the pivot – very nice attention to detail!
If you hold the Dynavap M Plus like a cigarette, that allows you to pivot and rock the device between your fingers to restrict the airflow inlet to suit your preference. Also it helps with holding it in the correct place to access the airflow.
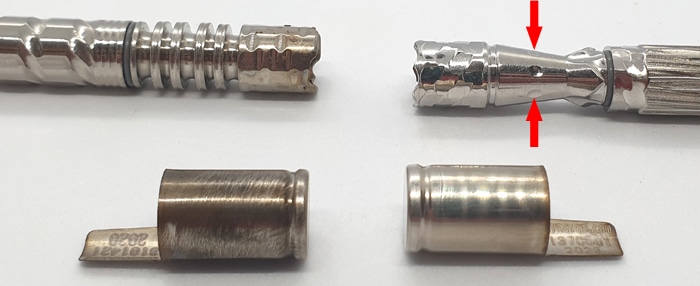
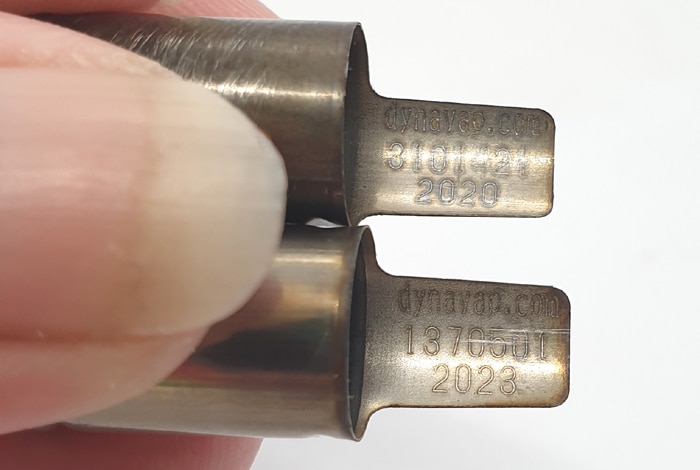
Inside the cap is the serial number and the date of manufacture.
The cap feels very thin and flimsy you can actually bend it with your fingers. However this is useful in two ways as – 1) it heats up quicker and 2) if the cap is loose on the tip you can slightly squeeze it to make it a tighter fit. When the cap is boiling hot, the last thing you want is it falling off and burning someone or something. So I would suggest you make sure the cap is not loose before heating.
I did try swapping the caps between both my devices and they were compatible with both.
The prong on the cap is actually a great functional bonus, you can use it as a scoop to clean out the spent material in the chamber.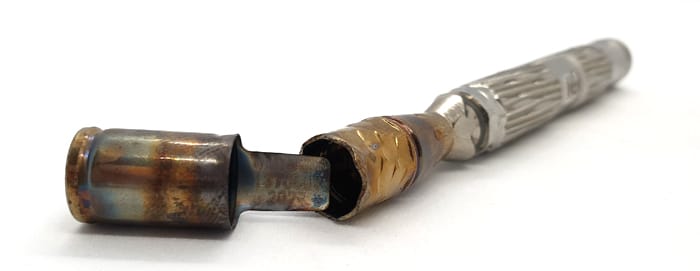
Quick Start Guide
There is no user manual included in the kit – but you can view one online here from Tools420.
Basic Operation
Once you get the hang of it – this device is one of the simplest vaporizers you can buy!
How To Fill
- Remove the cap.
- Hold the stem with the chamber section pointing upwards.
- Add the ground or small pieces of material into the chamber.
- Replace the cap whilst rotating to help chop up any larger pieces.
- Check the cap will not fall off. You do not want it falling when hot. If it is slightly loose – remove the cap and give it a gentle squeeze and it should be a tighter fit on the tip.
How To Heat
Use a Butane Torch style lighter or an induction heater.
You can use a regular cigarette lighter if you are stuck but it will take longer to heat and it will leave sooty deposits on the cap. I know as I have had to resort to this myself in the past!
Induction Heater Method
An induction heater works on the same principle as an induction hob. This uses the magnetic field created by the device cap and inductor which creates a current to create heat.
With an induction heater you insert the cap end of the whole device into the heating port and remove when you hear the cap make a loud “snap” noise. This noise denotes that the required temperature has been reached.
Note: there is sometimes a quiet “click” noise prior to the louder “snap”. This is also the same when it is cooling down.
Using A Torch Lighter
If using a lighter, the area you heat is important.
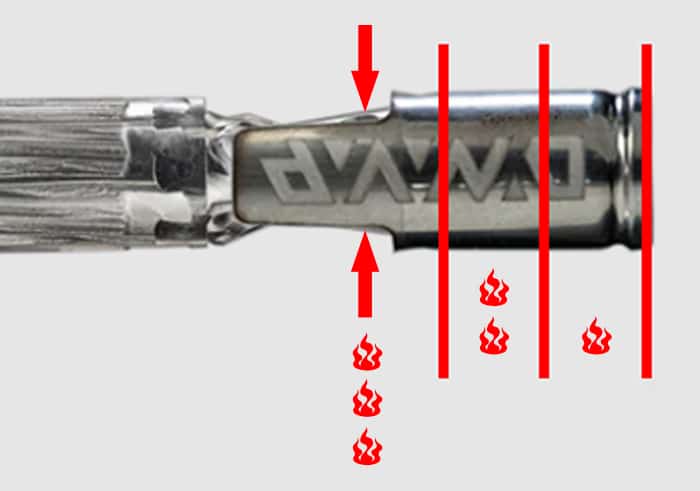
If you want a gentle hit, aim the flame towards the bottom end of the cap.
For a slightly stronger hit move the flame nearer the top of the cap towards the tip.
I have included a video of myself heating up the Dynavap M Plus below as a guide.


