I’ve just received the Geekvape Obelisk 65 FC Kit and I can’t wait to charge it! I know that sounds a bit strange, but I’m being serious…
GeekVape are a pretty big player in the vape industry. You know those leather back vapes that have been flooding the market for the last 2 years? What about all the shock-proof and water-proof mods, that hit the market in the last 2 years?
Well they’re pretty much thanks to Geekvape. The Geekvape Aegis line started in 2017 (I think) and the whole aegis range is made up of dust, water and shock proof mods (and later pods too).
Additionally all of the designs consisted of a rubber coated frame with a leather patch on the back. I mean seriously when you look at some of the other devices, they’re practically clones!
The Aegis range isn’t Geekvapes only ‘bragging right’ though. Founded in 2015, Geekvape isn’t the oldest vape manufacturer but they’re not too far behind!
There are 3 more big range names:
- Geekvape Z (Z for Zeus) – which consists of 2 RTAs, 1 RDA, 4 tanks and 1 kit.
- Wenax – which consists of 4 Pod systems
- Obelisk – which consists of 4 kits and 2 tanks
The Aegis range is their biggest range. It consists of 17 kits (9 pod/ pod mod kits and 8 conventional kits). We have reviewed most, you can check them out here.
Outside of those ranges, Geekvape have an additional RDA, starter pen, pod kit, 2 tanks and other stuff like pre-built coils, cotton and DIY tools kits.
What To Expect From The Geekvape Obelisk 65 FC Kit
There are two kits at play here. The Obelisk 65 and the Obelisk 65 FC. I should add, I have only received the Obelisk 65 FC.
Some of you may have guessed the FC stands for Fast Charging, which is one of the main features of the kit. Geekvape boasts that the kit charges its built in 2,200mAh batteries (2x 1,100) fully and safely in just 18 minutes. The Non FC version has a 2A charge rating.
Additionally the FC kit allows a two way power flow thanks to the OTG (On The Go) user mode. That essentially means you can use the mod as a power bank, if you have the charger handy.
The output for both kits is 5-65W with Variable Wattage, SMART, Temperature Control, VPC (custom curves), Bypass and OTG (FC Version only) user modes.
They have a 0.96″ TFT Screen, top adjustable airflow and a top filling system. The pods, which are cross compatible, have a volume of 4.5ml (or 2ml TPD).
OK, on with the review. This was sent for the purposes of review, all opinions are my own at the time of use.
In The Box
As far as I could see the TPD and non-TPD contents are the same with the exception of the pod volume.
- Geekvape Obelisk 65 FC Mod
- Pod
- 0.2ohm B series coil
- 0.4ohm B series coil
- Coil removal tool
- Spare parts pack
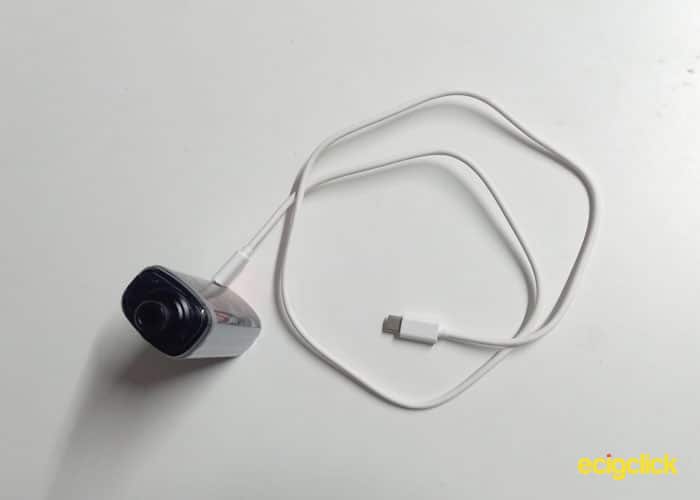
- Type C USB to USB C Cable
- User manual
The above is for the FC kit. I’ve been informed the standard kit comes with a USB to USB-C cable and obviously the mods are different.
Geekvape Obelisk 65 FC Specs
- Dimension: W27xL42xH101mm
- Power Output: 5-65W
- Modes: Smart/Power/TC-SS/TCR/VPC/Bypass/OTG
- Temperature Control: 200-600°F/100-315°C
- Battery: Built-in Battery: 7.4V, 2x1100mAh, 7.4Wh
- USB-C Charging: PD Fast Charging: 15V, 3A/45W (Max) – Regular Charging: 5V,2A (Max)
- Screen: TFT 0.96 inch Colour Screen
Geekvape Obelisk 65 FC Features
- 18-min full charge.
- TUV-tested Durable Battery.
- Chip-triggered Smart Mode.
- Leak-proof Pod. Easy Hands-on.
- Tech-chic. Palm-fit.
Before we move on there is obviously a lot of questions you may have about the FC technology and its safety. You can read more specifically about that here.
Build And Design Quality
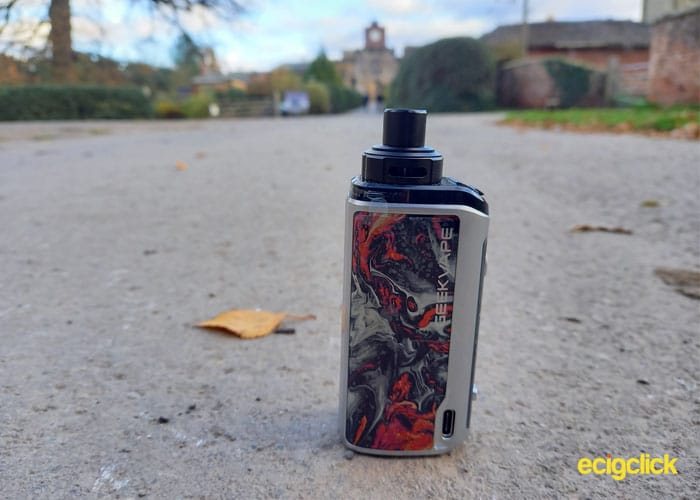
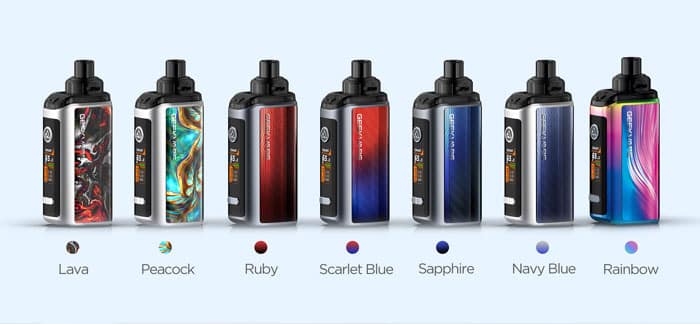
The Geekvape Obelisk 65 kits come in the same 7 colours. I received the Obelisk 65 FC in Lava.
Sweeping declaration: personally I don’t usually like these resin type designs, I think they’re disgusting. However I do really like the Lava, there’s something quite hypnotic and satisfying about the red, black and silver blend.
Geekvape Obelisk 65 FC Mod
When I first opened the Geekvape Obelisk 65 FC, I thought it looked a lot like the GeekVape Aegis Boost kits. However, I don’t think that’s really the case, if there’s any similarity, it’s the fact the pod is the full side of the top of the mod.
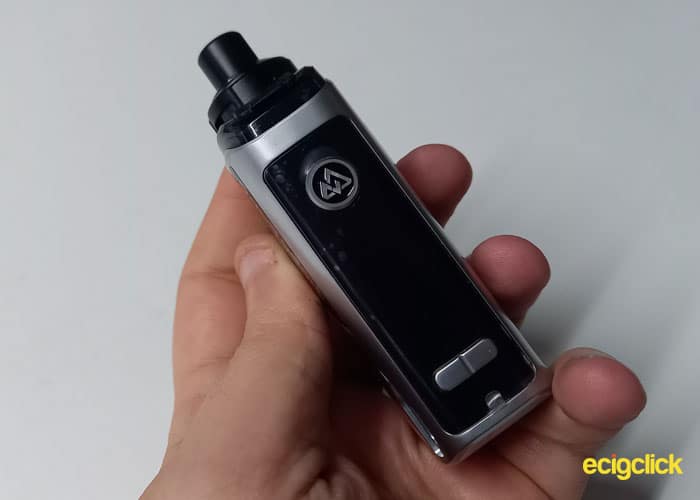
The mod is a really comfortable to handle. With my little finger under the mod, it feels like it was designed for my hand.
The shell of the kit is made from some sort of metal. It has a cold feel to it with a smooth matt finish.
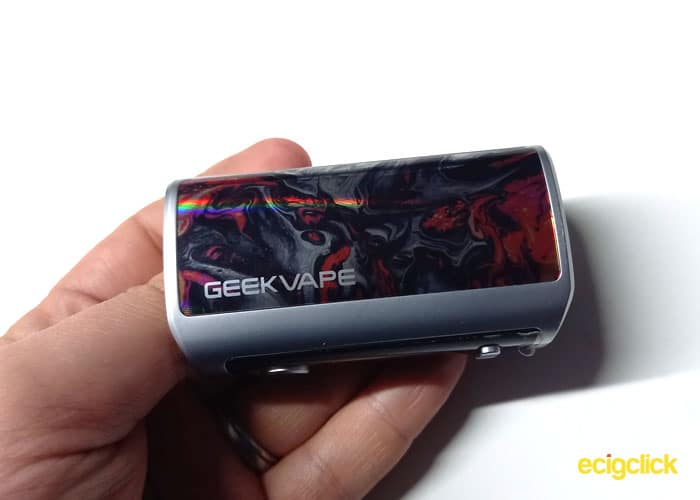
On either side is the resin stickers. They’re well applied and placed.
On the back of the mod is some sort of bumpy wave pattern. I’d guess it’s there for general design and maybe grip.
The base of the mod is has some branding and the CE marks and stuff but no vent holes, which I found interesting.
The Buttons
The Geekvape Obelisk 65 kits have 3 buttons; Fire, + and -. So that’s pretty standard.
The fire button is towards the top. To say it’s a circular button with a diameter of 10mm, makes it sound pretty boring. However I do like the fire button.
It has some symbolism on it, to what I can only guess is the Obelisk logo. Which, if I may add, looks a lot like the AS chip logo.
The silver part of the fire button feels metallic, although I can’t be quite sure of the buttons materials.
The +/- buttons are towards the bottom of the mod. The buttons are joined in the middle and overall they measure at 4 x 12.5mm.
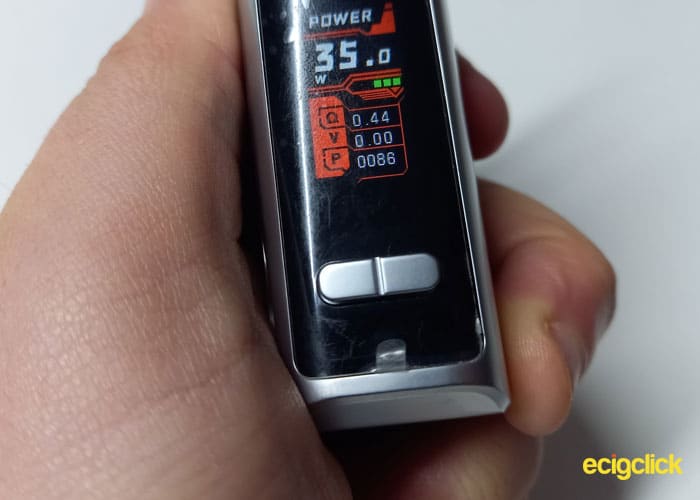
All the buttons are nice to press, with a definitive click feel and zero rattle.
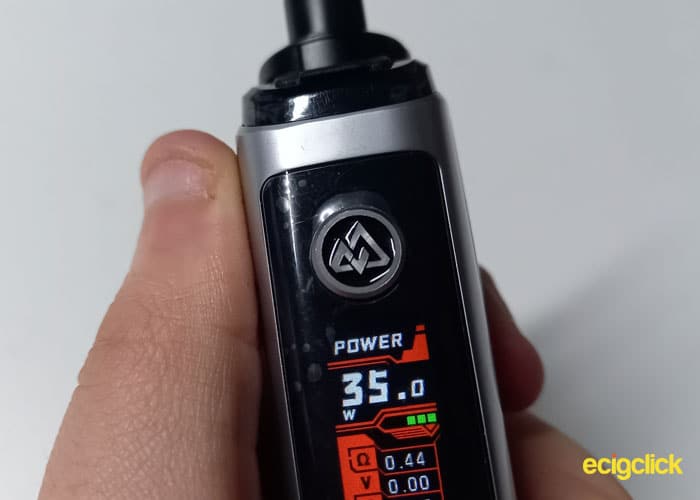
Obelisk 65 Screen
The screen itself is a 0.96″ TFT screen, measuring at approximately 10 x 21mm.
I like the User Interface on my Obelisk 65 FC. Geekvape have found an awesome mix of style and practicality.
The functionality and layout of the screen is the same (or very similar to the aegis devices), with a different decoration.
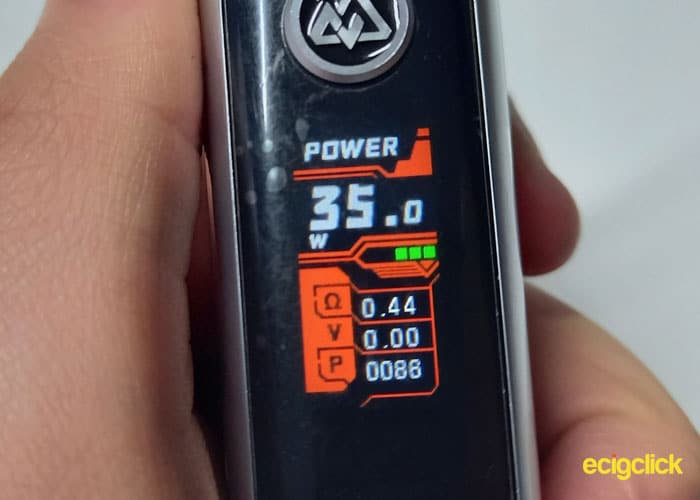
Its main colour is orange, with white text and a bit of green for the battery status.
Up at the top is the mod setting (Smart, Power, TC, VPC, Bypass & OTG).
Below that is the power setting, displayed in a bigger font to make it easier to see at a glance than the battery indicator which is set slightly to the right.
The bottom section has the information table which has the coil resistance, voltage output and the puff information (timer when vaping and puff count when idle).
The Pod Connection
As I mentioned earlier the pod sits on top of the mod, at the full size and shape of the mod.
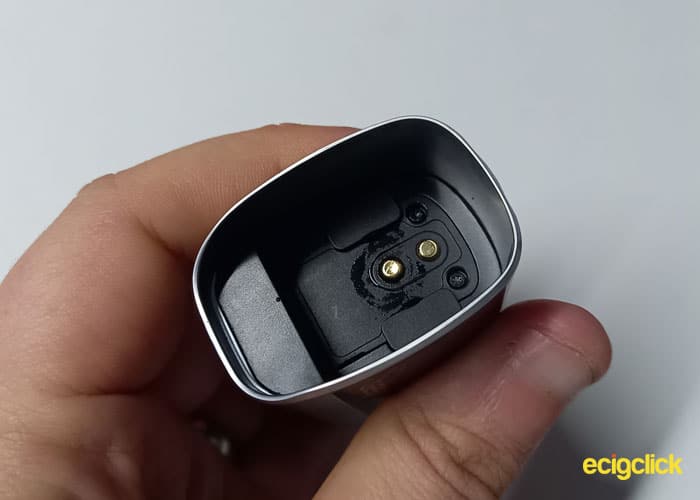
The edges of the port are bevelled in to match up to the pod.
Inside the port looks huge! However there isn’t much to say about it, there are the connection pins, 2 screws and a ledge, which matches the shape of the pod.
The pod is held into the mod via magnets. There are 2 on base of the pod and 2 inside the port which match up.
Literally that’s all I can say about the port… It does look oddly big though.
Geekvape Obelisk 65 FC Pod
You know what they say about big pod ports right? Yes, they usually have big pods too.
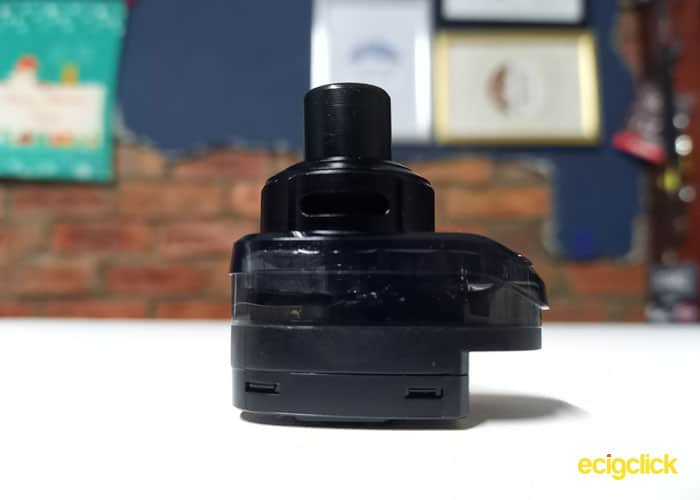
When the pod is connected to the mod, it only protrudes by about 4mm (excluding the mouth piece and airflow). However in total the pod is 22mm tall (42mm including the airflow control and mouth piece), with a width of 27mm and length of 40mm. So it’s a pretty big pod system.
More importantly, the capacity is 4.5ml (non TPD version) and the coil system is a pretty standard push pull installation.
The part of the pod that holds liquid is a black transparent plastic, making it fairly easy to see the liquid level. However, as I said before the majority of the pod is concealed by the mod, making it near impossible to see the liquid level without removing the pod.
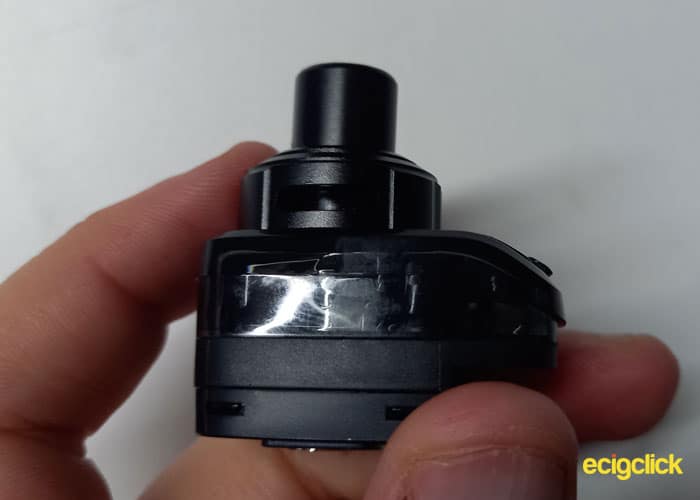
Towards the front, the top of the pod starts to slope down. And it’s here where the rubber seal and the top-fill are located. It’s pretty basic, remove the plug, fill and replace.
The fact that port is on top is great to prevent leaking and it also makes it that little bit less faffy to fill. Additionally there is a little tab on the bung making it easier to lift, even for us nail biters!
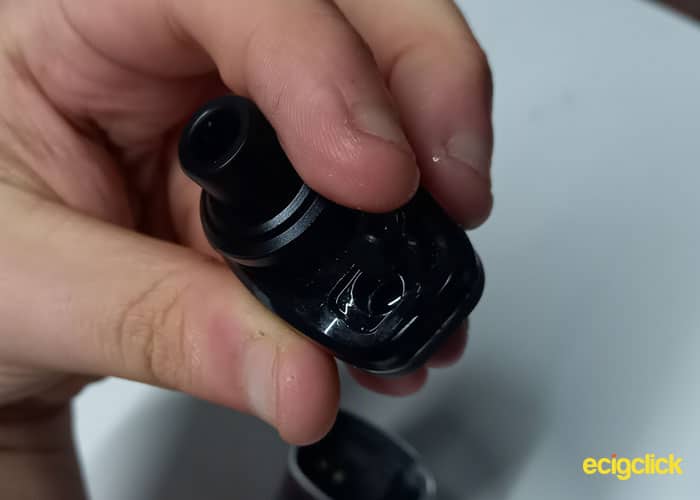
Airflow Control
The Geekvape Obelisk 65s have top airflow and that is said in the most literal sense.
There is a circular ‘lump’ on top of the pod, it measures at 10mm high and 22mm in diameter. This ‘lump’ is the airflow control. It has grooves for easy grip, which are actually the same as the grooves on the back on the mod but smaller.
On either side of the Airflow ring there is a 10x 2.5mm airflow hole. The ring doesn’t have infinite turning but allows for the airflow to be fully open or fully closed.
While fully open the airflow isn’t restriction free, but I think it suits the power of the device well. It allows plenty of airflow through for a good direct to lung (DTL) draw.
While the airflow is fully closed it still allows enough through for a restrictive direct to lung hit.
Mouth Piece
The mouth piece plugs into the lump, that is the airflow control, which gives it a stacked cake type of look… It is a bit strange looking.. However it works well so let’s not complain.
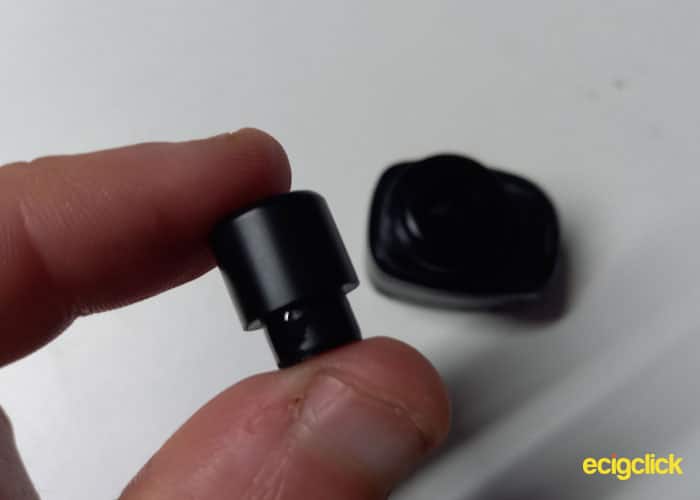
There is one small O-ring inside the port, right at the top, and non on the actual mouth piece.
The mouth piece itself looks bigger than a 510 and smaller than a 810 but I took to it with my callipers and it does seem to measure at 8.5mm which makes it a 510… how strange.
It sits at 10mm from the top of the AFC, which is a nice size.
Using The Geekvape Obelisk 65 FC
Filling The Pod
Super simple!
- While holding the pod (on or off the mod) lift the fill port seal
- Fill the pod with E-liquid via the newly uncovered hole
- Replace the seal
If this is your first time using the kit or it’s a new coil, allow the E-liquid to soak in for 5-10 minutes before using.
Changing The Coil
To prevent the loss of liquid, it is best to do this while the pod is as empty as possible.
-
-
-
- Remove the pod from the mod.
- Holding the pod upside down, pull the coil out from the base of the pod
- Insert new coil and press it firmly.
- Fill the pod and allow to soak for 5 minutes
-
-
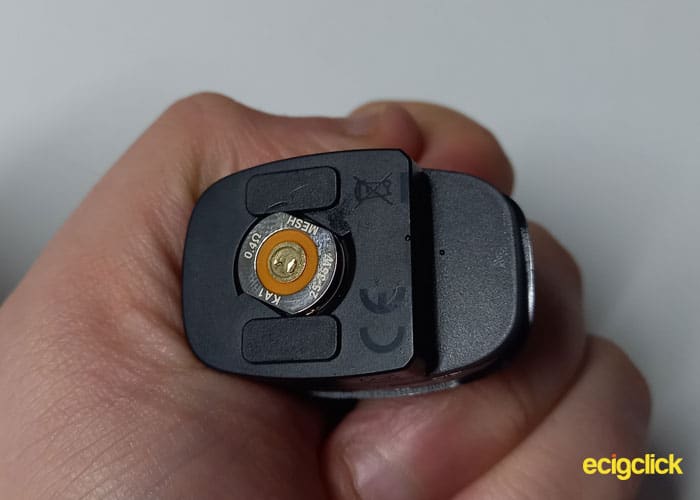
Something I’ve always liked about Geekvape coils, they have the coil information on the base of the coil which makes it super easy to see, even if they’re already in the pod.
Operations
- Turn On/Off = Press fire button 5 times within 2 seconds
- Vape = Press and hold the fire button to fire the device
- Change Mode = Press fire button 3 times within 2 seconds. The mode (very top) will light up orange, press + or – to move through the modes. Pressing and holding the fire or 2 seconds of inactivity will save and exit.
- Change Wattage or TC = press + or -. Press and hold to go fast. Power also loops (for high to low or low to high)
- Set the VPC curve= change the mode to VPC (see above). Press the fire button once, the press + or – to set the first power, then the fire button to move on to the next and repeat. To exit, hold the fire button or leave idle for 2 seconds.
- Clear Puff Count = Press 3 times, when the menu activates, single press the fire button until the puff count lights up. Press the + or – button once to clear the puff count.
- Lock The +/- Buttons= Press + and – simultaneously
- Lock The Fire Button = Lock the +/- buttons then press the fire button 3 times in quick succession.
- Stealth mode (screen off/on) = press fire, + and – simultaneously and hold for 2 seconds.
- Theme colour= press fire 3 times then press and hold + and –
- Adjust screen brightness = press fire button and + simultaneously for brighter or fire button and – for dimmer
- Factory reset= with the device off press and hold + and – simultaneously. When the firmware version appears press and hold fire, + and – simultaneously
Power Modes
- Smart Mode = System automatically detects the coils resistance and limits the power accordingly
- Power= straightforward wattage setting
- TC (SS, TCR)= straightforward Temperature control setting
- VPC= Variable Power Curve – allows you to change the wattage by puff time (so for example. you could make the vape fire 55w, then 10w, then 55w)
- Bypass = fire voltage is the battery voltage (fires at the full power of the battery).
- OTG (On The Go) = allows you to use your vape as a battery bank (charge another device like your phone). When the device is fully changed or the device is running low it will automatically return to the previous working mode.
How Does The GeekVape Obelisk 65 FC Perform?
I’ll be using these coils with the gorgeous Lemon Meringue Tart by Rochford Project. Its 70VG/30PG and I’ve added nicotine to make it 3mg.
0.2ohm coil (B Series)
This coil was pre-installed and has a recommended wattage of 50-58W. The smart feature limits the mod to 58W.
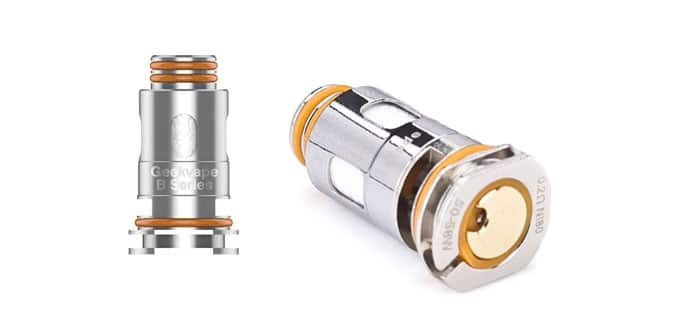
In good fashion we’ll start at 45W. Despite being below the recommended wattage, you do get a nice flavour. It doesn’t flood the mouth but it’s super prominent at the back of the throat and as you exhale you get a nice wash over your taste buds.
50W is the Minimum recommended wattage. It seems to be more dense at the back of your throat and we get closer to it flooding the mouth but we’re still not at a “Wow” moment.
54W is half way through the recommended and it’s here the flavour flows! It washes your mouth out with the flavour so well that you can still taste it a moment later.
Up at the top, 58W floods the mouth beautifully. I’ve spent most of my time at 58W with this coil but 54W is almost as good.
Throughout the above, the vapour production has been nice and thick. Thick enough for me to do tricks with easily. It’s also been really smooth.
Let’s leave smart mode and bump it up to 65W. 65W is the mods full power and the coil handles it like a charm. 5 constant full lung hits and not a single dry burn. The flavour and vapour were both beautifully thick.
If you like to sub-ohm 50/50 juices (which isn’t recommend), it’s good news! I had a little play after using the coil with the thick stuff for a week, and for a full day it worked well with the 50/50 juice.
I consistently used this coil with full airflow.
0.4ohm coil (B Series)
This coil has a recommended wattage of 25-35W. The smart feature set the power to 31W and limits the mod to 33W. However that’s likely to be because the mod is reading the coil at 0.44ohm rather than 0.4ohm.
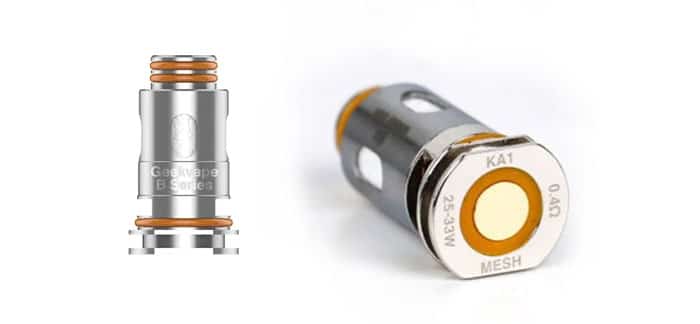
Down low at 20W, it does feel rather powerless. However with a slow inhale you do get a small thick cloud, with a prominent but not amazing kick of flavour at the back of your mouth. Turning the airflow down does give the flavour a little boost.
25W is the minimum recommended power and the flavour does bump up a lot. It fills the mouth a lot more and it is nice, but not quite amazing.
The flavour and vapour gradually increase until we get to 35W. It’s here at 35W that that we get a full mouth beautiful flavour.
I wouldn’t say that it floods the mouth but it’s certainly impressive for 35W. Again from a nice slow inhale you can build up a decent thick cloud, which is thick enough to do vape tricks with.
Menus & Operation
The menus and operation on the Obelisk 65s are very typical Geekvape. Which isn’t a bad thing. You could argue that it’s a lot to remember but half of the things you don’t need. I like it.
It’s simple and slim-lined.
Battery Life
The battery on the Geekvape Obelisk 65s isn’t huge, 2,200 is smaller than most 18650s.
That being said, it is only a 65W mod, so it isn’t that little in that regard.
If you use the 0.2ohm coil at full power (55W) you should expect about 8 hours of having a puff every other minute, so you should get a full day there.
Using the 0.4ohm coil we can expect 13-14 hours if we’re firing at full power (35W).
Leaking
The kit doesn’t leak, there is a picture above of the pod port. In that picture you can see a little bit of e-liquid, that bit of e-liquid is literally the only leaking that has happened in the last 2 weeks.
However, I do think that the liquid is actually left over from when I changed the coil, rather than leakage.
Fast Charging – The Charger
There was some confusion when it came down to the charging. I was told it was coming complete with charger (available to buy from Geekvape)… then it arrived, and it was just the FC kit, with no charger (other than the cable).
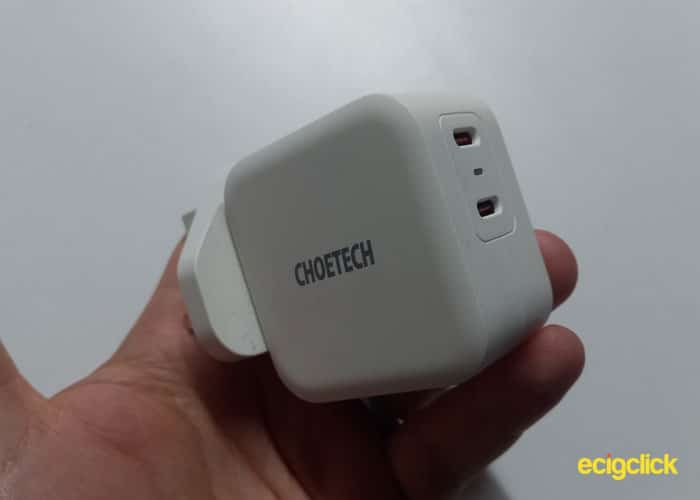
Then I got all ‘electro’ confused, because none of the plugs on amazon went by Amps. Then realised the manual said “PD Fast Charging: 15V, 3A/45W (max)”. So I set out to find a USB-C 45W plug to use with the provided cable.
That didn’t go great, after half an hour of feeling like I had a burden of a job, I settled for a 40W USB-C plug. I know it isn’t what I needed but it was the highest wattage USB-C plug I could find. And it cost me £21. Not amused.
When I received the plug I took a look through the manual and it states that it outputs 3A, but it suggested that each USB-C port (it has 2) is limited to 20W, with a total output of 40W… Which is not what the Obelisk requires, so we’ll have to see what it can do.
Charging
The kit was on the last battery display bar for a short while before it started to lose power. It was set to 58W but could only manage 20W after vaping a little longer so I put it on charge with the USB-C to USB-C cable that came with it and my new plug.
It took the kit 25-30 minutes to be fully charged – which is longer than the 18 minutes specified but it’s still pretty incredible. If you were to use a normal 2A charger to charge the 2,200mAh batteries it would take just over 1 hour.
A ‘normal’ 3A charge would take 44 minutes, so it’s certainly faster than my sceptical mind expected.
I considered going back online spending another hour looking for the correct charger. But I decided not to. We have already established that the mod charges faster than expected.
I do believe it will charge fully in 18 minutes. However due to me not being able to source a 3A/45W charger, I can’t conclude that it does and how well it does it.
So, if you are buying this for the FC feature, make sure you can get a plug that does the job!
OTG Mod – Charging Other Devices (Phone/Mods)
I don’t usually give modes their own section because they usually do the same thing and there isn’t usually any discrepancies.
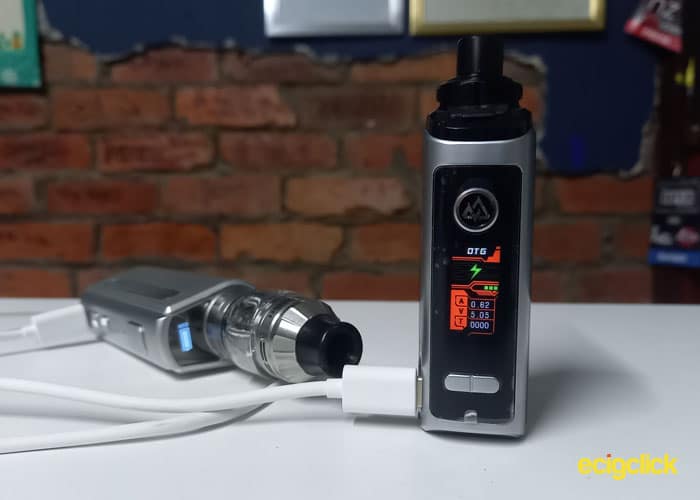
However the On The Go mode, is something new.
The manual states that the OTG mode can output 5V/2.4A, which I think is really impressive. That’s what most phones (up until late) charge at anyway.
I set the mod to OTG then plugged my phone in with the USB-C to USB-C cable that came with the kit.
All looked well, and I was pleased. But I noticed my phone didn’t say “fast charging” which suggest it wasn’t getting 2A. So I figured I’d leave it for a minute and see what happened.
Literally a minute after I went back to the mod and it was in “smart mode” (ironically). My phone still thought it was charging but had gone down 1%. I tried plugging it in several times and this happened each time.
Confused, I grabbed the Kriemhild kit which was sat at the side of me and it worked, it charged it just fine.
I can’t be sure why it didn’t work on my phone, maybe it’s an early sign that my phone is about to stop working.
Pros
- Good Flavour
- Good Vapour
- Fast Charging
- Satisfactory battery life
- Handy Reverse Charging
- Fits hand Nicely
- Easy to use.
Cons
- Hard to find the right charging plug
- No MTL airflow setting
Geekvape Obelisk 65 FC Final Verdict
Let’s make this quick and simple.
It’s a really good device. Honestly it is. I can’t fault the vapour or flavour production, even at 25W.
The biggest feature or selling point for this kit is the 18 minute fast charge, which is great… if you can get a charger.
Personally I think Geekvape should include a charger or at least have an additional kit that comes with a compatible plug. That way you’d know what you’re getting and that it would work well and safely without wasting your time and money like I did.
I haven’t really talked about the lack of MTL airflow yet but I added it as a con because I expected it to have some MTL airflow when I saw that it came with a 25W coil. However it doesn’t and although that coil isn’t really an MTL coil, the lack of MTL draw restricts the possibilities of the kit. Truth be told, it could have been a really, really good All In One.
So there you go an awesome compact kit that feels good, vapes great and has a useful extra function.
Did you buy the Geekvape Obelisk 65 FC kit? let us know your thoughts in the comments below.


