The GeekVape Wenax Stylus review and I’m pretty sure this is new territory for the popular five year old Shenzen based vaping manufacturer.
They are of course responsible for the hugely successful Aegis Boost and Aegis Max pod based systems and I personally know lots of people that use them on a daily basis.

We’ve also reviewed the Aegis pod with its beetle like appearance – a device that is not only extremely pocket friendly and ergonomic but more than lives up to the hype as far as excellent flavour production is concerned.
Delving further there’s the Bident kit, a device that incorporated the first dual coils in a pod system – although it does look a little naked without the stitched, leather look outer. It’s a look that’s now very much associated with Geek Vape products.
What Can We Expect From The GeekVape Wenax Stylus Pod Kit?
Geek Vape is renowned for durability, ruggedness and strength from its vaping devices.
As I just alluded to, they are also well known for their trademark leather look outer casing, which provides a large degree of comfort when handling.
So when I first set eyes on the GeekVape Wenax Stylus pod it almost felt like a creation from another manufacturer.
For me, this pen like device signals a radical departure, and it seems that Geek vape is traveling uncharted territory as well as throwing a nod in the direction of the virgin vaper.
We can only admire them for that.
To sum it up, expect the unexpected from GeekVape…this time they’ve gone all out for simplicity and portability.
So how does it perform and what’s the flavour like from the two included coils?
Time for me to grab my stylus.. vape pen.. my pen! lol!
Inside The Box
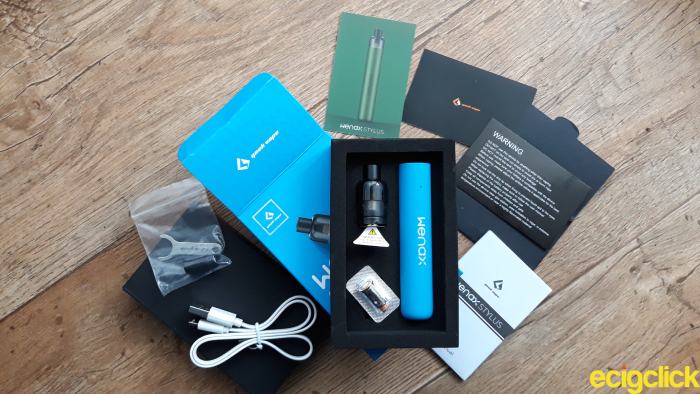
- Wenax Stylus
- Wenax pod – 2ml ( 0.6ohm mesh G coil pre installed)
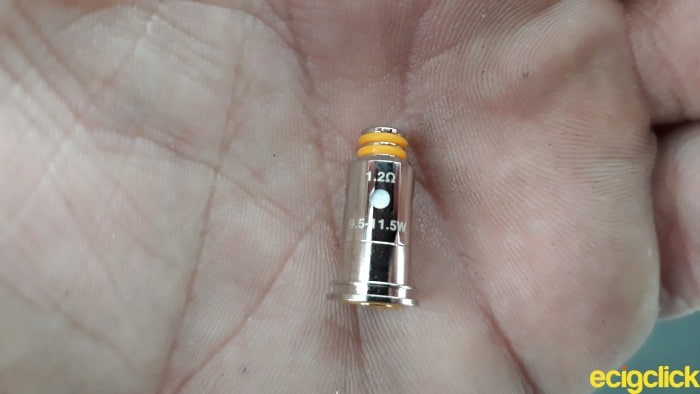
- 1.2ohm G coil
- Spare Delrin drip tip
- USB cable
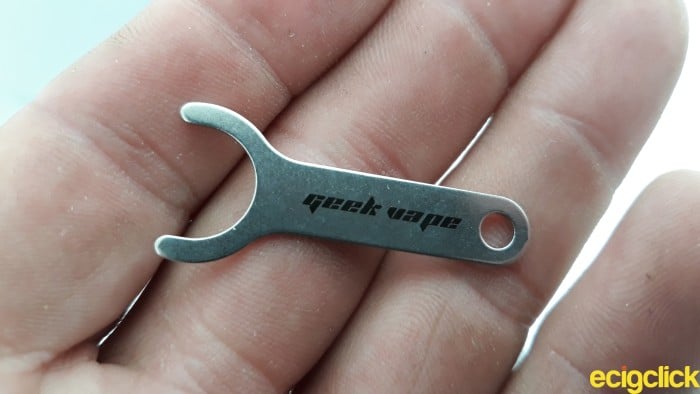
- Coil tool
- User manual
- Warning, warranty and promotional card
Specifications And Features
- Dimensions 42.5mm x 18.85mm
- Weight 44g
- Integrated 1100mah battery
- Pod capacity 2ml
- Three step adjustable power 3.4V – 3.6V – 3.8V
- Output power via auto draw
- Coil resistance range 0.5 – 3.0ohm
- Charging Micro USB 5V/1A
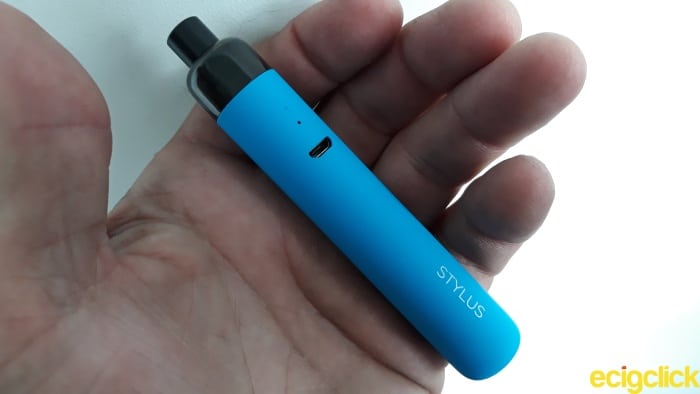
The Geek Vape Wenax Stylus pod kit is available in an array of simple, monochrome colours.
Choose from Army Green, Classic Black, Devil Red, Granite Grey, Space Grey and the colour under review, Ocean Blue.
It is only available as a TPD compliant product and as far as I can make out there are no larger capacity pods available.
The coils have been designed to provide a long lasting mellow flavour, and said to be able to pick out the subtleties created in multi layered E liquid profiles.
Not only is auto draw a feature but button activation is also possible enabling the user to maximise coil power capabilities. The Internal 1100mah battery is said to last for two days continuous vaping.
The chip set will automatically identify the installed coil and preferred lowest power setting and a three step voltage setting allows for fine tuning when using the fire button.
We’ll be putting these claims to the test with this review.
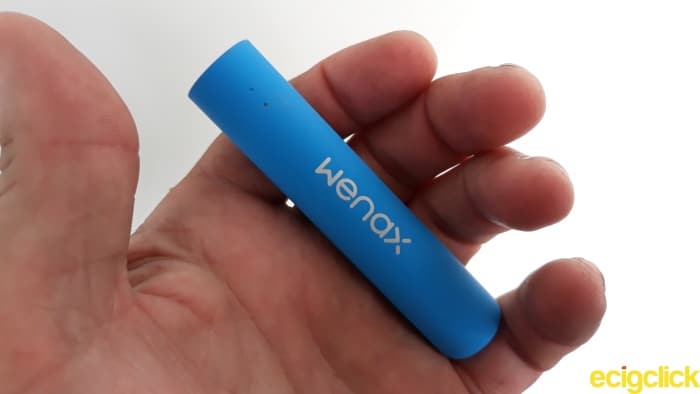
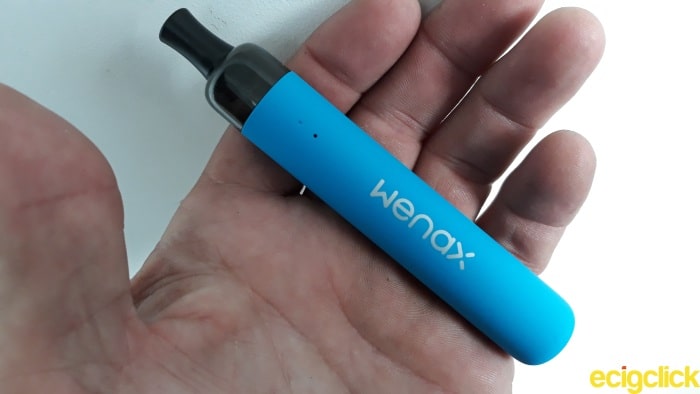
Design and Build Quality
The body of the GeekVape Wenax Stylus is comprised of aluminium alloy making it extremely light and at the same time very durable.
Geek Vape themselves refer to it as a unibody aluminium structure…so now you know!
The colour schemes have a paint grade finish but only time will tell how resistant it is to scratching up and whether the aluminium structure becomes exposed.
With the Delrin direct lung drip tip attached to the pod it measures 112.7mm in height.
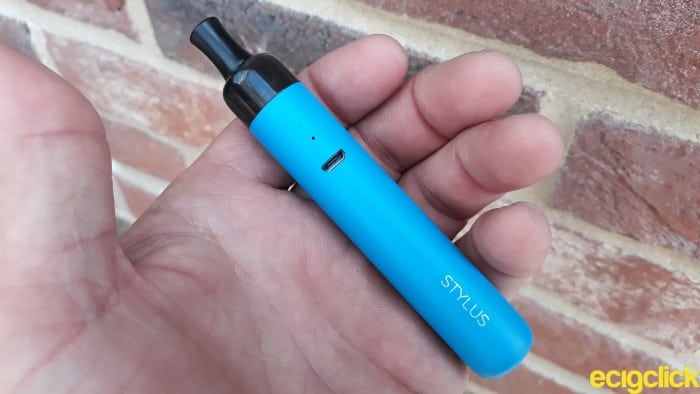
There are two very small airflow holes either side of the battery section that give away the fact this device is aimed strictly at the mouth to lung vaper.
There are also two semi punched holes. I’m not entirely sure what the thinking is there..
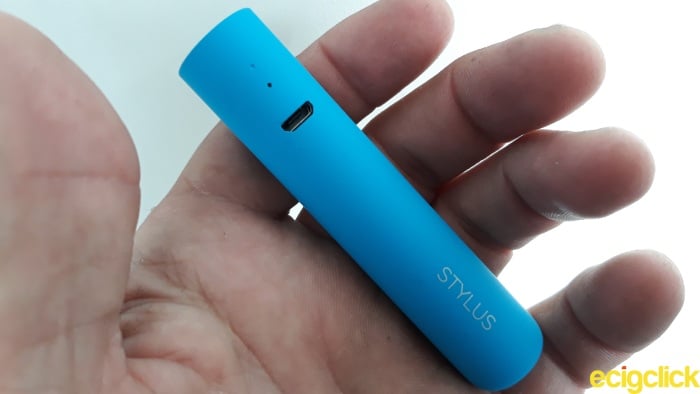
The side of the battery section also incorporates the USB port. It’s a shame it wasn’t located lower so the device could sit vertically.
![]()
GeekVape reminds us of the company logo, being embossed into the fire button. Yes! It’s at the base of the battery. To the seasoned vapers among you I ask: Mech tube mod, anyone? lol
As well as illuminating, the difference between a mech mod soon become apparent in that the fire button also adds extra functionality to the device.
It’s the usual five clicks of the fire button to turn the device on or off.
GeekVape Wenax Stylus Battery Indicators
Pressing the fire button three times will toggle between the three power settings.
- Low – White (3.4V)
- Medium – Blue (3.6V)
- High – green (3.8V)
The chosen output setting is then available while using the auto draw function.
The condition of the battery can also be recognised by the colour illuminated on the fire button.
- Green – 71-100%
- Blue – 31-70%
- red – 0-30%
While the GeekVape Wenax Stylus is being charged the battery indicator will respond as follows:
- 0-70% – pulsing red light
- 71-99% – Pulsing green light
- 100% – solid green light
GeekVape Wenax Stylus Built With Safety In Mind
GeekVape has included a series of five safety features. Extremely useful given this is a very simplistic device that negates the need for a screen display.
- Low battery – Red light will flash five times
- No atomiser – Red light flashes three times
- Output timeout – after ten seconds of vaping red light will appear for three secs
- Overheat protection – Red light will appear for ten seconds if device overheats
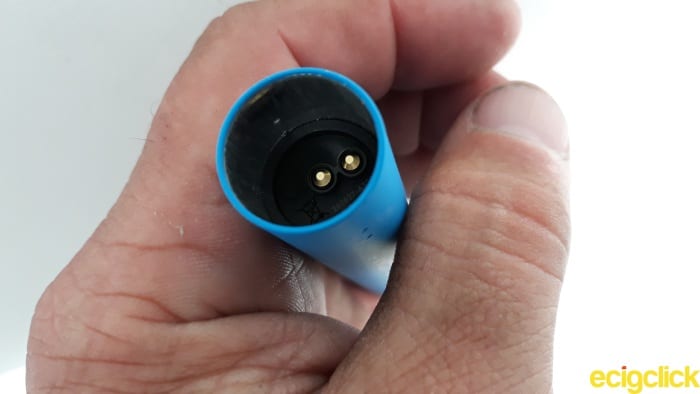
Inside the battery section are two offset spring loaded battery contacts as well as a small tube allowing a passage of air flow to the coil.
That’s about it for the battery section. Very simple, very straightforward stuff.
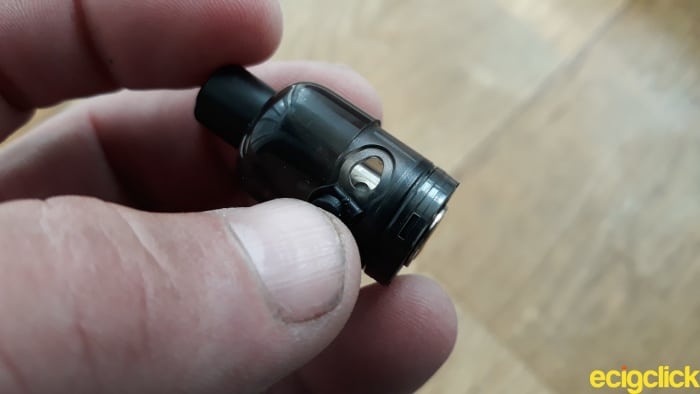
GeekVape Wenax Stylus the Pod Section
The height of the semi transparent PCTG pod is 27.5mm and 18.8mm at its widest.
Although the viewing window is tinted it’s still possible to view e-liquid levels under more favourable lighting conditions. However, half of it is hidden within the battery section so you’ll still be pulling it out on occasion to check.
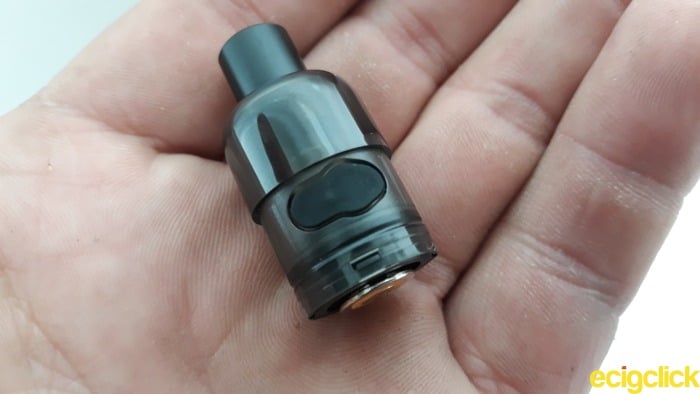
If I’m honest, this is the perfectly shaped pod and it looks great when plugged into the battery section.
It’s a snap fit and doesn’t rely on magnets to hold it in position thus impossible to shake out. I like that…I like that a lot!
It has to be said that the coils are something of a tight fit when it comes to installing, an airlock can be created when pushing in too quickly.
They’re equally as fiddly to remove. The circumference of the included coil removal tool is wider than the coil base rendering it pretty much useless.
GeekVape Wenax Stylus – How To Install A Coil
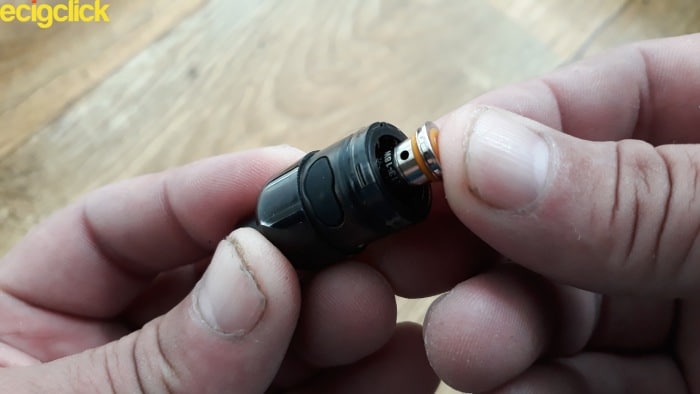
It’s the usual plug and play arrangement when fitting a coil.
- Remove the pod from the battery section
- Push the coil up into the base of the pod ensuring a snug fit
- Snap the pod back into the battery section
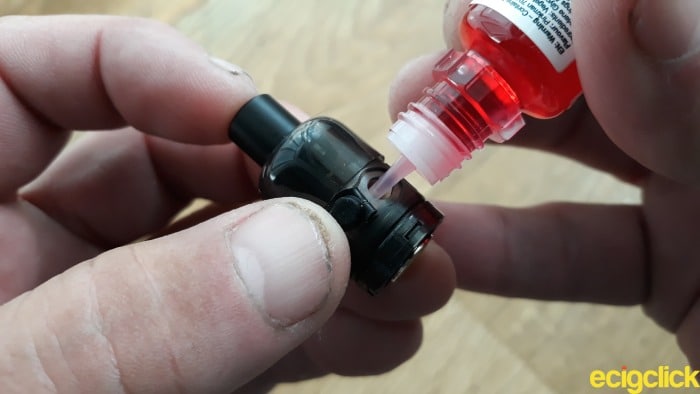
The fill port on the pod measures 4.5mm x 3.8mm so is suitable with all TPD standard 10ml bottle nozzles on the market.
You may need to take care with wider ones in order to avoid potential air locks/spillage.
Unfortunately I found the stopper to be a pain to use. There’s simply no way I could pries it open without the use of a pin, for example, even then it was still a task.
For anyone that’s read some of my other pod reviews they’ll know I’ve been here, got the T shirt and now using it to mop up e-liquid! lol
GeekVape Wenax Stylus How To Fill the Pod
I always prime the coils before plugging them into the pod. It’s not vital but just helps with the soaking in process with E liquid. A few drops on the wicking ports is all it takes.
- Lift the silicone stopper out of the pod
- Gently pour E liquid into the fill port taking care not to overfill
- Replace the silicone stopper back into the pod ensuring a snug fit
- Plug the pod into the battery section
Leave the e-liquid to soak into the cotton for a good five minutes or so before vaping.
How Does The GeekVape Wenax Stylus Pod Kit Perform?
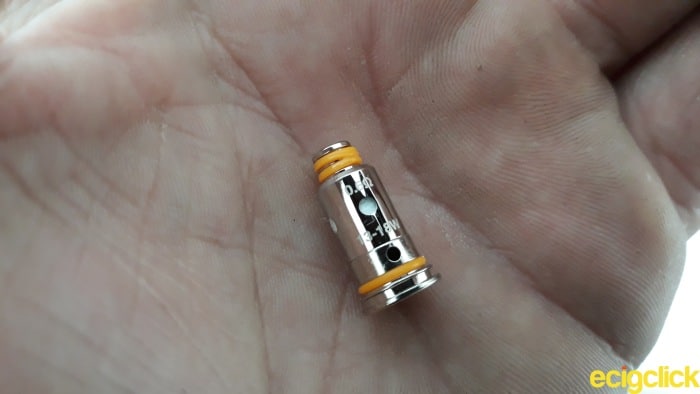
0.6ohm G coil kanthal mesh (14-16W) Power toggle 14-15-16W
Both the included coils are comprised of kanthal and use organic cotton as wicking material.
Interesting fact! They are the same ones used in the Geek Vape Aegis Pod Kit.
I used Vampire Vape Pink Man to test the 0.6ohm mesh coil. It has a juice ratio of 70VG/30PG and the 10ml TPD compliant bottle contains 3mg freebase nicotine.
Using the auto draw feature of the device and with the wider, shorter Delrin drip tip attached I got a very restrictive direct lung pull from the coil, despite the two additional airflow inlets at the base.
The flavour produced was very good and the berries were already popping. Cloud production was minimal and stealthy, certainly more in line with a MTL experience.
Employing a mouth to lung gave a much more comfortable and satisfying vape, flavour dispersal was also better.
Attempting a direct lung vape when adjusting the power settings caused a few coughing fits.
For this reason I ditched the idea of the coil being suitable for a restrictive direct lung vape, it’s not – in my opinion, or at least not with this device.
Still, an extremely satisfying MTL vape is obtainable while adjusting the power settings.
There’s a noticeable difference in both flavour and warmth when switching between 14, 15 and 16W.
1.2ohm G coil kanthal A1 (9.5-11.5W) power toggle 9-10-11W
This round wire coil has a single airflow inlet on its base as opposed to the two found on the 0.6ohm mesh coil.
I used 88vape raspberry ripple, a 50VG/50PG ratio with 6mg freebase nicotine inside the TPD compliant 10ml bottle.
Again using the auto draw feature, the flavour quality was superb from the very first vape. I have to write this is the perfect mouth to lung experience, it really is bob on!
There’s just the right amount of airflow restriction. Not too tight and certainly not airy as is often demonstrated on other pod starter kits.
It’s amazing too, how much flavour is still able to pass through such a low powered coil, and these results were obtained on the lowest setting of 9W.
Cloud production is suitably stealthy for a MTL set up. You’re not going to be made to feel uncomfortable when taking this out in public.
Vaping At Higher Wattage Using Power Toggle
Again, there is a noticeable difference even stepping up by a single watt.
It’s quite impressive how GeekVape has managed to achieve this. Instead of being a gimmick, it’s the ideal introduction to power control on a device…full kudos to that!
The raspberry becomes more intense (at 11W) even to the point that the cream notes gets knocked into the background due to the added warmth of the vape. So there’s scope, albeit limited to fine tune your vaping preference.
..and GeekVape live up to the “subtleties of multi layered flavoured replication” claims. Excellent stuff!
Pros
- Lightweight and extremely portable
- Able to view remaining juice levels
- Auto draw feature works flawlessly
- Excellent flavour quality from both coils
- Superb battery life (2 days plus)
- Three step Voltage mode works a treat.
Cons
- The silicone stopper is awkward to use
- Unable to direct lung vape with the 0.6ohm kanthal mesh coil
- Finger firing can be awkward for some (subjective)
- Loud “buzzing” noise when using the 0.6ohm kanthal mesh coil
Final Review Verdict
The silicone stopper of the GeekVape Wenax Stylus gave me a major headache! I managed to lose the stopper inside the pod.
The reason this happened was because there’s no actual pull tab. You’re going to either have to use very long finger nails or a pin to prise it from the pod.
This is an inherent problem with pod based systems and I honestly can’t understand why it remains an issue. In my own experiences Aspire is the only manufacturer to pick up and run with this particular ball of concern.
Neither am I a fan of pinkie firing a device. Admittedly it’s not that difficult but if Geek Vape are hoping to gain the attention of a new vaper there are easier methods. I would have preferred to have seen the fire button side mounted.
I got a worrying “buzzing” tone when using the 0.6ohm mesh coil. I’ve no idea what was causing that. The MTL coil performed admirably – buzz free.
So Who Is The GeekVape Wenax Stylus Aimed At?
Most certainly a new vaper.
There’s absolutely no doubt about that. It’s extremely portable, lightweight to the point of forgetting you’re carrying it and offers absolutely stonking flavour qualities.
Those are vital ingredients in help the fledgling vaper. Additionally the auto draw feature is often critical in replicating the act of smoking.
It’s claimed by GeekVape the coils will need replacing after seven refills or 14ml of E liquid. They also state that both coils are future proof and will be utilised in starter kits moving forwards.
That’s very good news.
As usual though there are a few caveats. A few negative Neils.
The design of the silicone stopper is poor.
The lack of airflow available for what is marketed as a DTL coil (0.6ohm kanthal mesh) is also somewhat misleading. It works a treat in the Geek Vape Aegis pod but the Wenax Stylus has been designed purely for a MTL vape.
The fire button could have been set into the side of the device to make life easier for a new vaper. It does, however allow for a convenient blast of maximum power from the coils.
Having weighed up the positives and negatives, the GeekVape Wenax Stylus Pod kit still comes out a winner.
Why?
Because it performs fantastically well, has exceptional battery life (two days plus) and the flavour qualities from both coils is superb.
The three step voltage mode is the perfect way to introduce a relatively new vaper into the world of variable wattage.
So the Pro’s most certainly outweigh the Cons with this stylish stylus.


 The Limits?")


i have put this on the charger multiple times.. but is always dead soon as i take it off? am i doing something wrong? using the charger cable that came with it.? also use my phone on this charger at it is fine so not the charger..
hello there
how to change the vape from button fire to auto fire..
thx in advance
I don’t think you can turn off the fire button, you either press fire or just use the draw firing.
You can download the user manual here
https://www.geekvape.com/upload/download/wenax-manuals.pdf
This thing is absolute garbage. Ready to throw it away after 2 days. I swallow more juice than I vape with every hit. Disgusting amd very weak hits. Don’t waste your money on this trash.
Hi, Colin. Thanks for taking the time to read our reviews. It’s much appreciated.
I did have a few issues with the design of the Wenax Stylus but found it to perform well for me as far as flavour was concerned.
Those design issues will clearly be a problem for the new vaper who will be looking for something quick and easy to set them onto the road to vaping full time so I understand your frustration. Also keep in mind the coils aren’t the most powerful in the world and aren’t intended to be as this is just a starter kit.
Cheers,
Neil C
Sorry to be a know-it-all, but the adjustable voltage settings do apply to the auto fire. They actually only apply to the auto fire.
9-10-11W for 1.2ohm, are auto fire only.
14-15-16W for 0.6ohm, are auto fire only.
Button fire gives full power only, so 11W for 1.2ohm, and 16W for 0.6ohm.
👍
JD, please accept my apologies. You’re absolutely right!
I’ve made amendments to the review. I’ve obviously missed that vital fact and overlooked it. To make things even more embarrassing Geekvape mention it in the instruction manual. My bad – but thanks for pulling me up on that.
Neil