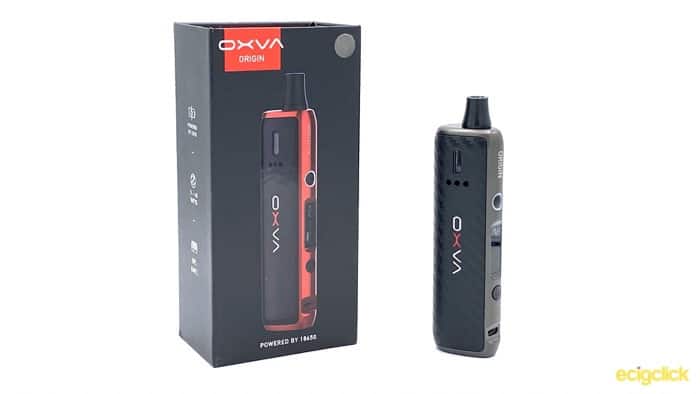
The new Oxva Origin AIO is certainly a smart looking device and comes from a new vape company with a named designer you might be familiar with.
Pod systems seem to have been on the way out for a while now, so it’s good to see a new vape company cutting its teeth on an AIO’s.
I have to admit that I hadn’t heard of this company before. Cynically I wondered whether this might be another no-name brand that quickly disappears.
However a little bit of research turned up the fact that the CEO (and designer of the Origin) is none other than Justin Lai.
If that name is familiar, it’s because he is the designer behind the Geekvape Aegis line of mods and the Zeus tanks!
So this company definitely has some design chops behind it!
What Can We Expect From The Oxva Origin AIO?
As an AIO it has a removable tank with replaceable coils, and it also uses a single removable 18650.
In fact Oxva say this is the smallest AIO that takes an 18650 battery and fires up to 40W!
This was sent over free of charge from Oxva – thank you – but as usual I will report back honestly on what I find!
Inside The Box
- Origin Device
- 0.3Ω Mesh Coil (preinstalled)
- Airflow Ring (preinstalled on coil)
- 0.5Ω Coil
- USB Cable
- Warranty Card
- User Manual
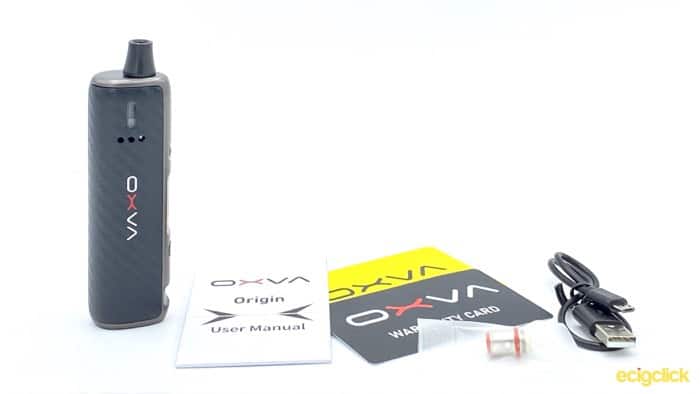
I also received some spare tanks and their rebuildable coil for it.
Specs
- Dimensions – 32.8mm x 23.5mm x 113.5mm
- Weight – 70g
- Power Output – 5-40W
- Resistance Range – 0.25Ω-2Ω
- Battery – Single 18650
- Capacity – 3ml (2ml TPD)
- Charging – micro USB 2A
Design and Build Quality
The Oxva Origin comes in 5 different colours:
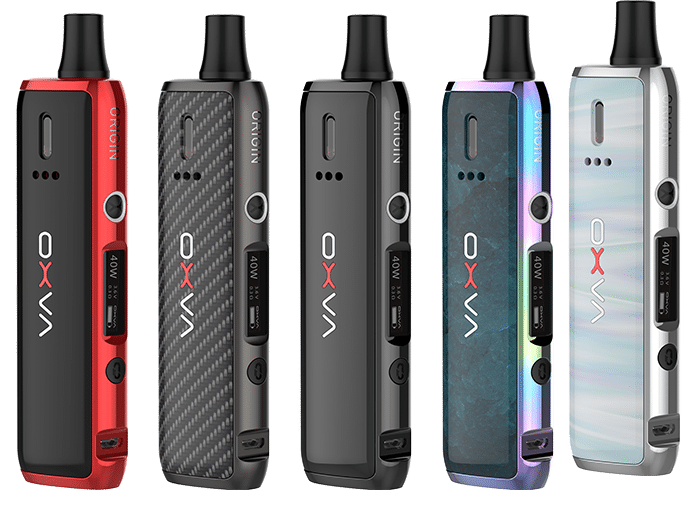
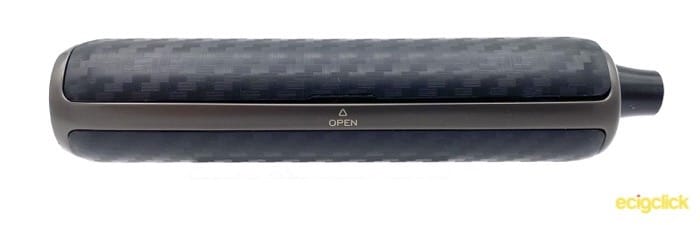
Black and Red, Brilliant Black, Muzo Green, Silver Aurora, and the one that I’m reviewing, Black Carbon Fibre.
Oxva Origin AIO – Drip Tip
Starting at the top, we might as well start with my one niggle with the kit.
The drip tip is perfectly comfortable, which is good as you’re not going to be able to change it easily, it’s a sleeve design that is held on with two o-rings.
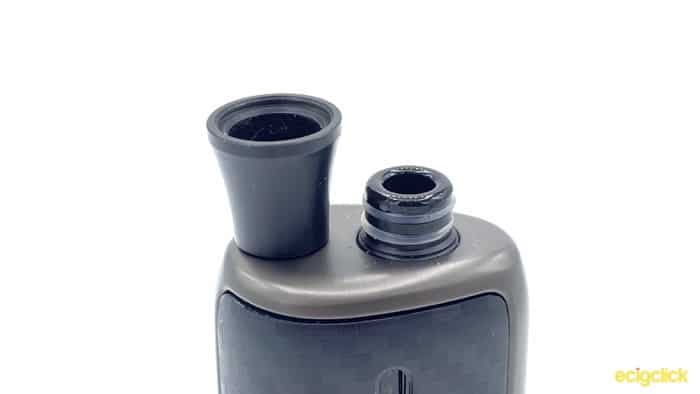
I can see why they’ve gone down this route, as it allows the tip to be closer to the coil than if you had enough space for a 510 drip tip.
But I still think it’s a bit disappointing, especially as it can wobble a bit and I’m frightened of losing it.
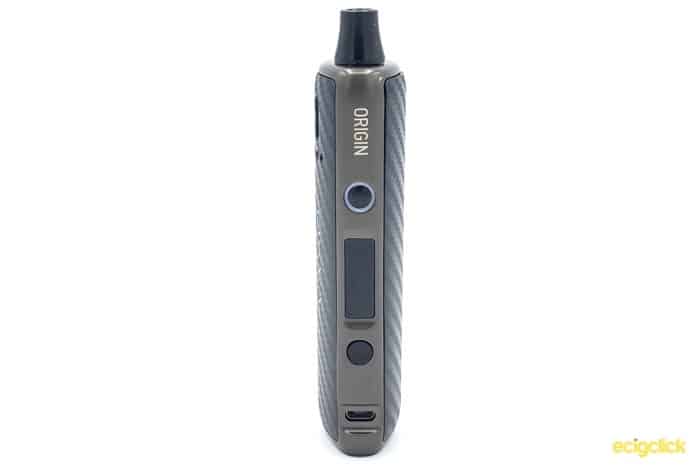
Oxva Origin AIO – Body
This is a really comfortable device, it fits in the hand wonderfully.

To gain access to your tank and battery compartment, there’s a single removable side panel. This has a little cut out to get your fingernail in to remove.
On one side you have a little window to check your e-liquid level. The tank has a moulded section that fills this window, so it doesn’t get obscured by shadow.
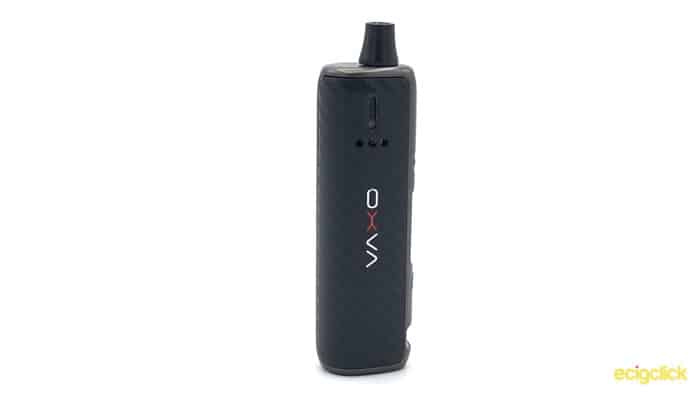
Below this you have three airflow holes, and under that is the brand name OXVA in silver and red – very slick.
Oxva Origin AIO – Tank
The 3ml tank is made of clear PCTG – the TPD version does of course have a 2ml capacity.
To remove it from the kit you pull it from the right hand side, and it pivots out around the connector.
It’s really satisfying how this spins out, and it’s nice and easy to do.
Which is a good thing, as unfortunately, the airflow control is not really accessible without removing the tank.
This is a pet peeve of mine with AIO systems, and I wish more would allow you to adjust your airflow on the fly, without having to take things to pieces.
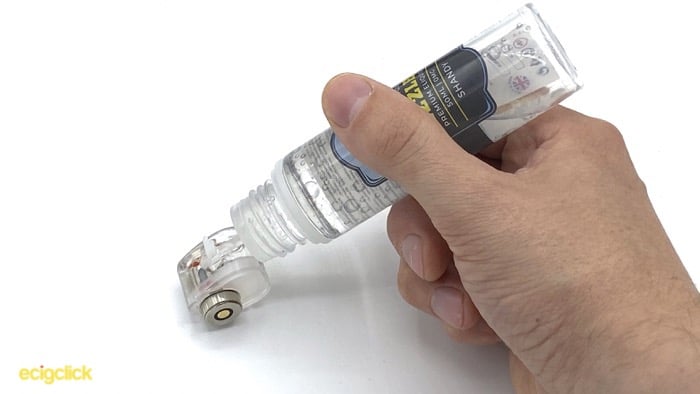
How To Fill The Oxva Origin AIO
- Remove the side panel from the device
- Take the tank out by spinning it round (not required but recommended)
- Remove the silicone stopper and fill with your preferred e-liquid
- Replace the stopper, reinstall your tank, and remember to wait 5-10 minutes if you’re using a new coil
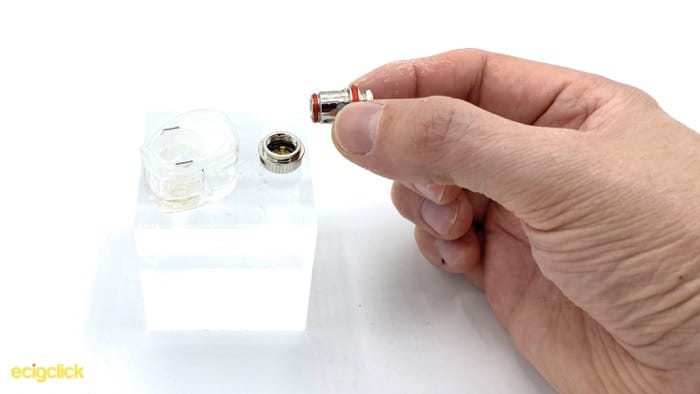
How To Change The Oxva Origin AIO Coil
NB: The tank should be almost totally empty before doing this
- Remove the side panel from the device
- Take the tank out by spinning it round
- Invert the tank and pull the coil straight up and out
- Unscrew the Airflow Ring from the coil you’re removing
- Screw the Airflow Ring onto the new coil
- Push the complete assembly back into the tank, being careful to line up the two flat edges
- Fill it up and then put everything back together
Interestingly if the device detects that you’re using a new coil, it won’t fire until it either times out (I think it’s 5 minutes) or you press the wattage button.
This is a nice touch to stop you accidentally burning out your coil if you haven’t switched it off before changing it!
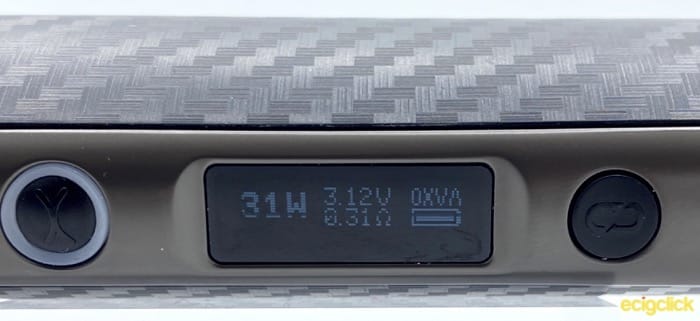
Oxva Origin AIO – Screen and Controls
This is a two button device, and it’s super simple.
You have a fire button with an LED ring. This fires pretty much instantly thanks to the Photon chip they are using, and has a 5 click on, 5 click off.
Below this you have your screen, showing wattage, volts being drawn, the resistance of your coil, and your battery life.
At the very base of this side is your USB port. It’s capable of 2A charging which is good, but sadly is a micro USB, rather than the increasingly common USB C.
Oxva Origin AIO – Wattage
Below this is your wattage button, it only adjusts the wattage up starting at 5W, and round robins once you get to 40W.
It scrolls super quickly, taking about 2 seconds to scroll through the whole range.
If you are using the 0.5Ω coil, it will only allow you to go up 25W, and the 1.0Ω coil goes to 15W.
I can see the reasoning here, to stop you burning out your coil with too high a wattage.
It makes sense for the new vaper to have this safety feature in place, but as someone that knows what they’re doing, I kinda wish it didn’t impose it’s limits on me.
Oxva Origin AIO – RBA Section
As with most RBAs for AIOs, this is super tiny.
But it’s not that difficult to work on. To test it out I installed a simple round wire coil, but you could get away with a thin clapton or similar.
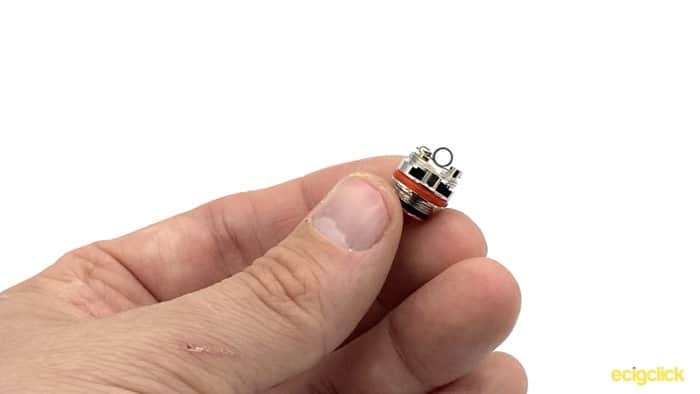
In the package for the RBA, you get a 510 adapter that you screw on to the base.
This allows you to put it on resistance tester to build, and also dry burn your coil.
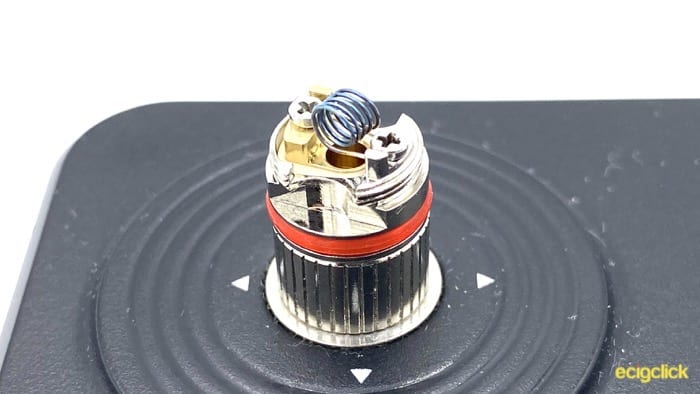
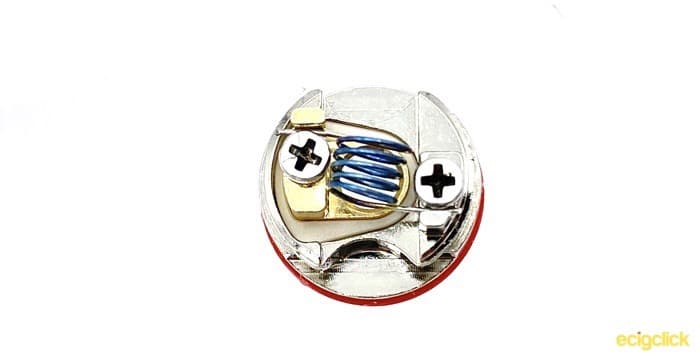
Once you’ve unscrewed the small cross headed screws, you just need to pop your coil between the coil and the post, and tighten the screw down to hold it in place.
Use a coil jig to adjust your coil and make sure it’s centred over the air hole.
Wicking it up is similarly easy, just make sure not to over stuff it.
Although you have a decent amount of space for the wick to sit in the cut outs, you don’t want to choke this off when you screw on the top cap, so be prepared to thin it out slightly.
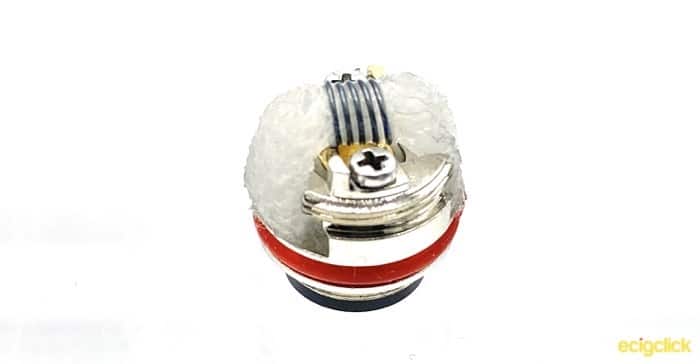
Once you’ve finished wicking it, drop some e-liquid on to it to pre-saturate it – known as priming the coil.
After this you can screw the top part of the RBA section down. My own attempt in the below picture has just a bit too much cotton in it, but subsequent attempts were better.

Once that’s all done, you can screw the RBA section back onto your airflow adapter and put it in the tank ready to go!
How Does the Oxva Origin AIO Perform?
I’ve really been enjoying my time with the Oxva Origin, it’s a little flavour machine with it’s two stock coils.
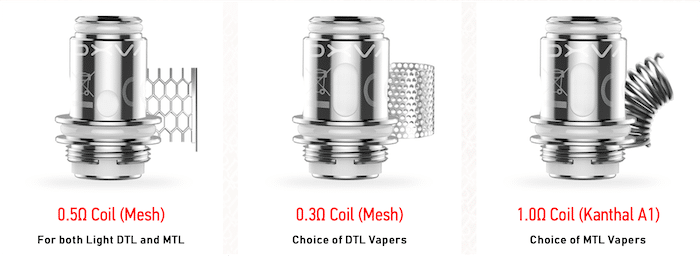
Oxva produce a 0.3Ω mesh, a 0.5Ω mesh, and a 1.0Ω Kanthal round wire. As well as their RBA section I looked at above.
For these tests I mostly used Fizzle’s Shandy e-liquid at 70/30 VG/PG for the two mesh coils, and SVC Labs Berry Ice at 50/50 for the 1.0Ω and the RBA (which I built as a 0.9Ω).

You can read more about VG and PG here.
Oxva Origin AIO – 0.3Ω Coil – Airflow and Cloud Production
There’s bags of airflow with this coil.
Fully open it’s an 8.5 on a 1 to 10 scale from tightest to wide open.
Happily it’s not just the airflow that is generous, as this thing can manage some pretty impressive cloud production.
I’d be quite happy comparing this to smaller stock coil sub-ohm tanks. Cloud production is good enough to fog out a room with a bit of chain vaping.
I did get some spit back at the beginning of using this coil, but that seemed to disappear on the second day, so I’m going to put it down to the coil breaking in.
Oxva Origin AIO – 0.3Ω Coil – Flavour
Great flavour from this coil. Although it can’t match the sort of separation of flavours you’ll get from much bigger coils or rebuildables, it’s really punchy.
Of the two stock coils, this one was definitely my favourite.
It’s rated 30W-40W, but if you’re keen to save your battery life I was happy with it all the way down to 25W.
30W seemed to be the sweet spot for me though, but if you like a warmer vape you can definitely bump it up to 40W with no loss of quality.
Oxva Origin AIO – 0.5Ω Coil – Airflow and Cloud Production
This coil gives you a slightly more restrictive draw, around a 7 on the 1-10 scale.
Still a direct to lung draw fully open, but if you close the airflow right down, you can also get a loose mouth to lung draw from it.
Cloud production is slightly less than the 0.3Ω, but not by much.
Oxva Origin AIO – 0.5Ω Coil – Flavour
Flavour to me is pretty indistinguishable from the 0.3Ω.
It doesn’t give you as warm a vape, but the flavour is ticking all the right boxes.
Although this can manage a lose MTL, I think it still performs at it’s best as a Direct Lung coil.
Oxva Origin AIO – 1.0Ω Coil – Airflow and Cloud Production
Obviously this is a much tighter draw than the previous two coils, and as the device sets your maximum wattage to 15W, you’re not going to be fogging out any rooms!
Even fully open this is quite a restrictive coil, on the 1-10 scale it’s about a 4.
Nice and smooth airflow though.
Oxva Origin AIO – 1.0Ω Coil – Flavour
Flavour is pretty good, but it’s not quite in the same league as the other two coils.
It’s decently punchy, and it’s pretty comparable to a lot of other stock coil MTL tanks, especially if they are tanks that are set up to do DTL as well.
It also seemed to take a longer to break in, it definitely wasn’t reaching it’s potential until it had had a full tank worth of e-liquid put through it.
Oxva Origin AIO – Battery
Battery life is always going to depend on a lot of different factors, wattage, frequency of vaping, the battery you’re using, all of these are going to play a big part.
I was able to get just under a day of moderate vaping from this at 30W, and I would say that lines up pretty favourably against other single battery systems I’ve tested.
Pros
- Great Flavour
- Comfortable and sleek
- True AIO from DTL to MTL
- Decent Rebuildable option
Cons
- Impossible to adjust the airflow without removing the tank
- Sleeve style drip tip rather than standard 510
- micro USB rather than USB C
Final Review Verdict
Although three cons might look like a lot, they are all small niggling issues.
The main thing I’m looking for in a device like this is quality of the vape, and how easy it is to get on with.
It’s an extremely nicely put together piece of kit, and definitely the type of kit I would keep as a back up, or recommend to a new vaper.
Comfortable, great flavour, really small for a removable battery device.
All in all it’s checking a lot of boxes!
The fact that OXVA has used the same coils for both of their devices makes me hopeful that they’re going to make more.
All three coils that I’ve tried have been really good, and after a couple of weeks of using them, I haven’t had one die on me (although I’ve obviously been swapping between them).
So great flavour, super simple, with some intelligent design decisions that should help the new vaper.
Are you using this one already?
After this review are your considering buying one?
As always, let me know your thoughts and opinions in the comments below!


You never mentioned the flavor from the rba or the airflow. What wattage did you use it@ for your .9 ? Does it do a decent enough mtl?
Hi, and thanks for reading the review!
I didn’t focus much on the RBA section, because these days I feel like a half-way decent RBA is cost of entry for an AIO.
With the 0.9 (it was actually about a 0.92 or thereabouts) I was limited to 15W, so that’s where I vaped it. Could have done with a little bit more power though. To be honest I’m never a fan of imposed limits, and I’m glad that they changed this for the Origin X.
Flavour is fine, nothing much to write home about with a simple round wire. I did test it with a microfine fused clapton (at 0.5) and it was far better.
Although you *can* do MTL with the RBA, it’s got a bit too much airflow for it to be really good. Restricted direct lung is where I would say it fits.
Hi, I was wondering does the Oxva Origin AIO coils (specifically the 0.3 mesh) have better flavour than the Nord RPM 0.4 mesh coils and the Nord 0.6 mesh coils if I were to use the nord coils in the Smok Nord 2? I currently have the Smok Nord and want to upgrade but I don’t know if the flavour from the Oxva Origin AIO 0.3 mesh coils is better for flavour than the Smok RMP 0.4 mesh and the Nord 0.6 mesh. Let’s say both of the products are using those coils at 30W… Pls help. Thanks
Origin is better