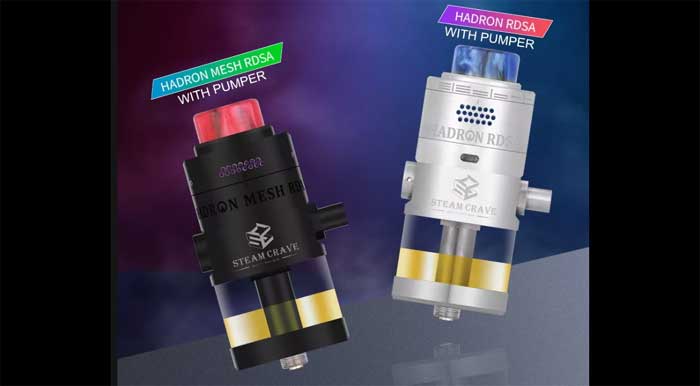
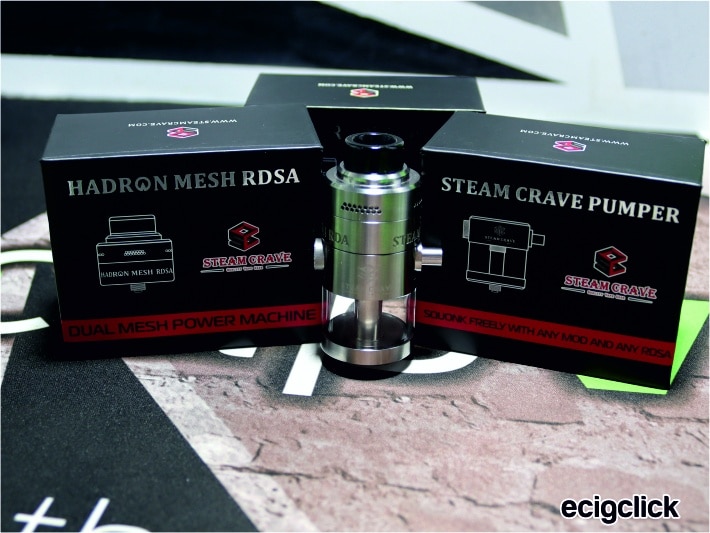
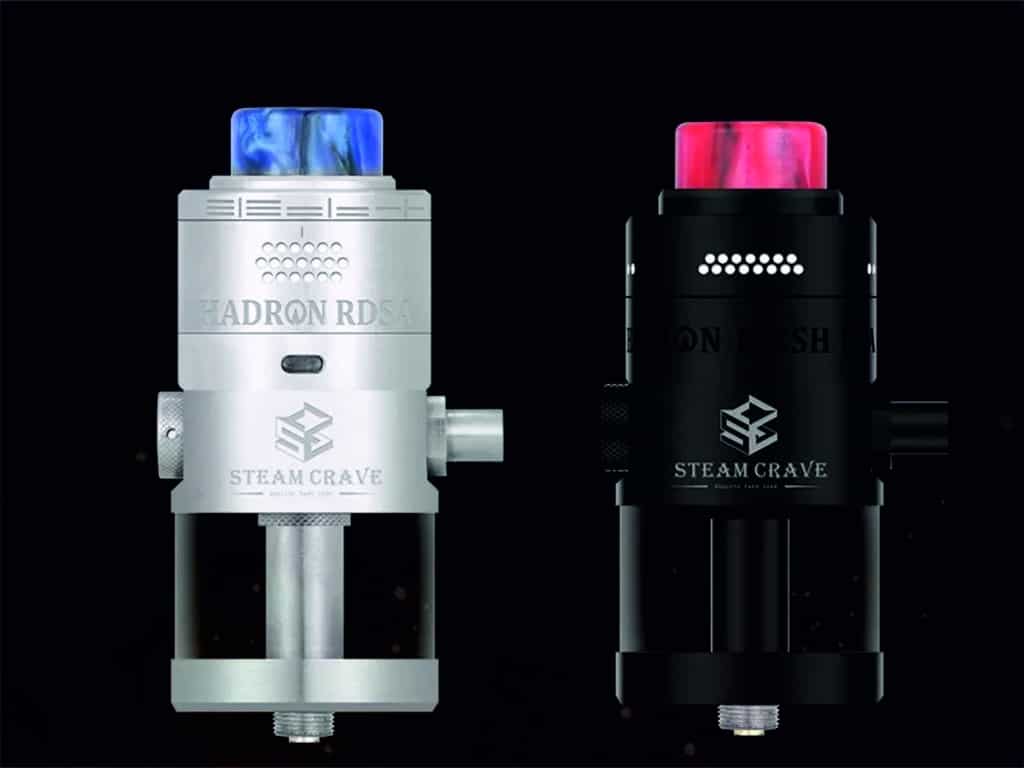
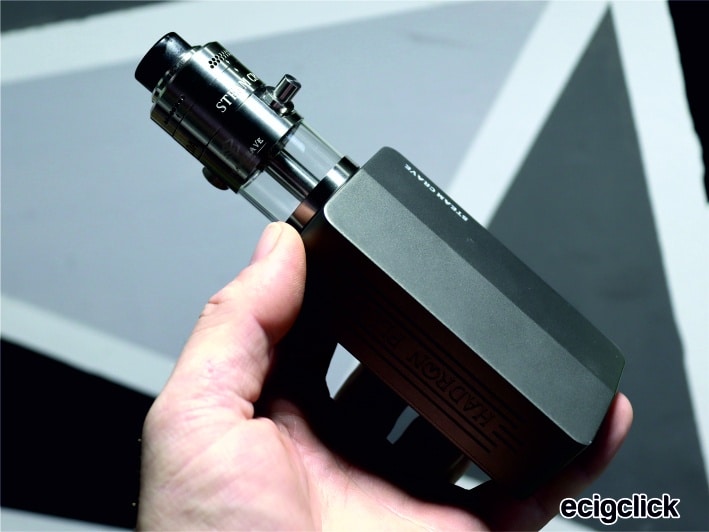
In for review are the Steam Crave Hadron RDSA, Mesh RDSA and the Pumper squonk attachment!
By the way RDSA stands for “Rebuildable Dripping Squonk Atomiser”!
Steam Crave for the most part, are the kings of creating large, high powered mods and tanks and as always they never cease to surprise me with what they come up with next.
At the start of this year I was fortunate enough to try out the Hadron Plus Combo Kit that combined a huge Dual 21700 DNA250c device with the Aromamizer Plus V2. For the most part, it was a thoroughly enjoyable bit of kit, if not a little on the large side – but that’s to be expected from Steam Crave.
What Can We Expect From the Hadron RDSA, Mesh RDSA & Pumper by Steam Crave
So let’s be straight up about what we’re looking at with this next instalment in the Hadron line.
We have two rebuildables!
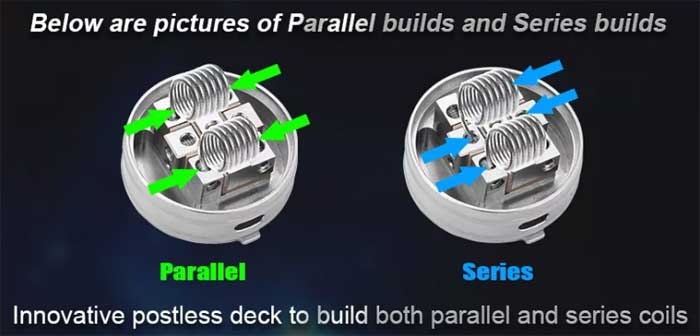
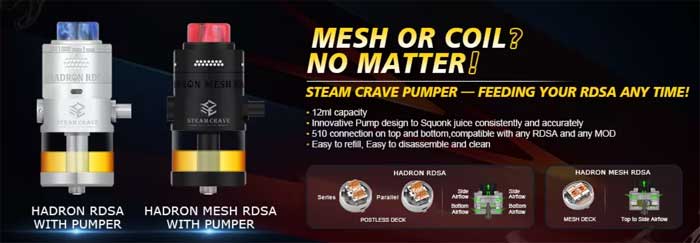
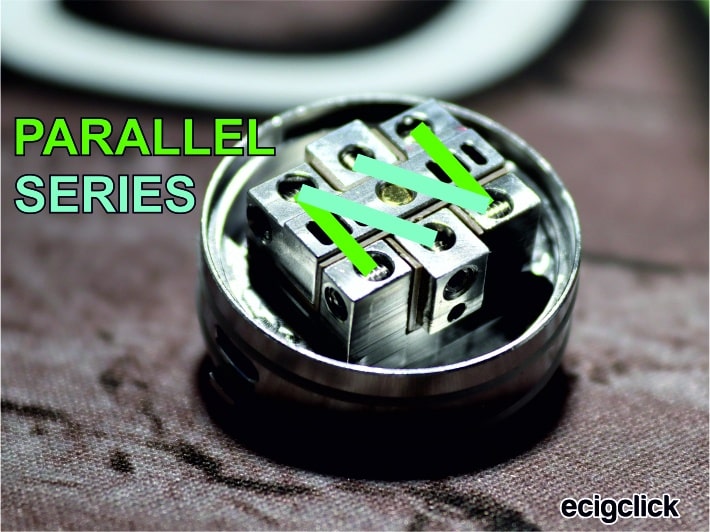
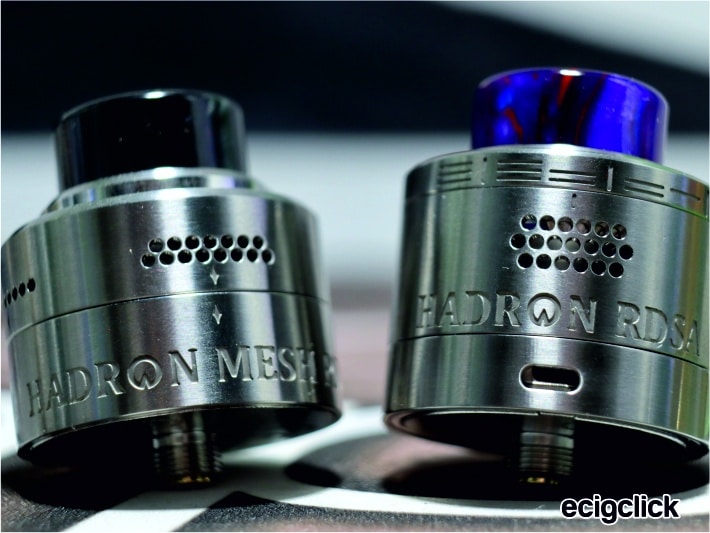
Firstly the Hadron RDSA is a 30mm dripper with a postless deck which is suitable for both series and parallel builds.
According to which clamps you use you can use this as a series or parallel deck. In series mode your coil resistance is added together – i.e. 2×0.3ohm = 0.6ohm total.
In a parallel build your coil resistance is halved so 2×0.3ohm = 0.15ohm total.
There are side and bottom airflow adjustments.
 The Hadron Mesh RDSA is also 30mm in diameter but is a Dual Mesh rebuildable and has side adjustable airflow.
 Both of the above drippers are perfectly compatible with something very new and ‘innovative’ – The Pumper.
 So what is the Pumper? Effectively it’s what I have affectionately called ‘The Squonky Tank’! A 30mm tank which can hold 12ml of e-liquid and has a very clever pump design meaning you can directly pump e-liquid into your dripper without the need to purchase a squonk mod.
However – Size, as always with Steam Crave is the real issue!
Let’s crack on and see how this performs!
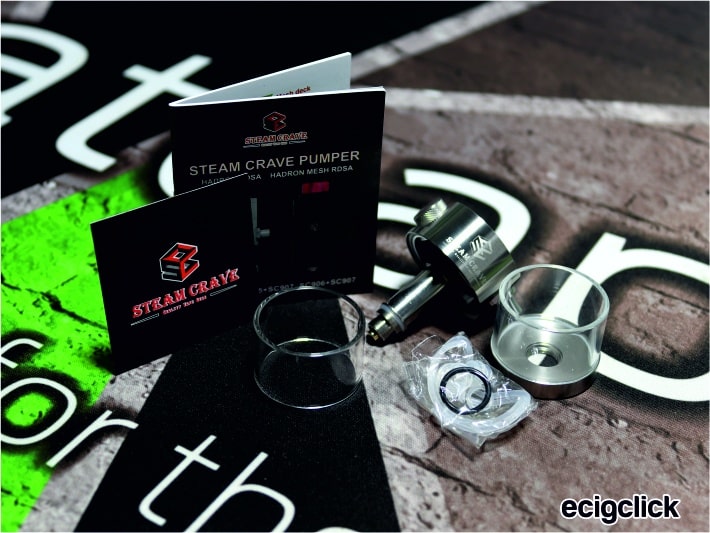
In the Box’s
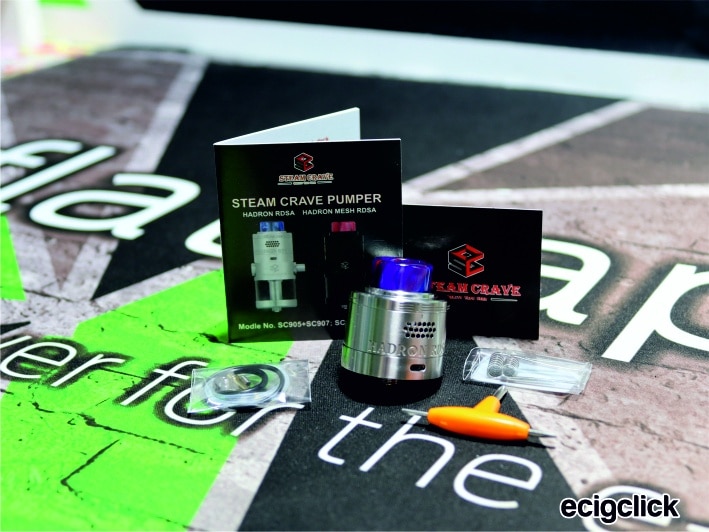
Hadron RDSA
- Steam Crave Hadron RDSA
- Pre-Installed Post-less Deck
- O-Ring spares & screws
- Tri-Tool
- 2 x Coils
- Squonk Pin
- Steam Crave Manual
- Sticker
 Hadron Mesh RDSA
 Hadron Mesh RDSA
- Steam Crave Hadron Mesh RDSA
- Pre-Installed Dual Mesh Deck
- O-Ring spares & screws
- Tri-Tool
- 2 x SS316 Mesh Strips
- 2 x Kanthal A1 Mesh Strips
- 2 x Shoelace Cotton
- Mesh forming tool
- Squonk Pin
- Steam Crave Manual
- Sticker
 Pumper (Squonky Pump)
 Pumper (Squonky Pump)
- Steam Crave Pumper
- Spare Glass
- O-Ring spares bag
- Steam Crave Manual
- Sticker
Hadron RDSA Specifications
 Hadron RDSA Specifications
- Height: 32.5mm Including Drip Tip
- Diameter: 30mm
- Dual or Single Coil Build Capacity. Parallel or Series
- Dual adjustable airflow. Side & Bottom AFC
- 810 Drip-Tip
- Stainless Steel or Black
Hadron Mesh RDSA Specifications
 Hadron Mesh RDSA Specifications
- Height: 30.6mm Including Drip Tip
- Diameter: 30mm
- Dual Mesh build deck with clamp system
- Adjustable side airflow
- 810 Drip-Tip
- Stainless Steel or Black
Pumper Specifications
 Pumper Specifications
- Height: 36.4mm
- Diameter: 30mm (39.1mm with pump button)
- Dual Mesh build deck with clamp system
- Dual adjustable airflow
- 810 Drip-Tip
- Stainless Steel or Black
 Key Features
 Key Features
Fortunately all these three products can be purchased separately.
If you’re just looking for a new 30mm dripper, you can pick up the Hadron RDSA and use however you like. Or pair it with the pumper?
Or if you’re not a fan of 30mm drippers and don’t like the thought of carrying around a bulky squonk mod, you could get the Pumper and use your own dripper as the 510 connection on the Pumper allows use of any dripper you like.
Design and Build Quality
I received the Stainless Steel variants of all three products and across the board, like pretty much all Steam Crave products, the general build quality is to their high standard.
Hadron RDSA
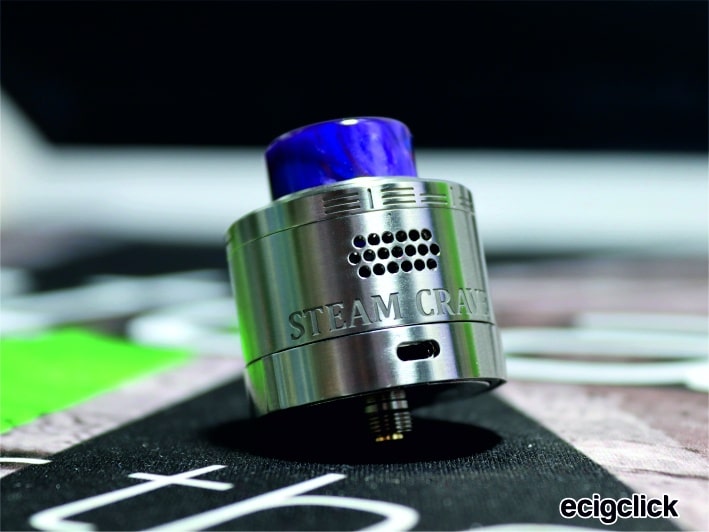
Drip-Tip and Top-Cap
The top of the Hadron RDSA features a nice marbled blue/purple 810 drip tip that fits nicely into the top cap which is push fitted into the barrel. The Top-Cap is also responsible for your side airflow adjustment and rotates nicely with a small amount of restriction. The top knurled design offers a small amount of additional grip
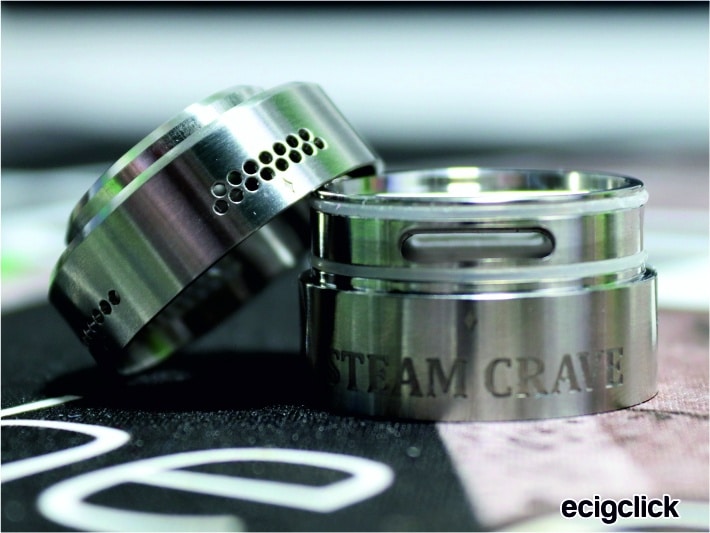
 Barrel & Bottom Airflow
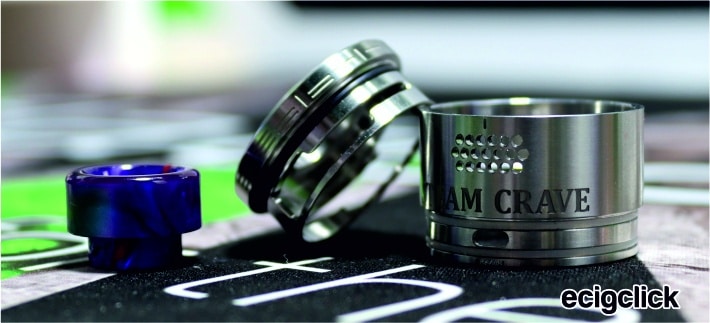 Barrel & Bottom Airflow
The main barrel is held on via O-rings which personally I find a little on the loose side. The barrel has 2 small locator notches that click into place with the deck meaning your airflow is always centred with the coils. The airflow options are quite vast from all open, to just the centre holes open or just the bottom two open.
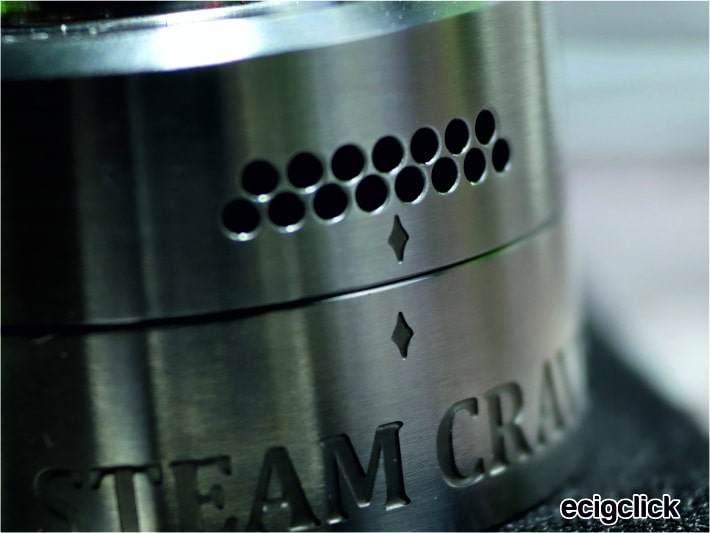
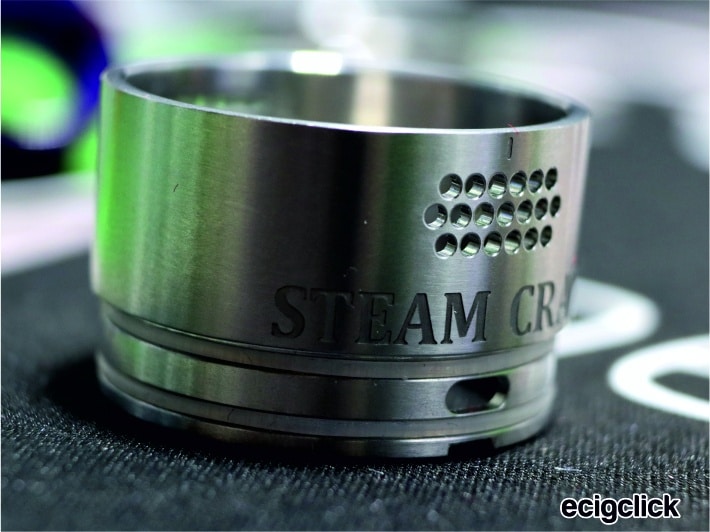 The barrel itself has some nicely etched STEAM CRAVE text along with a honeycomb airflow design. Connected to the barrel, but removable is a bottom airflow ring which adjusts freely and offers a direct airflow under the installed coils.
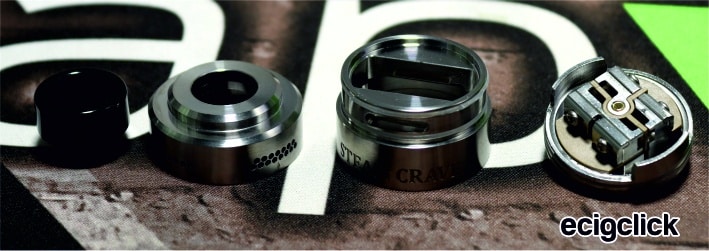
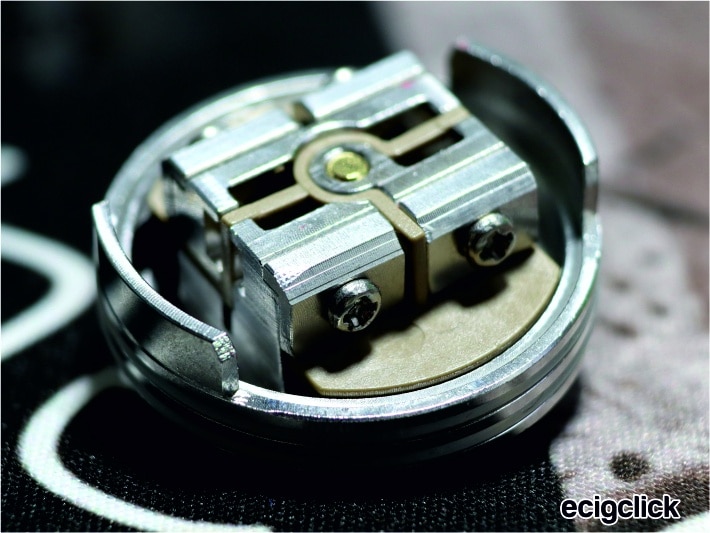
Deck
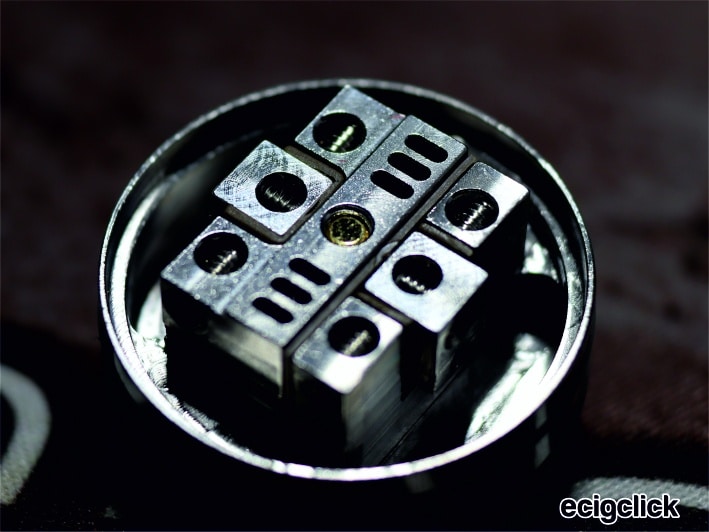
This is where things get a little clever. The Hadron RDSA deck is a post-less deck with Allen key grub screws and can be built as a Series or Parallel build. Therefore you have a vast number of options when building on the Hadron RDA. Not to mention it is capable of holding up to around 5mm ID coils.
 The deck itself is push fitted into the base of the RDA and has two small notches which locate into the groves of the barrel which makes fitment very easy. It also has a fairly nicely sized juice well, ideal for dripping and absorbing e-liquid when squonking.
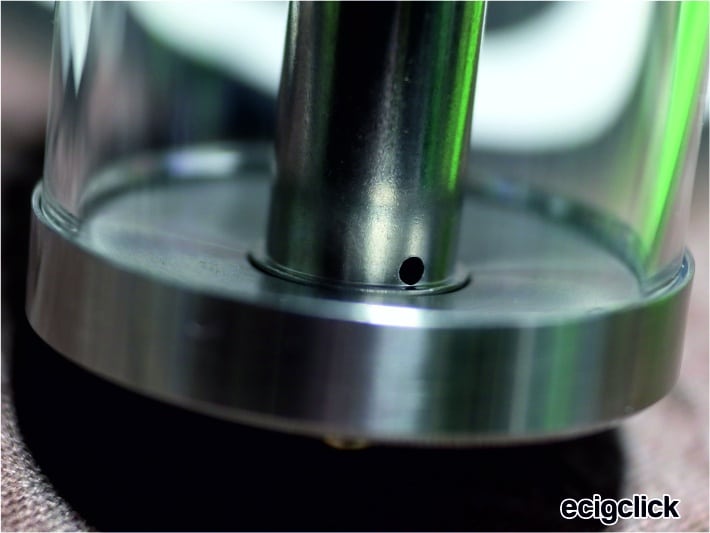
Either side of the deck are two small holes located near the base of the juice well, which is where e-liquid will flow when squonking. So it’s wise to keep these slightly clear to allow e-liquid to flow.
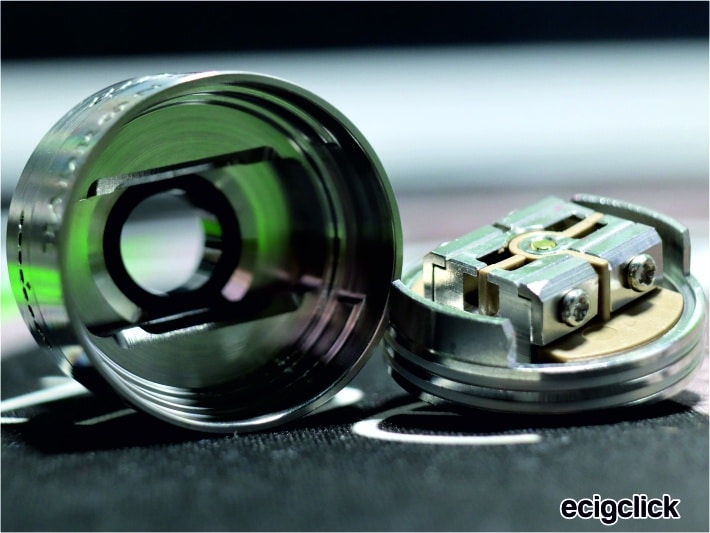
The Base
If you’ve not had a Steam Crave rebuildable before, specifically an RDA or RDTA then the style in which the base doubles up as the deck can be a little strange but its nothing too confusing. The solid 510 pin protrudes nicely and can be swapped for a bottom feed (BF) hollow squonk pin.
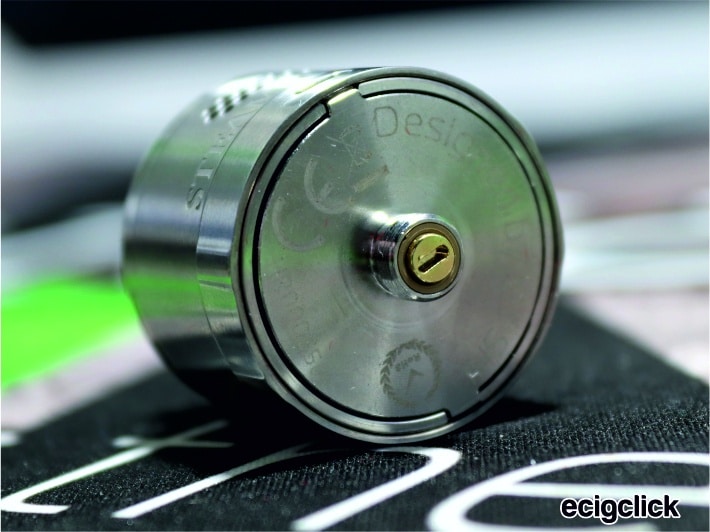 The base includes the usual branding and batch numbers.
How Does The Hadron RDSA Perform?
Building on the Hadron RDSA
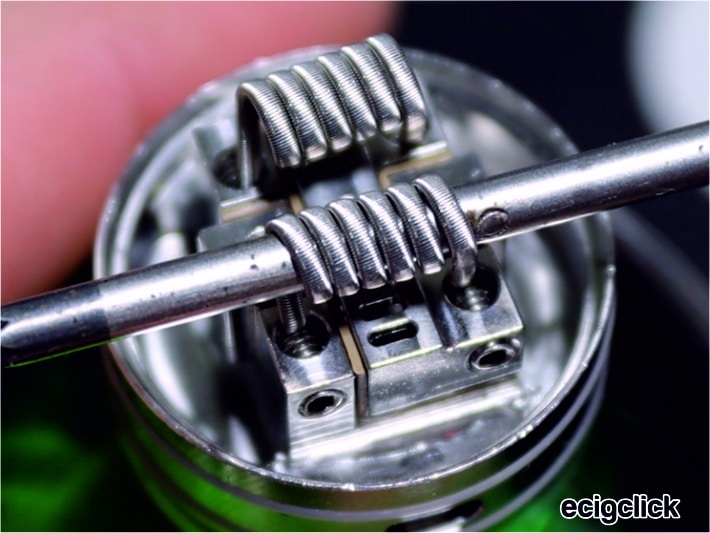
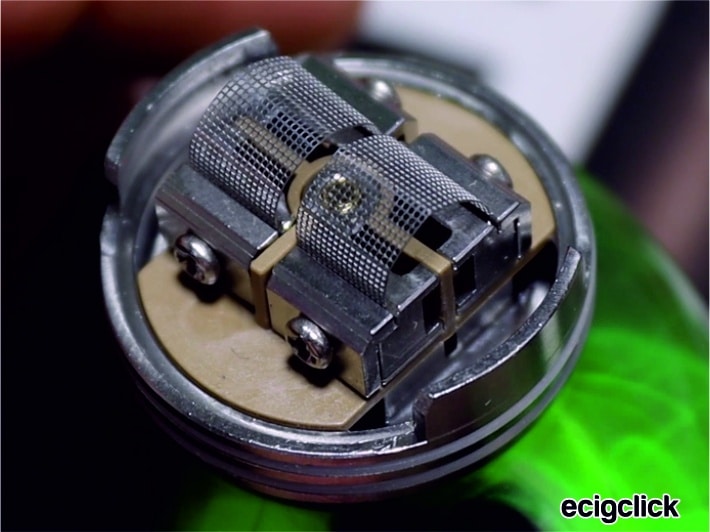
Due to the post-less deck, building on the Hadron RDSA is very easy. Coil position is the main thing to consider.
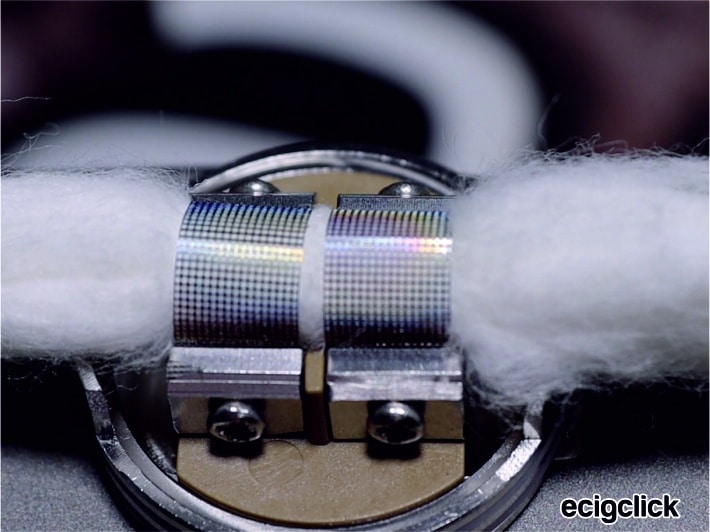
Using the furthest two outer positions will create a Parallel build, whereas if you connect the coils diagonally (Shown in the image below) you will create a Series build meaning your resistance will be higher than that of a parallel build.
 I found cutting my coils at 6.0mm was an ideal length to allow the coils to meet centre with the side airflow, along with leaving enough height for bottom air to flow freely as well as plenty of room for a fair length of cotton.
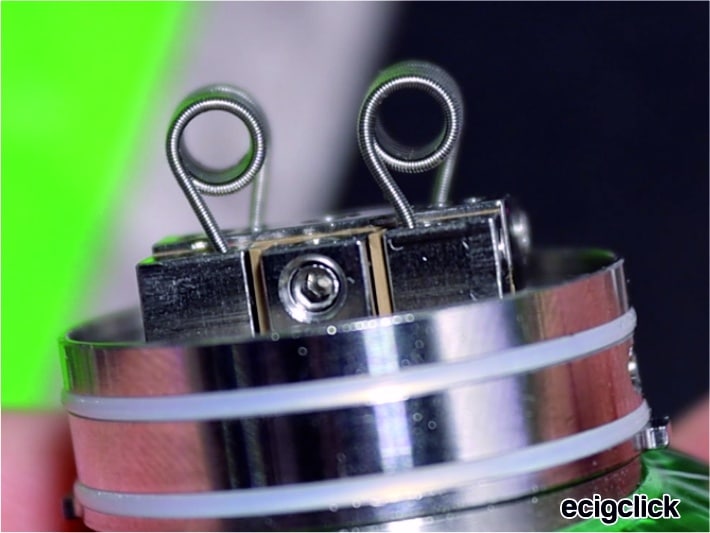
Once I had fitted the coils, I pulsed them at a low wattage and raked out any hot spots until the coils glow evenly from the centre.
Wicking The Hadron RDSA
 Wicking The Hadron RDSA
If you’re planning on using the Hadron RDSA as a dripper, then you’re welcome to pack the deck with cotton to your hearts content. However if combining with the Pumper or a regular squonk mod then its worth considering thinning the cotton a little to allow for a smacking of e-liquid to be absorbed quickly without blocking up and flooding the deck. Which unfortunately, can be done easily if you’re not careful.
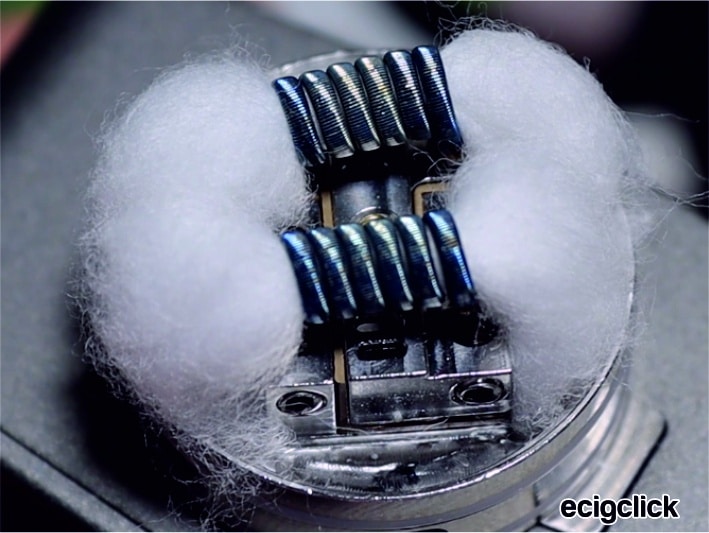 Even though the Hadron RDSA has a fairly sized juice well, once that space is filled with cotton, when squonking the e-liquid will have no-where else to travel but through the bottom airflow and anywhere else liquid likes to travel.
Flavour and Clouds
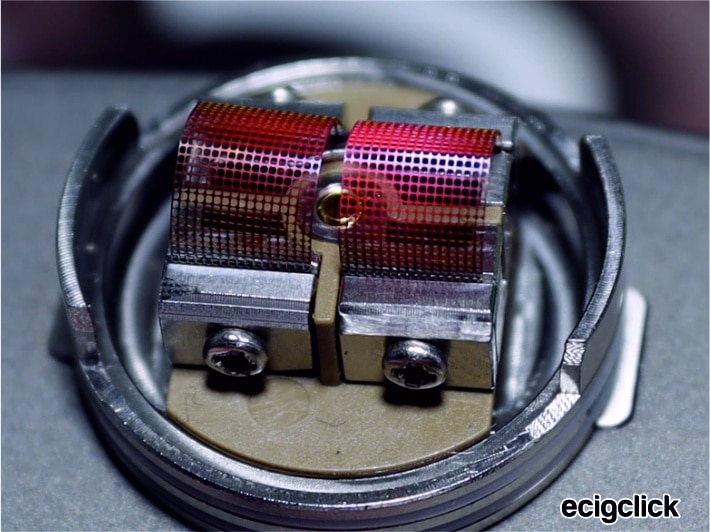
I used a pair of Fused Clapton from Proper Coils, coming out in Parallel at 0.14Ω and vaping at 100watts. The flavour is very good but making a number of airflow adjustments really makes a difference to the experience.
 With both the bottom, and side airflow both open, the airflow is direct, open and surprisingly smooth with the tiniest of restriction. It certainly feels similar in vape experience to something like the Aromamizer Plus V2 with perhaps a little less restriction. Flavour is an 8 out of 10 for sure.
Closing the bottom airflow and relying fully on the side, the restriction is only slightly more noticeable, flavour is the same but if anything it’s a little warmer than with all airflow open.
Closing the side airflow completely and relying on the bottom airflow alone is not a good idea. The draw is just too tight, yeah sure it allows for a restrictive DTL draw but with the large coils installed, it’s a little too toasty for a good vape.
DTL stands for “Direct To Lung” and we describe it in more detail in our Guide To Vape Styles.
 My favourite preference is with the bottom airflow open and just the two bottom rows of the side airflow open. This allows for a little restriction, but a very smooth draw and very good flavour.
Hadron Mesh RDSA
 Although you may think Steam Crave would just swap the deck of the Hadron RDSA and pop a Mesh deck in. Well no – the Mesh RDSA is much more than that and they’ve certainly made different considerations when it comes to airflow and the way in which a mesh coil works differently to a standard dual coil build.
Once thing that surprised me initially with the Mesh RDSA is just how short and stumpy it is. For a 30mm diameter Mesh RDA, its only 0.6mm taller than it is wide!
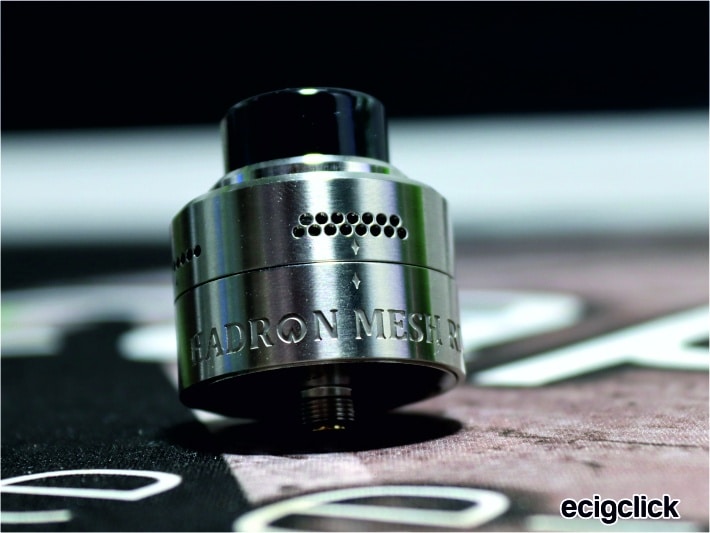
Drip-Tip and Top-Cap
The Black 810 drip tip sits nice and snug on the top cap and sits on a slightly raised platform. The top cap also doubles up as the airflow adjustment and clicks into place thanks to the small locator markers on the top cap. You can adjust the airflow between two options, a dual honeycomb row or a single row of holes on each side.
Inner Barrel
 Inner Barrel
The inner enclosure fits onto the deck via O-Rings and is a little loose in fitment which means it falls off easily. A little annoying but it does have two large airflow slots that allow air to directly hit the dual mesh build. This inner barrel condenses the RDSA so that when air enters the dripper, there is barely any room for it to move, other than across the mesh and up through the drip tip.
Deck
 Deck
DeckThe build deck is similar to the Mesh deck available for the Aromamizer Plus V2 however this one provides space for two mesh strips. Apparently meaning more flavour, vapour and certainly more e-liquid.
The deck consists of 4 clamps with Phillip’s head grub screws which provide a nice tight clamp to your mesh strip.
 The juice well is a little small considering the massive amount of cotton you have to pass through the mesh but with a little thinning, it fits fine.
The deck doesn’t provide any additional support for the cotton under the mesh, which is different to most mesh rebuildables which usually have a spring loaded support for the cotton to keep it pressed against the mesh. Not having this in place, is a mistake in my opinion.
The Base
 The Base
The base of the Mesh RDSA has a protruding 510 pin and the expected branding and batch information. The 510 pin can be swapped for a squonk pin as well but be careful when removing the pin as its holding the deck in place also.
How Does The Hadron Mesh RDSA Perform?
Building on the Hadron Mesh RDSA
The kit comes with two sets of mesh strips, two are SS and the other two are Kanthal A1. In the kit is a mesh forming tool which is handy to carefully bend the mesh into a curved shape.
 Opening the grub screws just enough to fit the mesh into place isn’t too difficult, just be sure not to open the clamps up too much or the screw will fall out. And more importantly ensure the mesh is sat square and flush otherwise its possible to twist the mesh or even kink it.
Once the strips are installed and the clamps are tight, be sure to give the mesh a gentle pulse at around 20W to remove any dirt and to ensure an even glow.
 Generally speaking the deck is very simple to build on, it’s the wicking which can be a challenge.
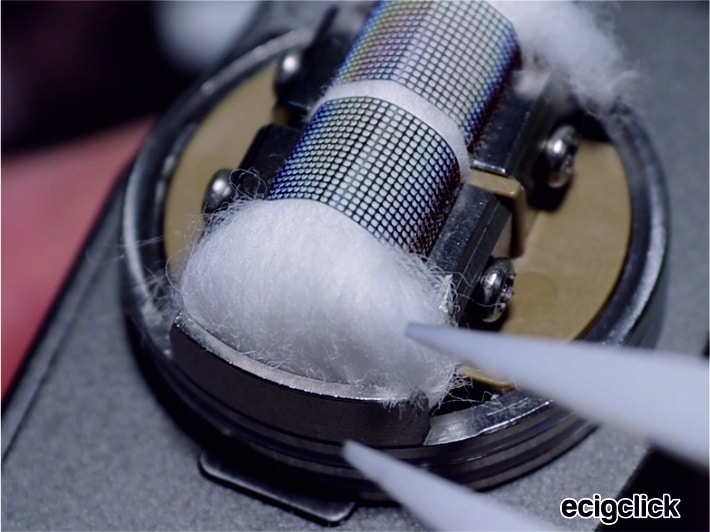
Wicking The Mesh RDSA
The kit comes with 2 large shoe lace cotton strips and it only takes one strip to wick the deck. Gently guiding the cotton through the two strips can be tricky, so take your time.
Once through the two strips, give the cotton a gentle to-and-fro pull to ensure it’s tightly bedded against the mesh.
 I found cutting the cotton at a diagonal angle and raking out a small amount as well allowed for the best wicking and also allows a little room for e-liquid to travel especially when squonking. But it’s a fine line between too much cotton which will mean leaks and lack of saturation and too little cotton which will cause flooding and leaking also.
Honestly I’ve struggled to find the balance between the two, but it’s possible with practice. Less is generally more with this deck. Just be sure to have some tissue close by to mop up any leaks.
Flavour and Clouds
 Flavour and Clouds
Generally speaking Mesh rebuildables can be a bit hit or miss and I’m yet to figure out quite why because in essence they’re generally very similar in style, build deck and airflow design. The Hadron Mesh RDSA sits somewhere in the middle between a great vape, and an under achiever. But it’s still a serious cloud chucker for sure thanks to that Dual Mesh build.
 I started off at 60 Watts with the double slotted airflow and the experience is cool, and airy with average flavour. Ramping up the wattage to 80 Watts (the lowest recommended) and the clouds become thick and dense. There is a slight warmth and the flavour comes through quite well too. However it’s still a fairly airy draw but I always prefer high amounts of airflow on mesh rebuildables so I stuck at it.
The maximum recommended on the Kanthal A1 Mesh is 160 watts. So why not…
 Honestly – I was scared due to the fear of a mesh dry hit from hell! But amazingly the cotton and the mesh work wonders to create a serious cloud whilst still keeping decent flavour. The warmth from this build is surprising considering it is mesh! A little Over-The-Top for me personally, however it works, it keeps up and it’ll fog out a room in no time.
I need to mention at this point, I tried the single slotted airflow but felt it was just a little too restrictive regardless of how you set your wattage so during all my testing I used the double row of airflow slots. I just feel like mesh needs much more airflow.
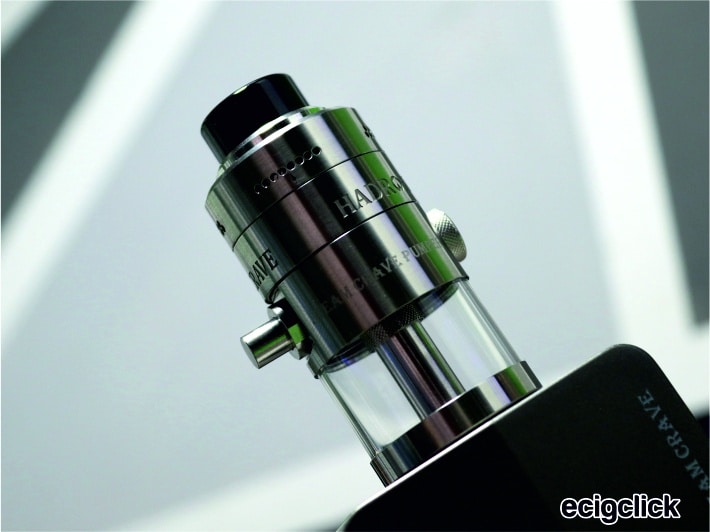
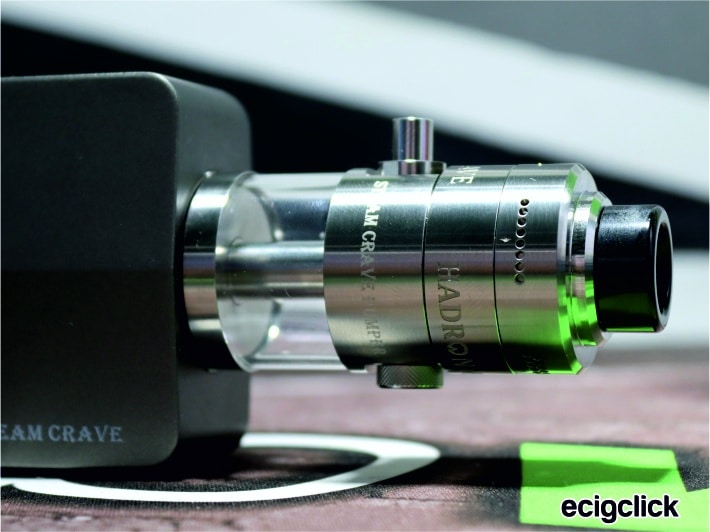
The Steam Crave Pumper
After reading all the waffle about the Hadron RDSA and Mesh RDA you’re probably wondering how well the Pumper can be combined with either of the two rebuildables to become a super mega pumpy squonk tank. So here goes….
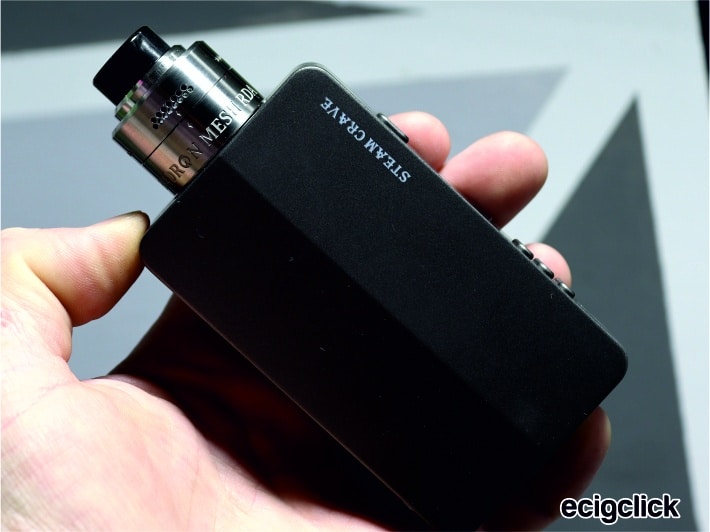
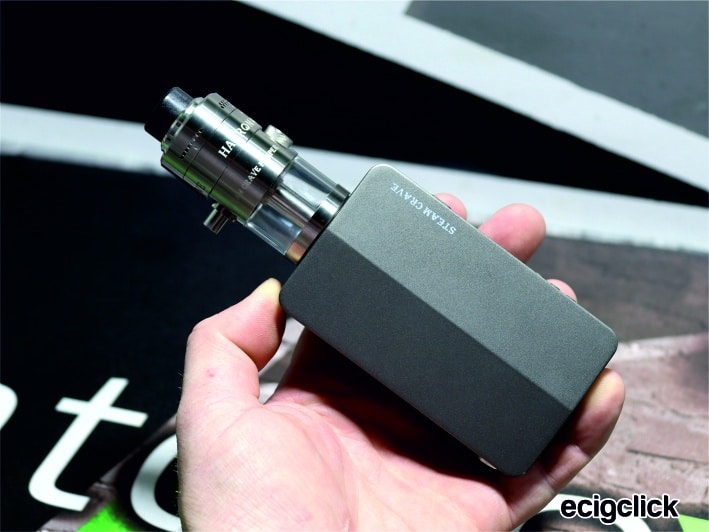
 First off – using the Pumper with any 510 threaded dripper is going to drastically raise the height of your setup. The Pumper is almost 40mm in height so adding that to any setup is going to ‘raise’ its profile quite a lot, if not double it. So that’s something to keep in mind.
The Pumper allows you to use any dripper with squonk pin installed on top of the pumper and removes the need for a squonking device. Very clever and it works very simply.
The 12ml capacity tank doesn’t surprise me as Steam Crave always offer the maximum they can and 12ml is a larger capacity than a number of squonk mods offer.
 The idea is you place your dripper on top of the pumper and when you need to saturate the cotton you give the side mounted plunger a ‘pump’ and e-liquid will travel into the dripper. Simple right?
But is the side mounted push button a bit of an eye-sore? Well yeah a little and it also adds to the width of the setup, but I suppose if you want this kind of thing, you’ll just have to accept it.
The Top/510 Connector
Having a 30mm diameter means you can fit anything up to 30mm on top of the pumper without any overhang. But of course you can use any dripper you like or even an RDTA if it’s capable of being used with a squonker – i.e. includes a hollow (bottom feed – BF) 510 pin.
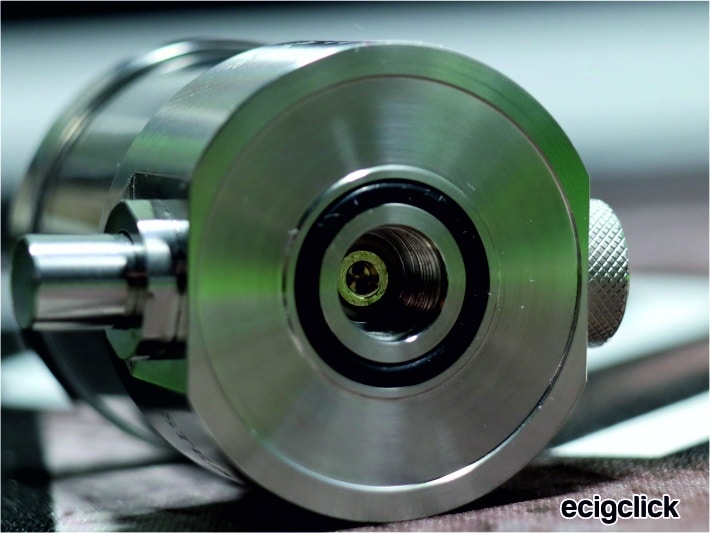 At the top there is a nicely located O-Ring to limit leaking when squonking and also to protect the 510 connection. And it seals quite well.
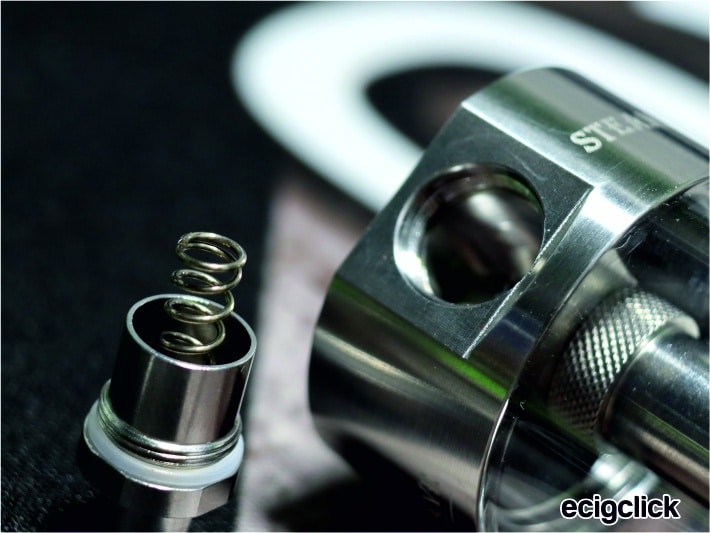
Internals
Taking the Pumper apart and you realise just how simple, yet clever the system is, there is a small hole near the bottom of the pump tube which will force the e-liquid up into the RDA. There are O-Rings top and bottom to create a good seal also.
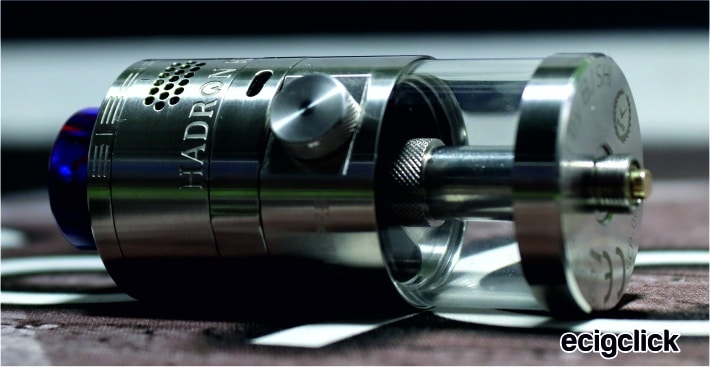
Squonk Plunger
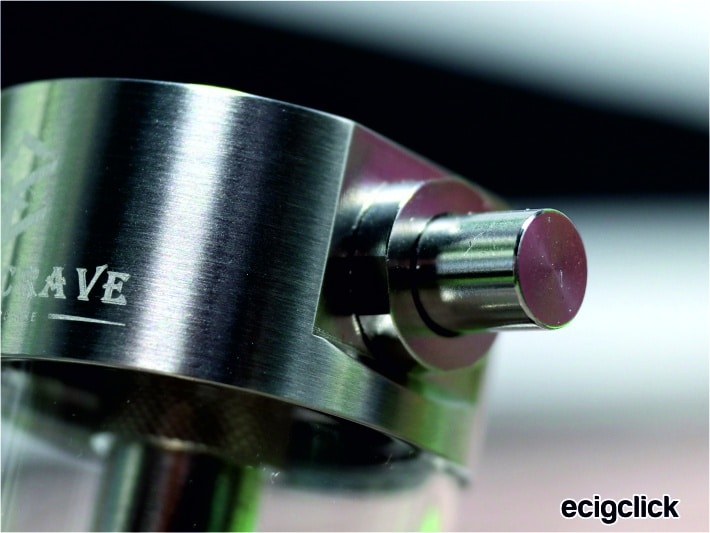
Protruding on one side is the actual Plunger or press-button which does all the squonky magic. The solid feeling button presses smoothly and each press of the button pushes exactly 0.22ml per press. As much as it’s perhaps a little ugly, it’s functional and throughout my testing has been trustworthy.
Fill Port
 Fill Port
Opposite the plunger is the filling port which is protected by a threaded, knurled cap which also has a small airflow hole on one side.
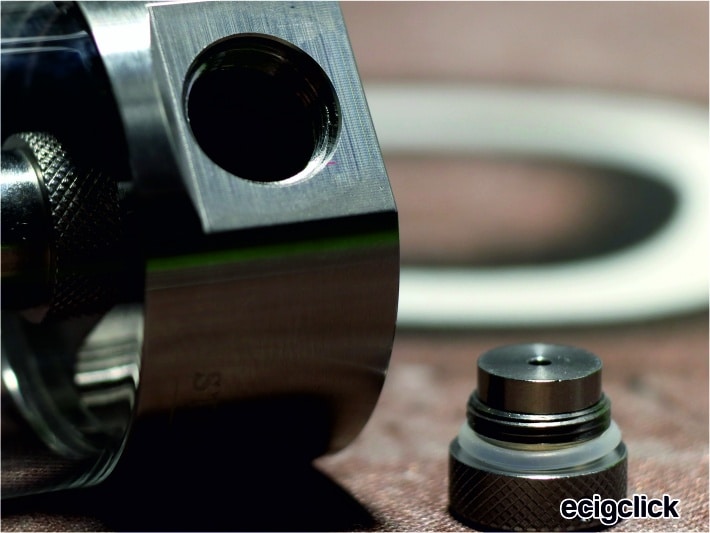 Unscrewing the cap can be a little tricky as it’s quite small, but the knurl helps to grip. However keep an eye on it as it’s very easy to loose and there are no spares in the box!
How Does The Steam Crave Pumper Perform?
Squonking & How many Pumps?
When you buy a new Squonk Mod it can take a little while to get accustomed to how long, or how hard you have to press the bottle to perfectly saturate the coil. And the Pumper is no different. It’s very easy to over-squonk so to start with I strongly suggest the ‘One Pump at a time’ technique – Without sounding too smutty!
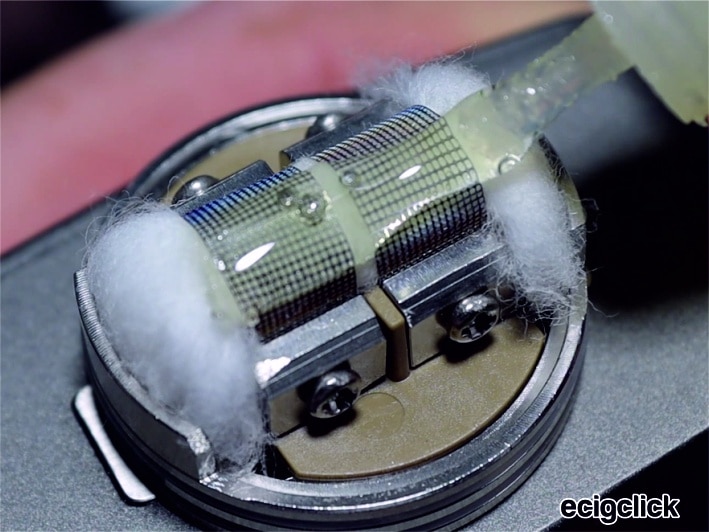
 When using the Hadron Mesh RDA – I found 1 single squeeze of the plunger was enough to force e-liquid right into the centre of the cotton under the mesh – Any more than that and the e-liquid floods the deck and becomes a problem.
When using the Hadron RDSA, I’d say a press and a half is much better. The RDSA has a better juice well which won’t be as packed with cotton as the Mesh deck will, allowing for excess e-liquid to sit in the juice well rather than flooding out. But again, be cautious because an over-squonk can start leaking out through the bottom airflow.
 Generally speaking, once you come to terms with how it behaves, it performs very well and is actually quite fun in a way. It’s also very trustworthy and I’m yet to experience any airlocks, bubbles or seizing of the pump button.
Another thing to mention, I was surprised that adding the Pumper to an RDA didn’t make any difference to the resistance reading on a device. Literally nothing. Adding this kind of size tank in-between the build deck and the 510 connector on the device itself, surely would affect the resistance, but clearly not. So you can appreciate that decent materials have been used to keep the resistance super low.
Aesthetics
There are two main problems when combining the Pumper with any Dripper.
Firstly – it’s a big old unit to add onto your setup, its height and width really make your existing setup top-heavy, especially when freshly loaded up with 12ml of e-liquid. So it doesn’t look very smart, nor is it very practical to carry around.
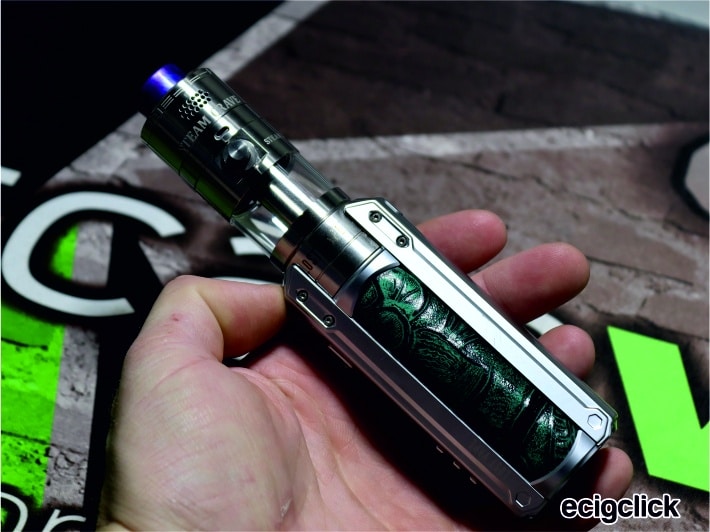 The second issue is alignment – with the pump button on one side sticking out like a sore thumb, I try as hard as I can to align it square with whichever device I have it fitted on, but it’s not always that simple and becomes a little annoying.
However paired up with the Steam Crave Hadron Plus device, I was able to align it beautifully and I pretty much kept it on this mod the entire time. Also meaning the device itself can absorb some of the size of the pumper and RDA making it looks smaller than it is thanks to the size of the Hadron device itself.
Steam Crave Hadron RDSA
Pros
- Well built
- Easy to build deck
- Series/Parallel option
- Great airflow adjustment options
- Deep juice well
- Decent flavour
Cons
- Loose O-Rings
- Side airflow adjustment knurl limited and slippy
- Large diameter may not suit some
Steam Crave Hadron Mesh RDSA
 Steam Crave Hadron Mesh RDSA
Pros
- Easy to build
- Nice airflow adjustment options
- Fairly good flavour
Cons
- Loose O-Rings
- Limited juice well
- Tricky to wick correctly
- A slight over-squonk and it leaks
- Drinks e-liquid
- Requires high power to be effective
Steam Crave Pumper
Pros
- A great budget option to squonk
- Massive capacity
- Works reliably
- Compatible with any squonking RDA
- Easy to fill
Cons
- Ugly
- Fill cap is tiny and easy to misplace
- Adds massive height to your device
Final Review Verdict
Well – where do I start.
Firstly, and one thing I really like, each of the components listed in this review can be independently purchased and work perfectly well on their own, well – as long as you have a dripper prepared for the Pumper. Considering the size and build quality of the three products, they’re all very competitively priced also.
Obviously, pairing one of the RDA’s with the Pumper, isn’t going to be everyone’s cup of tea. But for those who enjoy this kind of high powered ‘Out There’ systems, particularly the Steam Crave Nuts – I’m pretty sure they will thoroughly enjoy the experiences on offer from these products. So let’s keep these factors in mind when rating the Steam Crave Hadron RDSA, Mesh RDSA and Pumper.
Would this device be long lasting and still work 3, 6 or even 12 months from now?
All three products are to Steam Craves high standards of build quality and durability. The only minor observation comes down to how loose the O-Rings are on the barrels of the RDA’s and they certainly need beefing up a little. The top cap coming off too easily is certainly my biggest nit pick out of every Con I listed above.
Does this device deliver the flavour, vapour and general experience I require, in order to be enjoyed?
Generally speaking the vape experience is very good, it’s certainly Steam Crave-esque. Sure if you’re looking for a high powered, sub-ohm vape then the two RDA’s can certainly provide that. Personally I’m a fan of larger RDA’s, 28-30mm in particular as they allow a plume of vapour and tons of flavour along with a bagful of airflow.
Is this device versatile to suit a new vaper and an experienced one alike?
Clearly not for the newbies – An experienced hobbyist would certainly enjoy this if they have a large high power device to pair them with. Just remember when all put together, this isn’t the kind of kit you can stick in your back pocket.
 Have you bought the Hadron RDSA, Mesh RDSA or Pumper by Steam Crave?
Or have you given it a try?
Let me know your thoughts in the comments below!


