The name they’ve given this one is a bit of a mouthful – the Steam Crave Aromamizer Plus V2 RDTA – we’ll have to see if I’m getting mouthfuls of tasty flavour!
Steam Crave Aromamizer Plus V3 RDTA Review
The last time I reviewed a product by Steam Crave, it was their dinky little mouth to lung focused Glaz Mini.
I really enjoyed it, but Steam Crave are more known for their big, bruising, DTL tanks!
You can read more about the difference between Mouth To Lung (MTL) and Direct To Lung (DTL) here.
What Can We Expect From The Steam Crave Aromamizer Plus V2 RDTA?
This is the second version of Aromamizer Plus, and along the way we’ve also had the Aromamizer Ragnar and the bucket sized Titan!
Unlike some companies, when Steam Crave update a product to a V2, they refine what worked and fettle the rough edges, rather than doing a total redesign that brings its own issues.
We never reviewed the original Aromamizer Plus. But we did review the Aromamizer RDTA, Aromamizer V2 RDA and the Aromamizer Supreme RDTA back in 2015 and 2016. So I think we’re a little overdue to check out one of these!
The Aromamizer Plus V2 is an interesting bit of kit, because whilst it’s an RDTA, the deck is at the bottom of the tank. With a clever double walled chamber, the airflow hits the coils from the sides.
The tank section is actually above the height of the deck, and for this reason your wicking needs to be spot on.
Trust me, you do not want a leak with a possible 16ml of e-liquid in your tank!
This was supplied free of charge for the purposes of review, but I will report back honestly on what I find!
Inside the Box
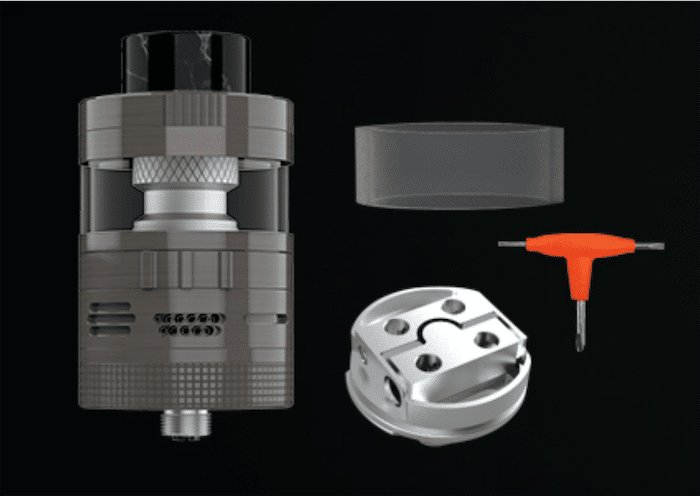
Basic Kit
- Aromamizer Plus V2
- Spare 8ml Glass
- Spare O-rings and Grub Screws
- T Shaped Allen Key
- Manual
- SteamCrave Sticker
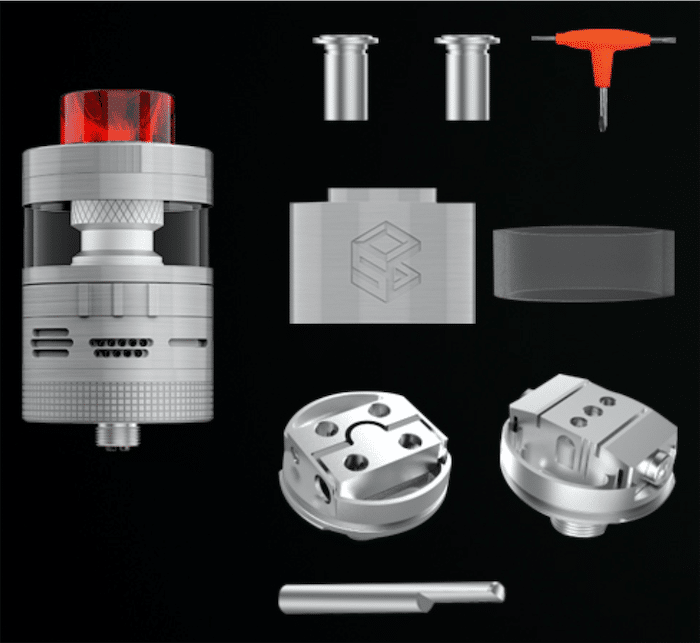
Steam Crave Aromamizer Plus V2 RDTA – Advanced Kit
Same as basic kit with the addition of:
- 8ml Extension Piece
- 2x 6mm Chimney Reducers
- Mesh Deck Kit
Steam Crave Aromamizer Plus V2 RDTA – Specs
- Dimensions, Excluding 510 & Drip Tip – 30mm x 50mm (standard), 70mm (extended), 35mm (RDA)
- Coil Type – Dual Coil Postless Deck, Mesh Deck included in Advanced kit
- Also available – Single Coil Deck, Series Deck, Velocity Style Deck
- Capacity – 8ml (16ml extension included in advanced kit), TPD Version Available
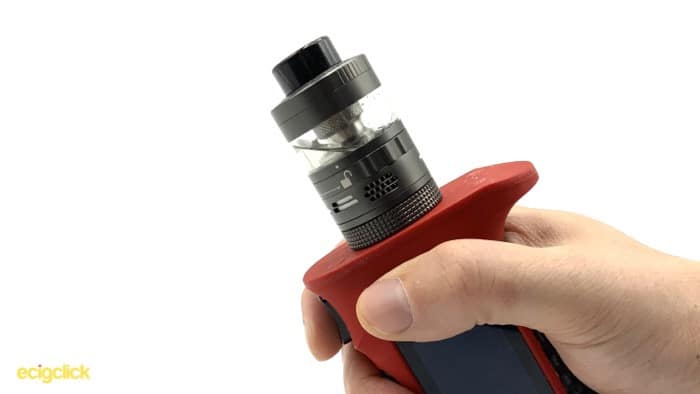
Design and Build Quality
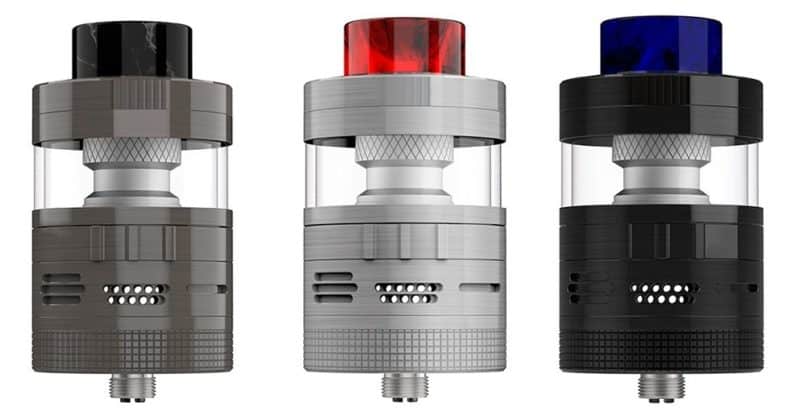
The Steam Crave Aromamizer Plus V2 RDTA comes in three different colours, Steel, Gunmetal, and Black. I received the Gunmetal for this review.
First impressions are really positive.
This is a very solidly built tank, there’s a good amount of weight to it and all of the threads are lovely and smooth.
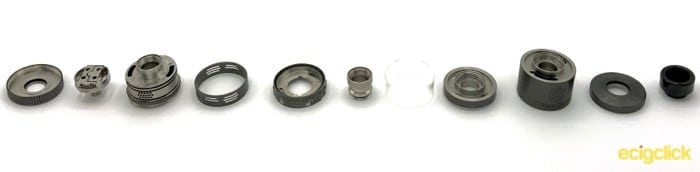
It also strips apart into a huge collection of pieces, I always like it when you can take your tank to pieces to clean it.
Steam Crave Aromamizer Plus V2 RDTA – Capacity Options
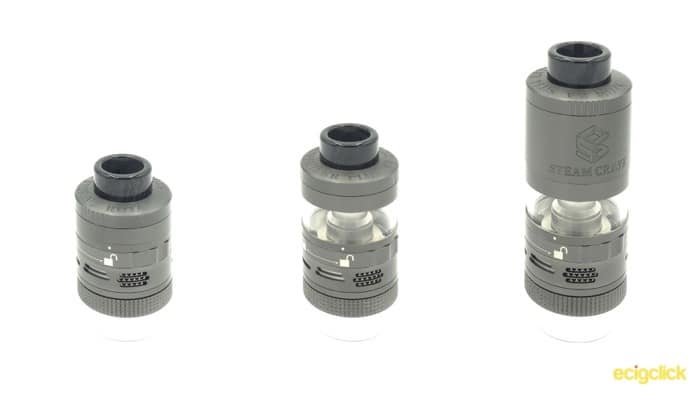
With the advanced kit, you get an extension piece in the box to increase your e-liquid capacity.
But with either the basic or advanced kits, you can also transform it into an RDA, by removing the tank section completely, this gives you three different possibilities when using the advanced kit.
Steam Crave Aromamizer Plus V2 RDTA – Drip Tip
Starting at the top, you have a resin 810 drip tip.
The o-rings are inside the top cap, so all your favourite goon style drip tips will fit.
Top Cap
The top cap has some nice deep engraving on it with the model name, I really like how deep and solid this feels, much like the rest of the tank!
There’s a little bit of knurling on either side to give you a bit of grip, though I wish this were a little deeper, or went all the way around.
Under the top cap you have two enormous fill ports, so no problem refilling with even the biggest bottles!
Extension Piece – Advanced Kit
If you have the advanced kit, you’ve got the option of using the 8ml extension piece, and this brings the capacity up to a whopping 16ml!
There’s a little bit more engraving on this, with the Steam Crave Logo on one side.
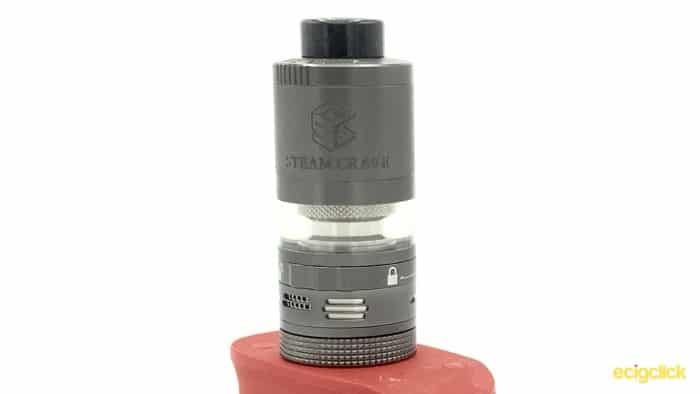
If you want an extension kit, but fancy something a bit different, they also do a full glass extension kit, I’m afraid I haven’t seen any pictures of this installed yet!
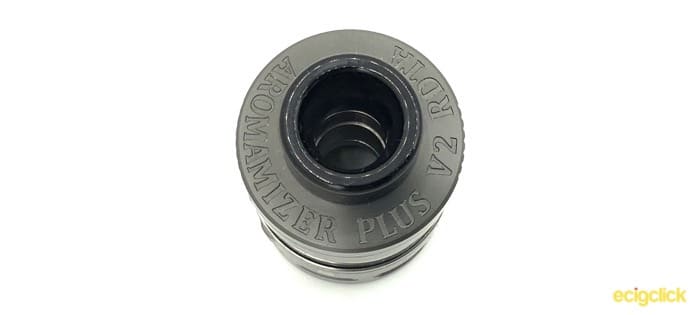
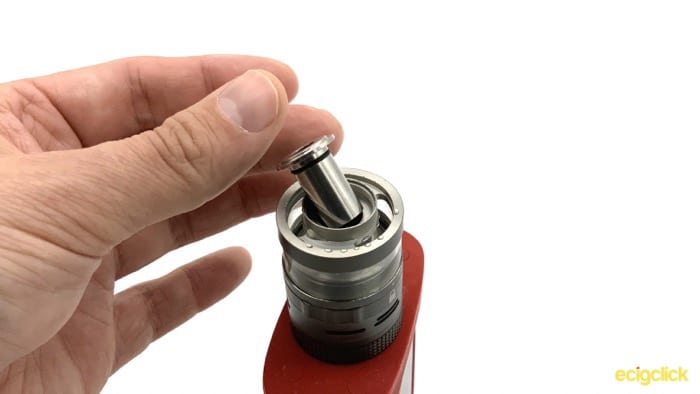
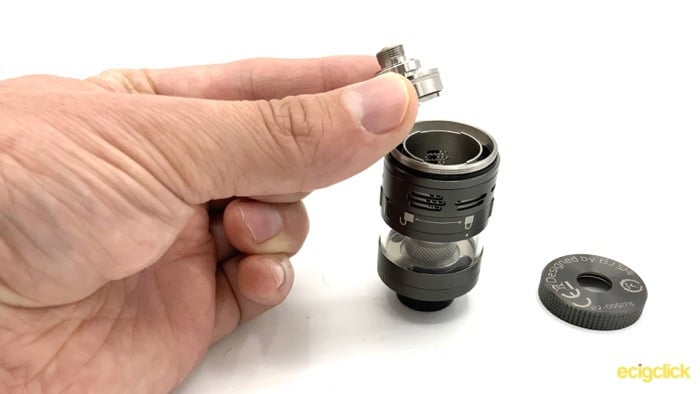
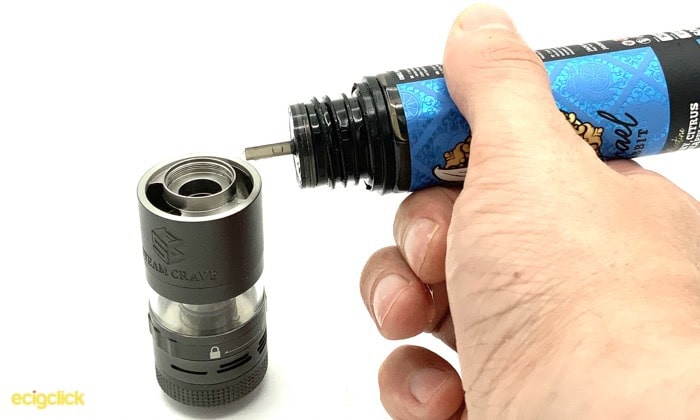
Steam Crave Aromamizer Plus V2 RDTA – Chimney
The internal chimney section is nice and grippy at the top. This is useful because if you want to strip the tank down, this needs unscrewing to totally take it to pieces, or to convert it to an RDA
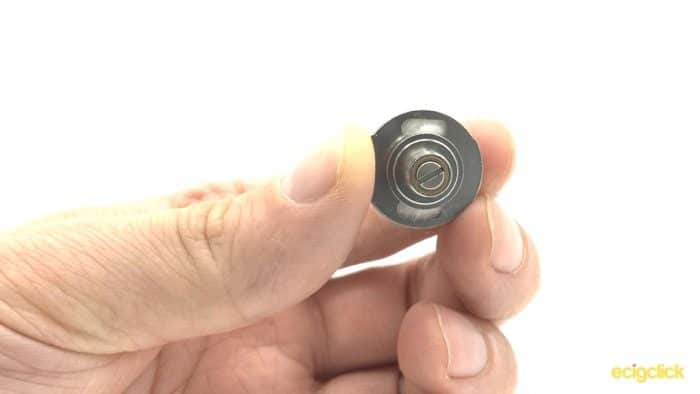
Juice Flow Control
I love the juice flow control on this. It is super simple to use, with a very clear Lock/Unlock symbol that you twist.
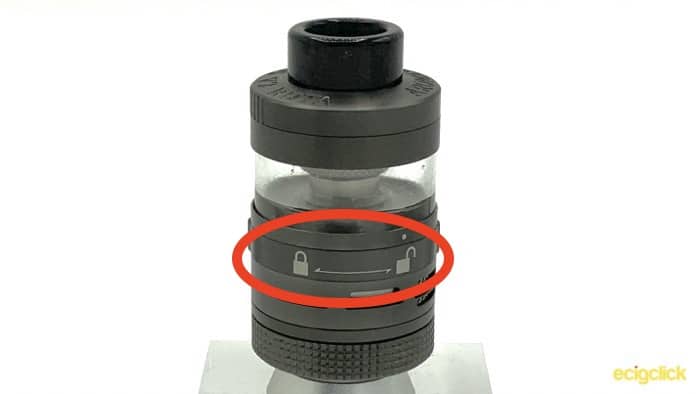
It has stops on closed and open, and I much prefer this to a control where you need to partially unscrew the tank (but not too far!) to open up the juice ports.
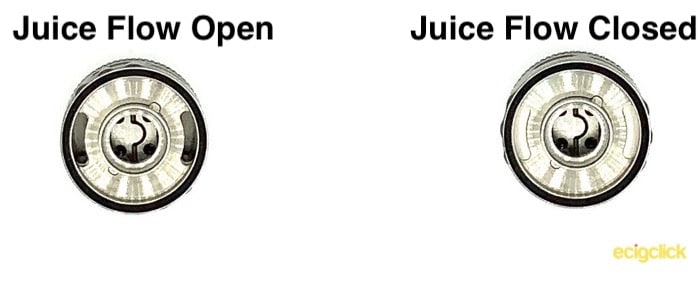
You can see that you’ve got two big juice ports, that fully open and close when you twist the ring.
Steam Crave Aromamizer Plus V2 RDTA – Airflow Control
The airflow control is similarly easy to use.
Because of how the chamber is double walled, the airflow is going to be side airflow slamming straight into your coils.
It’s a honeycomb airflow with 16 holes. You have 3 different cut outs, one that has 3 lines for all the holes, 2 lines with 11 holes, and 1 line with 6 holes.
You can then fine tune this a little more by partially closing off one of those three options.
If you’re using the mesh deck, Steam Crave recommends you remove the airflow ring, and install it upside down. This will then switch the 2 slit airflow from being the bottom and middle lines, to being the top and middle lines.
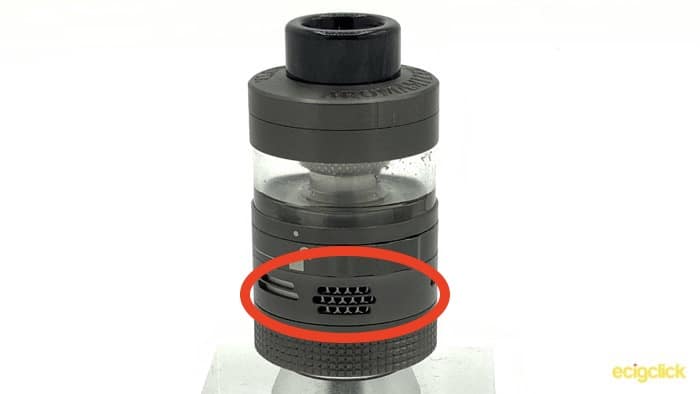
The picture above shows it in this configuration.
I’ve tried this out both ways and haven’t noticed much of a difference, so don’t worry if you forget!
One important thing to note, is that if you are turning the airflow ring over, be very careful when you put it back into place. The airflow slots are just the right size to trap one of the o-rings as you push it down.
Airflow Reducer – Advanced Kit
In the advanced kit you have the option of installing a reducer that fits inside the main chimney, and this takes the chimney down from a diameter of 14mm to 6mm.
Steam Crave recommends that this is used for the mesh deck and for the single coil accessory deck
You get two of these in the package with the advanced kit. You can then put one into the main chimney section, and the second into the extension piece if you’re using it.
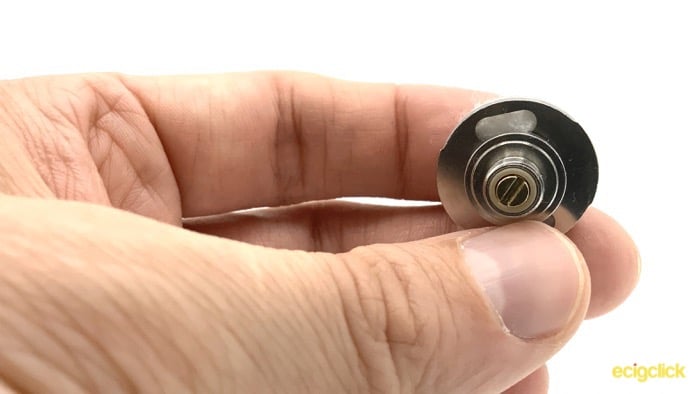
Steam Crave Aromamizer Plus V2 RDTA – Postless Deck
The postless deck is set up for a dual coil, though you could run it with one massive single coil if that’s what you wanted.
It uses grub screws trap the leads, and you get spares in the box.
My one complaint about, is that the coil holes could be a tiny bit wider.
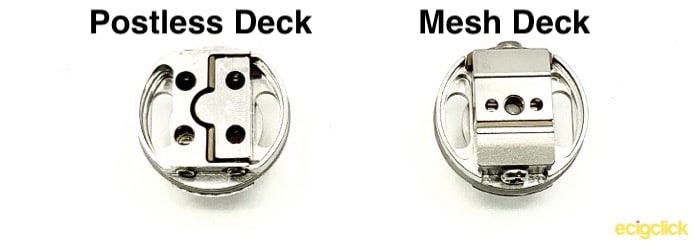
If you like to use particularly large coils, you might find it a little tight. This hasn’t been an issue with any of the Aliens or Fused Claptons I’ve used, but it’s something to be aware of.
Steam Crave Aromamizer Plus V2 RDTA – Mesh Deck – Advanced Kit
We’ve all seen a mesh deck like this before, and there’s nothing particularly innovative about it. It’s well made, and the clamps are spring loaded which I always prefer to work with.
With the mesh deck kit, you also get a squonk pin included, so you can convert it to a squonker if you want to. I would imagine that this is going to be more interesting to those that use it in RDA mode.
Steam Crave Aromamizer Plus V2 RDTA – Accessory Decks
Steam Crave is always good at creating additional bits and pieces for your tank, and the Aromamizer Plus V2 RDTA is no different. You have a choice of 3 different decks that you can choose to purchase separately.
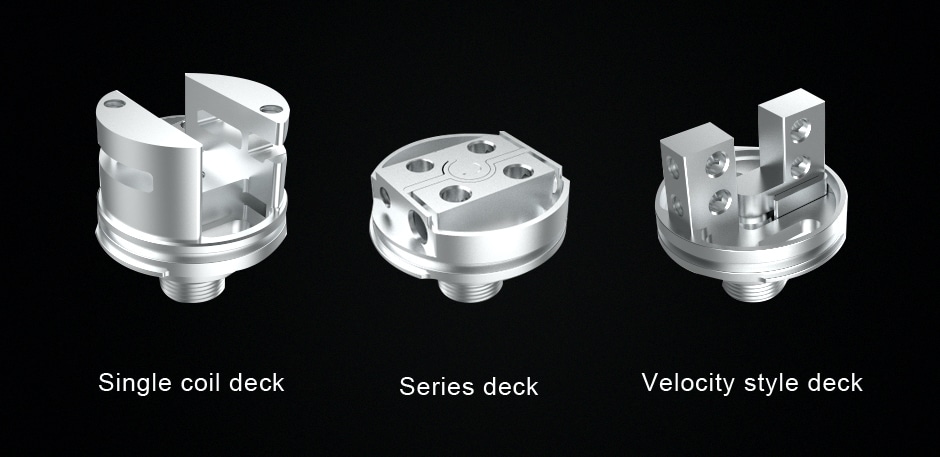
Single Coil Deck, Series Deck, and Velocity Deck.
The two most interesting ones here I think are the single coil deck for using a big complex coil, and the series deck.
The series deck is set up very much like the postless deck, but the positive block is split in two.
What this means is that on the normal postless deck you halve the resistance of your coils to get the resistance of the tank.
With the series deck, you double the resistance of the coils to get the resistance of the tank.
This is then perfectly set up for crazy-powerful series boxes, like the Hammer of God V3, without having to build really long coils.
How To Build The Steam Crave Aromamizer Plus V2 RDTA
- With either deck, the first step is to unscrew the bottom cap, and pull out the deck from the main chamber.
Postless Deck
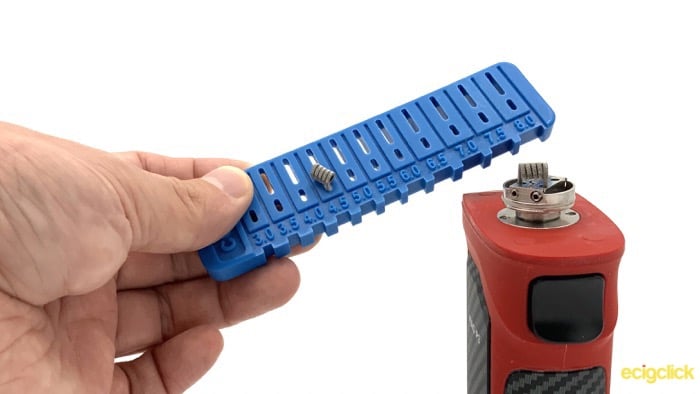
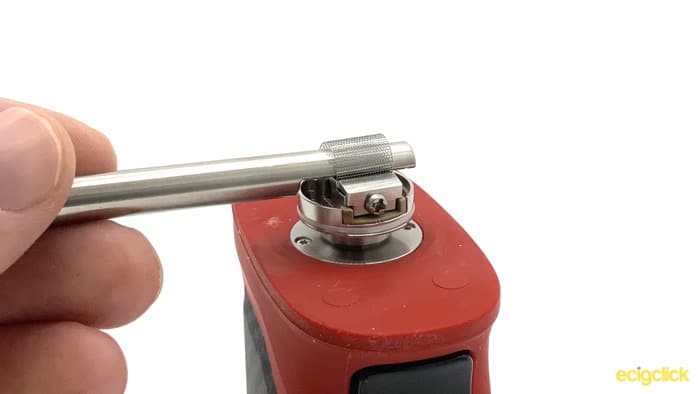
- Snip your leads to 4.5mm (I’m using the Coily Tool to measure this). Then unscrew the grub screws and place your coils into the deck. Tightening them up to clamp the coils in place.

- Use a coil jig to level your coils and make sure they look equal, then dry burn them and rake them with ceramic tweezers to make sure they’re glowing evenly.

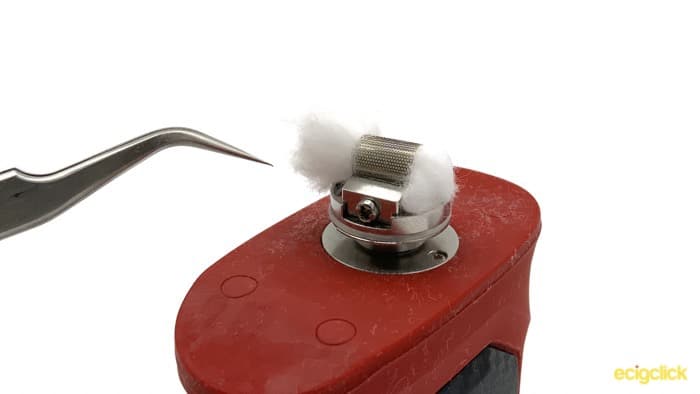
- Insert your wicks and cut them to about 2cm. I always leave a little extra to trim off once I’ve raked it out. Give the ends a rake to thin them out a little. When you’re ready to put them into the wick ports, gently push them in towards the coils. Keep doing this and it will allow the ends of your cotton to find their own way. Do not cram them in, as if you compress the cotton too much you will choke off the juice.

- Once you’ve done this you can turn it over and take a look. You should see that your cotton is totally covering the juice port, without sticking through it too much. If you see any big gaps, remove the cotton, fluff it out a little more, and try again.
Mesh Deck – Advanced Kit
- Unscrew the spring loaded clamps

- Use the forming tool that came with the mesh deck to bend your mesh to the right shape. As this has a cut out on one side, you can use this to position your coil on the deck
- For wicking it, I have used one of the agletted cotton strips that come with this. You need quite a lot of cotton packed in directly under the mesh, to avoid the cotton collapsing on itself and giving you a dry hit
- Thin the ends out, and as with the postless deck, just push it back in towards the deck for the cotton to feed down in the juice ports. It is even more important here to make sure you don’t choke off the juice, as a dry hit from a mesh deck is nasty!
- Turn it over and again you should see the cotton covering the whole of the juice port without poking through, and with no big gaps
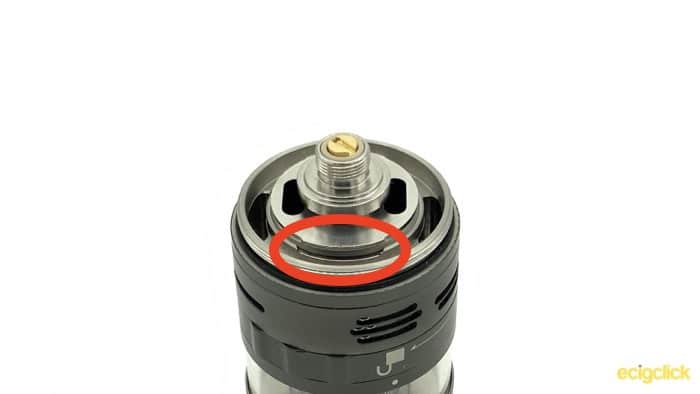
Reassembling
- When you are ready to install your deck, first prime the wicks with some e-liquid to get them nice and saturated. If you look at where you removed the deck earlier, you will see there are two notches in the chamber, these match up with the tabs on either side of your deck. Make sure these marry up, and then screw on the bottom cap
How To Fill The Steam Crave Aromamizer Plus V2 RDTA
Important – Remember to close your juice flow control before you unscrew the top cap.
Once your juice flow control is closed, unscrew the top cap and fill up with your favourite e-liquid.
Screw the top cap back on, and remember to open your juice flow control once you’ve done this.
How Does the Steam Crave Aromamizer Plus V2 RDTA Perform?
I’ve tested this out thoroughly over the past couple of weeks.
I would love to give you a total comparison of each and every combination, but this review would end up being the size of a small novel!
So I’m going to give you my impressions, and how the main variables change the quality of the vape. I’ve used both the mesh deck with the Steam Crave mesh at 0.18Ω, and the postless deck with a couple of fused claptons at 1.0Ω.
I’ve mostly been using Rachael Rabbit’s, Blueberry, Citrus and Pineapple. As well as Tonics Vape Co, Sloe Gin & Cucumber. Both at 70/30 VG/PG.
Steam Crave Aromamizer Plus V2 RDTA – Airflow
You’ve got loads of airflow options on this tank. On a scale of 1 to 10, without the chimney reducer in, the airflow ranges from about 7 to a 9.5.
Especially running the dual coils at 80W and above, the vape is really smooth, with very little turbulence and not too noisy.
Popping in the chimney reducer in the advanced kit, and it dramatically alters the airflow, down to something nearer a 5 to a 7.
This is useful if you’re running at slightly lower wattage with the mesh deck or the single coil, otherwise it can get a bit turbulent.
Having a smaller chimney definitely reduces this, and keeps the vape as smooth as it is on the higher wattage.
Steam Crave Aromamizer Plus V2 RDTA – Cloud Production
Even using a fairly pedestrian pair of coils, the cloud production from the postless desk is impressive. If you’re wanting to cloud out a room then this is definitely capable of it.
Provided you have your wicking right, you can also run this at very high wattage.
I’m not overly fond of a hot vape, but I was happily getting it up to around 150w without any sign of getting a dry hit.
Switching over to the mesh deck and cloud production is definitely a little lower (as you would expect), but still thick and luscious.
Using it without the chimney reducer though, does make the clouds feel a bit weedier. So I would definitely recommend using the reducer if you’re running wattage below about 50-60w.
I’m currently running the mesh at about 70W and it’s a lovely rich vape.
Steam Crave Aromamizer Plus V2 RDTA – Flavour
Absolutely cracking flavour with both decks on this. I think the side airflow, like you would get in a dripper, really brings a lot of flavour with it.
Although I was a little bit worried that this would fall off a bit with the distance it has to travel to your mouth, I found that the difference in flavour was pretty minimal from using it in RDA mode to using it in standard mode, and from standard mode to extended mode.
If you compare extended mode and RDA mode against each other, you don’t get quite as much flavour when it’s extended, but it’s not a big enough difference to convince me to use it as a dripper.
The mesh deck gives you a slightly cooler vape, with more separation between the various flavour notes in your e-liquid.
Having said that, I preferred the slightly punchier flavour of the standard coils.
Any other points?
One of the biggest worries about a tank that’s holding so much e-liquid is the possibility of leaking.
I’m pleased to say that in the two weeks I’ve used it, I haven’t had even the smallest leak from this tank – provided you get your wicking right of course!
Having the juice flow control also means that if you’re traveling somewhere and have it in a pocket, or a bag, you can just shut off the juice, and so the only liquid that could possibly leak is the amount in the deck and lower section – always good for peace of mind!
Dry Hits and Mesh!
Another point that people worry about, understandably, is getting a dry hit from mesh. If you’ve never had a proper dry hit from a mesh strip, it is very unpleasant.
This tends to happen when either your cotton collapses in on itself, pulling it away from the mesh.
Or if the wicking isn’t up to snuff, and the cotton underneath the mesh can’t replenish the e-liquid quickly enough.
Whilst we’ve seen some innovative ways of avoiding this with other manufacturers, such as a spring loaded ceramic plate, Steam Crave hasn’t felt the need to over complicate things.
Honestly I think that you don’t need any special tricks to avoid a dry hit from mesh, it is all down to getting your wicking right.
Make sure you’ve got plenty of cotton under the mesh, and then make sure that your wicks aren’t forced into the juice ports.
Wicked up properly, I haven’t had a single dry hit from this tank, even when I’ve been chain vaping at 70-80W on the mesh.
Pros
- Great Flavour
- Built like a tank
- Huge range of options
- Well designed and machined
Cons
- Coil holes could be a little bigger in the postless deck
Final Review Verdict
I have really enjoyed my time with this tank.
I always thought that these type of enormous tanks looked a little silly, but having spent a couple of weeks with this I am totally converted.
E-liquid capacity is one of the reasons I tend not to take big sub-ohm kits out with me. I just don’t like the faff of having to carry around a bottle of juice to fill up when I’m out and about.
With a 16ml tank, I can easily get away with going out for a day and not worrying, even at the rate this ploughs through it.
I also love having lots options available to me, so I can really fine tune my vape to be how I like it.
With a total of 3 different capacity options, 5 different decks, and a chimney reducer, as well as a highly responsive airflow control system, you can play around to your hearts content.
This definitely gets a strong recommendation from me, and it’s a tank I see myself using for a long time to come!
Have you been using this beast?
Thinking of getting one?
What’s been your best set-up?
Let me know in the comments below and I’ll also try and answer any questions 🙂


