I am delighted to have received the Vandy Vape Kylin Mini V2 RTA for review.
Although I have reviewed a fair few Vandy Vape devices, the original Kylin RTA was my go to tank for a long time before I started doing vape reviews.
Updated tank: Vandy Vape Kylin V3 RTA

Founded in 2016, Vandy Vape has an impressive catalogue, it currently consisting of 13 Kits and 41 rebuildable atomisers (16 RTAs, 20 RDAs and 5 RDTAs), which is impressive for 4 years!
They also have their own brand of wire, cotton and DIY tool kits.
The Kylin Mini V2 RTA is the latest addition to the line of Kylin RTAs which already includes the Kylin RTA, Kylin Mini RTA, Kylin V2 RTA and Kylin M(esh) RTA.
As I previously said, I’ve reviewed a few Vandy Vape items on my YouTube Channel and although not all are perfect, none could be classed as awful.
With that short introduction to this very popular brand, lets go look at what they have to say about the Kylin Mini V2 RTA.
What Can We Expect From The Kylin Mini V2 RTA
Obviously the first thing we would expect the Kylin Mini V2 RTA to be is… well mini, and it does live up to it’s name measuring at 24.4mm wide and 37.7 mm tall, although it still has a 3ml capacity (5ml if you include the bubble glass).
One of the biggest differences I can see between the Kylin Mini and the Kylin Mini V2 is the airflow. Unlike it’s predecessor the Kylin Mini V2 RTA has a top airflow inlet. However how the airflow is positioned to the coils is very similar.
It has a 270 degree internal honeycomb airflow which I’m looking forward to trying out because the last RTA I had with this kind of design didn’t sit too well with me.
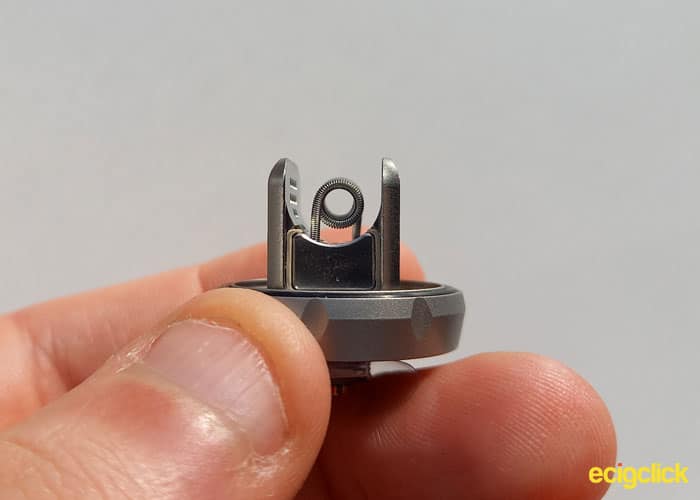
By design it looks nice and easy to build, the coil installation has been made easier than the first version with the clamps moved outwards rather than being in the center and the wicking port looks as user friendly as always.
Vandy Vape is branding this RTA as the “optimised version of Kylin Mini“. Can it make my best RTA list?
Inside The Box
I received the standard version which is listed below. On the Vandy Vapes website, the Standard and TPD content lists looks identical and not not specify if you get the bubble glass included with the TPD or not, although it suggests by pictures that you do.
- 1 x Kylin Mini v2 RTA
- 1 x Pyrex Glass Tube
- 1 x Spare Parts (O-rings, Driptip adapter, Screws, Allen Key)
- 1 x Coil Lead Guide
- 1 x Instruction Manual
- 1 x Prebuilt Fused Clapton – 0.3ohm
Specs & Features
- Size: 24.4 x 37.7mm
- Weight: 164g
- Capacity: 3ml / 5ml
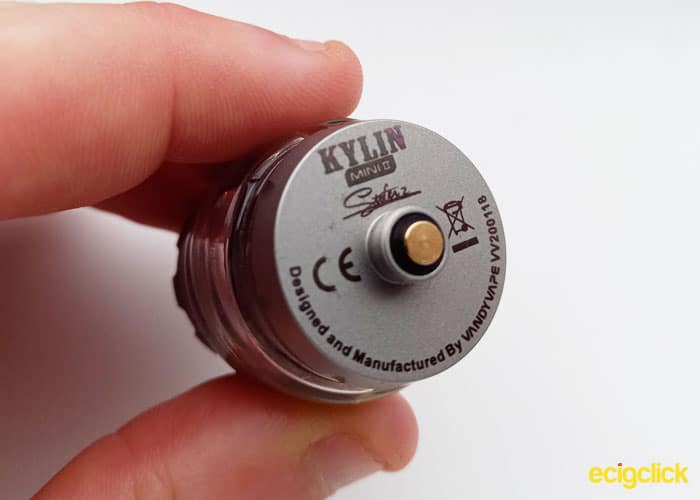
- Connection: 510 – Gold Plated
- Coil: Single
- 810 Drip tip – Changeable – includes adapter
- Top Fill – Screw off
- Adjustable Top Airflow
- Internal 270degree Honeycomb Airflow
- Anti-Rotation System
Design & Build Quality
The Vandy Vape Mini V2 RTA currently comes in 6 colours; Matte Black, Stainless Steel, Frosted Grey, Gun Metal, Rainbow and Gold.
I had to check the box to find out what colour I had because it doesn’t seem right to be Stainless Steel but it looks too light to be the frosted grey… according to the box I have the Frosted Grey…
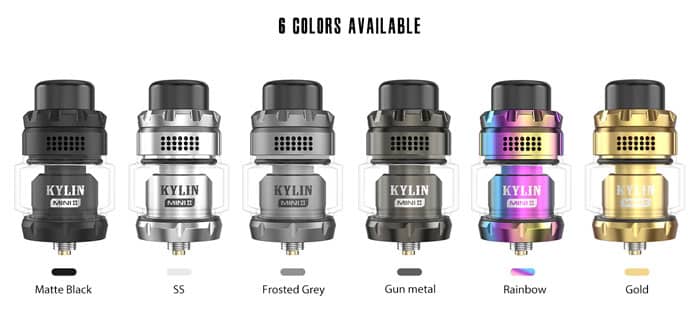
Looks more like Frosted Silver to me.
Assembly Of The Vandy Vape Mini V2 RTA
I think the assembly of the Vandy Vape Mini V2 RTA is pretty standard at this point but I like laying out RTA review like this because it add a nice structure and allows us to look specifically at each part.
Vandy Vape Mini V2 RTA the Bases and 510 Connection
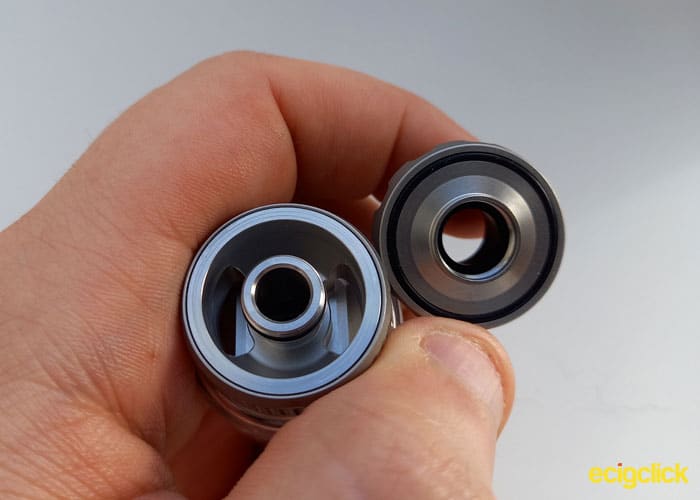
The deck and the airflow connect in quite a common way but with a unique twist.
It’s common these days to have a rotating part on either the chamber, base or deck (Anti-Rotation System). This rotating part allows the deck to always line up with the airflow system, to ensure the airflow gets to the coils as intended.
On the Vandy Vape Mini V2 RTA it is the build deck that rotates free from the base.
Although some people don’t like that type of design because it can be a bit fiddly when screwing the top cap on, there isn’t really an alternative for top to bottom on an RTA.

We’ll get to the unique part in a minute but before we do, I’d like to point out the design of the base from the side, unlike the original which had flat sides the V2 has a shape to it with evenly spaced dints to help with grip.
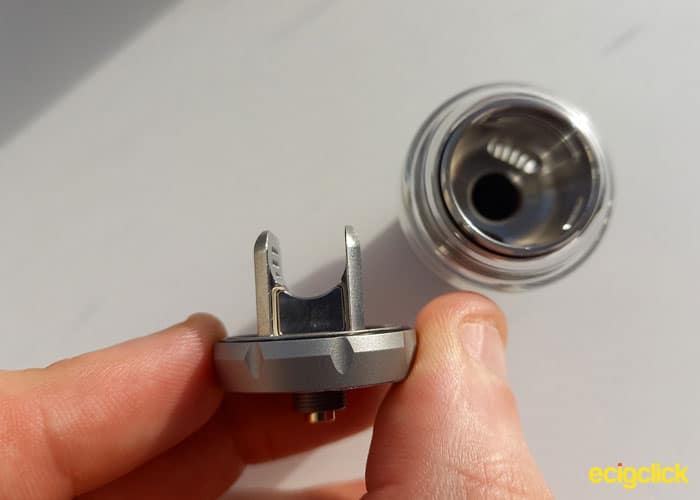
Vandy Vape Mini V2 RTA the Build Deck
The Unique thing about the airflow system that I’ve just been describing, is the airflow still goes under the coil.
Quite ingeniously the same style of airflow that the original mini had, Vandy Vape has kind of inverted the deck.
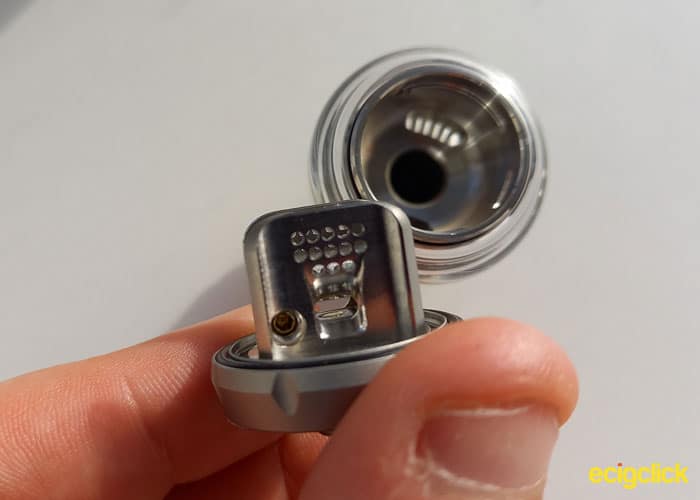
It’s quite hard to explain so I’ll attach a comparison picture.
The airflow works in almost the exactly same way except they have changed the input from the bottom to the top. I do very much approve!
Even the wicking port is super simple! OK the idea isn’t completely original but it has been executed excellently.
The wick for 3mm coils fits in the port brilliantly and there is even a bottom to the port which makes it really easy to see if your wick is too long.
To top it off the threads on a design like this usually run over the wick, which always amazes me, you’re just asking for problems in regards to the threads however Vandy Vape has sorted that out inverting the thread design so the threads are on the outside wall rather than the inside where the wick is.
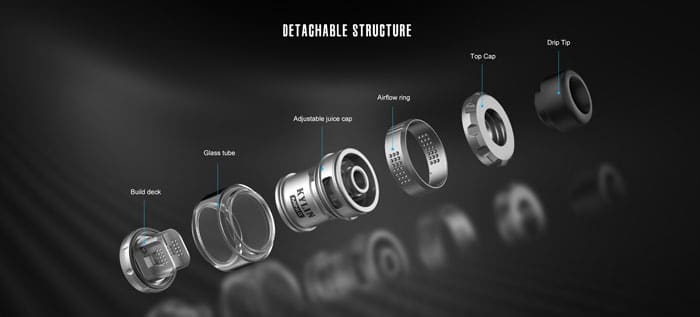
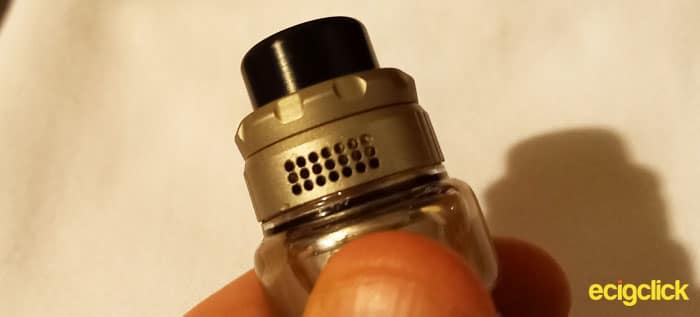
Vandy Vape Mini V2 RTA – Adjustable Juice Cap & Airflow Ring
I think this is a bit misleading, to me it suggests that it allows you to adjust the juice flow… but that isn’t the case, I think it’s because it is where the adjustment band sits.
There isn’t much to talk about here because we covered the airflow system above.
However I will say the airflow band has 42 holes (21 on either side) and can be fully open or turned down in increments of 6 all the way down to 0.
Strangely the there is quite a lot of room for juice inside the top cap, it isn’t entire strange to allow the juice to go all the way to the top, the structure usually sits right at the top. It doesn’t make a huge difference, so I suppose it was just for design purposes.
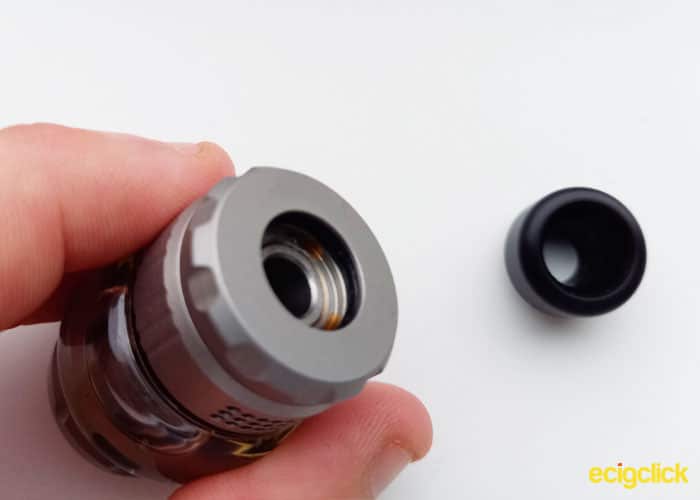
Vandy Vape Mini V2 RTA Top Cap
The top cap takes almost 2 full turns to remove, which was quite surprising, it’s not that common that manufactures go with this type of top cap these days.
Although any top-fill is better than no top-fill, in my opinion this is the worst kind of top-fill cap.
Tanks these days have the fancy swing out caps, pop-up caps or the quarter turn caps.
Although you could argue screw caps are more durable, I still would have much rather a quarter or half turn screw, call me lazy but an almost 2 full rotations seems to be far too much. And obviously any cap that comes off completely makes filling up on the move a lot more faffy and awkward.
In regards to sealing the top cap doesn’t have a silicone bed by any means but the 2 O-ring on the joins (chimney and outer rim) have proven to be ample, for a couple of weeks at least.
Vandy Vape Mini V2 RTA – Drip Tip
And last but not least the drip-tip.
Drip Tips are funny things, even on a device like this, on which the drip tip is removable and replaceable, it can still be a deciding factor when people are looking to buy.
The drip tip is a standard 810, with a single O-Ring inside the top cap to hold it into place.
In all honesty I don’t like it. I wasn’t fully sure why so I compared it to the HellVape Dead Rabbit V2 RTA drip tip (which I’ve been using ever since I reviewed it).

Each to their own, I’m sure there’s plenty of people that think the complete opposite to me, but I realised the reason I don’t like the Vandy Vape Mini V2 RTAs drip tipp is because although the inner diameter at the top is the same as the Dead Rabbit’s (~12mm), the walls of the drip tip is much thicker, creating a much thicker outer diameter (18mm compared to 16mm).
In addition to that the Vandy Vape Mini V2 RTA has much more bevel to it.
I’m not going to be focusing on my dislike for the drip tip though as I’m sure I will get used it, and if not I can always change it.
Let’s not forget that Vandy Vape have also been nice enough to include an adapter.
Design and Build Summary
OK so there’s been one or two things that I’ve thought was a bit strange like the amount of liquid that can be held in the top of the system but I don’t think there’s anything I dislike.
It’s good, nice and well built.
If there was one problem in regards to quality, it would be the threads on the connection between the chamber and the base/build deck, although over all the threats are good it does feel a little bit grindy and not very smooth towards the end. The top-fill threads seem great though, even if they are longer than I’d like.
The only issue I have with the design is the deck, it really doesn’t leave much room for design and creativity but I think that is quite common for single coil decks.
Building On The Vandy Vape Mini V2 RTA
Building an RTA has never been simpler.
Coil Height & Leg Length
Vandy Vape very kindly provide a tool to measure your legs nice and easily.
The tool has a little arrow sticker pointing to the 7mm step. That’s Vandy Vapes way of telling you to use that length legs for the Vandy Vape Mini V2 RTA.
After cutting your legs down to I initially figured I would try 6 first, but due to the 280degrees airflow 6mm would be a little bit too low, 7mm is pretty optimal for 3mm ID Coils.
Straight In No Messing
Thanks to the new position of the ‘post’ holes, you shouldn’t need to mess about getting your legs in the right place, as long as they go straight down (rather than going across a bit first) they will fit in fairly easy.
The deck screws are also super easy to access and use.
Wicking Made Easy
Many of you will know, I’m not a massive fan of fluffing.
In line with my lazy attitude, I didn’t do all that much fluffing, just a little bit to ensure it was nice and free.

And it worked well, If you are a fan of fluffing, I suggest you don’t over fluff, we wouldn’t want the wick too thin.
The main thing when wicking the Vandy Vape Mini V2 RTA is to make sure it’s not too long.
After thinning, make sure the cotton doesn’t go any lower than the bottom of the wicking port, wet the cotton with your e-liquid, and when I say wet it, I mean all over, not just around the coil.

Using the tip of your juice bottle, or another tool, ensure the cotton is still in the wick port and again if it goes lower than the bottom of the port, give it a quick trim, put it back and put the top on.
Final Review Verdict
If you’re looking for your first rebuildable device (RBA) then this is great for you, it is really easy to build on and the coil placement is pretty self explanatory; even more so, with the included tool.
If you’re a long time builder this is still a decent device, but with devices like this I always feel like I’ve been robbed of my freedom of design… as if the entire thing was designed around a 3mm ID Clapton coil. Which isn’t necessarily a bad thing, and that’s quite often the way with single coil RBAs.
I have to admit, I have never been a massive fan of single RTAs and because of that, the Vandy Vape Mini V2 RTA is not for me. By no means do I think it’s not good, I’m just not a fan of single coil RTAs. The scores will reflect on what the device is as unbiased and and fair as I can.
All in all, the device is very well designed and very well made, although there is a few changes I’d like to see which I have mentioned above, like the top cap system.
More importantly the flavour and vapour production are awesome.
I found with the coil provided by Vandy Vape the RTA is great at between 80-90w with the airflow fully open, or 65-80W if you turn the airflow down a bit.
I am someone that likes a really warm hit and I struggled to get that but I expected that with the 280degrees airflow design.
Is this an RTA you’re going to buy?
Already using one?
Let me know your thoughts or questions in the comments below…


Hi I just wondered if you could help I have this tank and are struggling to get decent flavour from it any tips you could help with ?