I’m a big fan of rebuildables, I definitely fit into the “hobbiest” side of the market. So when I heard I was going to be getting the Yachtvape Meshlock RDA in for review I was pretty excited (not least because it meant I wasn’t reviewing a pod system)!
I wasn’t familiar with Yachtvape, so I went to look them up. Turns out this is their first product!
What Can We Expect From The Yachtvape Meshlock RDA?
Single strip mesh RDA’s were pretty popular through the end of 2017 and 2018. However they seem to have lost their shine a bit in 2019, so Yachtvape obviously feel they have something new to bring to the party.
In the case of the Meshlock it’s an innovative tool free building deck. This is potentially going to appeal to people that struggle with the fiddly nature of tiny screws and screwdrivers.
Whenever a new company hits the market, their first product tends to set the tone with how people think of them. As my grandmother always says “You only get one chance to make a first impression”.
So does the Yachtvape Meshlock RDA do enough to get us excited about them as a company and look forward to any future releases? Can it land a place on our best RDA list? Let’s find out!
I was sent this product free of charge for review. However I am not influenced by freebies, and will report back honestly with that I find.
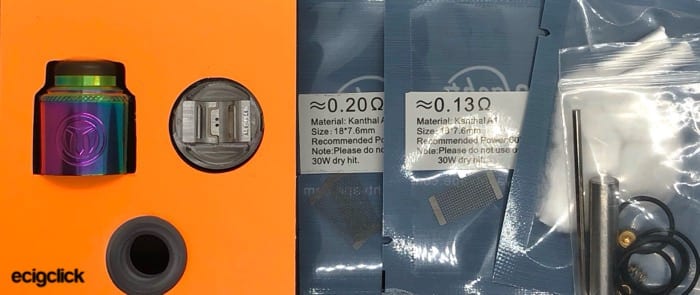
In the Box
- Meshlock RDA
- Ultem/Metal 810 Drip Tip (preinstalled)
- Extra 810 Smoked Drip Tip
- 2x 0.2Ω Kanthal Mesh Strips
- 2x 0.13Ω Kanthal Mesh Strips
- 2x Agleted Japanese Cotton
- Squonk Pin (preinstalled)
- Solid 510 Pin (in spares bag)
- Mesh bending tool
- Spares Bag
- User Manual
 Specs
Specs
 Specs
Specs- 24mm diameter x 26.6mm
- 138g
- Top Angled Airflow
- Tool Free, Single Mesh Strip Build Deck
Key Features
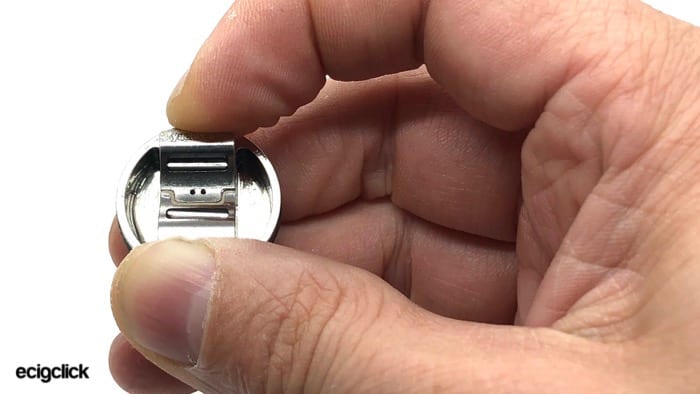
The standout feature here is definitely going to be the tooless build deck. As with other mesh RDAs, you have two clamps that hold the mesh in place. However, instead of using screws to tighten the clamps, they are spring loaded so you just push them in to open up the clamps, and release them to hold your mesh in place. More about how this works later!
Design and Build Quality
The Meshlock RDA comes in 6 different colourways, silver, blue, black, gunmetal, gold and the rainbow that I was sent.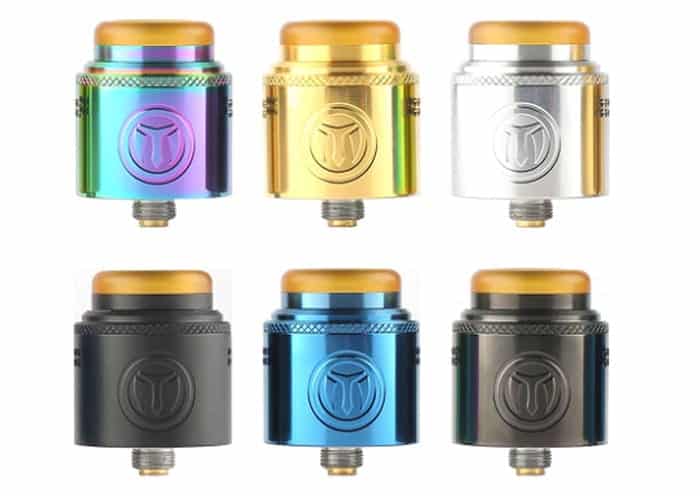
Fit and finish is really good, both the machining and the tolerances on the o-rings were spot on.
 Drip Tip
 Drip Tip
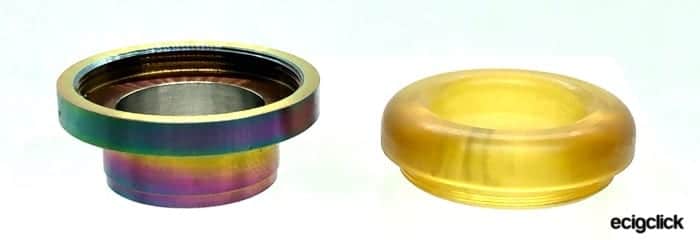
You get two drip tips in the box, they’re standard 810 fitting with the o-ring inside the top cap, so your goon fit drip tips will work fine. One of them is a translucent smoked plastic, fairly low profile and pretty comfortable.
The other is a bit more interesting, it’s a combination metal drip tip, with a screw in ultem piece at the top. Some people aren’t keen on ultem as a look, but I found this tip especially comfortable and thought it looked sharp.
 Top Cap
 Top Cap
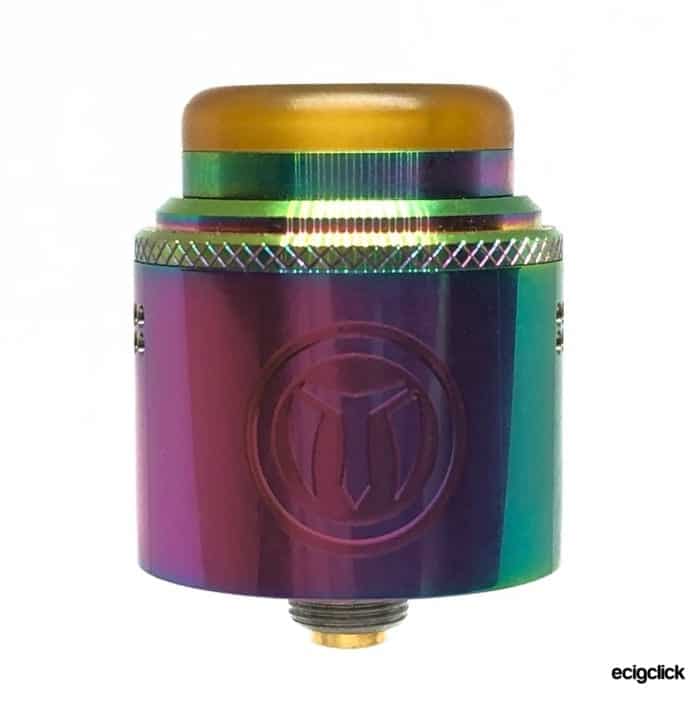
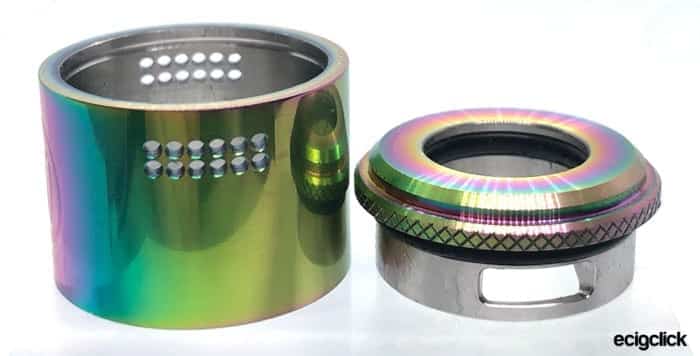
You have a two piece top cap for this dripper, the outer sleeve has the Yachtvape logo embossed on one side. There are also two small prongs on the inside, that fit into gaps in the base to keep your airflow lined up.
Airflow
Your airflow is a 12 hole honeycomb on the outer sleeve, and then is controlled by the inner section. There’s grippy knurling at the top of your AFC, so I found it easy to get a grip and turn.
Something that I have had issues with on similarly designed RDAs. The inner section angles the airflow down towards your mesh by having a slanted cut out. Unfortunately it’s not stepped at all, so it doesn’t have the finest control.
 There is also a good amount of doming going on, so hopefully this should help to concentrate the flavour.
Build Deck
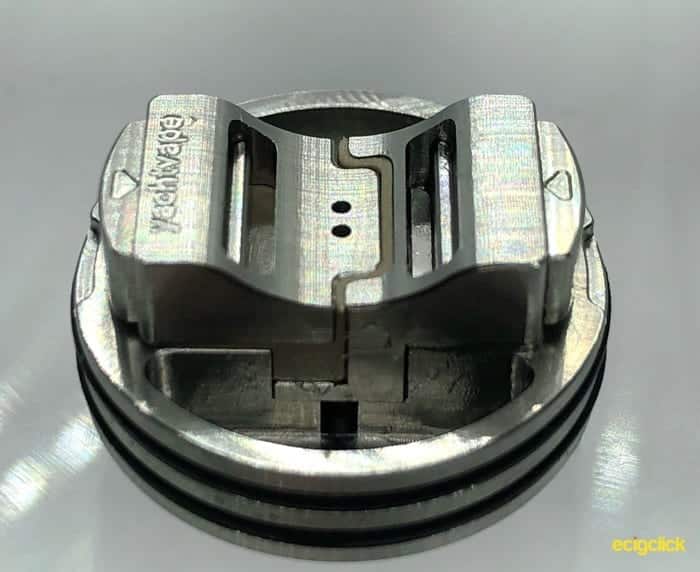
So the big feature here is that you no longer need a screwdriver to secure your mesh in place.
Just push in on the two sides marked with arrows, and your clamps open up to place your mesh in.
Although I thought this might be easy for people who have bad eyesight or poor motor control, I actually found this marginally more tricky than doing this with a screwdriver.
 The springs have got a fair amount of resistance, and helpfully you get a couple of spare ones, as all springs wear out eventually.
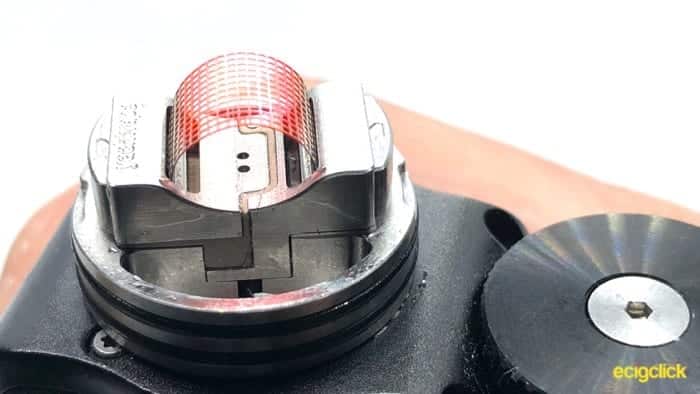
For squonking you have two tiny holes directly under the centre of your cotton, and then one either side of your deck going into the juice wells.
This should hopefully mean that it’s easy to saturate your cotton, whilst at the same time pulling any excess e-liquid back into your squonk bottle, more about how this performs later!
Base
The squonk pin is already installed in this RDA. If you want to replace it with the solid 510 from your spares bag, you take the Allen key, unscrew the hollow 510, and screw the solid one in its place.
The positive pin protrudes nice and far from the threading on the 510, so I’d be totally happy putting this on a hybrid mech.
How Does The Yachtvape Meshlock RDA Perform?
Building on the Yachtvape Meshlock RDA
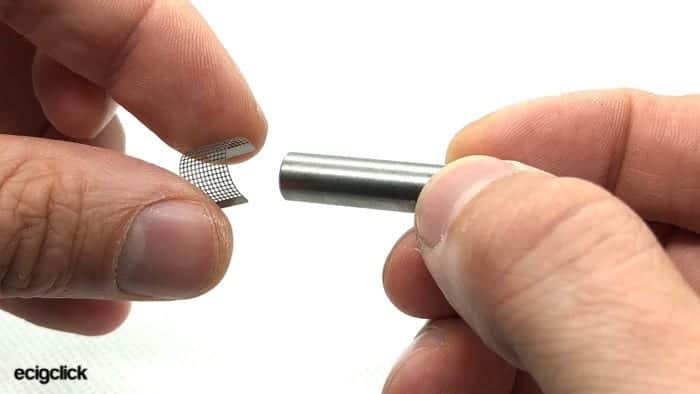
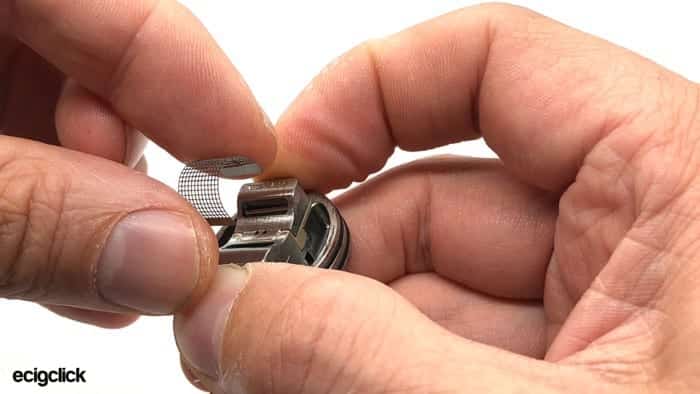
- Take your mesh tool and wrap a piece of mesh over it to form it into a crescent

- Push in on the two release buttons to open the clamps
- Position your mesh so that it drops into the clamps
- Release the clamps and make sure your mesh is level and secure
- Dry burn at less than 30 watts to make sure your mesh is heating evenly
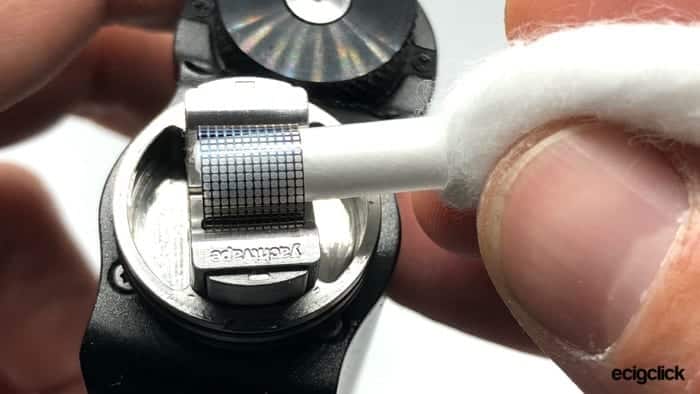
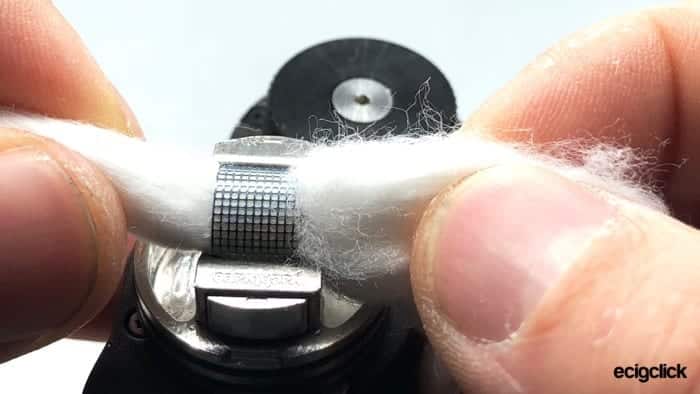
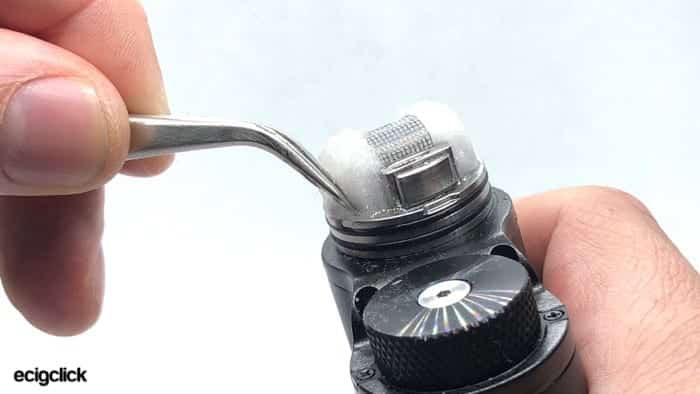
- Take a piece of agleted cotton and feed it under your mesh
- Pull the cotton through
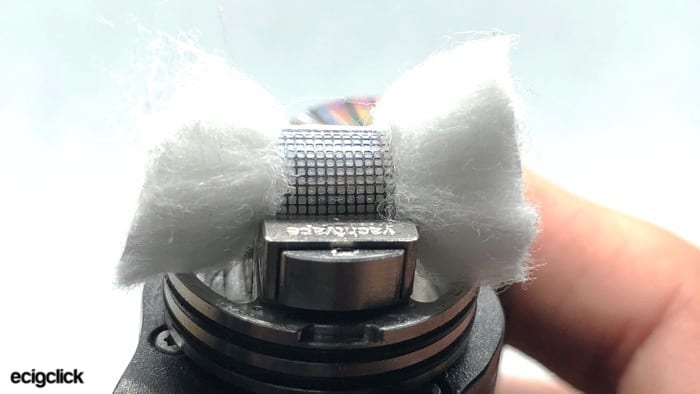
- Trim the ends of your cotton so that it will just touch the base of your deck
- Rake the cotton out to thin the ends
- Trim the ends you have just thinned out
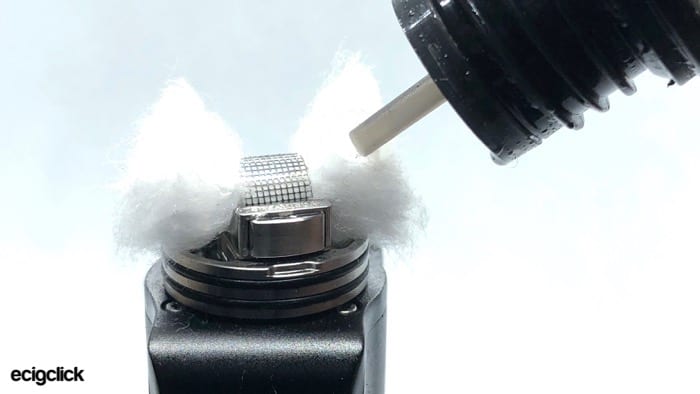
- Wet the cotton thoroughly with e-liquid
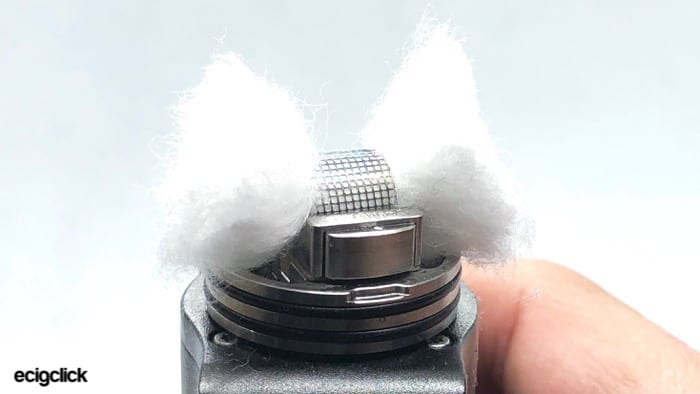
- Tuck the saturated cotton into the deck. Make sure that the section under the mesh is firmly stuffed with cotton, push in from the ends if it seems loose


Simple Right?
Now all of that sounds pretty easy, but actually getting the mesh into place is a right pain!
For starters the springs on the clamps are really firm, you need to apply quite a bit of pressure to get the clamps open. This is good on the one hand as it means your mesh is held securely, but on the other hand it probably isn’t great if you don’t have much strength in your hands.
The second problem I found was that the holes that you put your mesh into are not just open or closed. When they’re closed, there is actually a little bit of a gap on the other side of the clamp, so you can wind up trying to slot the mesh in front of the clamp.
There were several times I thought I had it clamped in place, only to take my hands away and realise one side had ended up in that little divot and wasn’t clamped at all.
Also whilst other single mesh RDA’s can usually take a coil as well, I discovered that the Meshlock cannot.
You can get a coil to sit in place, but the springs just don’t provide enough pressure to hold it, at least with the complex coils I tried. This results in your resistance jumping around and is not something I would recommend.
Definitely a minus point in terms of flexibility!
How Does it vape?
Now I know that the beauty of an RDA is that you don’t have to include whatever coils come with it.
However with mesh I think it’s only fair to try out the mesh strips that they send along.
The two mesh strips it comes with are both Kanthal, and I used the agleted cotton supplied, as well as some Wotofo agleted cotton.
For these tests I used a range of e-liquid, both Bozo and Barbuda from Chemical Clown, as well as Bueno Ice Cream from Ice Cream Nation.
- You can see some of our best e-juice brands here for recommendations.
0.2Ω Mesh
This mesh is rated at 50-70W, and I have to say I was pretty disappointed in the results. I found my sweet spot at 60, which gave me the most flavour. However it wasn’t much. It’s also a very cool vape at 60W, but going any higher and I didn’t get any more flavour from it.
0.12Ω Mesh
Now this is more like it! The 0.12Ω mesh is definitely more flavourful within the 60-80W that Yachtvape recommend. 70-80W gives you a much warmer vape, and the flavour carries on increasing. In fact I pushed this up to 90W and found this gave me a pretty satisfying vape.
Flavour
Sadly the RDA just doesn’t give as much flavour as I would like. It definitely works better at higher wattages with lower resistance mesh. But it is still falling short of the sort of separation of flavours that I’m used to with mesh.
Desert flavours seemed to work better than fruit flavours in it, you can get a nice creamy vape, just not the cooling higher notes.
Airflow
Although I dinged the Meshlock a little earlier for not having a stepped airflow, it’s not half bad. Fully open and there’s plenty of airflow, just the tiniest bit of restriction.
Personally I found that the flavour improved if you closed it off just a little bit, covering up the first 2 or 4 holes in the honeycomb.
Squonking
As I mentioned earlier you have 3 channels for your liquid to come up. One of which comes up straight underneath the middle of your mesh and into the cotton, and two that go straight into the juice wells where the tail ends of your cotton are sitting.
The problem I’ve found with this, is because you have such a lot of cotton underneath your mesh, the e-liquid will flow far more easily into the juice wells.
Because of this I have found that the only way to get the most crucial piece of cotton fully saturated (the bit directly under the mesh) you do have to squonk a lot more than you would usually.
Happily because the deck is double o-ringed, and the airflow is set quite high up, I have not had any leaking.
Also the two squonk holes on the side do a good job in sucking back any e-liquid if you flood out your deck.
Pros
- Good machining
- Really comfortable drip tip
Cons
- No ability to mount standard coils
- Tricky placement of mesh
- Fairly average flavour
Final Review Verdict
I had a lot of fun playing around with the Yachtvape Meshlock RDA, and it’s a solid showing for a brand new company. Nice machining, and a good looking little dripper (or squonker).
Mesh RDA’s aren’t for everybody, and it’s a shame that this one doesn’t allow you to put complex coils in it. You might be able to get away with something like a fused clapton or a staple coil, due to their “flatter” profile, but I’m not convinced.
If you don’t like having to screw in tiny screws, then this may be easier for you. But I’d say it’s worth tracking one down to test first, as I had a hard time getting used to the clamps!
As for flavour, if you like desert juices, then I’d be happy to recommend this. However if you prefer tropical fruits, or citrus flavours, then this just doesn’t quite hit those high notes for me.
Am I looking forward to their next release though? Yes I am.
Have you used the Meshlock RDA? Let us know what you thought in the comments below!


“Dry burn at less than 30 watts”
Curious why can’t I use more than 30W for the initial burn off?
I usually do 2x 35W on aegis solo.
Hi Dave,
Thanks for reading the review!
It’s not really a hard and fast rule, it’s more a reminder for people not to dry burn at crazy high wattage, as you’ll just end up welding your coils together or shortening their lifespan.
Obviously it will also depend on the resistance and make up of the coil.
Basically I always advise to dry burn the coils at a far lower wattage than what you might end up putting through them when they’re wicked up and you’re using them with liquid. Remember, you don’t have any eliquid vaporising and cooling them down, so they’ll get a lot hotter than when you’re vaping on it.
Hope that makes sense!
Will