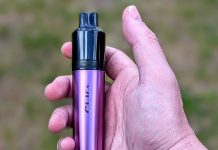
In for review is the latest Feelin kit – the Nevoks Feelin AX.
This review has been updated as I have now been sent production models. The original review was for samples.
We have previously reviewed the Nevoks Feelin X, Feelin A1 and Feelin 2 pod kits.
Nevoks were created in 2019 in Shenzhen China. Their mission is to…
“build a non-tobacco and healthy world. To achieve this, we offer innovative stylish products, exceptional user experience, and reliable pre-sales and after-sales service.”
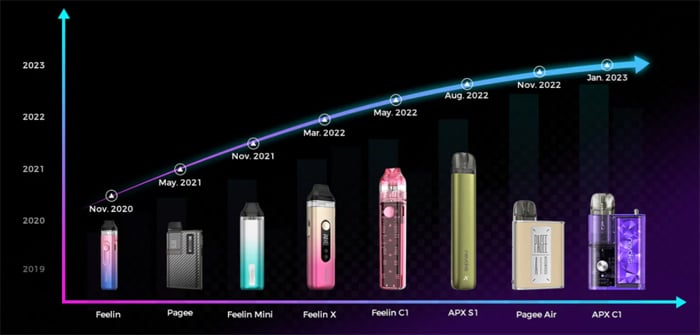
The Feelin range began in 2020 with the original Feelin Pod Kit, then the Feelin Mini in 2021 and the above mentioned Feelin X and Feelin C1 were the next in the series. They also created the Pagee and APX ranges.
Thank you to Nevoks for sending these over for review! I will report back honestly on the devices in my possession.
What To Expect From The Nevoks Feelin AX Pod Kit…
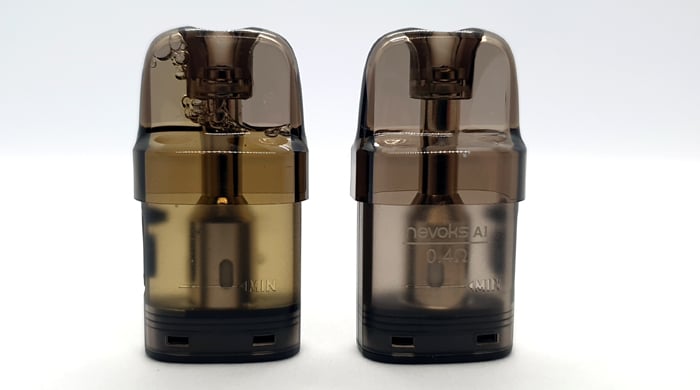
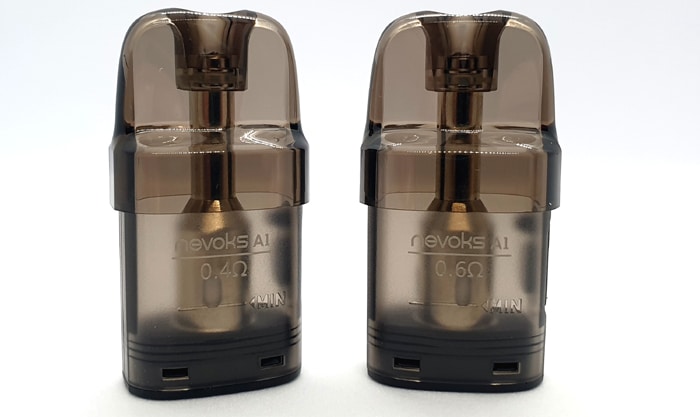
This kit is based on the Feelin A1 kit and uses the same pods.
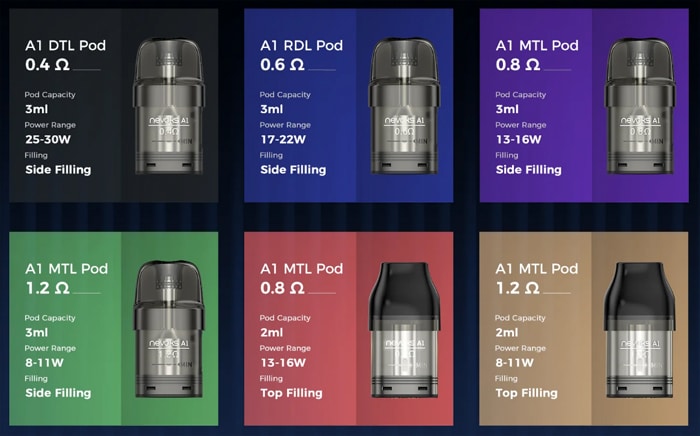
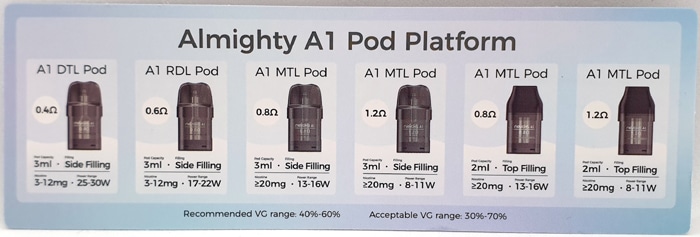
There are many pods to choose from: 0.4ohm, 0.6ohm, 0.8ohm and 1.2ohm.
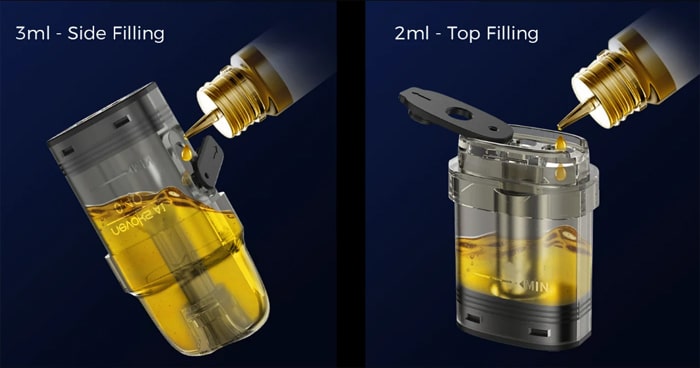
They come with a 3ml capacity as standard and a side fill port, but there are also the 0.8ohm and 1.2ohm top filling 2ml TPD compliant pods as well.
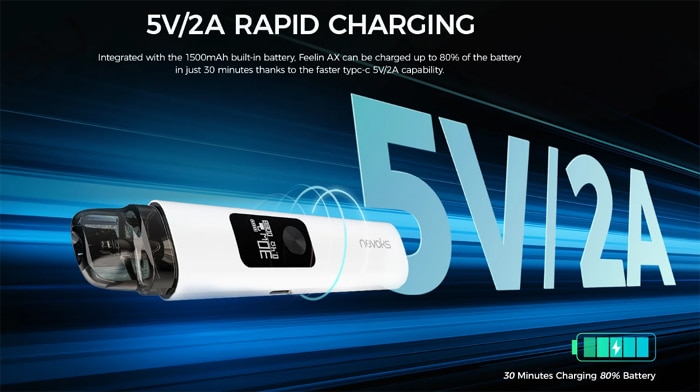
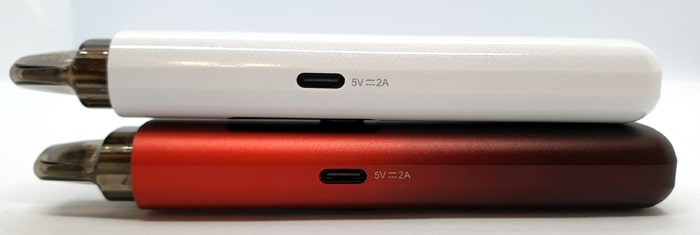
Inside the device body is a 1500mAh battery which is charged using the USB Type C port at a 2A charge rate. Nevoks state this will take around 1 hour to charge in the instructions, but only 30 minutes on their website?
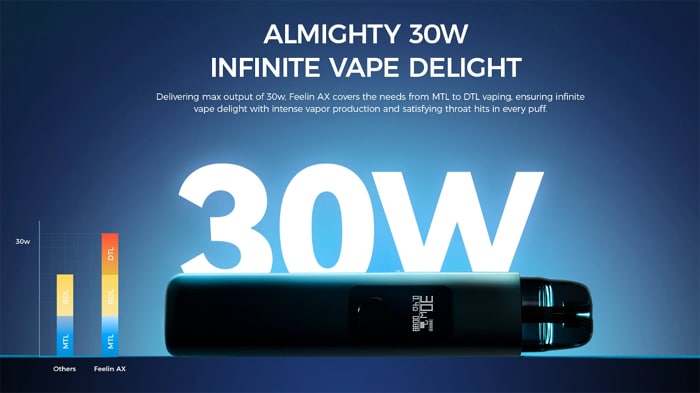
The output is specified as 5-30W and you can adjust the output.
You can either use the manual fire button or simply inhale on the mouthpiece to trigger the auto draw firing.
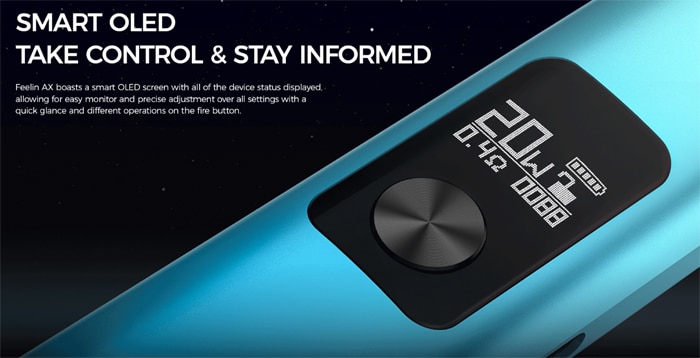
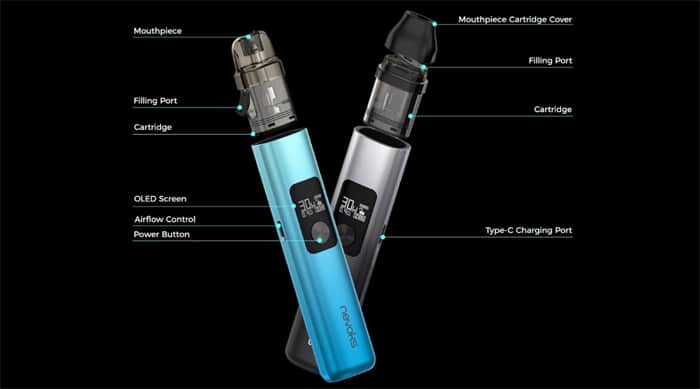
An OLED screen is provided to view the device status, battery level and power level.
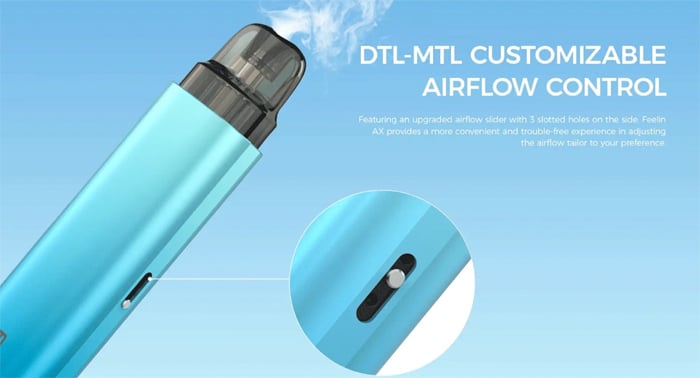
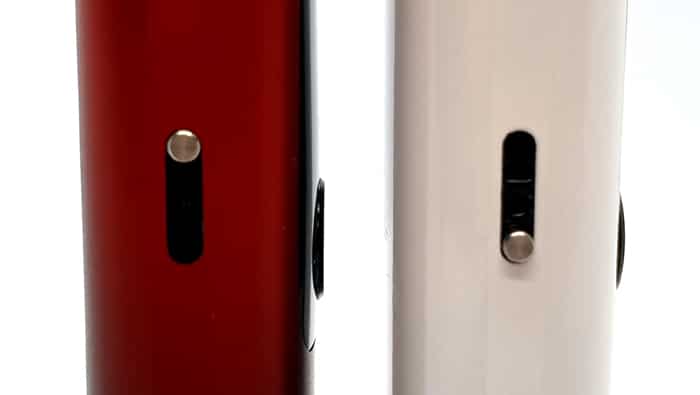
On the side of the device an airflow adjustment slider is provided to tailor the incoming airflow to your preference.
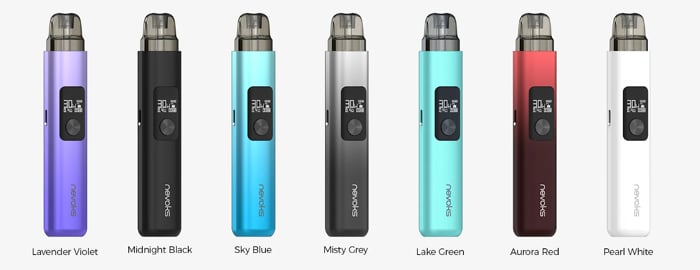
There are 7 colours to choose from: Lavender Violet, Midnight Black, Sky Blue, Misty Grey, Lake Green, Aurora Red and Pearl White.
Kit Includes
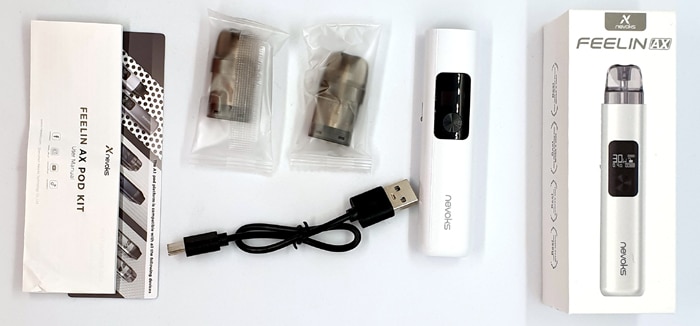
- Nevoks Feelin AX device
- 0.8ohm Nevoks A1 pod
- 0.6ohm Nevoks A1 pod
- USB Type C cable
- User manual
Nevoks Feelin AX Specs
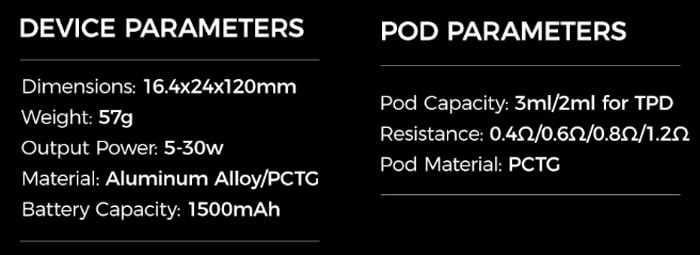
- Size: 16.4x24x120mm
- Output: 5-30W – Variable Wattage
- Battery: 1500mAh (internal)
- Display: OLED screen – size not specified
- Resistance range: 0.25-3.5ohm
- Material: Aluminium Alloy
- E-liquid capacity: 3ml (standard) / 2ml (TPD / CRC)
- USB Type C port – 2A charge rate – 60 minute charge time (30 minute charge time stated on website?)
- Pods: A1 Refillable, fixed coil – 0.4ohm, 0.6ohm, 0.8ohm, 1.2ohm
- Top fill (TPD) / Side fill port (Standard)
- Adjustable airflow
- Draw and button activation
Nevoks Feelin AX Design and Build Quality
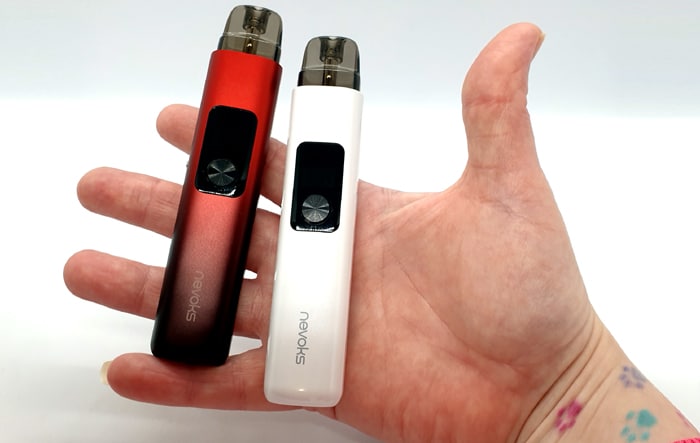
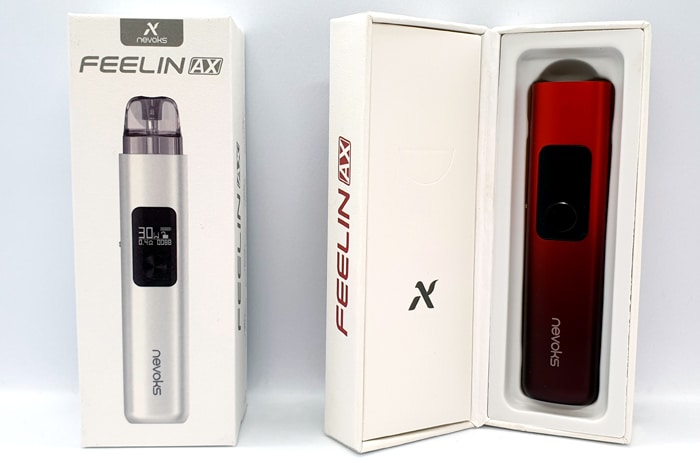
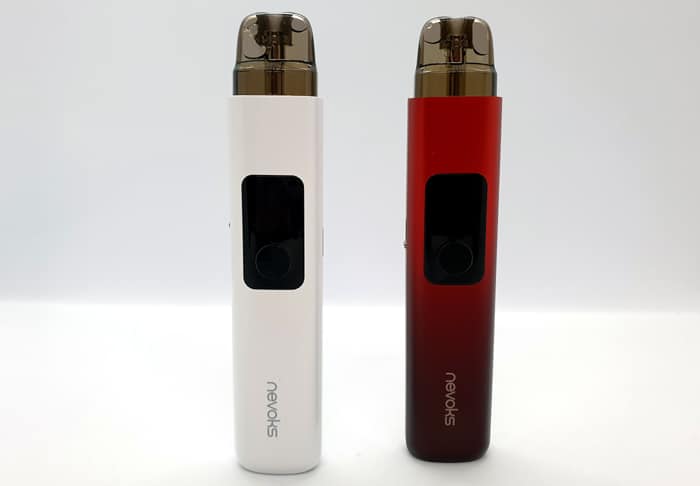
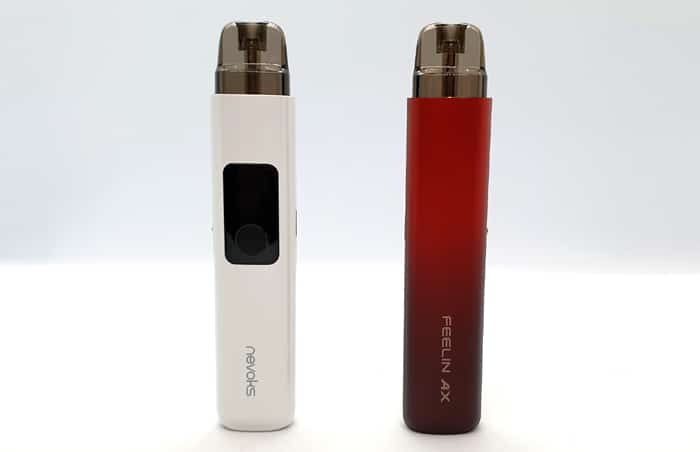
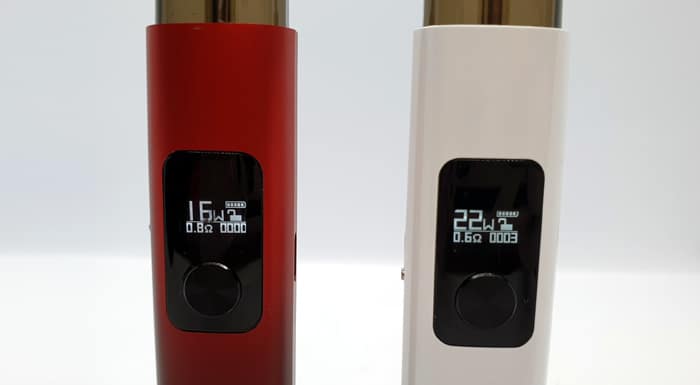
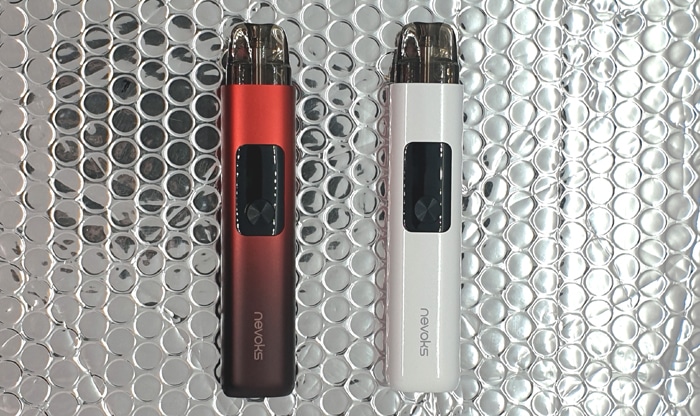
I received the Pearl White and Aurora Red versions.
The packaging is nice and compact as the box folds open with a magnetic closing catch. When open the left side has a smaller box which contains the pods, instructions and USB cable and the right side houses the device.
Instruction wise this is pretty good and tells you everything you need to know.
There is a downloadable instruction manual for those who prefer to zoom in – click here.
A handy card is included which displays all of the compatible Feelin A1 pods and the suggested power level and nicotine strength for each.
Nevoks Feelin AX Mod
This is a nice and smooth shape with plenty of rounded edges to make it feel nice in the hand!
On the Pearl White version the body is all White which in some lighting looks a bit metallic.
The Aurora Red has a two tone metallic gradient finish – starting at Red and moving down towards a dark Maroon at the base.
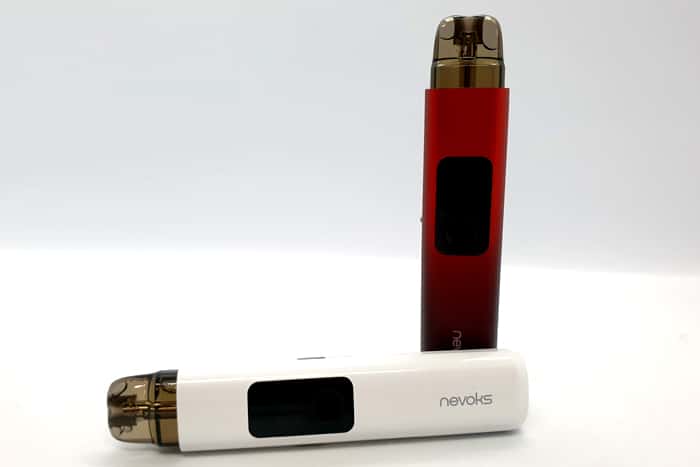
On the front and rear are the “Nevoks” and “Feelin AX” logos – printed in Grey on the White kit and a lighter colour on the Red one.
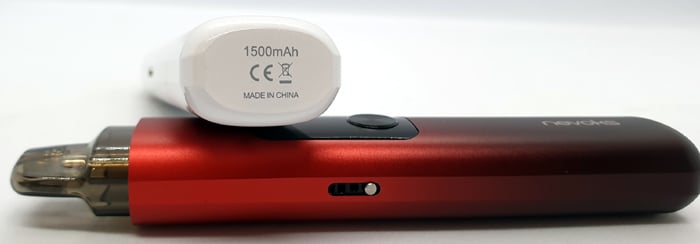
With the screen facing you, the left side features the Airflow Adjustment slider. This is slightly stiff but not difficult to move. This is a bonus as I think it is safe to say it is unlikely to move on its own!
On the right side is the USB Type C port with the charging spec “5V 2A” printed next to it.
You will find the legal logos and battery capacity printed on the base.
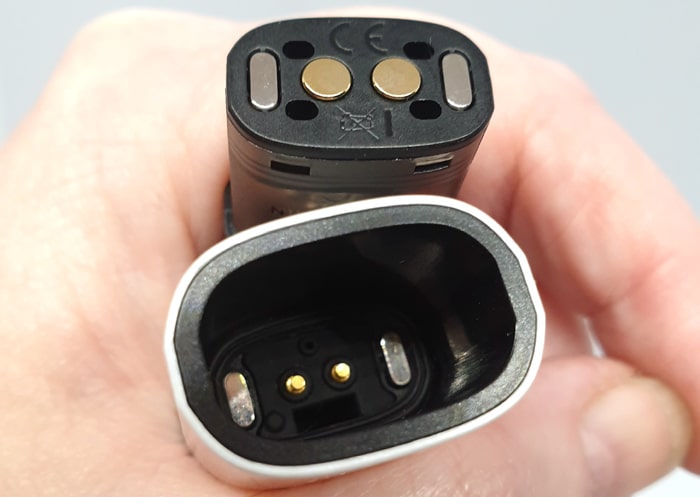
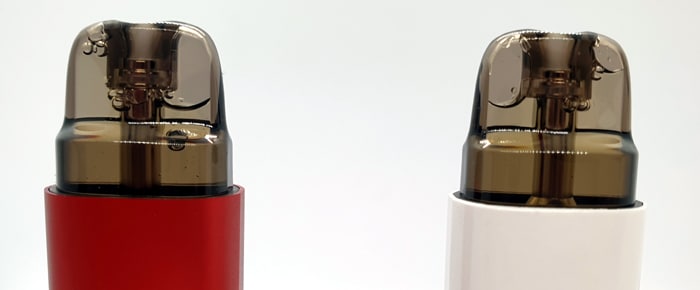
The pod port is a very deep one, so if you do need to clean the contacts you may need a Cotton Bud rather than a bit of tissue.
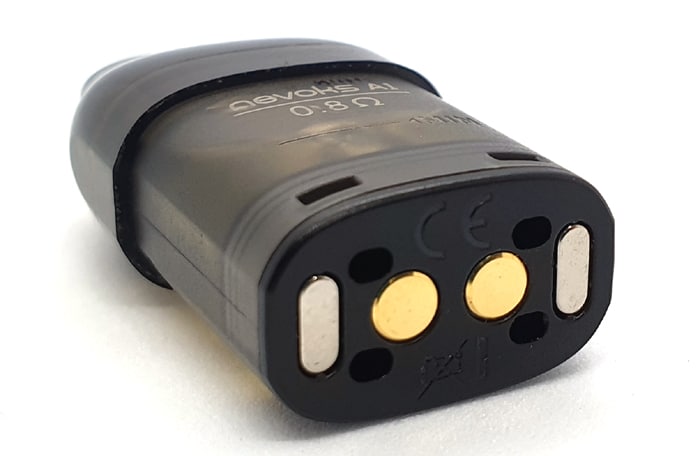
There are 2 magnets and 2 electrical connectors in the depths of this compartment and the pod is held in well with no rattles.
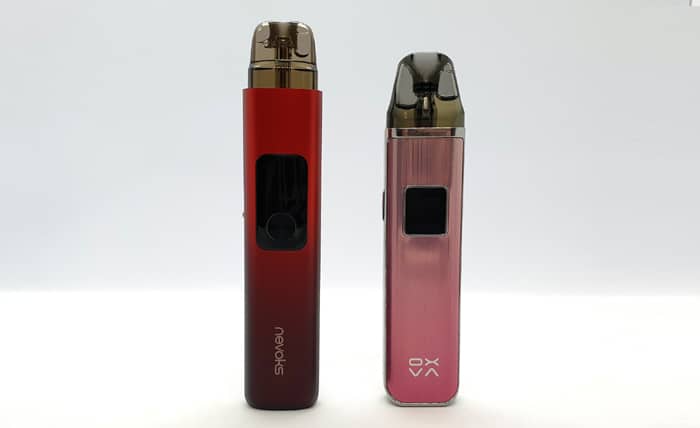
The device is only slightly bigger than my OXVA Xlim Pro yet has 150% the battery capacity at 1500mAh compared to the OXVA at 1000mAh. This means you get a lot more vapes per charge.
The Feelin AX weights 57g (empty) and the Xlim Pro is actually 66g with a smaller battery! So Nevoks have really nailed the design to enable a bigger battery without chunking the device up!
Screen & Controls
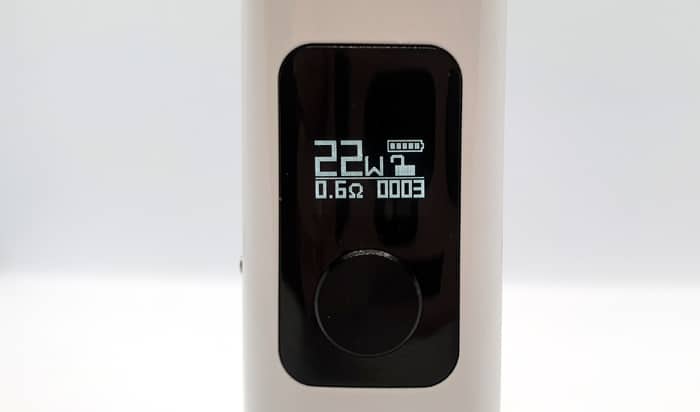
On the front of the mod is a shiny Black area which conceals the screen.
When the screen is on, the display area measures around 7mm x 12mm.
The screen is clearly laid out with White text on the Black background.
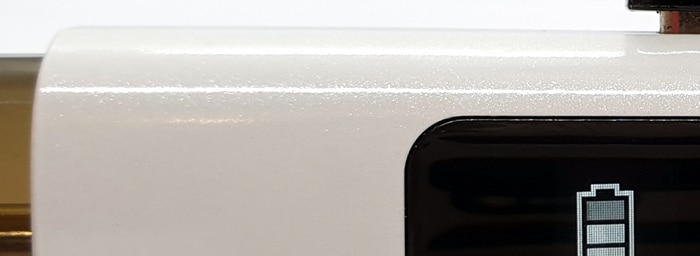
It displays the current power level, battery charge remaining, pod resistance, padlock symbol and puff counter.
The 9mm diameter circular fire button is located below the screen and has a “record groove” texture. It is clicky and responsive.
There is no button rattle at all.
Nevoks A1 Pod
The pod is exactly the same as the Nevoks Feelin A1 kit – so I have copied and pasted this part of the review!
I only received the side fill 3ml pods in my kits, but I have also reviewed the 2ml top fill pods in the past – which is what will be supplied in UK kits.
Side Fill 3ml Pod
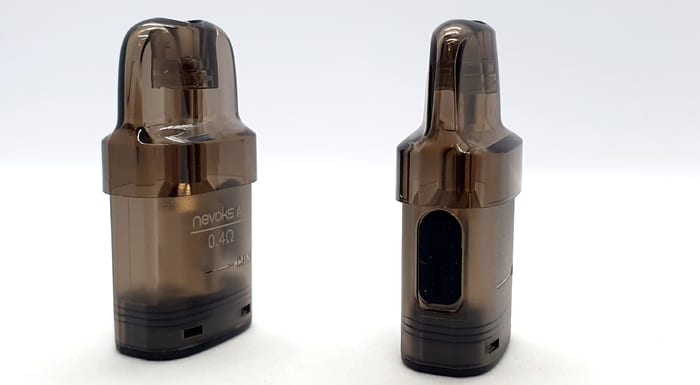
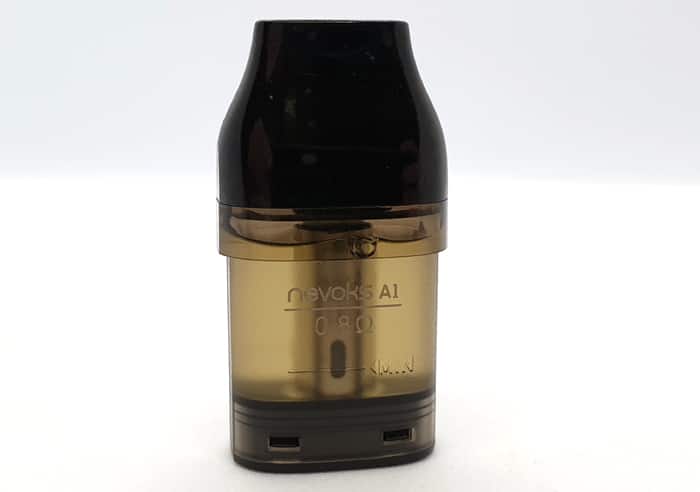
This for me was the best design. The whole pod is a tinted colour and the top half is perfectly clear. The bottom half has a slight frosting which is a shame.
Even so the e-liquid level is clear to see. However when installed on the mod you will only be able to see half of the pod. Meaning when the e-liquid level has dropped below this point you will have to keep removing the pod to check it.
I love the mouthpiece it is wide but slim in thickness and quite square, but extremely comfortable in use.
On one side the resistance and “Nevoks A1” is clearly marked and both sides have a “min” level line etched in.
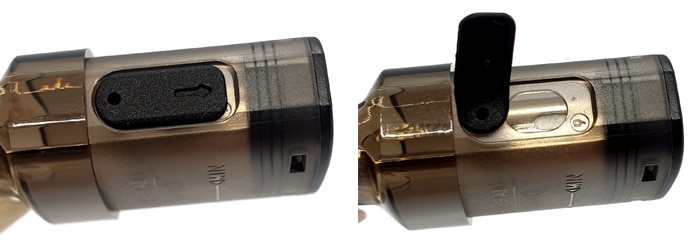
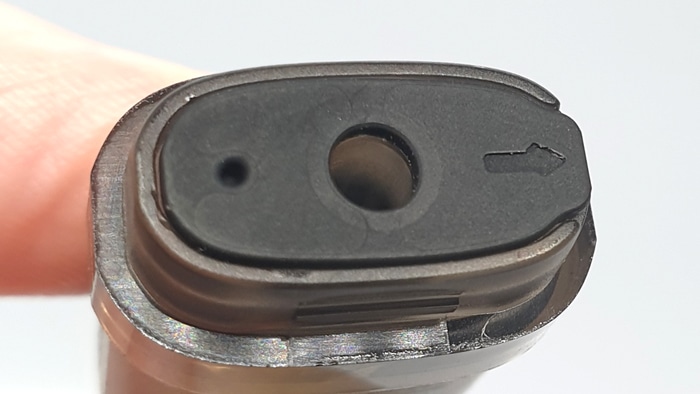
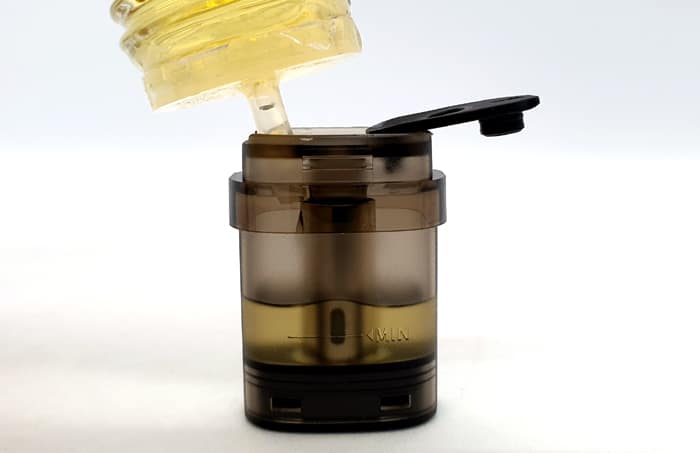
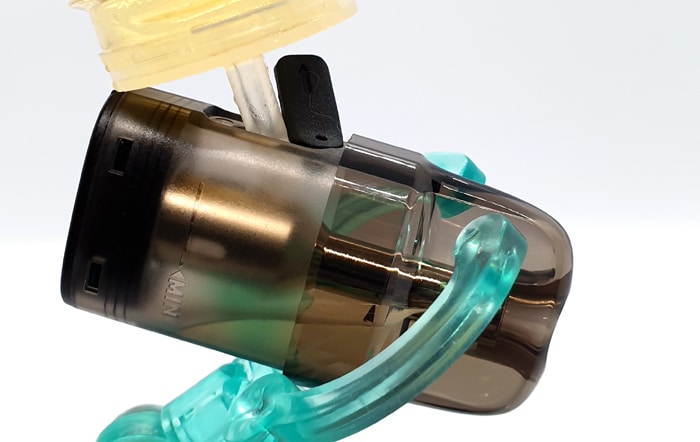
The fill port is covered by a Silicone cover with the lift side marked with an arrow and a small indent to allow you to insert a nail to lift the cover.
The fill port is an oval shape and roughly 5mm by 3.5ml and it was fine for my 30ml and 60ml bottles.
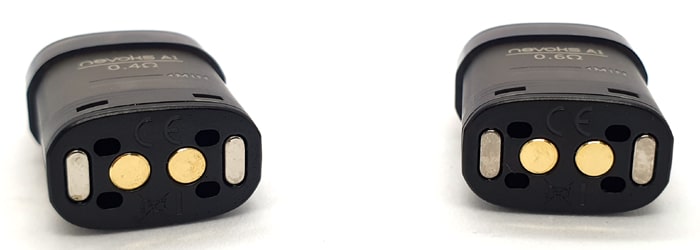
On the base you will find the required legal logos etched in, plus the 4 airflow inlets, 2 electrical contacts and 2 strong magnets.
Top Fill 2ml Pod
This pod is for us poor buggers in the TPD regulated areas as it will only hold 2ml.
It is the same height as the 3ml pod which surprised me.
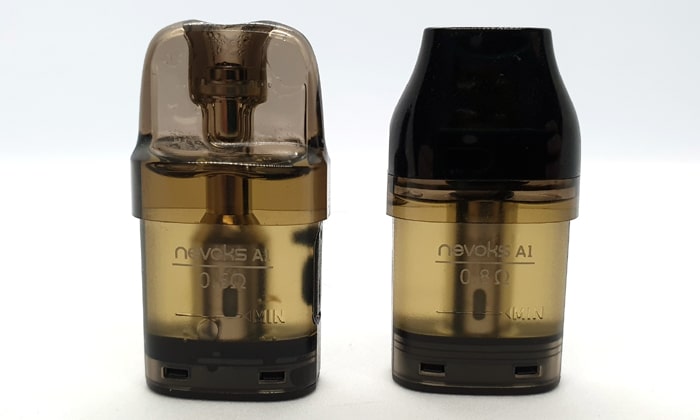
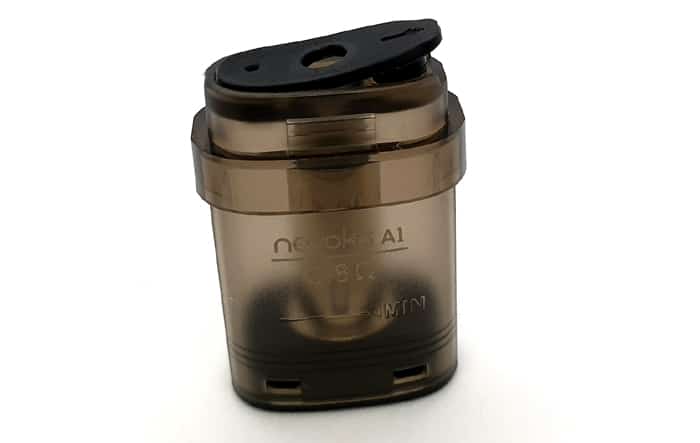
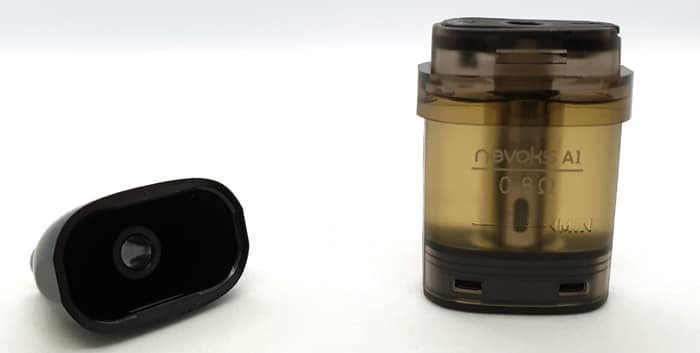
This time the top half of the pod is covered by the Black plastic removable mouthpiece. It is not as difficult to remove as some top fill pods I have tried but it does take a bit of budging.
I suggest snapping it off by gripping the pod and mouthpiece. I have added a video in the filling section.
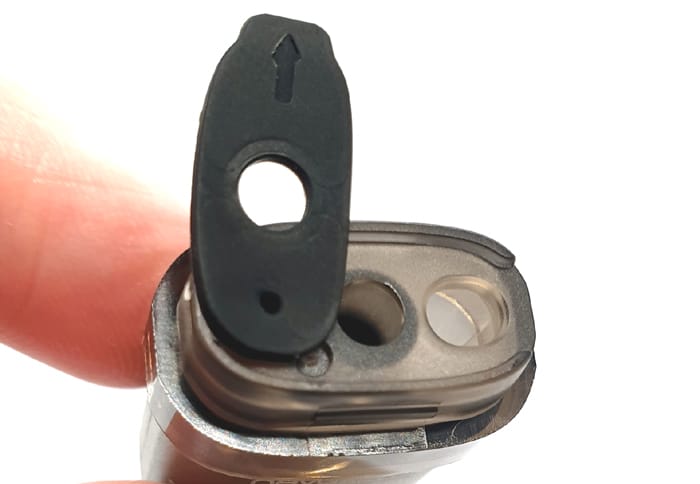
Below that you will find a Silicone lift up cover with an arrow and a cut out to lift with a finger nail.
You can then swing the cover out of the way to access the port.
As with the side fill pod, this has an oval fill port measuring roughly 3.5ml by 5ml and it performed fine with my e-liquid bottles.
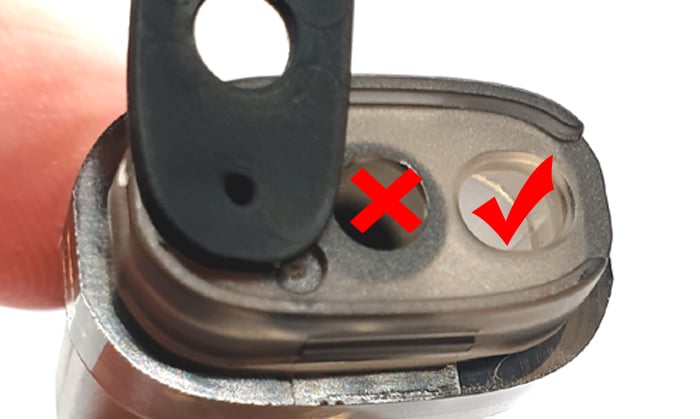
With the fill port cover lifted you can also access the vapour outlet path – which should not be used to add e-liquid as this will cause spitting and flooding.
The rest of the pod is the same as the side fill, with the slightly frosted bottom half, the same printing and base.
The capacity is reduced as the pod does not continue behind the mouthpiece – it has a flat top.
Quick Start Guide
The device arrives with no pod installed. So you can choose your pod, fill with e-liquid and get vaping! I will cover the process below!
Basic Operation
- Power On/Off = Press the fire button 5 times to turn on and off.
- Vaping = Hold down the fire button to vape (if the button is not locked) or simply inhale on the mouthpiece to trigger the auto draw activation.
- Battery indicator = The screen will display the battery charge remaining.
- Battery indicator when charging = The screen will display the battery charge progress and turn off when fully charged.
- Airflow = Slide the airflow slider up and down. Up = more restricted airflow, down = less airflow restriction.
Left = fully closed, Right = fully open - Adjust output = With the device switched on press the fire button 3 times and the wattage value will flash. Press the fire button to increase the output by 1W at a time. Or you can hold down the button to cycle through the output levels quicker. Once you have reached 30W the next press will return to 5W. When you have reached the desired output leave the device and it will return to the home screen.
- Lock the button = Press the fire button 4 times to lock or unlock the fire button. When the fire button is locked you can still use the auto draw firing. You can still turn the device off and enter the wattage adjustment mode. A padlock symbol on the display indicates if the button is locked or unlocked.
- Reset = To reset the device (I assume this means puff counter too?) turn the device off. Press the button 3 times and the screen will show the firmware version for 10 seconds.
- “Measure” = When you insert a pod the screen will display “Measure” whilst it reads the coil resistance. The output available is matched to the pod – i.e. 5-25W for the 0.6ohm pod and 5-18W for the 0.8ohm pod. This is to prevent the output being set too high and burning the coil out.
Protections
- No Atomiser / Resistance too high: If there is no pod installed, an open circuit or the coil resistance is above 3.5ohm the screen will display “No Atomiser”. Clean all the pod and device contacts. If not rectified try a new pod. If the fault continues the device may be defective.
- Low Battery: When the battery voltage drops below 3.3V the screen will display “Low Volt”. After the third time of this warning the device will shut down and needs to be charged to continue vaping.
- Short circuit: If there is a short circuit or the coil resistance is below 0.25ohm the screen will display “Shorted”. Clean all the pod and device contacts. If not rectified try a new pod. If the fault continues the device may be defective.
- Over time protection: If you inhale or hold down the fire button for longer than 10 seconds the screen will display “Time Out” and the fire will cut out. Simply inhale or press the fire button again to continue. This is to prevent accidental firing which could lead to damage or overheating.
- Overheat protection: If the control board reaches 85°C the screen will display “Too Hot”. Wait for the device to cool before using.
How To Charge The Battery
The charging rate is specified as 2A.
This does have “pass through” charging – meaning you can vape on it whilst charging.
- Using a USB type C cable, connect the small end into the USB port on the mod.
- Connect the large end of the cable into a suitable USB outlet.
- The screen will display the charging progress and turn off when fully charged.
I found this to take around 45 minutes to charge from empty. Nevoks state it will take 60 minutes to charge on the instructions so this is a rare occasion where a vape manufacturer is actually being humble! However the website states 30 minute charge time to 80% capacity.
How To Fill the Pod
There are 2 pod styles – the top fill and side fill so I will cover the filling methods for both.
If using a new pod leave to stand for 5-10 minutes after first fill to allow the coil to saturate with e-liquid.
Make sure to fill when the e-liquid level is above the minimum marking on the side of the pod.
Top Fill
- Push on the mouthpiece to get it to click off. I have recorded how I do it below (excuse my dodgy hands!)
- Lift up the port cover in the direction of the arrow.
- Add e-liquid to the oval shaped port. Do not add e-liquid to the centre port as this will cause flooding and spitting.
- Watch the e-liquid level through the side of the pod.
- Replace the fill port cover firmly.
- Replace the mouthpiece until it clicks.
Side Fill
- Remove the pod from the mod.
- Tip the pod on its side and lift up the fill port cover in the direction of the arrow.
- Rotate the cover out of the way if needed.
- Add e-liquid to the fill port watching the level through the side of the pod.
- Replace the fill port cover firmly.
How Does the Nevoks Feelin AX Perform?
I used my 50% PG / 50% VG Bubblegum e-liquid with 6mg nicotine salt. I mix this myself from the IVG concentrate.
Nevoks recommend an e-liquid ratio of 40%VG up to 60%VG for the 0.4ohm, 0.6ohm and 0.8ohm pods. If you are using the 1.2ohm pod the ratio recommended is 30-70% VG.
The included tips card also shows the recommended power settings and nicotine strengths for each pod.
If any of these terms are over your head – have a read of our handy guides below!
- MTL V DTL V RDL – A Guide To Vape Styles
- VG and PG in E-liquid – all you need to know
- Beginners guide to E-liquid
- Nic Salt E-liquid
0.8ohm Nevoks A1 Pod
The recommended power limits for this pod are 13-16W.
I am very impressed with this pod. I started at 16W as this is what I usually use my OXVA Xlim 0.8ohm pods at.
However the vape was slightly dry so I dropped down to 15W.
I have to say the flavour is really good – not up there with an OXVA Xlim or Uwell Caliburn, but a very close competitor!
My Bubblegum e-liquid is giving the flavour I love and just dropping the 1W means the slightly dry cotton taste has disappeared!
Very impressive!
After 10 refills the flavour is still going strong!
0.6ohm Nevoks A1 Pod
The recommended power limits for this pod are 17-22W.
I ran this at 21W which gave me the best flavour and warmth for my own vaping preference.
It was quite unimpressive for the first pod full (3ml) however suddenly the flavour really perked up and I found myself enjoying this a lot.
The Bubblegum is coming through in a bright and clear way and it is very succulent in this pod.
At 21W this is warm but not hot, so you can get a good long inhale plus you get a good quantity of vapour!
So persevere with this pod – the first 3ml was not great, but it soon wakes up and makes you smile!
Airflow
To help rate how restricted the airflow is, I use a scale – where 0 = fully closed, no airflow up to 10 = breathing fresh air.
For the 0.6ohm pod this ranged from 1 fully closed up to around 7 when fully open so quite a wide range of adjustment. Which is excellent as this pod is on the boundary of being MTL, DTL and RDL!
The 0.8ohm pod was 1.5 when airflow fully closed – you could still get an MTL vape as there is a small airflow hole. It is not as tight as some kits which have no airflow in the minimum setting – in fact the 0.6ohm pod has tighter airflow when fully closed which is odd! When fully open I would rate this around 5 – so it is possible for a good MTL (not the tightest) and a good RDL inhale!
Mod Performance
In general the output of the mod is very consistent and feels accurate.
There is a slight drop in power when the battery indicator is only showing 1 bar left. This is pretty normal and you often experience this with vape devices.
Leaks
Not a drop. Very happy!
Battery Life
This is always a variable and will depend on the pod installed, output level selected and your own vaping habits.
Also worth noting that I had the 3ml pod capacity.
With the 0.6ohm pod I got 7-8 hours (260 puffs) at 21W. This equated to around 3-4 refills per charge
I got around 10-11 hours (roughly 500 puffs and 4-5 refills) with the 0.8ohm pod at 15W. Epic battery life!
Pros
- Draw and button fire provided – sometimes over time the auto draw firing can fail on a device so it is great to have the back up of a fire button.
- Both pods give great flavour!
- A great range of pods to suit all vaping styles
- Large range of airflow adjustment from MTL to RDL
- Feels nice and smooth in the hand
- I love the 1500mAh battery capacity – great battery life!
- Only 45 minutes to charge
- Lockable fire button means less chance of accidental activation
- Variable wattage – means you can experiment with power levels and different pod resistances
- No leaks at all
Cons
- Can only see half of the pod when installed on the mod – so you have to keep removing the pod to check e-liquid level.
Nevoks Feelin AX Final Review Verdict
This little kit did impress me.
Firstly the large battery capacity means you will be vaping longer between charges. And even if you need a charge – it only takes 45 minutes.
The performance is great too – both pods chucked out some lovely flavour. With the 0.8ohm pod in particular, it was also economical on battery and e-liquid usage.
Design lost a point due to the fact you can’t see the e-liquid level when the pod is below half full. You have to keep removing the pod or tipping the device upside down to see how much e-liquid is left.
Usually I would rate a kit on “Value for money” but sadly at the time of writing the price is not showing on any vendor websites – so I cannot judge that.
If you are an RDL or MTL vaper you should be very happy with the airflow and pod performance.
I wouldn’t replace my OXVA Xlim or Caliburn Kits with the Nevoks Feelin AX, but it would be 3rd in line! Considering how amazing the other two are – this is a strong competitor and a real step up for Nevoks to be in that category!
I have reviewed the Feelin A1 and Feelin 2 which were decent kits but slightly missed the mark. However the Feelin AX kit is a huge improvement.
Well done Nevoks – you are evolving and improving with every kit!
Have you tried the Nevoks Feelin AX? Let us know in the comments below!

