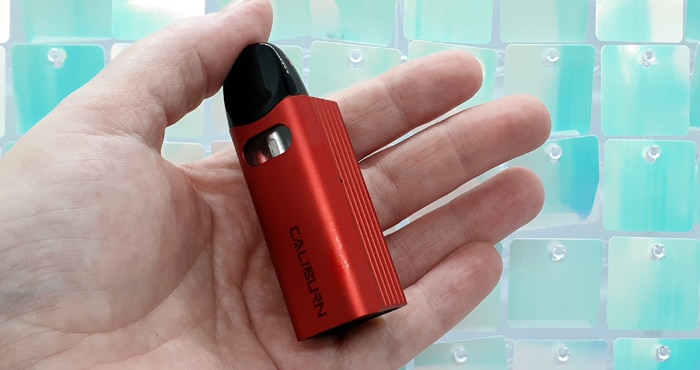
Here it is, the new Uwell Caliburn AZ3 – I love the Caliburn devices!
This fits into the “A” range of Caliburns – the simpler kits in the range.
The Caliburn A range started with the original Caliburn and then split into the bar shaped devices and the square shaped KoKo ranges in versions up to the recent Caliburn A3S.
What To Expect From The Uwell Caliburn AZ3…
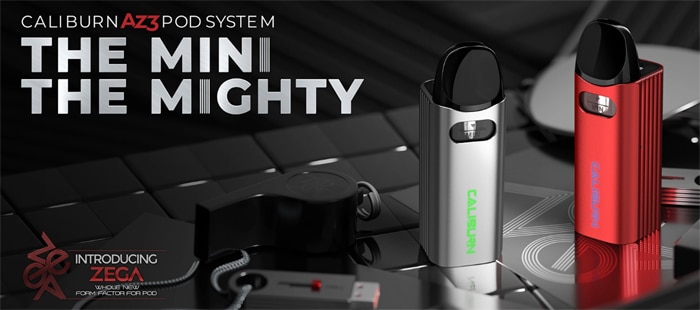
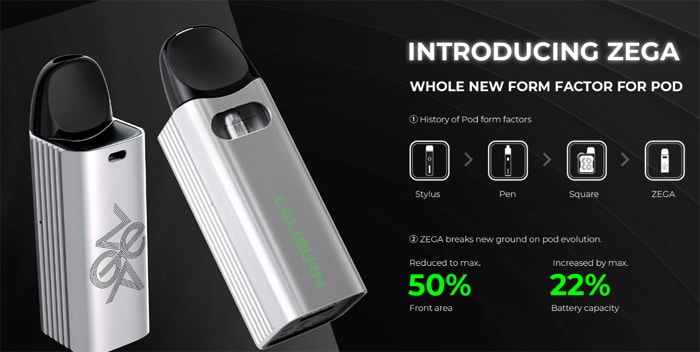
This is based on the A3 range of kits but with a more bulky body – which Uwell call the “Zega” shape.
Apart from the new shape, this is a standard Pod Kit format with a main device (mod) and replaceable tank (pod).
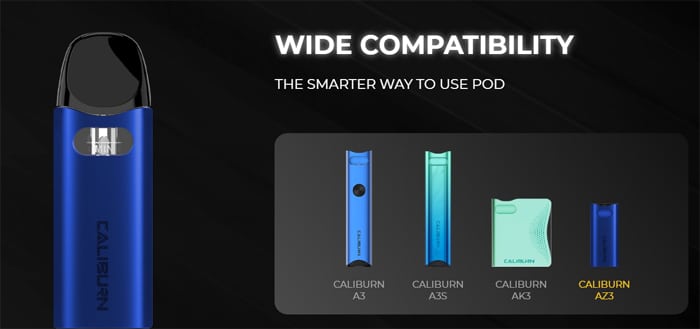
As this is A3 based it is even compatible with the existing A3 pod range found on the A3, A3S and AK3.
Included in the kit are the fixed coil 0.8ohm and 1ohm A3 pods. These are disposed of when the coil performance deteriorates and replaced with a new pod. Which means less mess and maintenance compared to changing coils.
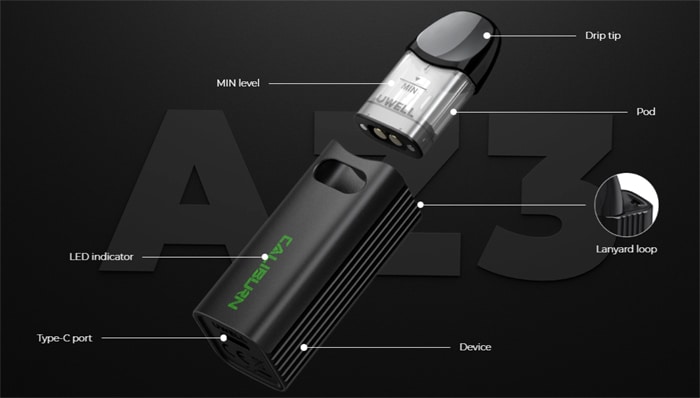
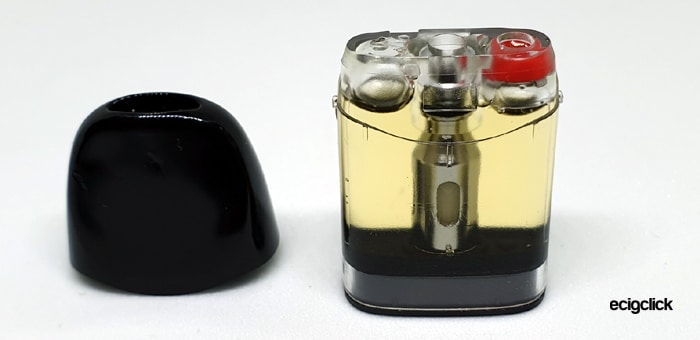
Each pod will hold up to 2ml of your own e-liquid and you snap off the mouthpiece to access the fill port.
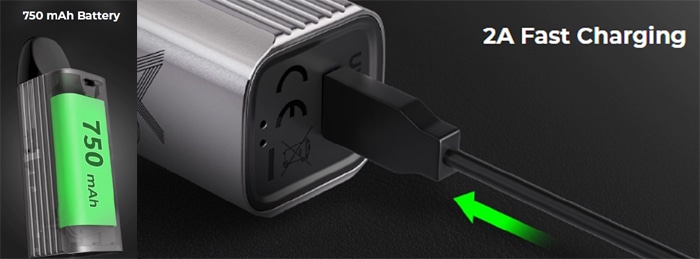
Inside the chunky body of the device is a 750mAh battery which has a 2A fast charge rate via the USB Type C charging port.
The output is specified as 17W maximum, but there is no need to worry as it will select the appropriate output according to the resistance of the installed pod.
Another feature which aids simplicity is the auto draw activation – meaning no buttons or switches, simply inhale on the mouthpiece to get it to fire.

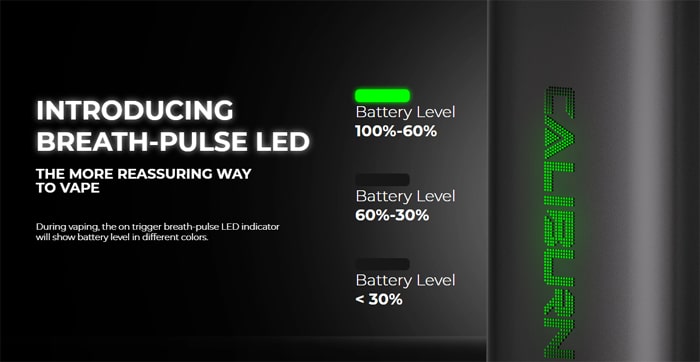
A funky LED is provided to inform you of charge remaining / fault conditions and like the A3S it is animated to shine through the Caliburn logo on the mod.
If you like an Unboxing video, featuring someone in a strange mask wielding a knife in a suspicious manner – here we are – this came from Uwell…
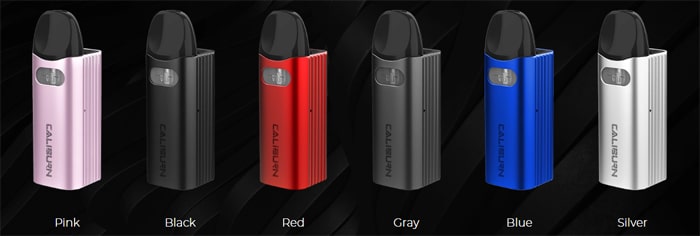
There are 6 colour options to choose from: Pink, Black, Red, Grey, Blue and Silver.
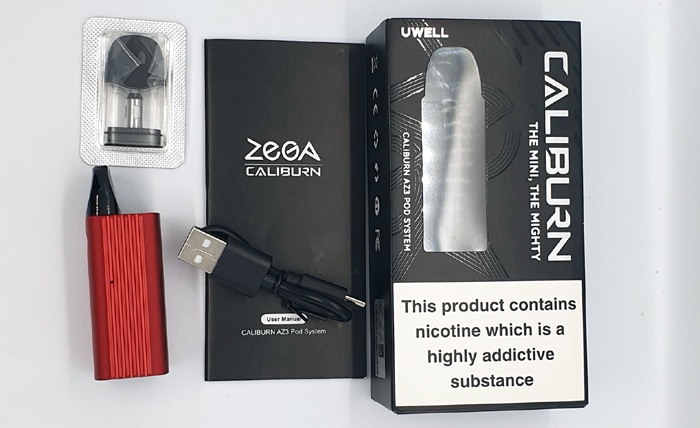
Kit Includes
- Uwell Caliburn AZ3 device
- 0.8ohm Caliburn A3 pod
- 1ohm Caliburn A3 pod
- USB Type C cable
- User manual
Uwell Caliburn AZ3 Specs
- Size: 68.9×23.8×23.6mm
- Battery: 750mAh (internal)
- Display: Pulsing animated LED indicator
- Output: 17W max
- Type C USB charging – 2A charge rate
- Resistance range: Not specified
- Capacity: 2ml
- Pods: Compatible with Caliburn A3 / A3S pods
- Top fill
- Auto draw activation
- Lanyard loop

Thank you to Vape Club for sending this over for review! I will report back honestly on my findings with the device in my possession!
Uwell Caliburn AZ3 Design and Build Quality
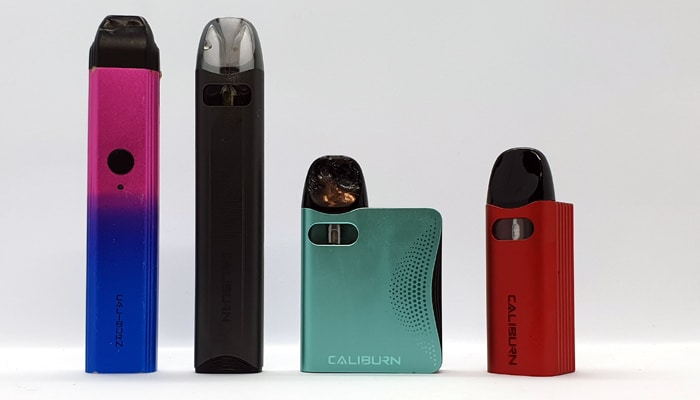
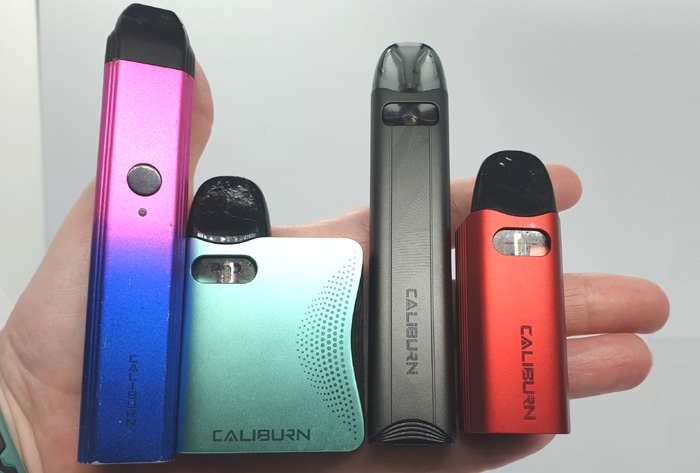
I received this in the Red version – it really is tiny! Below is a comparison with some of the other Caliburn A devices…
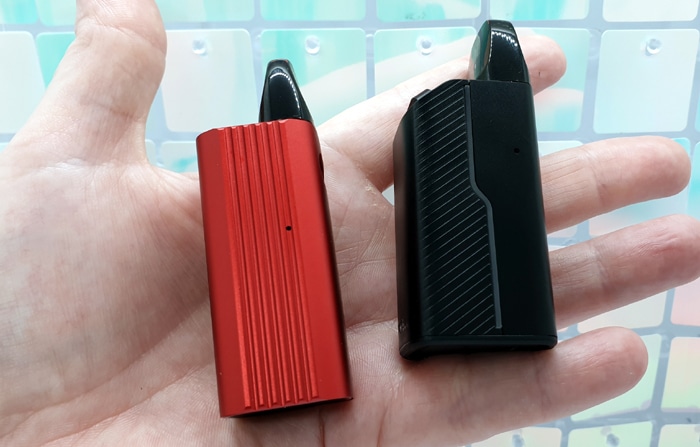
This has been released at the same time as its larger sibling the GZ2. You can see both in the image below.
The packaging is great and the device sits in a plastic pull out tray along with the spare pod and USB cable.
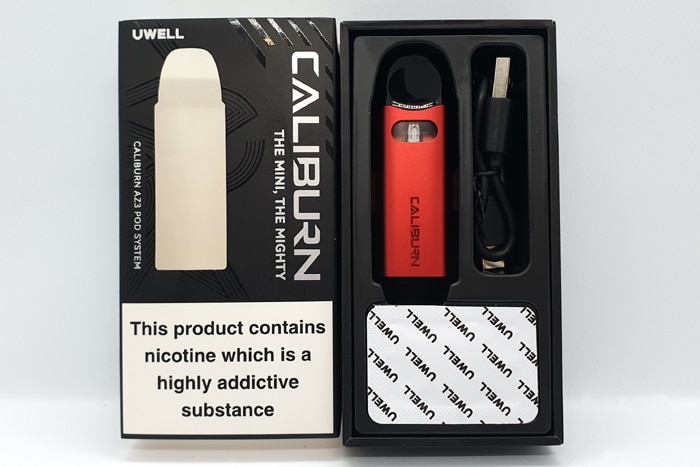
Lift the tray to access the instruction manual which is excellent and tells you everything you need to know. Sadly an online version is not yet available.
Uwell Caliburn AZ3 Mod
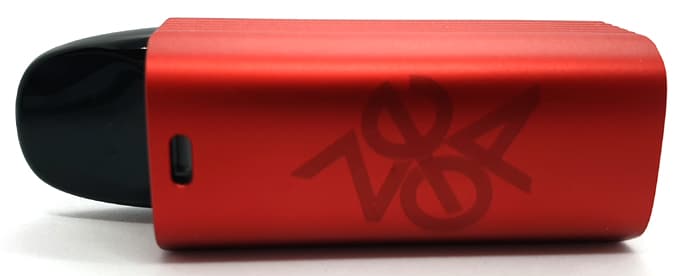
The mod is a cuboid shape with Aluminium Alloy coloured sides and hard plastic top and base.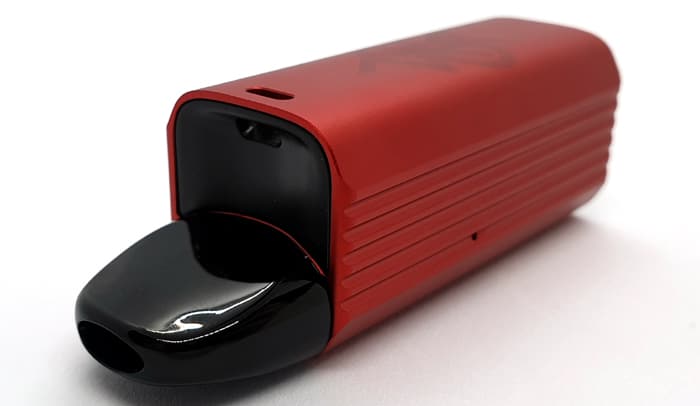
Both sides have a ribbed texture which helps with grip and adds some interest to the design.

Inside the ribbed area on each side is the pin hole airflow inlet.
The rear of the device has the “ZEGA” logo and holes to attach a lanyard, there is not one included in the kit.
The front of the device houses the e-liquid viewing window which is a bit dark to see through. But you can tilt it into a light source to get a clue of the e-liquid level.
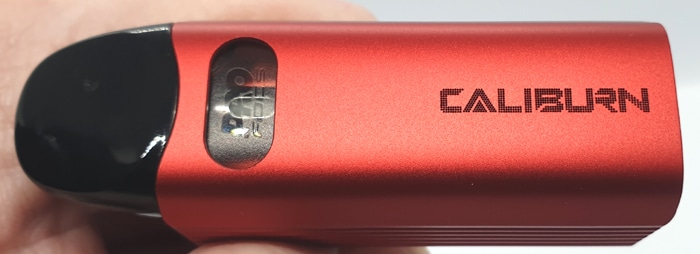
Below this is a cut out Caliburn logo.
In homage to the AK3 and A3S devices the LED indicator is animated and shines through the Caliburn Logo. I have captured the effect in a quick video below.
On the base you get the required legal logos and the USB Type C port.
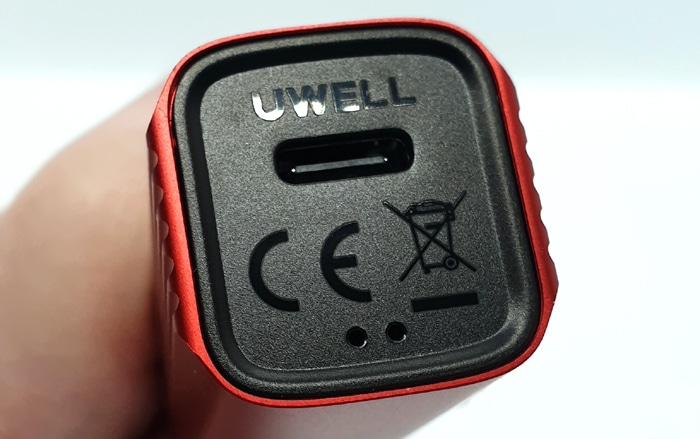
This is very sturdy to stand up on its own.
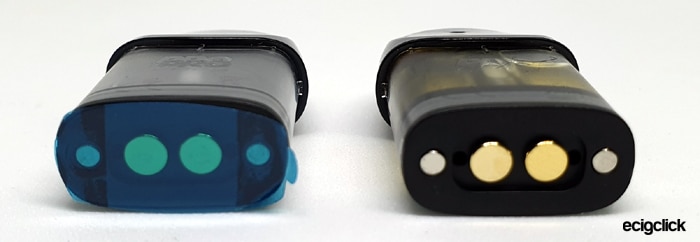
The top face houses the pod compartment and inside there are 2 magnets and 2 spring loaded electrical connectors.
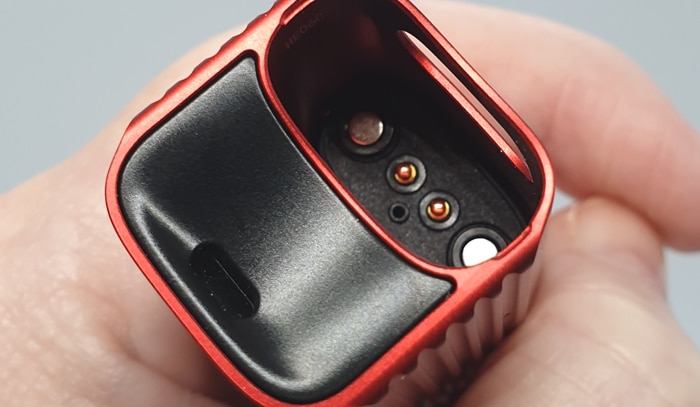
Next to the pod compartment is a strange concave face – which does feel nice!
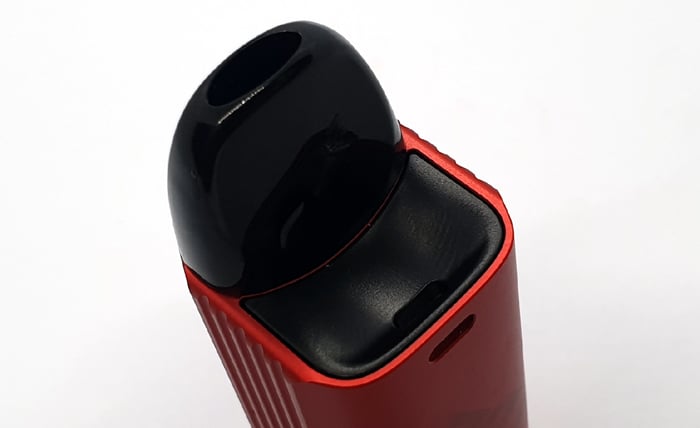
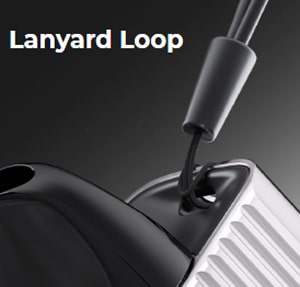 The little slots on the top and side face shown above are for a Lanyard but seeing as there is not one included in the kit, this image shows how you would connect it up.
As with all Uwell products the mod feels robust and has an excellent build quality!
Caliburn A3 Pod
This is the same pod as used on the Caliburn A3 – so I will be honest I have just copied and pasted this section across!
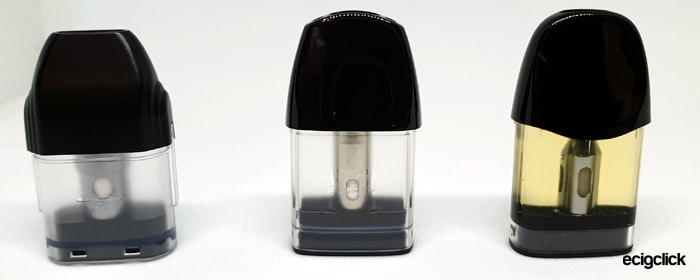
This looks extremely similar to the A2 pod but is slightly thinner, meaning the A2 pod is too large to use in this kit.
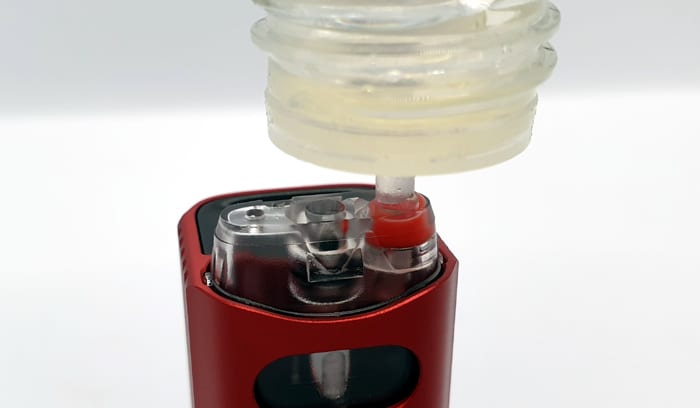
Under the mouthpiece (which I will talk about further on) are the fill and vent ports. Also there is a centre port which is where the vapour comes out. You need to make sure to only fill the Red port, adding e-liquid to the others could cause issues such as spitting.
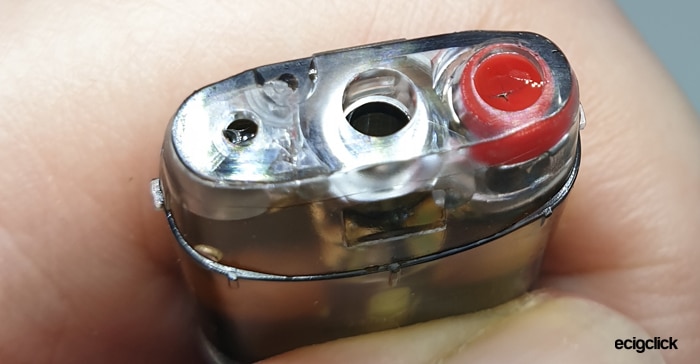
The air vent port makes filling super easy with no airlocks but the fill port will only just accept a 3mm diameter bottle nozzle. Anything larger will simply not fit and won’t allow the fill port valve to be opened. This could be a concern with some e-liquid bottles and the only way around that would be to decant your liquid into a smaller nozzled bottle.
The sides of the pod are totally clear with a “minimum” level disguised really well! It is there but it takes a lot of tilting and aligning with the right light to actually see it.

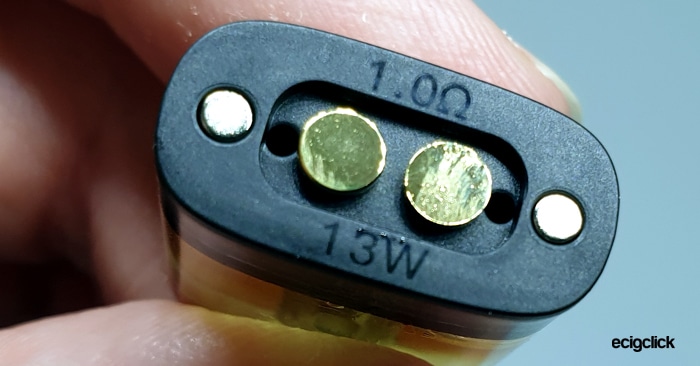
On the base of the pod are the 2 contact areas and two disks which mate with the magnets in the mod. Also the coil resistance and recommended wattage are stamped in.
Filling
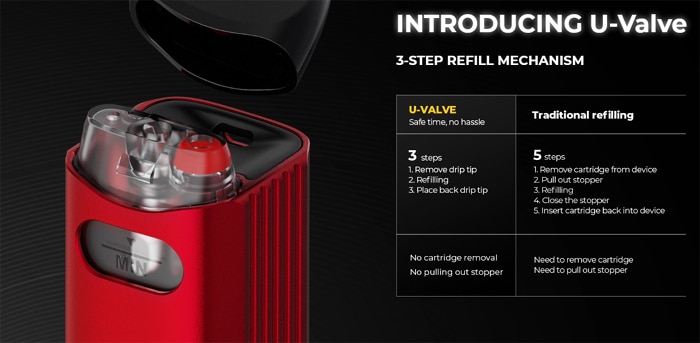
The most horrible bit of this whole kit – is the refilling system.
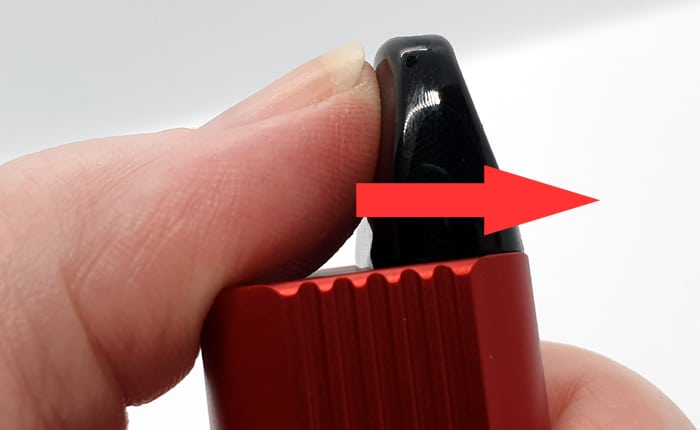
This has the pop off mouthpiece which you remove to get access to the fill port. Yeah “pop off” – sounds so simple and quick?
Nope – I am at a slight disadvantage having gammy joints in my hands but it was a real struggle to remove. The mouthpiece is all smooth so there is nothing to grip.
Officially you push the mouthpiece backwards to get it to “pop off”. In reality I found biting the mouthpiece whilst tilting the whole device worked. Not a great idea as my mouthpiece looks like it has been through a document shredder now.
But it is worth noting you can also use the pod from the A3S in here with the side fill port if you are struggling.
Uwell Caliburn AZ3 Quick Start Guide
This comes with an isolator sticker on the base of the pod to prevent operation before the pod has been filled. Therefore I would only recommend removing this sticker when the pod has been filled with e-liquid.
Basic Operation
- Power On/Off = This does not have an on/off switch.
- Vaping = Just inhale on the mouthpiece to trigger the auto fire system.
- Battery indicator = this changes colour according to the battery charge remaining whilst vaping – Green LED = over 60% charge, Blue LED = 30-60% and Red LED = less than 30%.

- Battery indicator when charging = same as above and the light will stay on solid Green when fully charged.
Protections
- Low battery – Red light flashes 10 times – recharge the battery to continue use.
- Short circuit – Red LED flashes 3 times – clean contacts, replace pod – if this does not rectify the fault the device could be faulty.
- Over Time Protection – Green LED flashes 5 times – if you vape for longer than 8 seconds the fire operation will cut out to prevent overheating.
- No atomiser (Pod) / open circuit – Blue LED flashes 3 times. Insert a pod. If this does not rectify follow the advice for short circuit.
How To Charge The Battery
The charging rate is specified as 2A.
- Using a USB type C cable, connect the small end into the USB port on the mod.

- Connect the large end of the cable into a suitable USB outlet.
- The LED will cycle through the colours and will stay on solid Green when charged.

The charging time for me using a mains charging plug was around 42 minutes.
How To Fill the Pod
- You can either remove the pod from the device or keep it installed. I did find it easier to remove the mouthpiece with the pod still in the body.
- Bite the end of the mouthpiece and tilt the device until it pops off! (This is unofficially my method – not recommended but I have joint issues in my fingers!)
- The proper method for removing the mouthpiece is to sort of push the mouthpiece back and it will unclick from the pod.

- Insert the e-liquid bottle nozzle right into the Red coloured port. Do not use the other two ports! The fill port has a valve which you must open with the bottle nozzle so it does need to be inserted in about 5mm.

- Fill the pod.
- Replace the mouthpiece until it “clicks” and replace the pod back in the device if removed.
- If first time use or a new pod leave this to stand for 10 minutes for the e-liquid to soak into the wicking. Failure to do this will result in the vape from hell (Dry Hit).
- Plus you can take a few dummy vapes on the pod before you insert it into the mod to help the e-liquid flow through.
- Also make sure to refill when the pod level is at the “Minimum” marking to prevent pod damage.
How Does the Uwell Caliburn AZ3 Perform?
I mix my own e-liquid using the IVG Bubblegum Concentrate to 20%. I add this to 50% VG and 50% PG base liquid. This is the ideal ratio of VG/PG for a low powered pod kit.
The flavour ratio I use is quite high, which can sometimes be a coil killer, but I love a lot of flavour!
I add nic salt to approx 6mg strength.
If any of these terms are over your head – have a read of our handy guides below!
- MTL V DTL V RDL – A Guide To Vape Styles
- VG and PG in E-liquid – all you need to know
- Beginners guide to E-liquid
- Nic Salt E-liquid
0.8ohm Caliburn A3 Pod
I mean – it is a Caliburn and has the “Pro-Focs” technology thingy going on! I have no idea what “Pro-Focs” means but whenever I see that it always equals an excellent vape!

The power output is perfectly matched to this coil giving a warm vape without it becoming too hot.
Also you will get a fierce throat hit with any e-liquid over 10mg nicotine strength, so if you want your throat to feel like it would when smoking that is a bonus. If this hit is too strong swap to the 1ohm pod.
The excellent flavour, (which is again another classic Caliburn characteristic) does not disappoint. I tried both my standard e-liquid and the concentrated SKE Crystal Salts Blue Fusion and the flavour blew me away with both.
So far have refilled 10 times and the flavour is still perfect!
This pod brings any e-liquid to life!
1ohm Caliburn A3 Pod
The flavour output on this is great, but not quite as strong as the 0.8ohm. To be honest that is to be expected as this is a lower powered pod.
There is only a weak throat hit with my 6mg nic strength e-liquid, but I also tried some of the Crystal Salts Blue Fusion in here. The Blue Fusion is 10mg nic strength, so not really strong but you do get a hint of a throat hit.
I would recommend this pod for those using over 10mg nic strength for the best performance. Below that strength and you may find the 0.8ohm is the better performer.
However the 1ohm pod is all about smoothness, you get plenty of flavour but it is cooler and just more mellow. Something which you might appreciate with strongly “iced” e-liquids.
A great performer, but my preference is the 0.8ohm!
After 7 refills the flavour is still just as good – no deterioration!
Airflow
The airflow here is fixed so there are no adjustments apart from which pod you install.
I will rate the airflow using a scale of 0 = fully closed (no airflow) – up to 10 = fully open (like breathing fresh air).
With the 1ohm pod I would rate this around 2.5. Plenty of restriction, not the tightest airflow I have ever tried but still perfect for MTL vapers. You would struggle for a RDL (Restricted Direct Lung) vape on this one.
As for the 0.8ohm pod there is barely any difference – still 2.5 to 3 on the scale. Again not much use for RDL vapers really.
If you are an RDL fan I would recommend the Caliburn GZ2 as that does have a wider airflow scale.
Mod Performance
No issues with the mod, it played nicely from the moment I started using it!
The auto draw firing is super quick and doesn’t fail or stutter – so it works perfectly.
Nothing to report at all – it just works!
Leaks
No leaks but the outside of the pod did have a misting of e-liquid at times. It may be down to e-liquid escaping from the vent port when filling or lurking on top of the pod when I replace mouthpiece. Nothing serious, a wipe with a tissue on top of the pod before replacing the mouthpiece should solve this.
The base of the pod had a slight mist of condensation (which is common) but no leaks and the pod compartment on the mod was bone dry.
Battery Life
This is always a variable, it depends on your own vaping habits, the pod installed and even the nicotine strength of your e-liquid (stronger nicotine = less / shorter vapes). So just use my findings as a guide as I am a heavy vaper who does take long inhales.
With the 0.8ohm pod I got between 5.5 and 6.5 hours vaping on one charge. That equates to around 3 pod fills between charges.
With the 1ohm pod bizarrely I only got 5 to 5.5 hours of vaping, again approximately 3 refills per charge. I believe the battery life was impacted by me taking much longer inhales as this was a lower power output.
Pros
- So cute and tiny
- Excellent build quality
- Love the animated LED effect
- Its compatible with previous A3 pods
- 2 different pods included in the kit plus USB cable
- Excellent quality vape experience
- Perfect MTL airflow
- A3 pods usually have great coil life (over 43 fills on my Caliburn AK3 1ohm pod!)
- 42 minutes charge time is ace
- 1ohm pod is economical on e-liquid usage
Cons
- I am not fond of the top fill design, I find it difficult. But use the A3S pod with the side fill to overcome this issue
- E-liquid window is a bit dark to easily see e-liquid level.
- Fill port hole is a bit tight for slightly bigger bottle nozzles
- Not really set up for RDL vaping
Final Review Verdict
It is hard to believe the extra battery capacity when you see how small this is! Remember it has a larger capacity than all the other A series devices in the image below, but it is a lot shorter in comparison. The others have 520mAh batteries and this has a 750mAh!
Oh yes I still detest the horrible top fill system. But thankfully I have the Caliburn A3S with the side fill pod and this pod works perfectly in the AZ3 – so that would be the perfect solution for anyone else struggling.
Also it is worth mentioning the 1ohm A3 pod in my Caliburn AK3 lasted over 43 pod fills (I stopped counting after that) and the flavour was still fine, so fingers crossed you should get the same great pod life.
Between the Caliburn and OXVA Xlim ranges I think you cannot find better flavour in a low power pod kit.
And this addition to the Caliburn range has not let the badge down at all. In fact the increase in battery capacity was exactly what was needed.
If you already have the A3, AK3 or A3S the fact that your stash of pods will still be useful means the upgrade in battery capacity will be worth it.
Yet (apart from the filling) this is still ultra simple for the new vaper to get to grips with. It is one of those ideal starter kits that you know will give newbies the best impression of vaping.
I just wish Uwell would take the example of the A3S and ditch the top fill pods. If they had, this would have got full marks!
Any Caliburn is always a solid investment!


