I’ve just received the Vandy Vape Kylin M Pro RTA and I’ve got mixed feelings on what I should expect.
For a long while the original Kylin RTA was my favourite atomiser. Since then I have reviewed the Vandy Vape Kylin Mini V2 for EcigClick and that scored a very decent 8.6 / 10.
I also reviewed the Kylin M (not for ecigclick). That was ok, but I’m really not a huge fan of mesh RBAs. At that time mesh strips were thin, faffy and temperamental. However, since then I’ve reviewed the Wotofo Profile RDTA which takes mesh strips and I absolutely loved it, so I’m not anti-mesh.
Truth be told, I’ve reviewed a few Vandy Vape RBAs on my youtube channel and in my opinion they’re ‘like Marmite‘, in the respect that I either love them or hate them.
Vandy Vape aren’t restricted to RBAs though, the brand was born in the vape capital of the world, Shenzhen, China, way back in 2016.
Since 2016, Vandy Vape have been super busy their catalogue currently consists of:
- 6 Mods
- 17 kits
- 18 RTAs
- 20 RDAs
- 5 RDTAs
- A bunch of accessories including wires, cotton and tool kits
I have to say the Vandy Vape Gaur21, which I reviewed last year is my favourite mod. It was my go to all the way up until I broke it a few weeks ago, but to be fair it had survived a lot of drops before it finally gave up.
What Can We Expect From The Vandy Vape Kylin M Pro RTA?
We should be expecting something special, the Kylin M Pro is just the latest edition to a lengthy family tree. Its predecessors are the original Kylin, Kylin Mini, Kylin V2, Kylin Mini V2 and the Kylin M RTA. There was also the Kylin M AIO pod in the range!
So if experience is anything to go buy we should be on to a winner!
From what I’ve seen, the Kylin M Pro is very similar to the M. The biggest difference is the E-liquid capacity, which has been upped from 4.5ml to 8ml with the bubble glassed.
Without the bubble glass it’s upped from 3ml to 6ml (2ml for TPD of course).
The bigger capacity has been achieved by restructuring the chamber slightly, but mainly by removing the honeycomb airflow and replacing it with a slit (at either side), which in turn reduces the space needed for the adjustable airflow band.
The top-fill remains underneath the cap, which is removed with a quarter turn (90degrees).
Without further ado, let’s see what this little beast can do!
In The Box
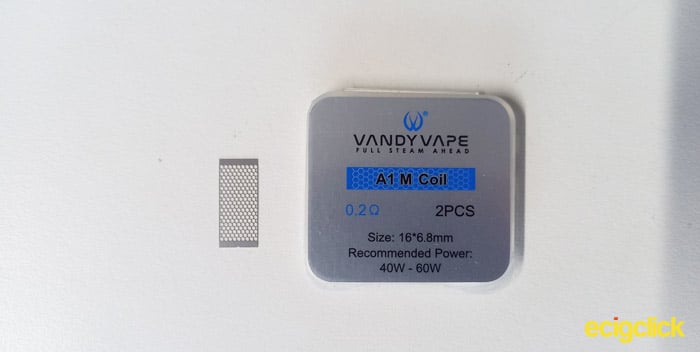
- Kylin M Pro RTA
- 2x A1 M 0.15ohm strips
- 2x A1 M 0.2ohm strips
- 2x Cotton Laces
- Pyrex Glass Tube
- Accessory Bag (including screw driver & 510 drip tip adapter)
- Instruction Manual
Specs
- Size: 24.2 x 33.35mm
- Capacity: 8ml (Bubble glass standard) / 6ml (straight glass standard) / 2ml (TPD)
- Single Mesh Build Deck
- Adjustable Top Airflow
- 5 Different Mesh Strips Available
- 1/4 Turn Top Fill
- Weight: 181g
Design & Build Quality
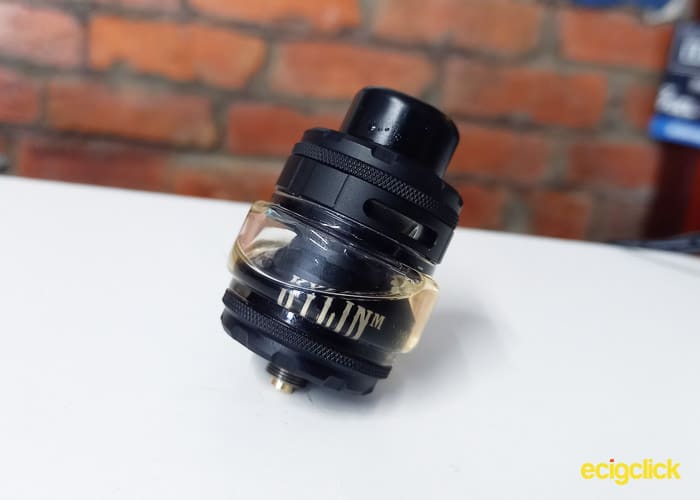
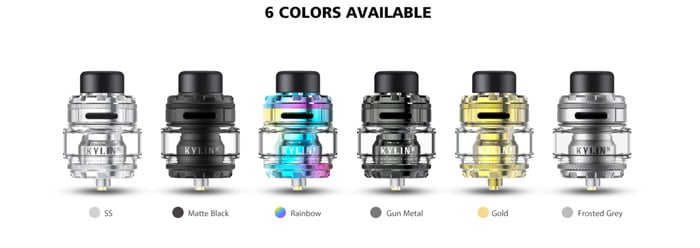
The Vandy Vape M Pro comes in 6 colours, I received the gorgeous Matte Black.
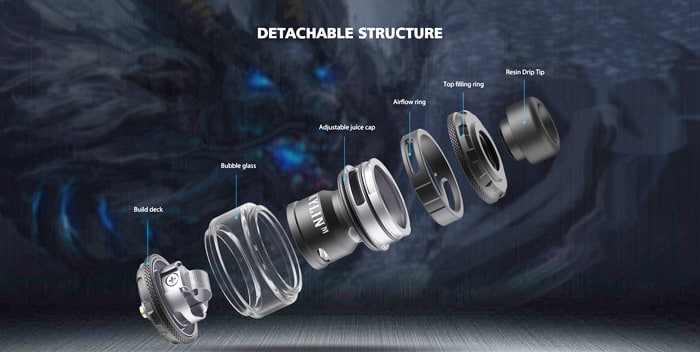
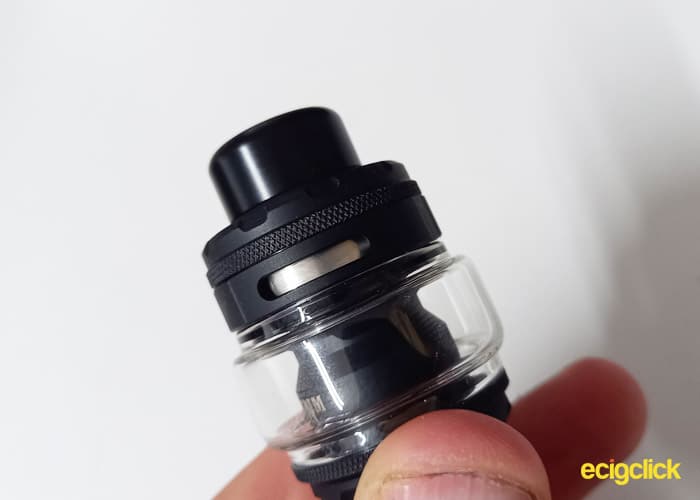
Assembly Of The Vandy Vape M Pro RTA
As you can see the Vandy Vape M Pros assembly is quite typical. But I like to post it because it gives a clear idea of how the RTA is set up and it sets us a nice easy work flow for the review.
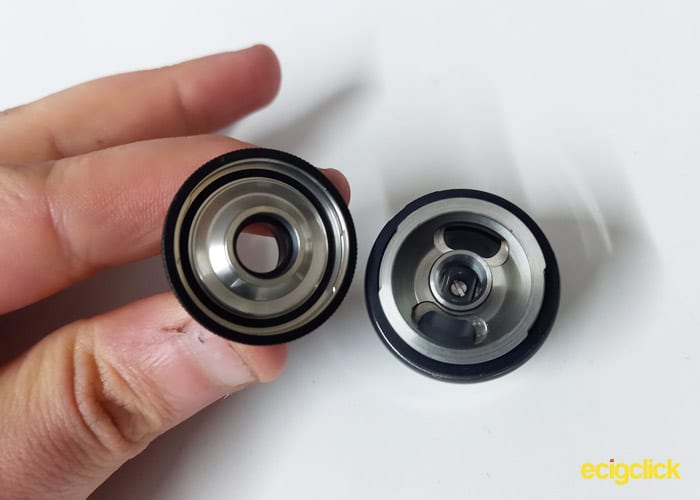
Vandy Vape M Pro Base & 510 connection
The base and connection on the M Pro is very standard and there isn’t much setting it apart from other RTAs.
The positive pin is silver (in colour), not gold which I thought was interesting, as the common choice these days is gold.
There is the Branding on the underside of the base.
On the outer edge of the base the bottom is chamfered with gaps, which always reminds me of the top of a castle wall. However, further up, just below the glass the base is knurled and although it’s only 2mm thick, it helps a lot for grip.
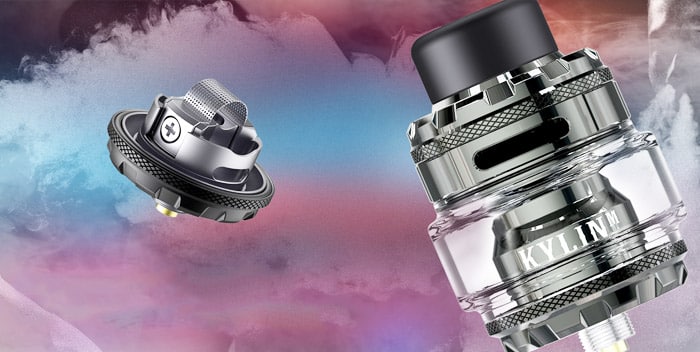
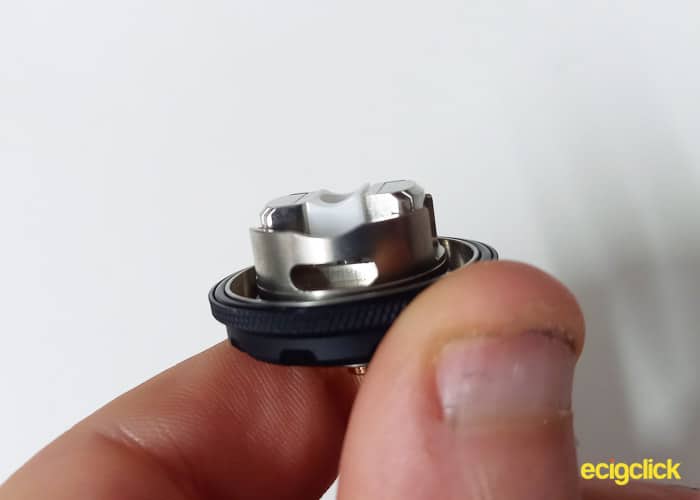
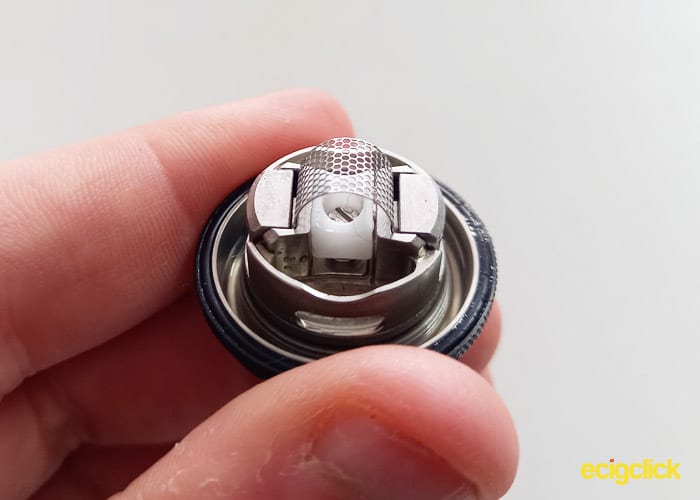
Vandy Vape M Pro Build Deck
The build deck is almost identical to the Vandy Vape M. The biggest difference I can see is the dip in the wicking port wall.
I don’t know the official reason for that being there, however it looks slightly better, it’s a little bit easier to wick and I presume it will probably help the wicking to.
The most crucial part of any decent mesh deck (in my opinion) is the spring loaded ceramic plate. It’s vitally important because it presses the cotton up against the mesh. Without it you’d be a lot more prone to dry hits and burnt cotton.
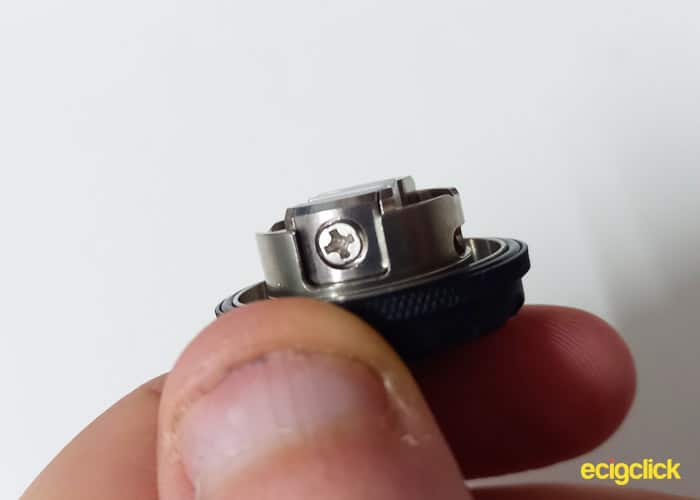
At either side, is the coil clamps. The clamps use a centred Philips screw, which is typical and in my opinion the best way.
On the adjacent sides are the wicking ports, which are a fair size. There is a pill shaped hole in each which matches up to the holes in the chamber, as the chamber goes all the way to the bottom of the base.
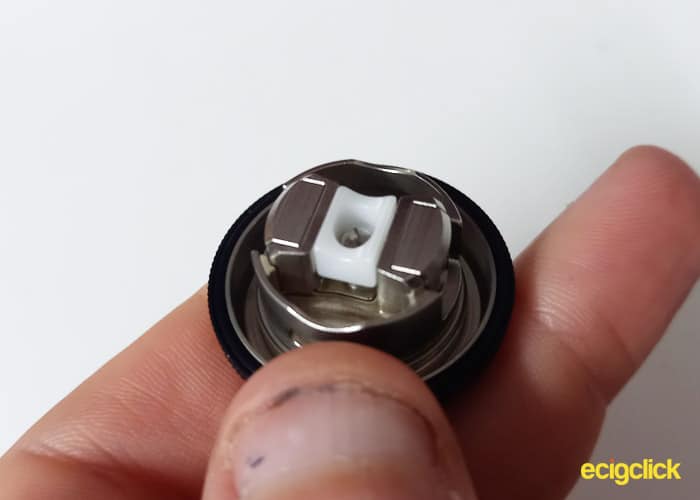
Vandy Vape M Pro Chamber
The Chamber is as you would expect. It has 4 pill shaped holes, 2 for the wicking port and 2 for the top airflow which is directed onto the mesh strip.
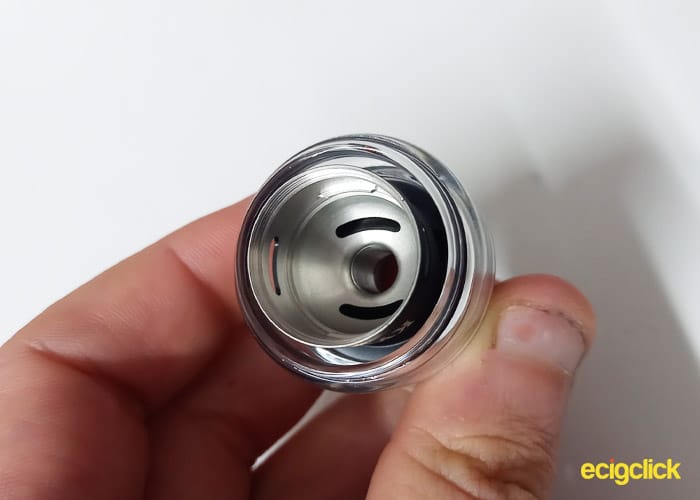
Over all the chamber is well built and smooth, with a chamfered roof.
As with any top airflow RTA, the chamber locks onto the build deck to ensure the airflow is pointing in the right direction.
What is impressive is Vandy Vape have done this without using any extra latches onto the deck. Inside the chamber there is 2 little lips on the wall which matches up to where the mesh clamps are, locking it between the wicking ports. It’s simple and elegant, I like it.
Something I have noticed, is when you take the deck off from the rest of the atomiser the chamber section actually over extends the glass by more than you would expect. This is because (as I just mentioned) the chamber actually goes past the wicking holes and all the way to the bottom of the base.

I’m not sure what causes it but the base to chamber connection isn’t the smoothest, it feels quite rough and at times hard to connect.
Vandy Vape M Pro Adjustable Airflow
The airflow ring has a slit at either side, each measuring at roughly 13 x 2.5mm. You can see that as soon as the air enters the RTA it is pushed down.
While fully closed it still allows for a RDL (Restrictive DTL) and while it’s fully open its very loose… And very loud. It sounds like a broken whistle, a very loud broken whistle. No I don’t mean it whistles but it makes that rushing air sound.
Although the airflow control band is nice and tight, it rotates really smoothly, it’s quite satisfying.
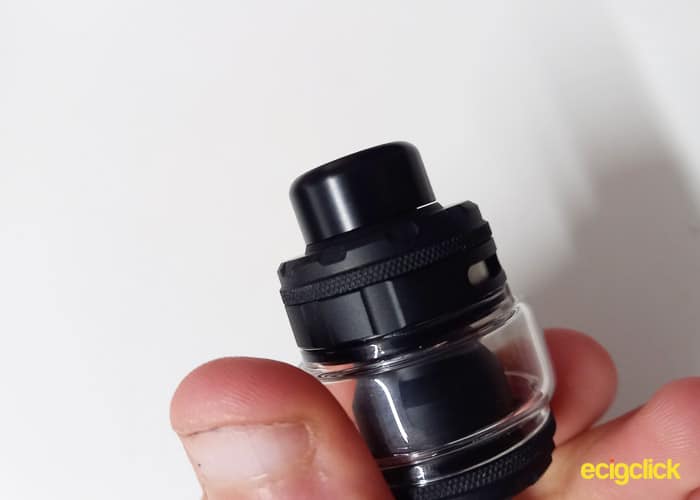
Top Cap / Filling Port
The edge of the top cap mirrors the base. It has a 2mm thick knurled band at the bottom and the “castle wall” edging at the top. Again this is excellent for grip.
 The cap is removed with a 90degrees (quarter) turn anticlockwise. Like the AFC band it’s fairly tight but it’s also satisfyingly smooth.
When the top cap is removed you’re met with a sort of top reservoir, which is all silver and shiny. The filling holes are quite low, but I don’t think that you’re necessarily supposed to put your nozzle through the hole like you usually do. Although that is possible
Vandy Vape M Pro Drip tip
The Vandy Vape M Pro uses a 810 drip trip. Although it’s pretty bulky, measuring at 18mm in diameter and standing 10mm tall when connected, it’s pretty standard.
There is one O-ring holding it in place and that is located inside the top-cap.
Build & Design Summary
All in all the Vandy Vape M Pro is pretty well designed and built. I love the small addition of knurled strips, they make the top cap and base so much easier to remove.
Talking of which, I’d like to mention the application of the base. Removing the base is fairly easy, however putting it back on is a little tight and at times a little bit awkward.
It isn’t a major issue, but it does ruin what is otherwise a set of satisfyingly smooth thread connections.
Building On The Vandy Vape M Pro
The first obvious step is to remove the base. If you’re rebuilding/changing the wick, make sure you hold the RTA upside down when you remove the base in order to preserve the E-liquid.
After you have chosen which mesh strip you would like to use, unscrew the clamp screws on either side. Don’t go mad, you only need to loosen it enough to get the end of the mesh strip in.
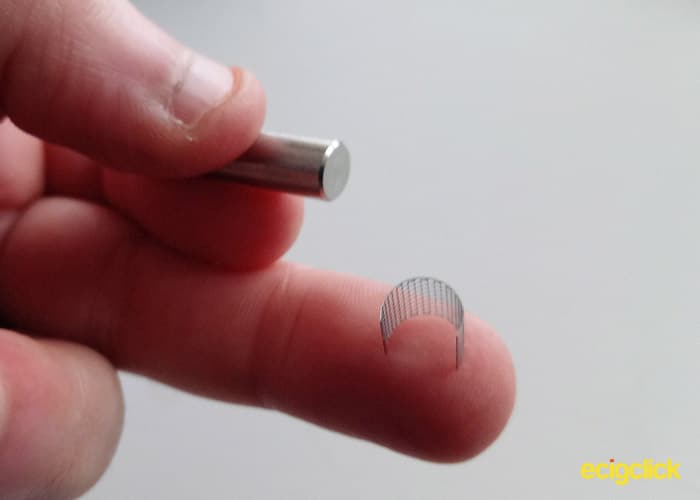
Find the bending tool, which is essentially a small bar. And wrap the mesh strip around it evenly and equally to make the mesh into a ‘u’ shape.
Place the, now ‘u’ shaped mesh into the clamps and screw them closed. It’s fairly easy to do. However make sure the mesh is level and proper.
Putting the cotton in can be difficult and it does require patience so I would always advise using the right thickness cotton laces.
Push the lace through the mesh. Then, while applying downwards pressure (onto the ceramic plate) slowly and gently pull the lace through, under the mesh. If you are struggling press the fluffy side of the cotton together to make it easier for the cotton to glide through.
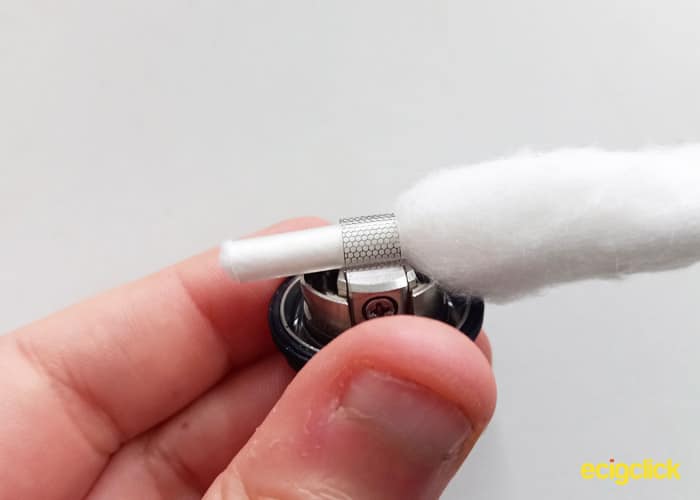
Be careful not to disturb the mesh. If you bend it or cause any kinks, the mesh will be ruined, so be gentle and patient.
In my opinion the hardest but it cutting the cotton neatly because it is so thick. Again just be patient and gentle and there will be no problem.
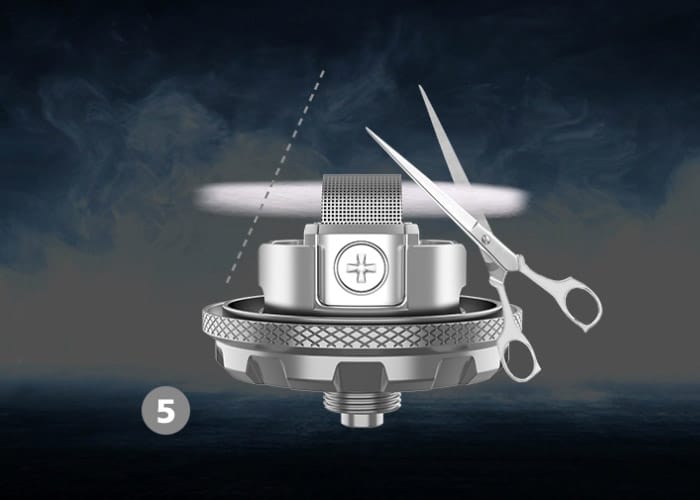
When you do cut the cotton, ensure you cut it diagonally like the image below shows. Cutting it vertically will do you no favours.
Fluff the cotton out so it isn’t tightly compressed where you cut it. Don’t go too heavy though, if you cut it right, there is no need to thin it out.
Now it’s built, saturate the cotton and mesh with e-liquid.
After that put another small drop of liquid on top of the mesh and fire at a low power. When doing this you should see the liquid get ‘sucked’ into the mesh, do this a few times to help ensure the cotton under the mesh is saturated.
Sorted.
If you have followed the above correctly, you should now be able to put the base back on, fill the RTA with e-liquid and start using it.
Vandy Vape M Pro Performance
The Vandy Vape M Pro is a true mesh RTA, it looks like one, acts like one but does it perform like one with beautifully smooth vapour and great flavour?
Throughout my time using the M Pro RTA I used Rochford Projects Lemon Meringue Tart. It’s mixed at 70VG/30PG and I added a nic shot to bring it upto 3mg.
A1 M 0.15ohm strip
I’d like to point out that this strip is actually reading 0.17ohm rather than 0.15ohm.
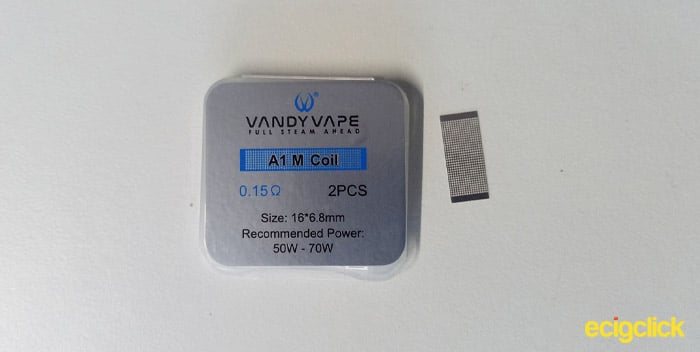
The A1 0.15ohm Mesh strip is recommended to be used at 50-70W, so in good tradition, let’s start way down low.
At 40W you get a small cloud but next to no flavour. We’ll give it the benefit of the doubt though, we are firing 10w lower than the recommended and mesh is usually very particular.
50W is the bottom of the recommended range and we get a decent, medium sized cloud however the flavour is still very weak.
In the middle of the recommended range, 60w starts to throw some flavour to the back of your throat, it’s prominent but weak at the same time. Almost like drinking something that hasn’t mixed properly, there is flavour but there more water around the edges… it’s weird and hard to explain.
So far it’s been a bit of a let down in regards to flavour, so fingers crossed for 70W, which is the top of the recommended range. Sigh.
There is now some constant flavour but I’m not impressed. Although it’s persistent and prominent, it doesn’t flood the mouth like I’d expected.
I’ll go up to 80W, but only because that’s what I always do. However, if truth be told, I’m quite scared. As I said before Mesh is very particular, and I’m never in the mood for a dry hit!
Well I never, 80W did provide a great hit. It still didn’t flood the mouth but it was pleasantly prominent. The vapour has a comforting warmth to it and with a nice long drag it provides a medium but thick cloud.
Turning the airflow down a bit does up the flavour but it’s still it still isn’t anything special.
A1 M 0.2ohm strip
The A1 0.2ohm Mesh strip is recommended to be used at 40-60W. I’m not going to start down low because there really isn’t any point.
At 40w with the airflow turned most of the way down you get a thin medium sized cloud with practically no flavour. Opening it fully allows you to get a hint of flavour. I’ve been playing with the airflow and it feels like a tedious game of hide and seek.
Things don’t improve much at 50w, the cloud does get a little bit thicker though. Super underwhelming.
To continue the game of hide and seek with flavour, I turned it upto 60W and couldn’t find it there either. Ok there was a subtle taste, but I’m seriously unimpressed.
In desperation, we’ll look at 70W, but if I get a dry hit there will be hell to pay!
I give in. During the 2 days I used this mesh, I even resorted to dripping into the RTA, to make sure there was enough juice around the ‘coil’. But even the ‘spitback’ was underwhelming!
The cloud is medium and I suppose you could call it thickish…. But I’m really unimpressed.
Pros
- Well built
- Easy to build on
- Huge Juice Capacity
- Top Fill
- Top Airflow
- 4 coils (strips) in the box
Cons
- Really noisy airflow
- Unimpressive Flavour
- Unimpressive Clouds
- Wicking is harder than a normal RTA
- Only 2 cotton laces provide but 4 mesh strips
- Base connection could be smoother
- It’s heavy (181g)
Final Verdict
Honestly I tried to be biased. Seriously I was going to give it the benefit of doubt and be positive.
And being positive on the build quality is really easy because it’s incredibly well built. I’m still impressed with the smoothness of the top-cap connection. Then again, that’s even let down by the un-smooth base threads.
However, a vape, especially a rebuildable, is supposed to give really good clouds or flavour production (preferably both). But it doesn’t!
The cloud production on both mesh strips were satisfactory and the 0.15ohm mesh flavour production was satisfactory. However the flavour production from the 0.2ohm mesh was non-existent.
Fortunately, if you do want to try it out for yourselves, it’s really easy to build on. With exception to wicking, but that’s expected from a mesh RTA and to be honest once you’ve done it once, it’s easy.
I will now apologise to all you Vandy Vape Fans, because in the past when I have given a not so glowing review on a Vandy Vape RBA, I’ve received an onslaught of messages telling me that I’m wrong. So there probably will be some people out there that love it. If that’s the case for you we would love to hear your thoughts in the comments below.
However in my opinion, for an RTA it didn’t hit the mark. I don’t see why you would bother using a device that you have to build on, if you don’t have the freedom to be creative, especially when the mesh strips it comes with aren’t all that good in the RTA.
Finally, I want to explain, that you CAN use round coils. HOWEVER, it is not designed for it, there isn’t a lot of space inside the chamber for a round coil and the clamps aren’t the best for round coils.
So don’t buy it if that’s what you want it for, there are plenty of RTAs on the market that allow the use of both, mesh and round coils.


