The new Kizoku Kirin kit is definitely an interesting vape kit to review!
Like a lot of people I’m stuck sitting at home at the moment, so it seems like a good time to be getting on with some reviews!
Happily I recently received the curious Kizoku Kirin, a bit of a mash up of various recent trends in the vape industry.
What Can We Expect From the Kizoku Kirin Kit?
As you will know if you read my review on the Kizoku Limit, Kizoku are a Japanese company that until recently have been more known for their atomizer stands and drip tips.
With the Kirin kit they have decided to combine two increasingly popular types of vape, the MOSFET tube mod, and the disposable tank. Slightly weird combo, especially when you have a sub-ohm, 18350 configuration, but OK!
Although Kizoku call the Kirin mod a “semi-mech”, it really is quite a long way from being a true mechanical device. That’s not to say I don’t like them, in fact I now own 4 different mods of this style including the Stratum 0.
For more information on the different types of mod I highly recommend our Mechanical V Regulated page which helps to break it down.
The Kirin goes the same way as the Ambition Mods Luxem, in that it is not only has some protection, but also has a constant voltage output, in this case 3.5V.
This was sent over for Heaven Gifts for review (thank you). As usual, by thoughts are my own, and I am not influenced by freebies.
Inside The Box
- Kirin tube mod (preconfigured for 18350)
- 18650 Extension Tube
- 0.5Ω tank
- 1.2Ω tank
- Manual and Warranty Card
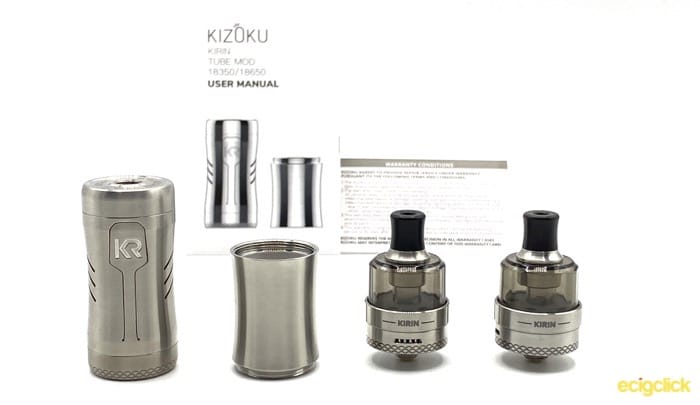
Please note, for my review I was sent the two tanks and the tube in individual boxes. I have seen at least one other reviewer who was sent it all in one box, so I’m unsure as to which configuration you will get at retail.
When it comes in one box you get the tank pre-configured as the 1.2Ω, and the 0.5Ω as only the spare internal section, so keep a hold of your base and drip tip!
KIZOKU Kirin Kit Specs
- Dimensions – 81mm x 24mm (mod) 42mm x 24mm (tank excluding 510)
- Weight – 75g (mod)
- Power Output – Constant 3.5V
- Resistance Range – 0.2-3.0Ω
- Coil Resistance – 0.5Ω and 1.2Ω
- Battery – Single 18650 or 18350
- Capacity – 2ml
Design and Build Quality
KIZOKU Kirin Kit – Tank
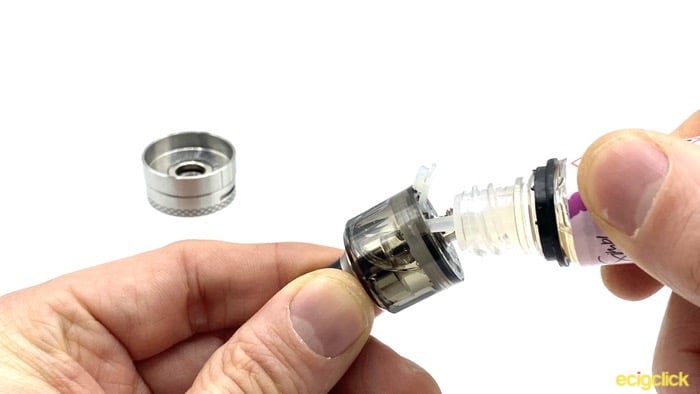
This is a two piece disposable tank. You have a PCTG section that your coil lives in and you fill up with e-liquid, and a metal base that houses your 510 connector and airflow control.
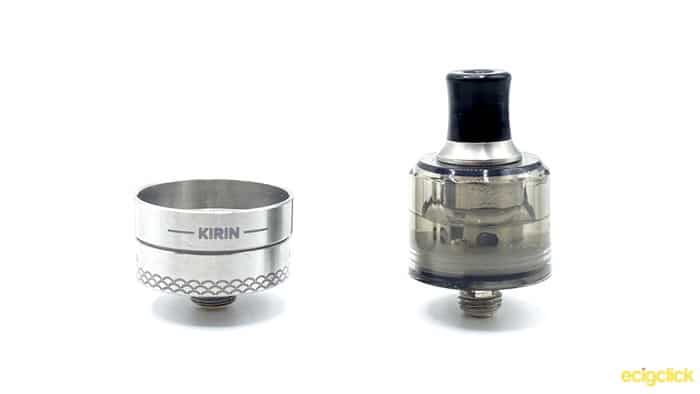 At the top you have a vase-shaped, removable 510 drip tip, that’s double o-ringed. It’s a two-piece design with an upper section of black plastic, and a metal base.
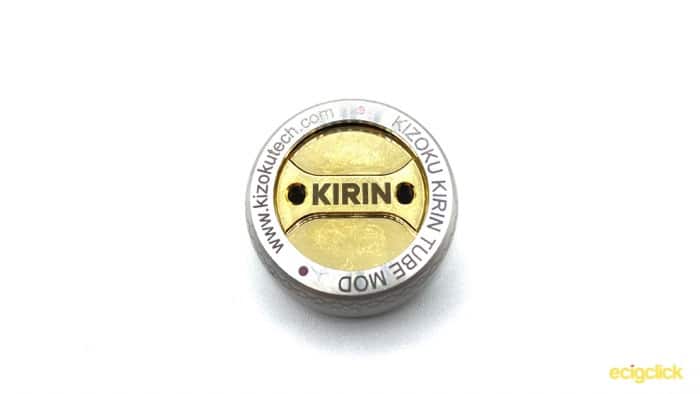
This is inserted into your clear tank section. It also means that when your coil is exhausted, you don’t need to throw away all of it. Just the internal tank section, just remember to keep your drip tip! There’s no markings on it except the regulatory marks on the base and the word “KIRIN”.
The fact that there’s no indication of which tank is the 1.2Ω and which is the 0.5Ω is a bit of an oversight here. As if you have a couple of them, you have no way of knowing which is which!
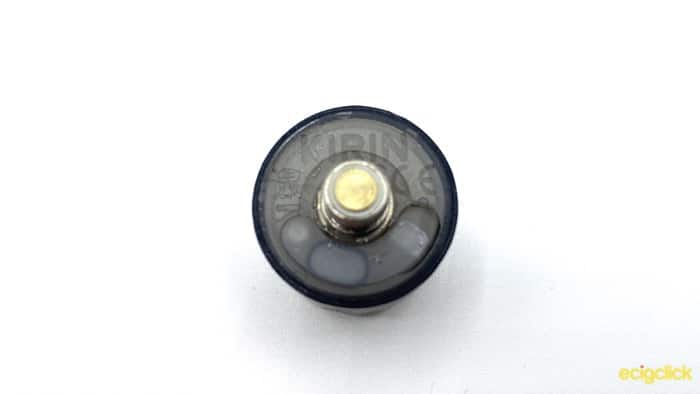 There’s a silicone plug at the base of this section with quite a tiny fill hole. I’ll speak more about this when we look at how to fill it.
KIZOKU Kirin Kit – AFC Base
The base is also a two-piece design. The lower section has your 510 connection, and two big air holes.
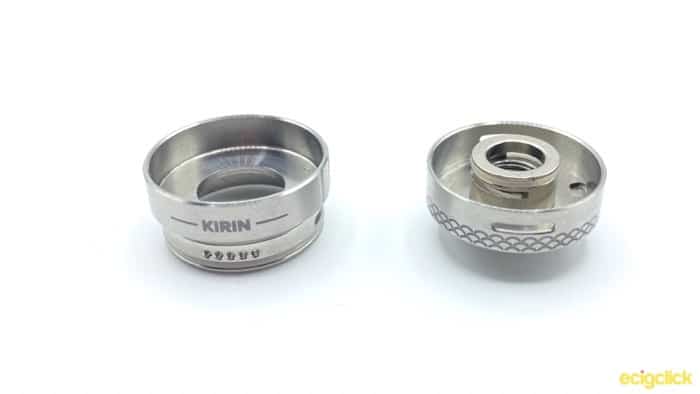 Into this, your airflow control is inserted and held in place by two o-rings. Unusually when it’s on your mod, the lower portion with the main holes stays static, and the upper section rotates lining up with different airflow control holes.
You either have a cyclops style AFC which is doubled up on the other side. Alternatively you can close these off and use 5 pinholes to adjust your airflow, these are only on one side of the tank.
KIZOKU Kirin Kit – The Mod
The tube is made up of three piece that can be unscrewed. In the box it will be set up in 18350 configuration, but if you want to put an 18650 in, you just need to unscrew the bottom cap insert the extension piece, and then screw it all back together.
KIZOKU Kirin Kit – 510 Connector
At the top you have your 510 connector with “Designed By KIZOKU” printed on it. The 510 connector is not spring mounted, although it does have a small amount of play. Instead it looks like the positive pin is sat on top of an insulating block to raise it up and stop it from getting pressed flat by a tank with an overly long 510.
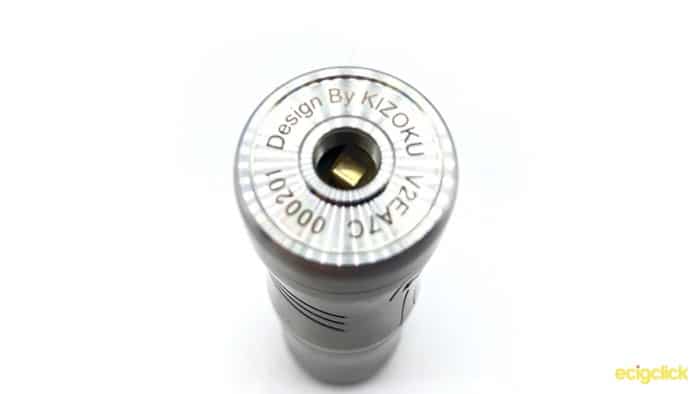 Unfortunately this also means that the two tank sections I have don’t quite sit flush with the mod, instead there’s a tiny gap between them. You can only see it if you look from the side, but it’s still a bit irritating!
The top of the tube has a slight bevel, taking it in to 22mm diameter. Anything more than this and you will get some overhang. The top cap looks like it should be removable, but it seems like it’s press fitted rather than screwed into place.
This is definitely a negative point for me, as if you get e-liquid into your 510 connector, it’s going to be making contact directly with the MOSFET and potentially causing issues. Without being able to access the MOSFET you can’t get in to dry it out, but also if you ever do damage the chip, you will have to bin (recycle!) the whole thing.
KIZOKU Kirin Kit – 18350 Section
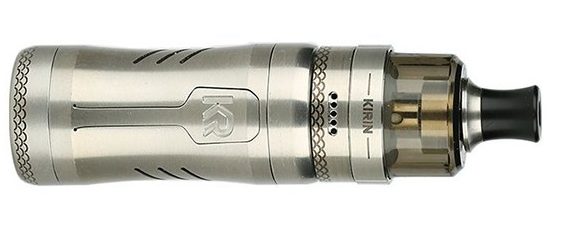
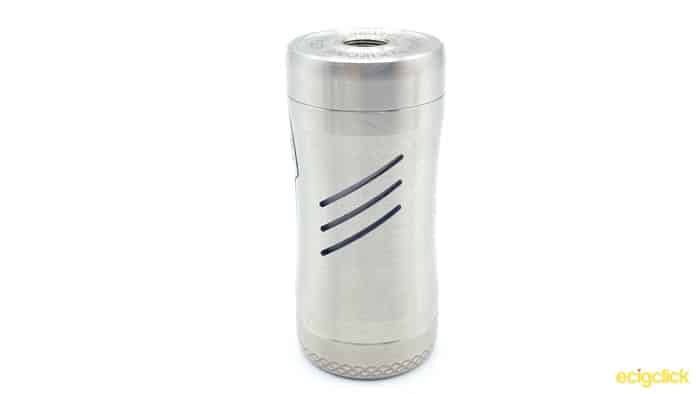
Working our way down the hourglass shaped tube, one side has your fire button. With the KR branding that I assume stands for Kirin. This is cut into the metal and has a nice satisfying click.
 On either side of this you have three angled slits cut into the tube, to begin with I though these were just decorative, the vape equivalent of “go-faster” stripes, but it turns out that the Kirin actually has an LED inside that glows through these.
 The side opposite your fire button has “kizoku” engraved into the metal, and this is actually another minor negative for me. When I’m using a tube mod, I like being able to pick it up and know where the fire button is by feel alone. Unfortunately on this one, it’s hard to distinguish behind the engraving on the fire button, and the branding on the opposite side.
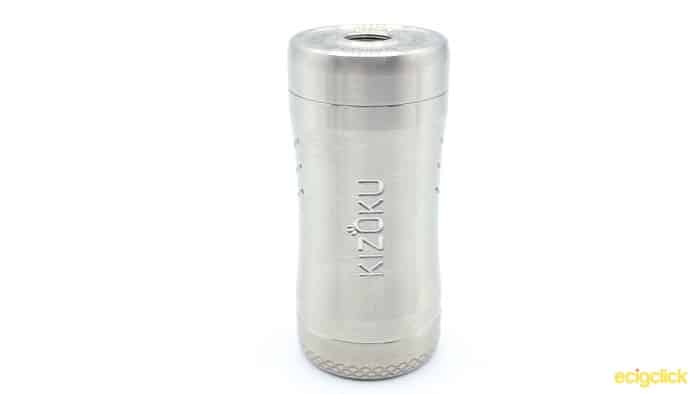 It’s a very minor niggle, but it’s worth pointing out. Especially as I have now had many times where I’ve gone to use it, and instead tried pressing on solid metal!
If you’re using it in 18350 mode, the bottom cap screws directly on to this. I’m pleased to see that they use the same battery cap, as something like the Ambition Mods Luxem, used one cap for the 18350, and a separate cap for the 18650.
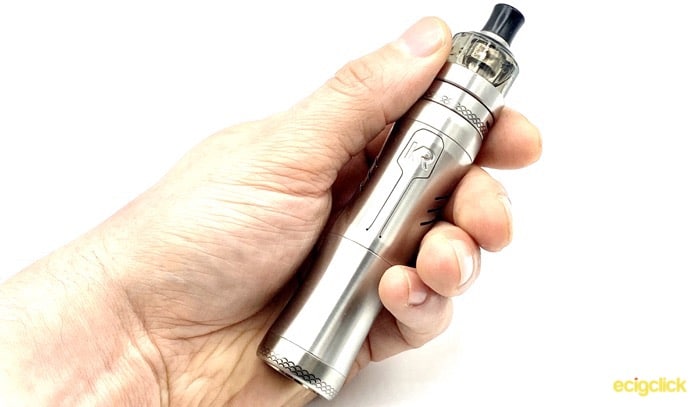
KIZOKU Kirin Kit – 18650 Extension
The extension piece for the 18650 battery continues the hourglass shape from the top section, though as it’s shorter it looks a little unbalanced to me. There’s no additional ornamentation on it at all, and I kind of wish it were just a straight tube for this section.
Bottom Cap

The bottom cap has the same rope design that is printed on the base of the tank, and the negative plate can be screwed in or out of the cap to adjust any battery rattle and ensure a firm connection.
 There’s a couple of vent holes on this with branding printed on the bottom, and the regulatory marks inside, along with the negative symbol.
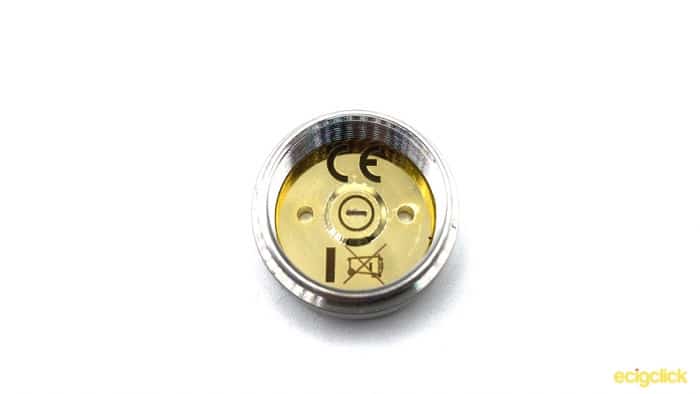 If you look down the tube to the top, you can also see there’s a nice big positive symbol printed, so pretty easy to tell which way up your battery goes!
You can also see that there’s an internal insulator, to make sure everything is safe even if you haven’t noticed damage to one of your battery wraps.
How To Fill The Kizoku Kirin Tank
Unscrew the clear section from the metal base. Pull out the silicone stopper and fill with your e-liquid of choice.
Remember to leave it 5-10 minutes if this is the first time you’ve filled it – known as ‘priming’ your coil.
Turns out I REALLY don’t like filling this thing. Unless you have a very fine tipped bottle, it’s ridiculously easy to end up forming a airlock and spilling e-liquid out the top.
Because you can’t put your bottle tip down into the tank a long way, the tip of your bottle is going to be right in the neck of the fill port.
Especially with large bottles of e-liquid this became a bit of a messy business, and I would have loved it if they had used a double stopper design to open another air hole and allow the air somewhere to escape.
How Does the Kizoku Kiri Perform?
1.2Ω Tank
I’m a big fan of MTL, so I thought I would try out the higher resistance tank first. With a 1.2Ω coil, and the mod producing 3.5V, the wattage is going to be a little over 10W.
I loaded it up with Berry Ice from Vape Simple at 50/50 PG/VG and put it in 18350 mode.
Unfortunately I discovered very quickly that I was getting dry hits. I tested this out with a couple of friends (I didn’t tell them what I was doing first) and I’ve found that it’s partly down to my style of vaping. I chain vape quite a lot and I suck on MTL quite forcefully.
If you go easy on it, it’s OK, but if you vape like I do then you end up getting a dry hit by the second or third pull.
However I think that also the mod is outputting a little too much power for this style of tank, whilst it’s rated between 8-12W, having put it on a regulated mod I think it’s definitely putting out towards the top end of this range.
Personally I found that this tank didn’t suit me on the Kirin tube at all, but putting it on a regulated mod at 8 or 9W, I was able to get a very pleasant vape.
Kizoku Kiri Kit – Flavour and Cloud Production
Flavour is generally OK. It’s nothing to write home about, and it’s not quite as punchy as I would normally like. But it does the job to the same sort of level as an older MTL pod kit.
Cloud production, especially at 8W, is pretty minimal!
Kizoku Kiri Kit – 0.5Ω Tank
Now this is more like it! It gives a noticeably warmer vape but is quite suitable for doing MTL as well as DTL. Wattage wise it’s putting out about 25W. Due to it outputting a higher power, I decided I’d give this a go in 18650 mode as an 18350 will not last long!
I tried this out primarily with Bango Mango from Large Juice, this is a 70/30 e-liquid and even chain vaping on it I couldn’t get it to give me a dry hit.
Kizoku Kiri Kit – Flavour and Cloud Production
Flavour is also a few steps up from the 1.2Ω. The Bango Mango I was using in it was full and flavoursome. To see how this would perform with a thinner e-liquid I also used my preferred Berry Ice at 50/50, and the flavour really popped.
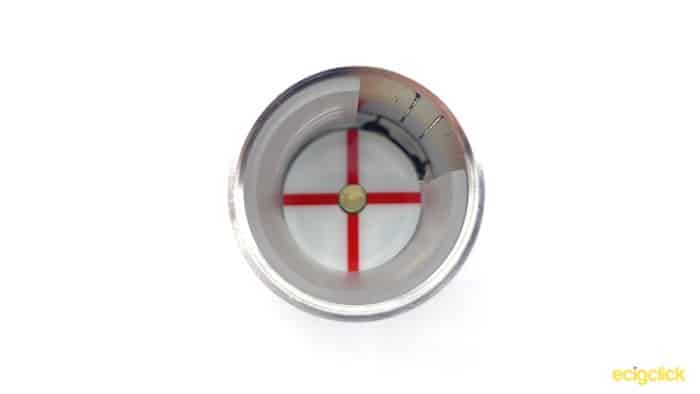
Looking down at the coil you can tell it’s actually a mesh coil (although they don’t seem to say this anywhere!) so it’s definitely capable of standing toe-to-toe with other pods and small disposable tanks on the market.
Cloud production is pretty decent from this combination, with a good amount of vapour. If you want to push it up a little higher, I found that it’s performed well up to around 30W on a regulated device.
Kizoku Kiri Kit – Airflow 1.2Ω and 0.5Ω
You’ll notice that I’m going to talk about the airflow on both of these in the same section. The reason for this is they are almost identical.
Both the airflow control options, but also the draw on them fully open. Having looked at the bore on both of these, it’s pretty similar.
Kizoku Kiri Kit – Pinhole Airflow
Starting off at a single hole, this is a pretty tight MTL draw. On a scale of 1-10, with 1 being the tightest “old school” draw, this is a 2.5.
Opening it up and that increases up to a 6 with all holes open. Plenty of air for a restrictive lung hit, or a loose mouth to lung.
Kizoku Kiri Kit – Cyclops Airflow
This is obviously much looser throughout it’s range, although you can close it down to be fairly tight, it isn’t easy to fine tune this.
Instead this is far more designed to be capable of a direct to lung inhale.
Using my 1-10 scale, it goes up to an 8. It is also a lot noisier, especially if you open it up.
Interestingly if you start from fully open you can close it down a little before there’s any difference in the draw. Telling me that the limiting factor is the size of the bore.
Kizoku Kiri Kit – Mod
There’s not a great deal to talk about with the mod, it’s a pretty simple setup!
5 clicks on the fire button will switch it on/off.
However the LED’s will only flash (5 times) when you switch it on.
Again this is a negative point, as I’d much rather it showed you when you were turning it off as well, there’s always that question mark of “Did I actually turn it off just then? Or is it going to fire when I’ve got it in my pocket…”
The LED’s will also light up when you fire the mod, and they have a subtle “breathing” effect where they seem to slowly light up, and then dim.
I am also pretty sure that they glow red to show a short (or other error), though I’ve only seen this happen once or twice.
Pros
Mod
- 18350 or 18650 with just one piece to change, versatility!
- Incredibly simple to use
0.5Ω Tank
- Good flavour
- Decent cloud production
1.2Ω Tank
- Decent MTL Vape on a regulated mod
Cons
Mod
- Unable to access to MOSFET
- Hard to find the fire button by feel
- Doesn’t confirm you have switched it off
0.5Ω Tank
- Difficult to fill
1.2Ω Tank
- Difficult to fill
- Dry hits (1.2Ω on 3.5V mod)
Final Review Verdict
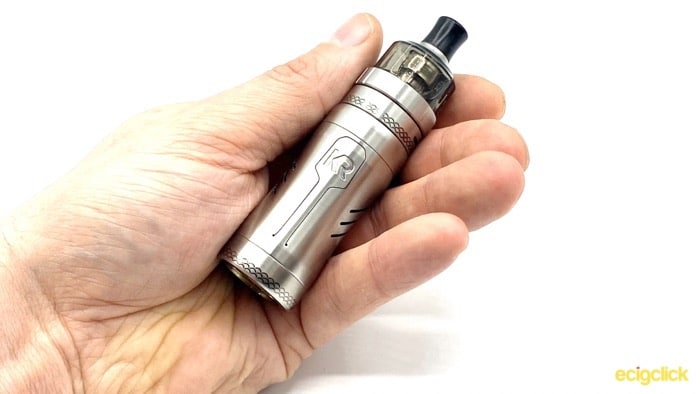
The Kizoku Kiri Kit is definitely interesting to say the least, and in 18350 mode it becomes super discrete and pocket friendly.
The few niggles I have with it are all pretty minor, there’s nothing “wrong” with it.
The one thing I would say is that all the advertising I have seen talks about the 1.2Ω tank and only maybe mentions that you get a spare 0.5Ω.
Personally I think the 0.5Ω is the star of the show, but battery life when in 18350 mode is going to be pretty short!
The mod itself is definitely something that I’m going to keep around, I enjoy how easy it is to get on with a Mosfet.
But I’m not a massive fan of the tanks, and I’m not sure how much I’d want to rely on being able to get replacement, even 6 months from now – especially from a relatively small company.


