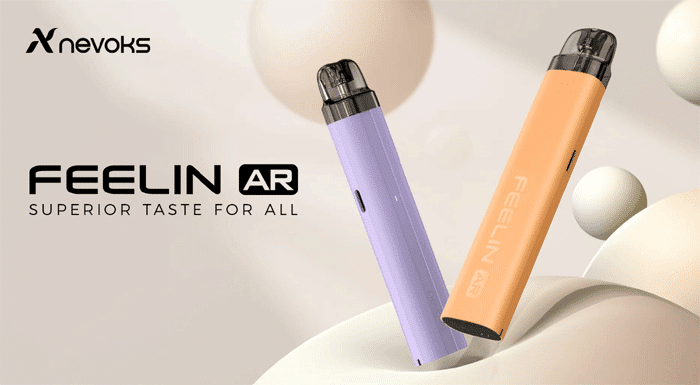
I would like to introduce you to the newest member of the “Feelin” gang – the Nevoks Feelin AR.
 I have previously reviewed the Nevoks Feelin X, Feelin A1, Feelin AX and Feelin 2 pod kits.
Nevoks were created in 2019 in Shenzhen China.
Thank you to Nevoks for sending over two of the Feelin AR kits and the full range of replaceable pods for review! I will report back honestly on the devices in my possession.

What To Expect From The Nevoks Feelin AR Pod Kit…
The first thing that catches my eye about this kit is the price! At most vendors this is around the same price as 3x disposable vapes (600 puff ones)!
Therefore this kit has more of a “budget” vibe with only 1 pod included but you do get a USB cable!
This kit is based on the Feelin A1 kit and uses the same pods.
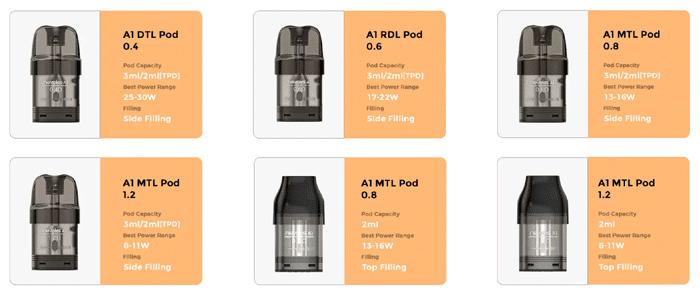
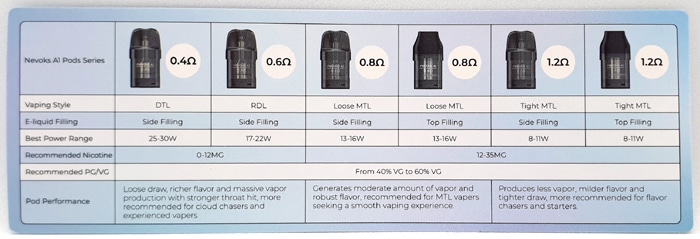
There 4 resistance options of pods to choose from: 0.4ohm, 0.6ohm, 0.8ohm and 1.2ohm.
They come with a 3ml capacity as standard and a side fill port, but there are also the 0.8ohm and 1.2ohm top filling 2ml TPD compliant pods as well.
The Nevoks Feelin AR kit includes 1x 0.8ohm pod.
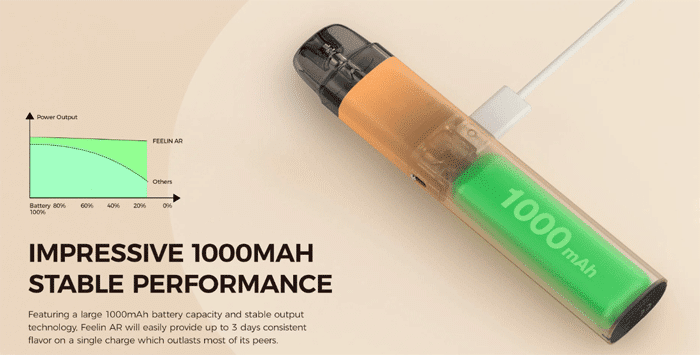
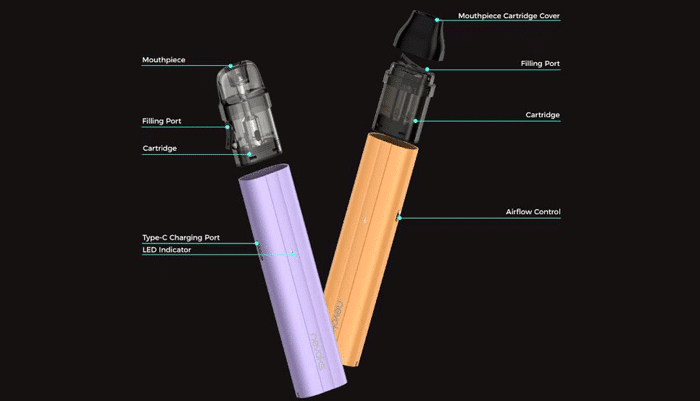
Inside the device body is a 1000mAh battery which is charged using the USB Type C port at a 1A charge rate. Nevoks state this will take around 85 minutes.
The output is specified as 9-30W and the device will automatically adjust the output to suit the pod installed.
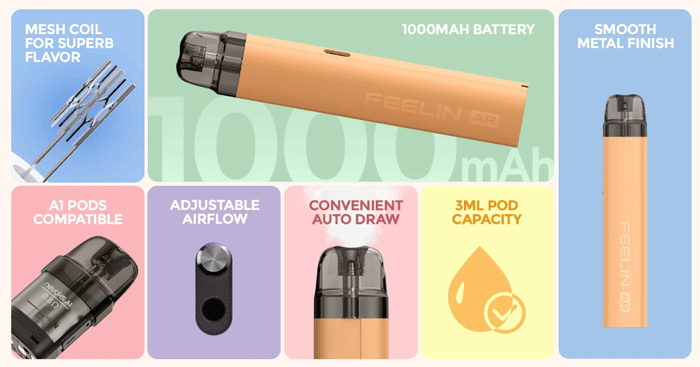
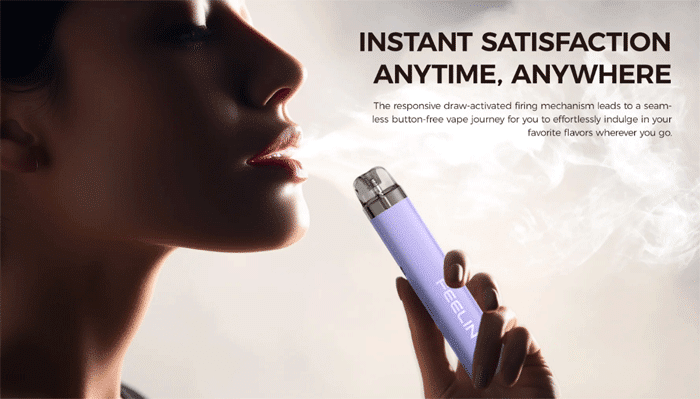
To make life even more simple this has auto draw firing – so no fiddling about with buttons!
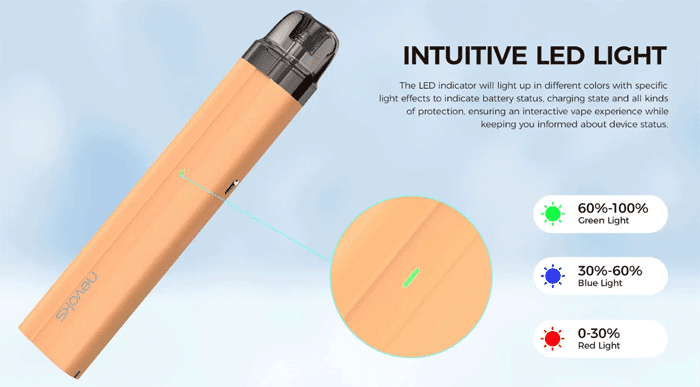
An LED indicator is provided to display battery charge and device status – we will discuss this further in the Quick Start section.
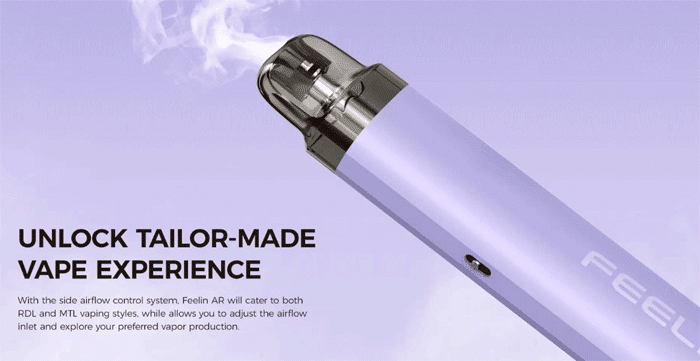
On the side of the device an airflow adjustment slider is provided to tailor the incoming airflow to your preference.
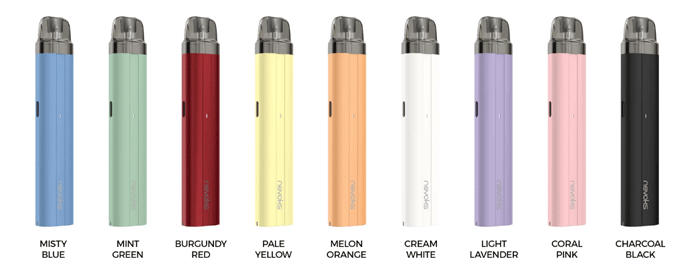
There are 9 colours to choose from: Misty Blue, Mint Green, Burgundy Red, Pale Yellow, Melon Orange, Cream White, Light Lavender, Coral Pink and Charcoal Black.
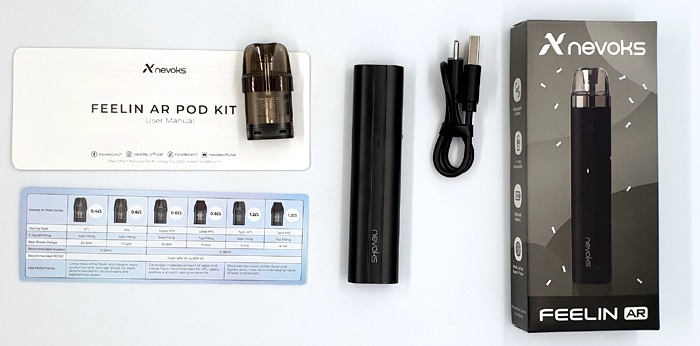
Kit Includes
- Nevoks Feelin AR device
- 0.8ohm Nevoks A1 pod
- USB Type C cable
- User manual
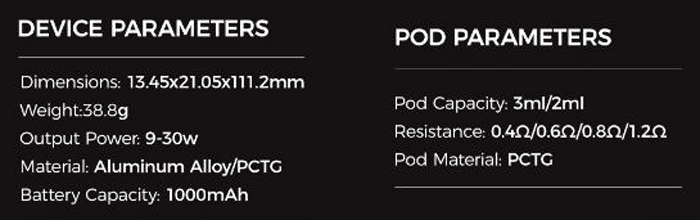
Nevoks Feelin AR Specs
- Size: 13.45x21x111.2mm
- Output: 9-30W – mod automatically selects output
- Battery: 1000mAh (internal)
- Display: LED indicator
- Resistance range: Not specified
- Material: Aluminium Alloy / PC
- E-liquid capacity: 3ml (standard) / 2ml (TPD / CRC)
- USB Type C port – 1A charge rate – 85 minute charge time
- Pods: A1 Refillable, fixed coil – 0.4ohm, 0.6ohm, 0.8ohm, 1.2ohm
- Top fill (TPD) / Side fill port (Standard)
- Adjustable airflow
- Draw activated
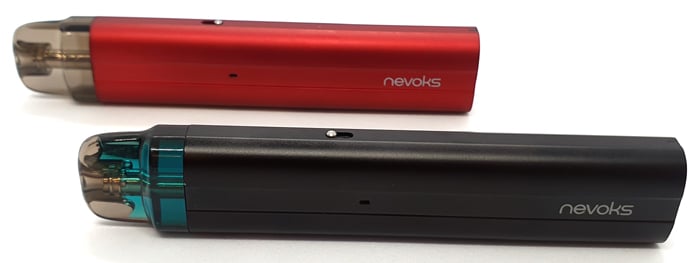
Nevoks Feelin AR Design and Build Quality
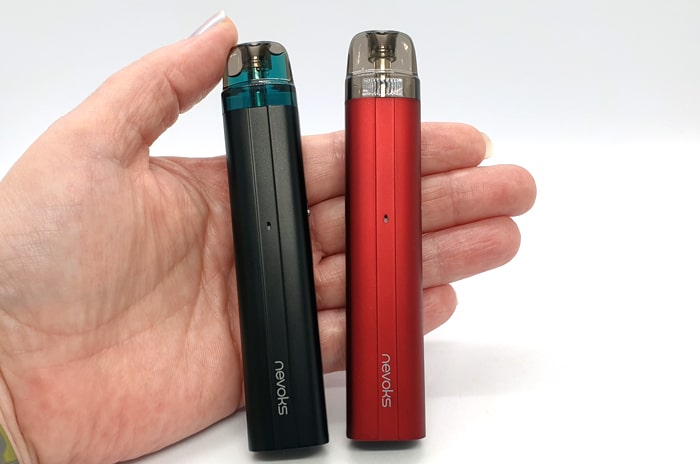
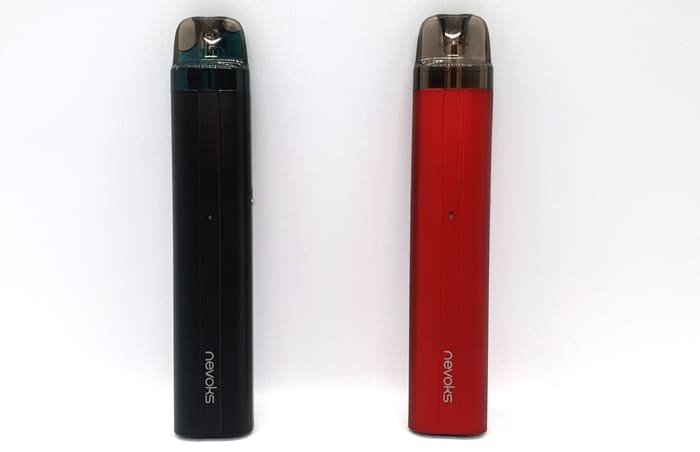
I received the Charcoal Black and Burgundy Red versions.
The box is nice and compact. You open it and pull out the blown plastic tray. Be careful as the paperwork and USB cable are tucked underneath the tray. You will find the device with pod in the top of the tray.
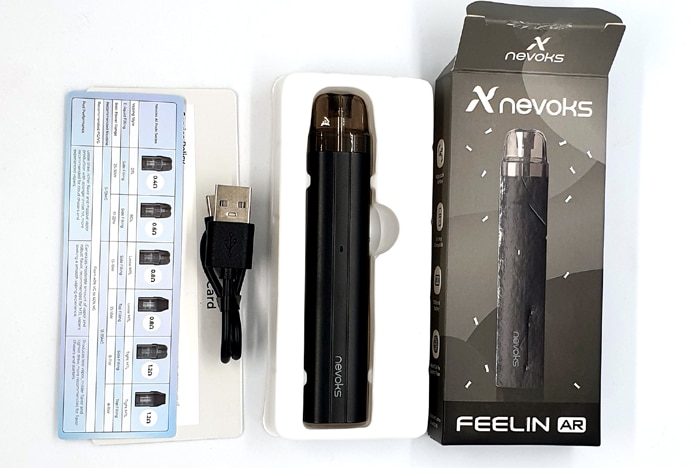
The instructions are great and massive. You will see one side in the image below, the other side is also in English too so everything is covered.
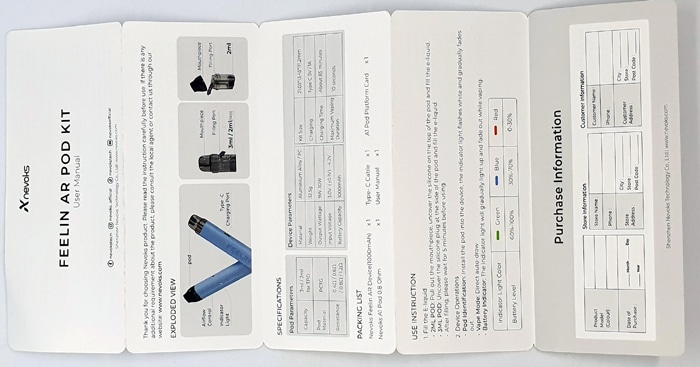
I spotted a few errors between the instruction manual and specs on the website. We contacted Nevoks who have sent us corrections. I will be using the updated specs in this review.
There is a downloadable instruction manual for those who prefer to zoom in – click here.
A handy card is included which displays all of the compatible Feelin A1 pods and the suggested power level and nicotine strength for each.
Nevoks Feelin AR Mod
The body colour looks like a brushed metallic finish, but when you actually hold the device it has a rubbery, soft texture! You genuinely would think it was metal!
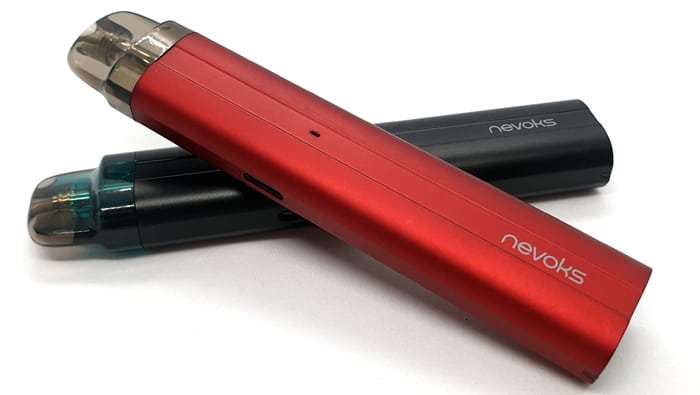
It is quite a basic design with the front having a slight channel in the middle where the LED indicator and “Nevoks” logo lives.
The LED indicator is a bit small in proportion to the rest of the mod but it is plenty bright enough.

On the right side of the device you will find the airflow adjustment slider. This has a “rubbery” feel when you slide it. So it isn’t exactly stiff just feels like there is a restriction there. This is a good thing as it stops the blumming airflow adjusting on its own.
On the opposite side is the USB type C port which works fine and I have had no issues. It is a bit difficult to charge it standing upright but you could of course prop it against something.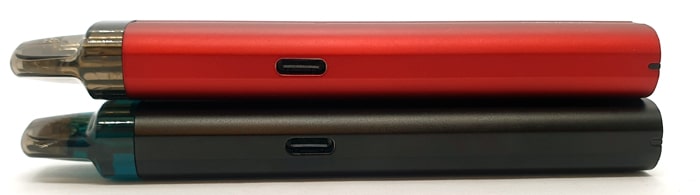
The rear is plain apart from the “Feelin AR” logo etched in. This etching has a shiny finish in contrast to the brushed finish.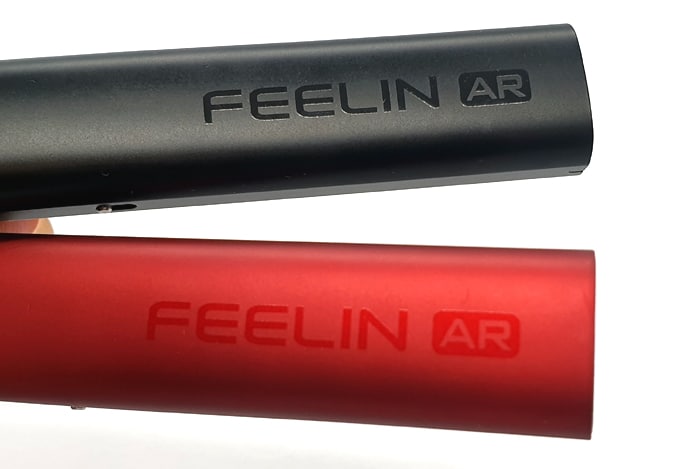
The base is made of a hard Black textured plastic and the legal logos and battery capacity are etched in.
We have a very deep pod compartment here, so if you do get any leaks or want to clean the contacts you will need a Cotton Bud / Q-Tip as you won’t be able to reach with just some tissue.
Inside the compartment are 2 spring loaded electrical contacts and 2 magnets. The magnetic pull is strong and if you insert a pod half way the magnets will pull it fully in. But it is not a struggle to remove the pod either so Nevoks have exactly the right balance.
One slight down point is that there is limited view of the e-liquid level.
On the fully clear 3ml pods around 1/2 of the pod is concealed. With the 2ml pods, there is only a small window to view the e-liquid level due to the Black mouthpiece and the rest of the pod hiding in the mod.
I have to say the build quality is the best I have seen from Nevoks to date!
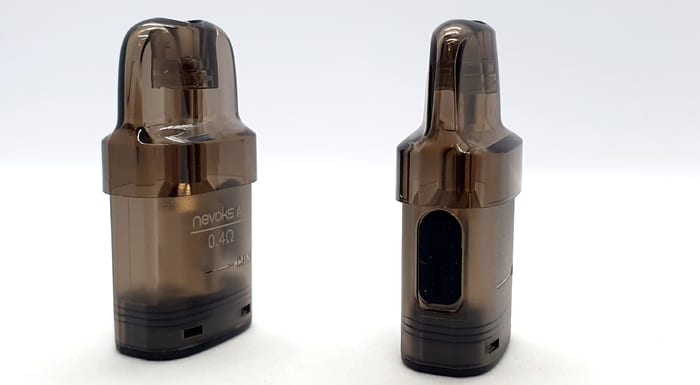
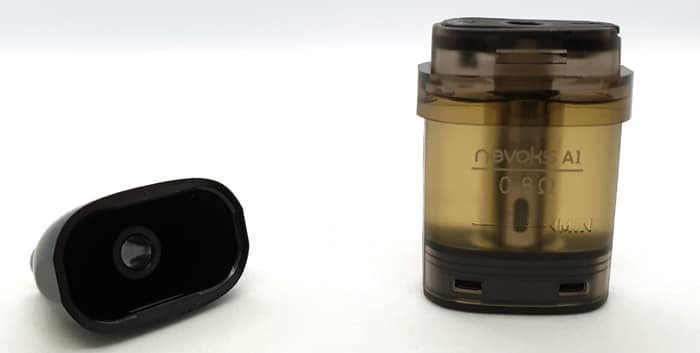
Nevoks A1 Pod
The pod is exactly the same as the Nevoks Feelin A1 kit – so I have copied and pasted this part of the review!
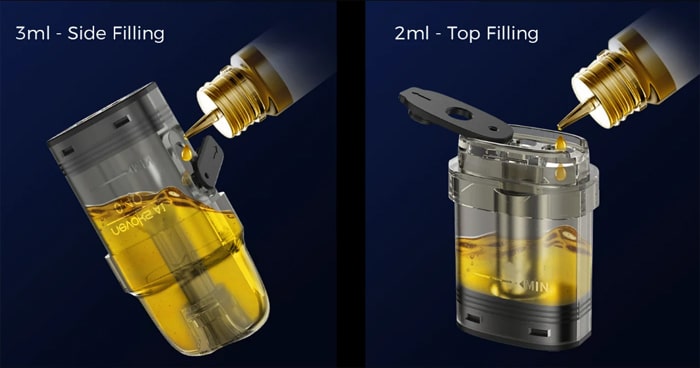
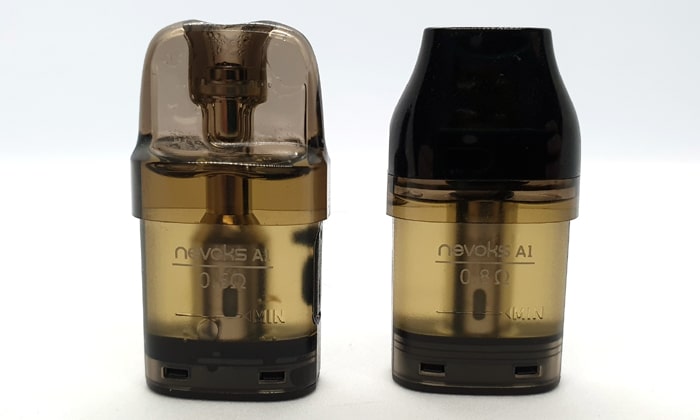
I was sent both types of pods – side fill 3ml pods and top fill 2ml pods in all 4 available resistances.
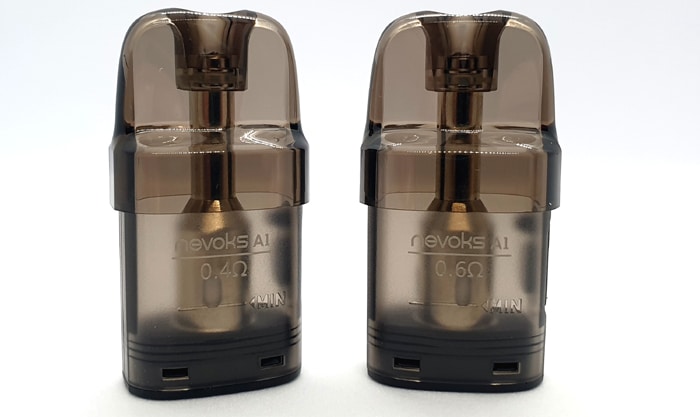
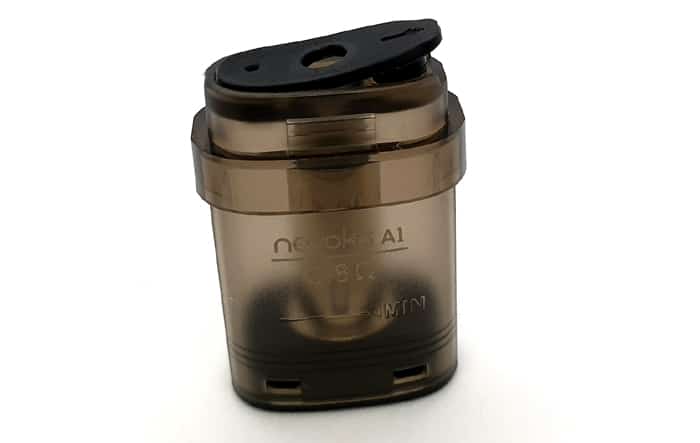
Side Fill 3ml Pod
This for me was the best design. The whole pod is a tinted colour and the top half is perfectly clear. The bottom half has a slight frosting which is a shame.
Even so the e-liquid level is clear to see. However when installed on the mod you will only be able to see half of the pod. Meaning when the e-liquid level has dropped below this point you will have to keep removing the pod to check it.

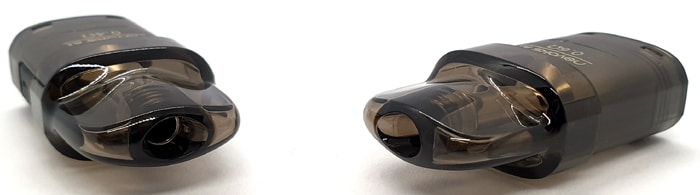
I love the mouthpiece it is wide but slim in thickness and quite square, but extremely comfortable in use.
On one side the resistance and “Nevoks A1” is clearly marked and both sides have a “min” level line etched in.
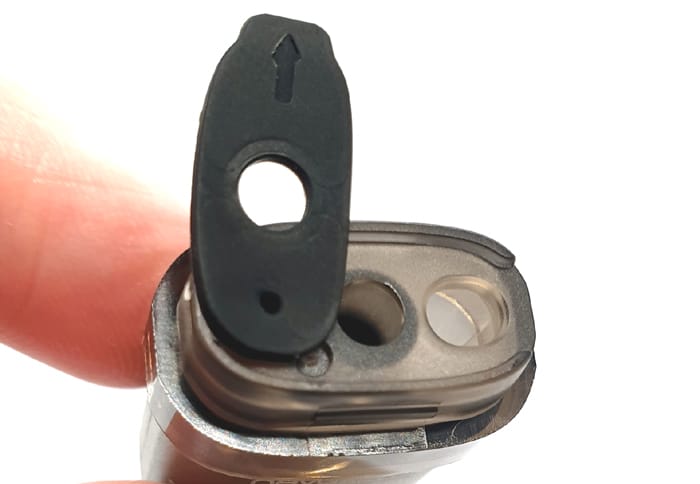
The fill port is covered by a Silicone cover with the lift side marked with an arrow and a small indent to allow you to insert a nail to lift the cover.
The fill port is an oval shape and roughly 5mm by 3.5ml and it was fine for my 30ml and 60ml bottles.
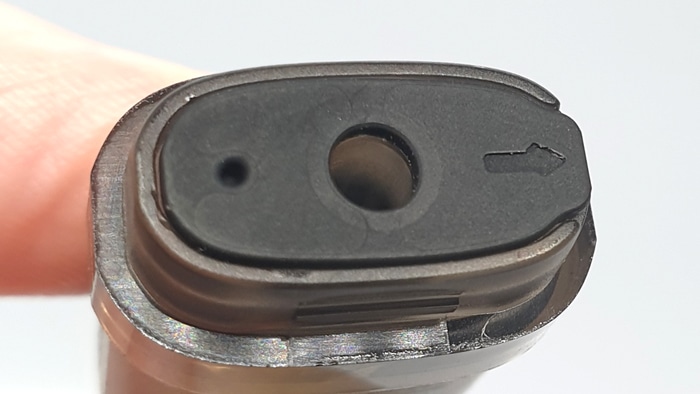
On the base you will find the required legal logos etched in, plus the 4 airflow inlets, 2 electrical contacts and 2 strong magnets.

Top Fill 2ml Pod
This pod is for us poor buggers in the TPD regulated areas as it will only hold 2ml.
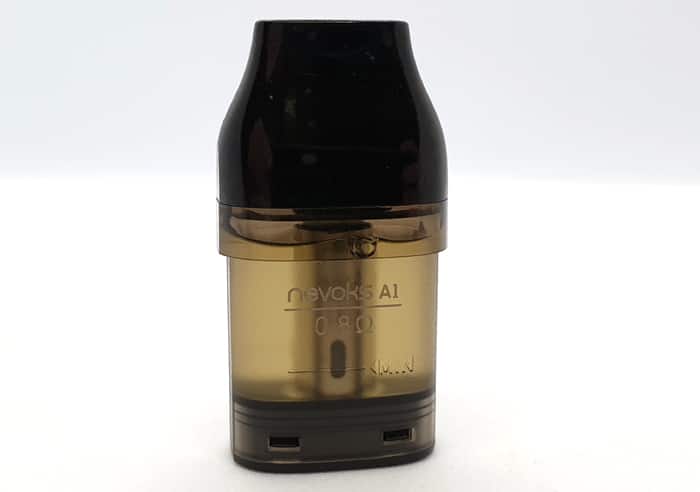
It is the same height as the 3ml pod which surprised me.
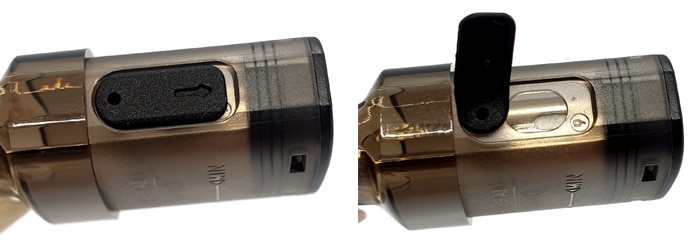
This time the top half of the pod is covered by the Black plastic removable mouthpiece. It is not as difficult to remove as some top fill pods I have tried but it does take a bit of budging.
I suggest snapping it off by gripping the pod and mouthpiece. I have added a video in the filling section.
Below that you will find a Silicone lift up cover with an arrow and a cut out to lift with a finger nail.
You can then swing the cover out of the way to access the port.
As with the side fill pod, this has an oval fill port measuring roughly 3.5ml by 5ml and it performed fine with my e-liquid bottles.
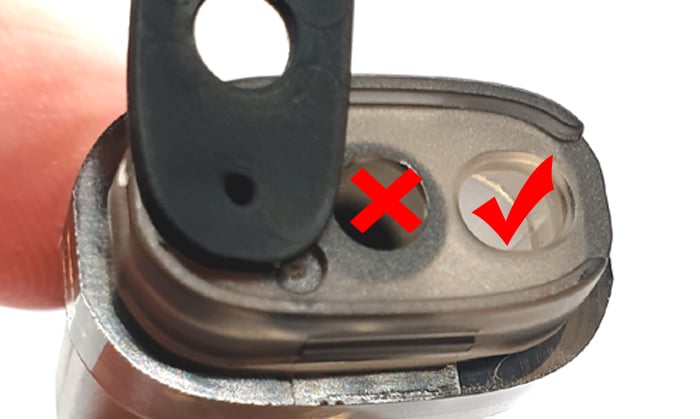
With the fill port cover lifted you can also access the vapour outlet path – which should not be used to add e-liquid as this will cause spitting and flooding.
The rest of the pod is the same as the side fill, with the slightly frosted bottom half, the same printing and base.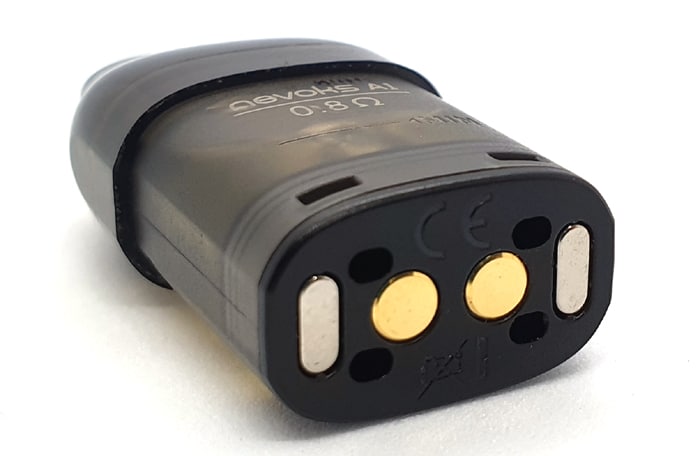
The capacity is reduced as the pod does not continue behind the mouthpiece – it has a flat top. This also means the e-liquid level view is reduced too.
Quick Start Guide
The device arrives with the 0.8ohm pod installed.
However there is an isolation sticker on the base of the pod to prevent the mod firing until the pod is full of e-liquid. If you fire the device with an empty pod installed it will damage the pod and render it scrap! Very important to take note of this when you only have 1 pod in the kit.
So you will need to fill the pod with e-liquid, remove the isolator sticker and get vaping! I will cover the process below!
Basic Operation
- Power On/Off = This has no on/off function
- Vaping = Simply inhale on the mouthpiece to trigger the auto draw activation.
- Battery indicator = When vaping the LED indicator will light up and the colour denotes the battery charge remaining: Green = 60-100%, Blue = 30-60% and Red = less than 30%.

- Battery indicator when charging = When you first plug in the charger the LED will flash once from Red, Blue to Green. Then the LED indicator will pulse to display the battery charge progress. Red = 0-30%, Blue – 30-70%, Green = 70-90% and a solid Green light = 90-100%. When fully charged the LED will turn off.
- Airflow = Slide the airflow slider up and down.
Protections
- No Atomiser / Resistance too high: If there is no pod installed, an open circuit or the coil resistance is too high – the LED will flash White 5 times and device will stop working. Clean all the pod and device contacts. If not rectified try a new pod. If the fault continues the device may be defective.
- Low Battery: When the battery voltage drops below 3.3V the Red LED flashes 10 times. The device will shut down and needs to be charged to continue vaping.
- Short circuit: If there is a short circuit the White LED will stay on for 5 seconds and the device will stop working. Clean all the pod and device contacts. If not rectified try a new pod. If the fault continues the device may be defective.
- Over time protection: If you inhale for longer than 10 seconds the LED will flash Red 5 times and the fire will cut out. Simply inhale again to continue. This is to prevent accidental firing which could lead to damage or overheating.
How To Charge The Battery
The charging rate is specified as 1A.
- Using a USB type C cable, connect the small end into the USB port on the mod.

- Connect the large end of the cable into a suitable USB outlet.
- The LED indicator displays the charging progress and turns off when fully charged.
Nevoks state this will take around 85 minutes to charge.
I found this to take around 95 minutes when I charged it so the estimated time is 10 minutes short.
How To Fill the Pod
There are 2 pod styles – the top fill and side fill so I will cover the filling methods for both.
If using a new pod leave to stand for 5-10 minutes after first fill to allow the coil to saturate with e-liquid.
Make sure to fill when the e-liquid level is above the minimum marking on the side of the pod.
Top Fill
- Push on the mouthpiece to get it to click off. I have recorded how I do it below (excuse my dodgy hands!)


