I had mixed feelings when I first wrote the preview for the Vaporesso PodStick.
We have had an explosion in pod mod vape kits lately and a lot of people are suffering from “pod fatigue”.
I personally love a good pod mod such as the Smok Nord or the Uwell Caliburn but even I at times wonder if there is much more any company can offer when it comes to pod devices.
So let’s have a look if the PodStick (or Stickypod as I have affectionately nicknamed it) can rival or even beat its competition!
What Can We Expect From The Vaporesso PodStick?
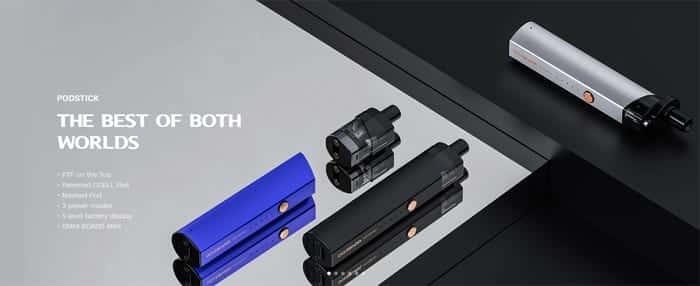
The Vaporesso PodStick is marketed as being “the best of both worlds”. This being a reference to the fact there are two styles of pod you can use with this device.
A lot of pod kits promise to be able to cater to MTL (Mouth to Lung) and DTL (Direct to lung) vapers but fall rather short in execution, often only performing well at the one task. So how does the PodStick offer these options?
We tell you more about vaping styles in our Guide to MTL and DTL Vaping Styles.
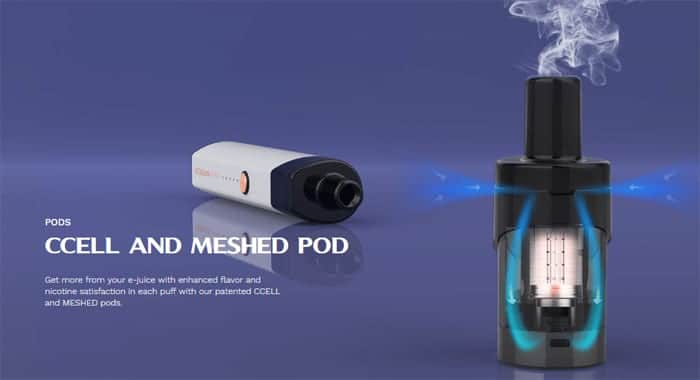
There are two pod options to choose from and you get both in the kit:
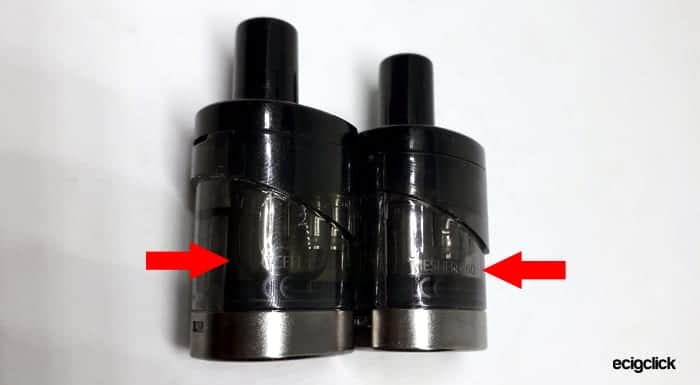
- 1.3ohm CCELL pod – this has a ceramic CCELL coil and is best between 9-12.5W. This appears to cater to MTL (Mouth to lung) vapers.
- 0.6ohm Meshed pod – this has a mesh coil and best between 17-22W. I would assume this pod is mainly for DTL (Direct to lung) vapers.
The pod has a fixed coil – so you can’t replace just the coil and will discard the pod when the coil has expired. However this device is designed to be very simple to operate so to some people not having to get their hands dirty changing coils is a bonus!
Inside the battery part of the device is a decent-sized 900mAh internal battery.
The power level is adjustable – you have 3 power levels to choose from but these are dependent on which pod you have installed – ranging from 9-12.5W for the CCELL pod and 17-22W for the meshed pod.
There are 6 colours to choose from: Silver, Black, Blue, Gold, Phantom and Splashed.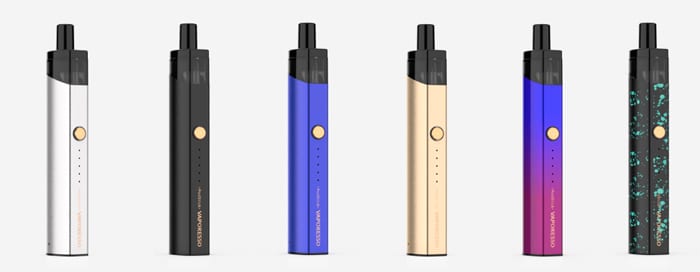
I received two of the PodSticks for review and as usual, I will report back honestly on my findings with the devices I have in my possession.
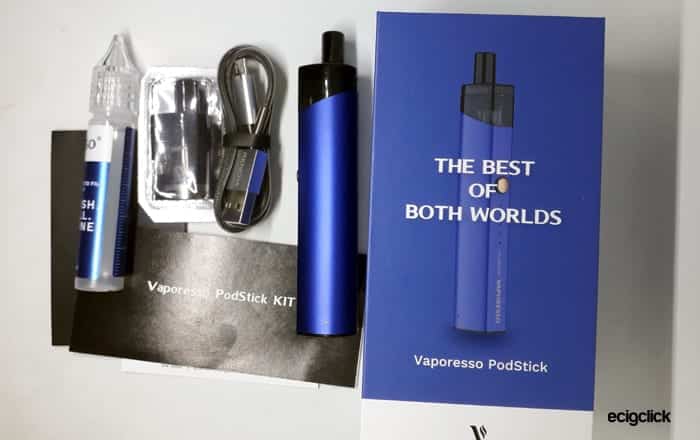
What’s In The Box
- Vaporesso PodStick device
- 2x Pods (1.3ohm CCELL and 0.6ohm Meshed)
- E-liquid refilling bottle
- USB cable
- User manual
Vaporesso PodStick Features
- Size: 111x22x18mm
- E-liquid capacity: 2ml – refillable
- Battery: 900mAh (internal)
- Output: 3 power modes depending on pod installed – CCELL Pod = 12.5W / 10.5W or 9W, Meshed Pod = 22w / 20W or 17W
- Battery indicator lights
- Pod options: 1.3ohm CCELL or 0.6ohm Meshed
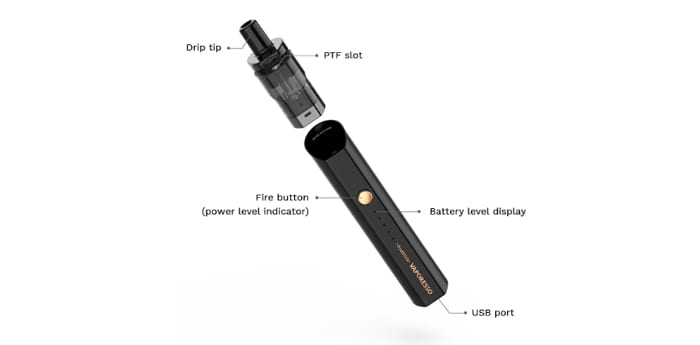
- Top fill – sliding cap and PTF valve (Push To Fill)
- OMNI Board Mini chipset

Build Quality & Design
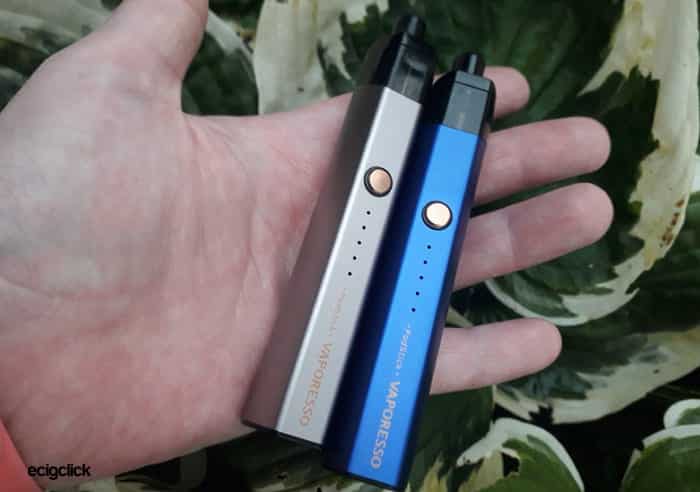
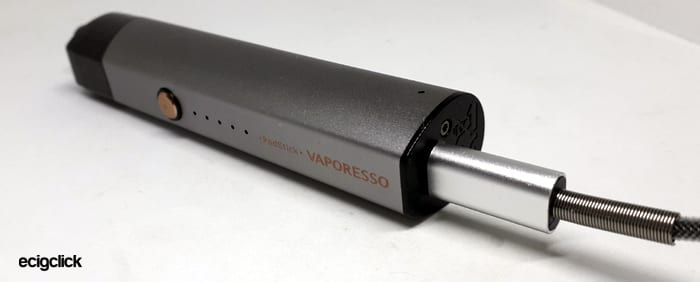
I received the Vaporesso PodStick in the Blue and Silver versions.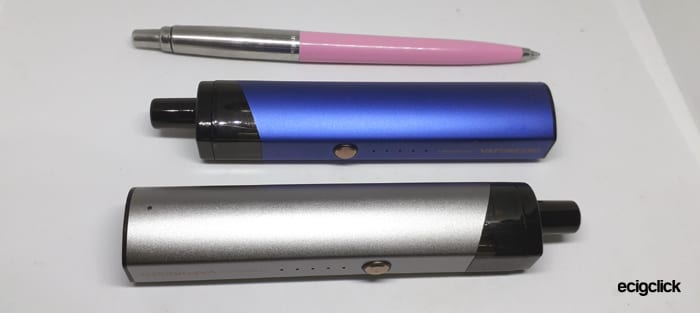
The packaging was well laid out and the instructions were pretty good. Also the inclusion of a very pretty braided USB cable always makes a kit look like it is higher quality!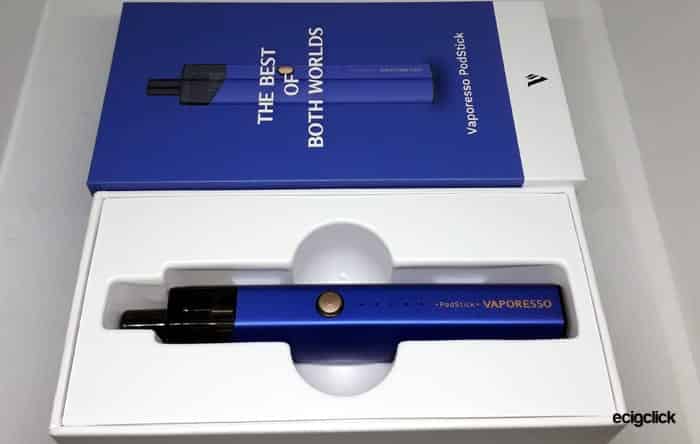
I also like the fact the pod base had an isolator sticker on it to try and prevent you accidentally firing the device without e-liquid.
Battery/Mod
This is a relatively plain looking device but still very cute as it is a lot smaller than you would expect.
The profile of the mod is a kind of U shape with a flat side where the button and lights live.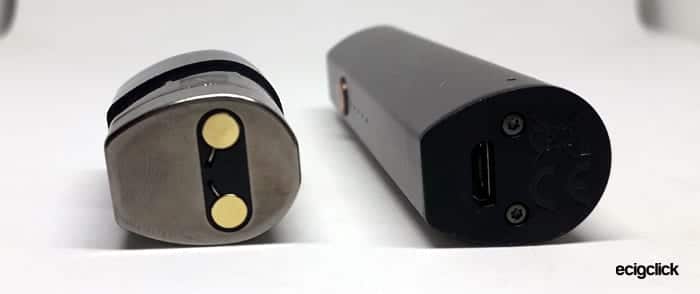
On the flat side is the backlit fire button which responds well and is nice and clicky. The light on the fire button changes colour according to which power mode you have selected.
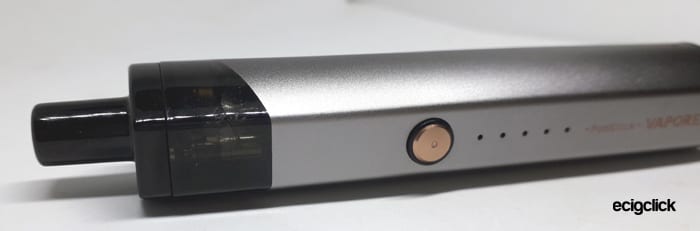 Below this are the 5 LED lights which display the battery capacity remaining and these are nice and clear and any kind of battery indication is a plus point for me!
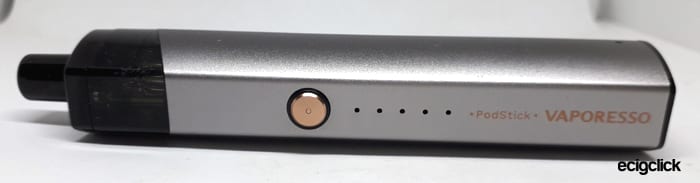
Moving down there is the Vaporesso and PodStick logo.
On the base is the Micro USB port, Legal logos and a couple of open screw heads. Some people find screw heads quite offensive. They bother me very little other than being a place where ming and fluff can congregate!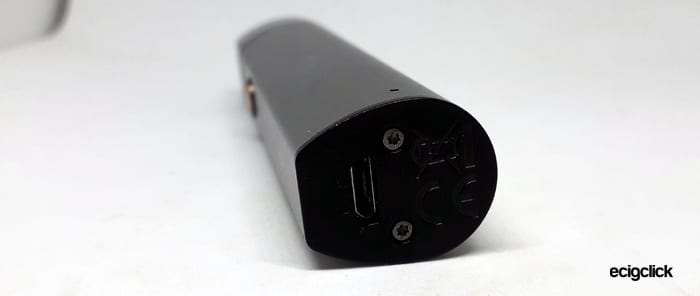
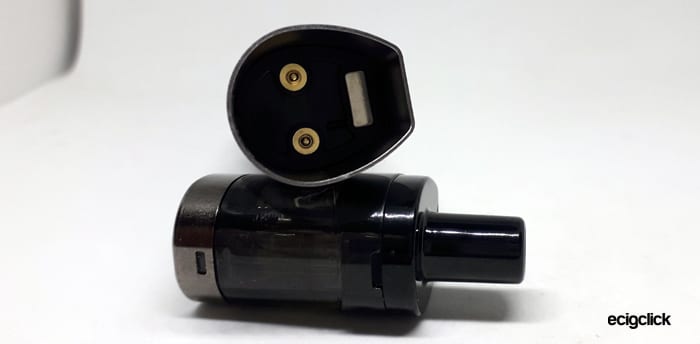
The rear of the device is plain apart from a small V logo and the little depression at the top which helps to hold the pod in position.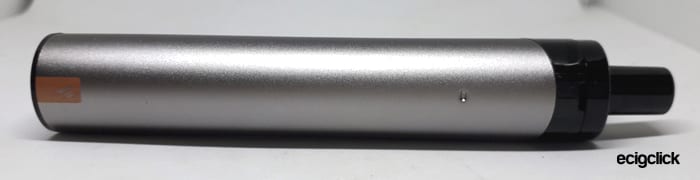
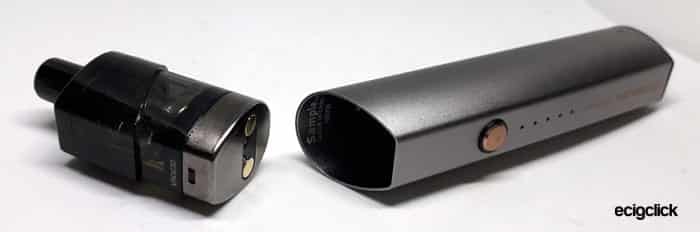
The pod is held in magnetically and there is a slight catch on the base of the pod where it is also held in the battery compartment.
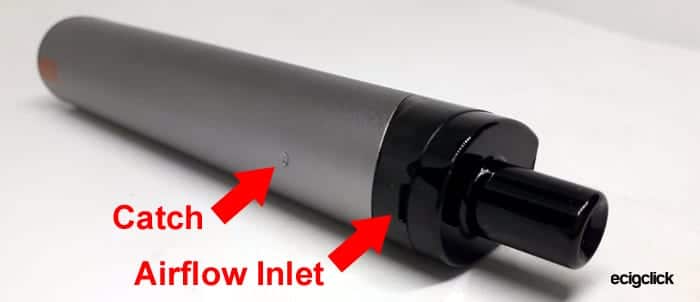
There is zero wobble or looseness and the pod is still easy to remove when required – this is great.
Pods
These are fixed coil pods – so you cannot just replace the coil you will need to replace the whole pod.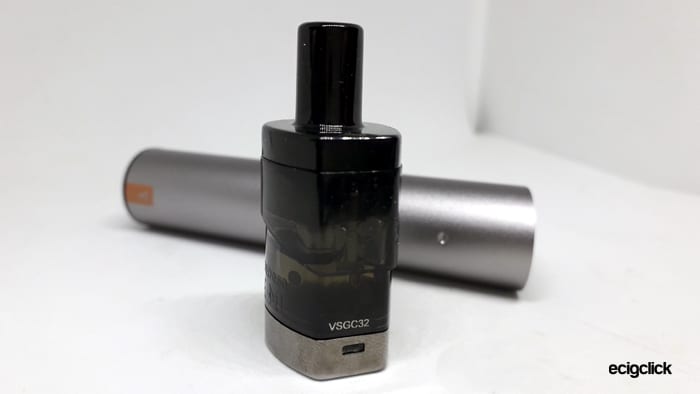
The top of the pod is almost black and not very transparent. So in order to view my e-liquid level I often have to remove the pod from the device which is a bit of a pain.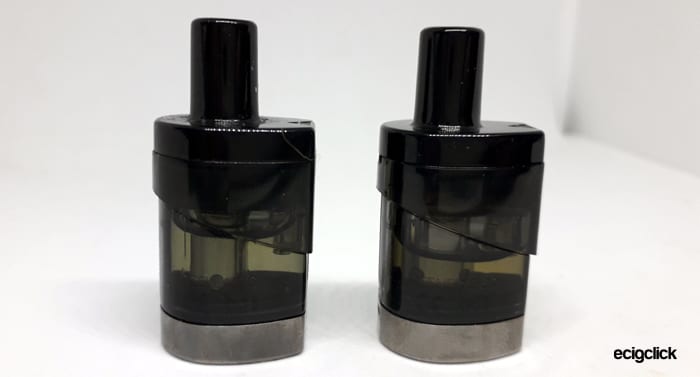
You cannot remove the tiny drip tip it is fixed to the pod. This is a shame as removing this tip would make the refilling a lot easier as the tip can get in the way at times.
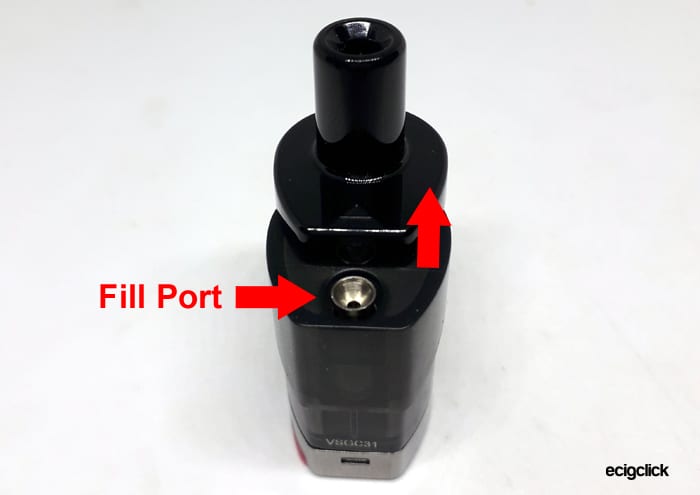
To refill the pod there is a slide across cover which then reveals a rather odd fill port arrangement.
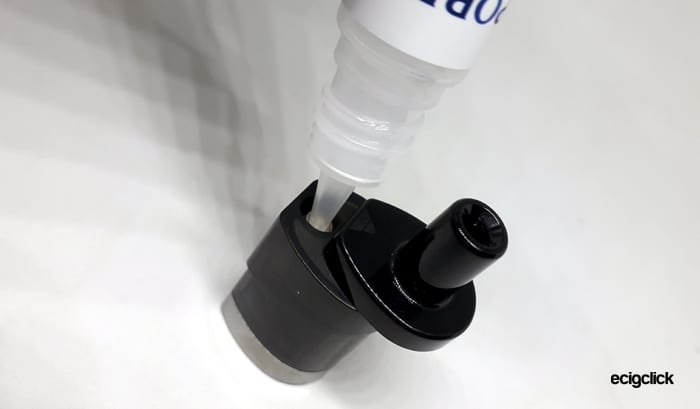
This almost has like a spring-loaded valve which you must push down on with the e-liquid nozzle to then allow liquid to enter the pod. Similar idea to the safety valve on a tyre – where you have to physically push the valve to open it.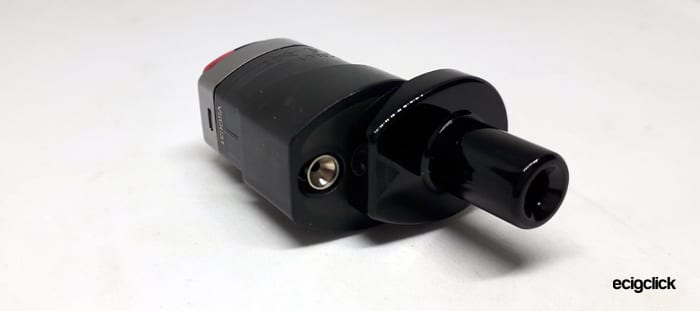
The push to fill idea is a bit over-engineered and can be a bit of a pain in the arse if I am honest.
So far I have been ok-ish with 10ml bottles. But I really think having to put your e-liquid into the bottle you get in the kit just so you can refill the device is annoying.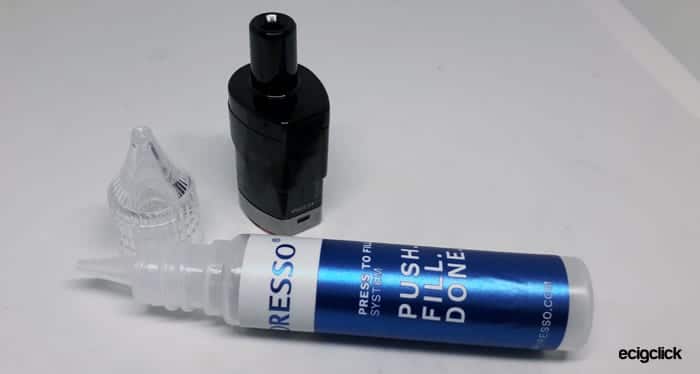
I think you could have some kind of membrane or a seal on the slide cover and remove this push valve completely.
Also it is quite difficult to tell the two types of pod apart – there is some writing on each pod – but you do have to hold it up to the light to see it! Even harder to try to capture on a photo!
Airflow
There is no airflow adjustment on this device.
Quick Set-up Guide
The kit comes with a pod installed – however to prevent accidental firing before the pod has been filled there is an isolator sticker on the base of the pod. You will need to remove this and fill up to get started.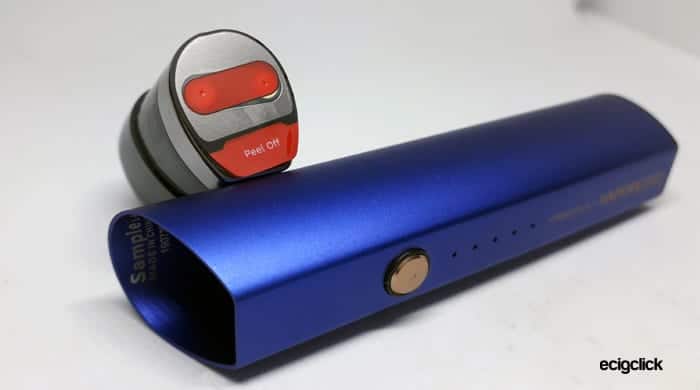
Basic operation
- Turn On/Off = 5 clicks of the fire button.
- To vape = press and hold the fire button.
Change Power Level
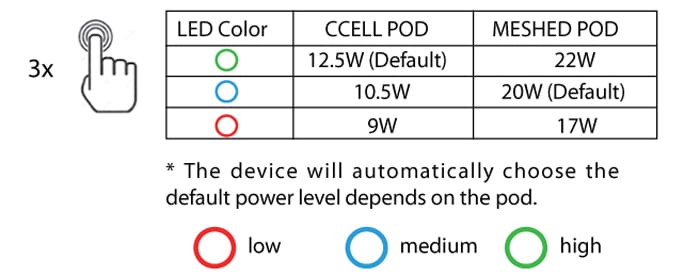
- Press the fire button 3 times and the indicator light will display which power mode is selected.
- Press 3 times again to move down to the next power level.
The power levels available depend on which pod is installed.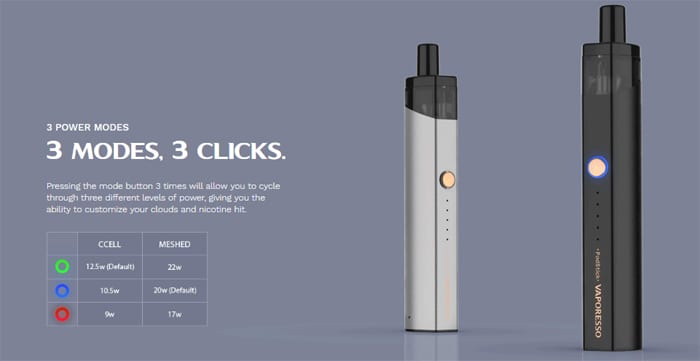
CCELL Pod
- 12.5W (Green Light)
- 10.5W (Blue Light)
- 9W (Red Light)
0.6ohm Meshed Pod
- 22W (Green Light)
- 20W (Blue Light)
- 17W (Red Light)
This does seem a bit “Back to front” as you start at high power then go down each time you do the 3 presses (rather than moving up the levels!)
I did find the default setting a bit annoying.
Basically, when you turn the device off or remove the pod – when you go to vape again it returns to the default power mode. So if you are using a different mode to this you will have to keep changing the power setting.
Not a deal breaker but slightly irritating!
Battery capacity remaining
The battery capacity remaining is displayed via the 5 LED indicator lights when you press fire or when charging. The key to interpreting this is as follows:
- 5 lights lit = 100% battery charge
- 4 lights lit = 80%
- 3 lights lit = 60%
- 2 lights lit = 40%
- 1 light lit = 20% or below

Protections
- Short circuit / no pod = indicator LED flashes
- 10 second maximum fire time = if the fire button is held down the fire operation will cut off after 10 seconds to prevent overheating.
- Low voltage protection = fire button back light flashes red and device will not fire. Time to charge!
How To Change The Pod
- This is sooo simple! Just pull the pod out and push a new one in! You cannot install the pod the wrong way around due to the shape!

- Check if a new pod has an “isolation” sticker on the base – just to prevent accidental firing before it has been filled. If it has remove this sticker.
How To Fill The Vaporesso PodStick Pod
- The fill port is located on the top of the pod – push across on the arrow where shown to open the cover.

- You will need to use a very small nozzle or the included refill bottle as the port will not open unless you push it down. This is to prevent leakage.
- Push onto the fill port and add e-liquid whilst watching the level through the side of the pod.

- Slide the fill port cover closed.
- If this is a new pod or first fill leave the device to stand for a good 10 minutes for the e-liquid to soak into the wicking before vaping.
How To Charge The Battery
This device can be charged using USB outlets outputting up to 1A/5V. Some newer charging devices can output 2A so make sure to only use applicable chargers.
- Using the included USB cable install the small end into the USB port on the device.

- Install the large end of the USB cable into a suitable outlet.
- Leave to charge – the battery indicator lights will in turn flash and come on as the battery capacity increases.
- If the battery is totally flat the lights might not start flashing until a few minutes after you have started charging. This caught me out a few times as I wasn’t sure if it was charging. I checked power supply and cables etc. then a few minutes later the first battery light started flashing showing it was charging.
- When all 5 lights are lit the battery is fully charged. The lights do not go out.
I found it took around 55 minutes to fully charge on my 0.5A USB ports on my PC.
How Does the Vaporesso PodStick Perform?
As there are two different types of pod included in the kit I used different types of e-liquid in each pod.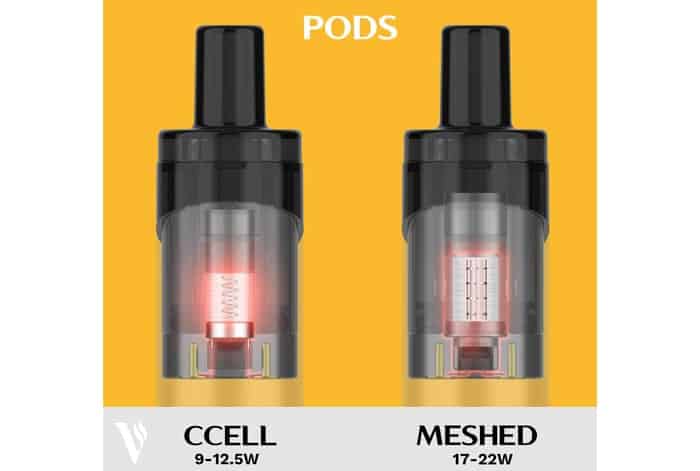
Further reading:
CCELL Pod (1.3ohm)
The CCELL pod uses a ceramic heating element.
I have had a few kits with ceramic coils and found on the whole they didn’t perform well and were prone to dry hits.
But if anyone can nail ceramic coils its Vaporesso – I loved the CCELL coil in the Vaporesso Revenger Mini kit.
I used a 50%VG / 50%PG Crazysaltzzz Nicotine salt e-liquid in a bubblegum flavour. This has 20mg nicotine strength and should be ideal for a low power pod kit.
At 9W – wow I am surprised how much vapour is coming out of here and a huge throat hit. Not much flavour yet.
At 10.5W (Blue light) – this is even better tons of throat hit and masses of vapour which I wouldn’t expect from a 50/50 e-liquid! The flavour is starting to come through now – slightly muted but this might bed in with a few more tank-fulls.
At 12.5W (Green light) – more of the same but just stronger flavour and slightly warmer vape.
This is a nice vape I have to say. Despite the first vape making me cough the coil has settled in quite quickly and gives a smooth but extremely restricted vape.
The flavour whilst not being the best is by no means terrible either – the flavour started to come through more after the first tank-full of liquid. Where this shines is that throat hit you get and the sheer vapour output!
I mainly used this in the highest power setting. I had no choice really as I switched the device on and off and it automatically defaulted to this mode.
After a while it was becoming tedious cycling through the power modes each time! So I just went with the flow and left it on the green light!
Meshed Pod (0.6ohm)
For this pod I used the IVG Bubblegum e-liquid which has 70%VG and 30%VG. I have also added nicotine salts to make the nicotine level 7mg.
Even on the lowest power setting (17W) this feels pretty powerful and already a pretty decent flavour.
In the middle power setting (20W) this is a lot warmer and the flavour has improved slightly.
On the high power setting (22W) again a lot warmer and plenty of vapour – but I do feel this setting is slightly on the high side as with repeated vapes it was verging on getting quite dry.
Now the second pod fill is when this came alive. The flavour and vapour are so impressive and I am happily vaping away on the 20W blue light setting. This is an amazing pod!
So far I have gone through about 5 pod fills (10ml) and the flavour is still perfect.
Airflow
On the CCELL pod this is extremely restricted.
Way more restricted than the Uwell Caliburn or Voopoo Drag Nano!
So those who like quite a loose MTL vape will struggle with this. I think it is fine but did take some “sucking” (as the actress said to the Bishop etcs…).
On the Meshed pod this is a lot more open. Still not quite a DTL vape but not the restricted suck out a tonsil draw of the CCELL pod.
I would compare the draw on this as being the same as my Uwell Caliburn.
So definitely a MTL vape.
Battery Life
As always your battery life will depend on the power level you use and your own vaping habits.
To give you a guide with the Meshed pod installed on the Medium power level (20W – Blue light) I got 4.5 hours of vaping.
It is worth noting this was with high VG low nicotine e-liquid. With higher nicotine liquid you may vape less frequently.
Pros
- Simple to use
- Handy little size
- Pod removal super simple
- 3 power modes
- CCELL coil gives amazing throat hit and vapour and good flavour.
- Meshed pod is amazing!
- Not a single leak or malfunction – dry hands! Rare!
- Very well made – no wobbles or rattles
Cons
- Push to fill port seems a bit unnecessary
- No airflow adjustment – CCELL pod extremely restricted, Meshed Pod still has MTL airflow
- Cannot replace just the coil
- Dark pod makes it difficult to see e-liquid level
- Keeps changing back to default power mode when turned off or pod removed
Final Review Verdict
Usually Vaporesso are one of the better brands when it comes to Ceramic coils and the CCELL pod wasn’t bad – it is definitely one of the better ceramic pods I have tried.
But I do feel this pod is outclassed by devices such as the Caliburn or Nord.
The CCELL pod was also totally upstaged by the attention seeking Meshed Pod – this is incredible.
The first tank-full wasn’t anything to write home about but after that this little pod really swung into life.
It was like refilling woke it up – perhaps I shoved my nozzle in a bit too hard? Who knows!
I highly recommend this for the Meshed pod alone.
The CCELL pod wouldn’t be missed if the kit had 2 of the Meshed pods instead in my eyes.
I sometimes think manufacturers include under-performing coils / pods just to tick the MTL and DTL boxes. There is no need.
One other HUGE bonus is that through all my time with the PodStick I had ZERO e-liquid on my hands, clothes or desk.
Refilling is an extremely clean business and no leaks whatsoever. I know this seems a pretty basic requirement for a vape device but you would be surprised how many leak on me or are messy to refill.
Flaw wise – the push to fill port is over-engineered although it does do its job, the top of the pod is too dark to view the liquid level and the device keeps returning to the default power setting after being turned off or the pod removed.
Plus some people may find the airflow too restricted – it is very tight on the CCELL pod and still restricted on the Meshed pod.
None of these are enough to say to not buy the Vaporesso PodStick but they do niggle a bit.
Have you used the Podstick? Let me know in the comments below!


Just scored one of these in the cute gold exterior. Agree with EVERYTHING you’ve written, right down to the pods – the CCell “MTL” has me drawing air around the drip tip just so I feel like I’m not going to black out.
The only other PITA is the initial fill of the first pod. Nowhere in the instructions does it say “PUSH” the tip of your fill bottle down until the little silver cone retracts into the body of the pod a little to fill. Once I worked that out (by reading your review), I was up and running, and like yourself – completely clean. No drips, leaks or spillage on the fill – yay!
Even though I got this as part of a promo pack at about a 50% discount, I reckon it’s worth the full price. As long as the coils in pods last the equivalent of a regular coil (eg, 1-2 weeks), then I’ll be – maybe – parking it in the glove compartment of the car in case my main device powers down, or runs out of juice, etc and I need something to get around town for the day.
Good gadget. Just what you’d expect from Vaporesso. 9/10, with lost points for the lack of the word “push” in the pod filling instructions, the almost useless CCell pod, and the pod itself needing to be a tiny bit more transparent to see juice levels.
(PS, turn the gadget upside down to check the juice level without removing the pod 🤫)