The Aspire Mulus kit is an AIO device that borrows very heavily from the design of the well know Billet Box.
It could be argued that Aspire cornered the All In One market a few years back with their popular Breeze pod based system.
The success continued with a follow up which also did well even if the name Aspire Breeze 2 was uninspiring.
Time moves fast in the world of pod based systems and they swiftly stormed the AIO arena.
Here, the well known Aspire Tigon spawned an AIO brother all of its own, wonder if you can guess its name?
They’ve taken ideas from their K1 Stealth, Plato and Gusto Mini kits with the Mulus and have opted for, yes! you guessed it.. pods as the chosen nicotine delivery system.
To all intents and purposes everything about the Aspire Mulus kit is hidden away and encapsulated in a box mod style all of its own.
It’s time we asked it to come out and play.
BTW the word ‘mulus’ can be interpeted as smooth – as in vape? Or it appears to be ancient Greek for mule – so time for me to do the donkey work on this review 😉
What Can We Expect From The Aspire Mulus Pod Kit?
The Mulan Kit is available TPD compliant offering a 2ml pod capacity – the one I’m reviewing is for use outside the EU.
This means I’m getting down and dirty with the 4.2ml version.
Expect everything else in both variants to be identical.

Being an open based pod system we can expect versatility and adaptability.
It features an ergonomic design, fast refill system and a single 18650 battery (not included) that can be charged via the type C USB port.
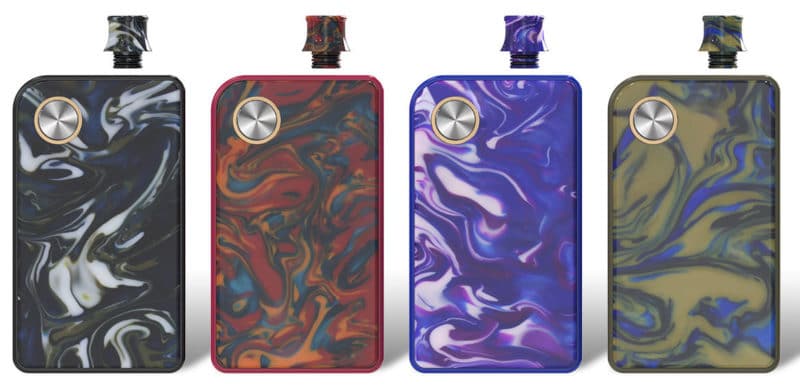
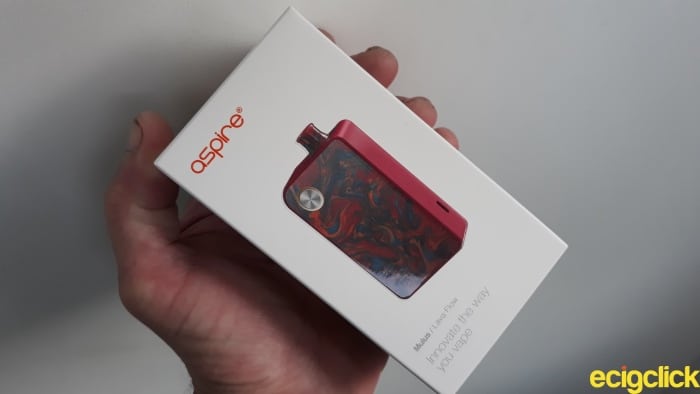
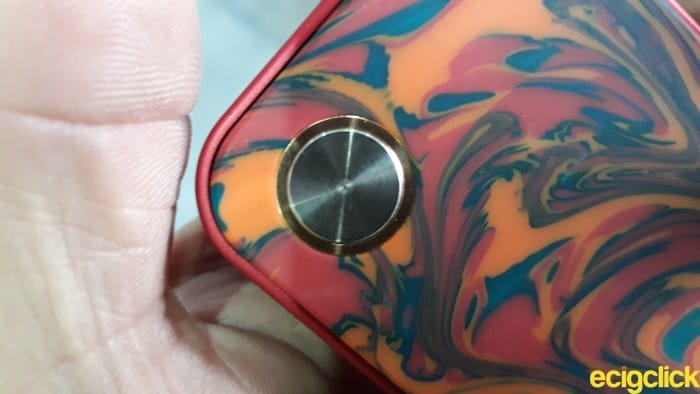
There are four colour schemes available: Shale Black, Psychedelic Blue, Deep Valley and the one under the spotlight which is Lava Flow.
It’s certainly not all about the abilities with this kit because there’s also compatibility.
The popular Nautilus and Tigon coils are included offering both MTL and DTL vaping experiences.
I would like to thank Aspire for sending this product over free of charge for the purposes of review.
Please note, these are my opinions and may differ from your own experiences of the device.
Inside The Box
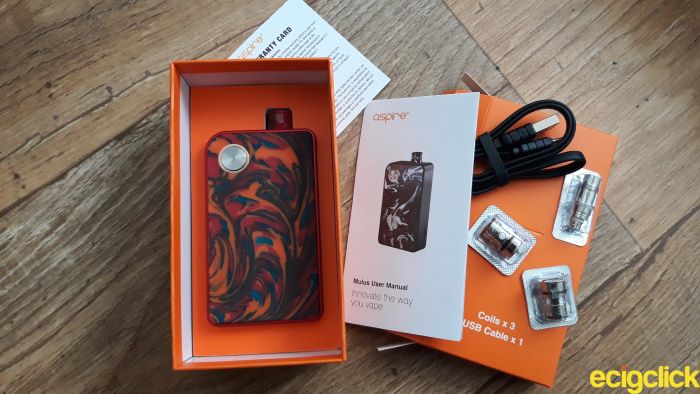
- Mulus device
- Pod (4.2ml capacity)
- Coil adaptor
- Nautilus 2S mesh coil 0.7ohm (pre installed)
- Nautilus BVC coil 1.8ohm
- Tigon coil 0.4ohm
- Tigon coil 1.20hm
- Type C charging cable
- User Manual
- Warranty card
Specifications
- Aluminium alloy with with resin front panel
- Dimensions (including drip tip) 50mm Width 24mm Depth 97.4mm height
- Resin 510 drip tip
- Pod capacity 4.2ml
- Output wattage range 1-80W
- Output voltage range 0.5V – 8.0V
- Recommended resistance 0.2ohm – 0.8ohm
- Screen 0.6in LCD display
- Type C Charging port
Aspire Mulus Kit Features
- Convenient pod side refilling system
- Adjustable bottom airflow when connected to Nautilus coils with adaptor
- Magnetic battery door
- 10 second continuous fire time
- Wattage, Voltage and bypass modes
- Mouth to lung and direct to lung vaping options
- Easy coil switching via plug and play
Design and Build Quality
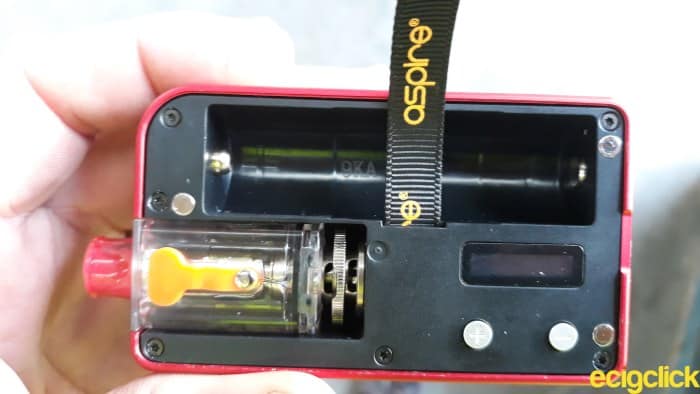
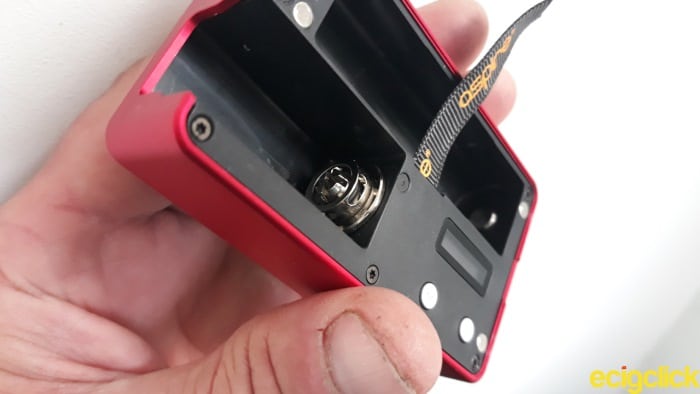
Battery Door
The Aspire Mulus kit is partly designed from aluminium alloy.
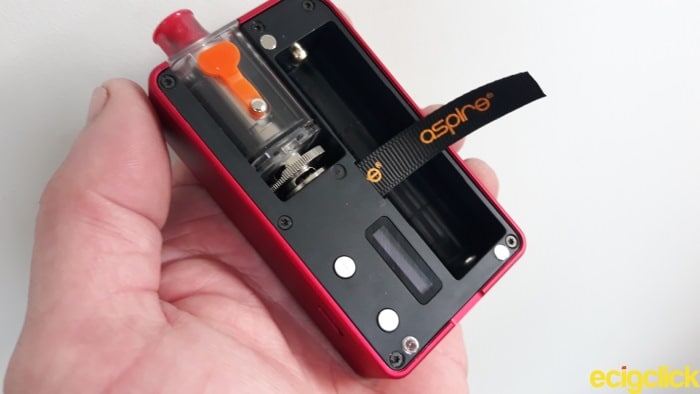
I found it to be extremely strong and bend proof which is reassuring.
There are two vertical slits in the upper left that allow:
- Visible access to e liquid levels.
- The passage of airflow to the installed coil within.
Further down there’s another wider vertical window that allows the internal screen of the device to be read.
Three magnetic contacts align to those within the mod providing a nice snappy grab every time.
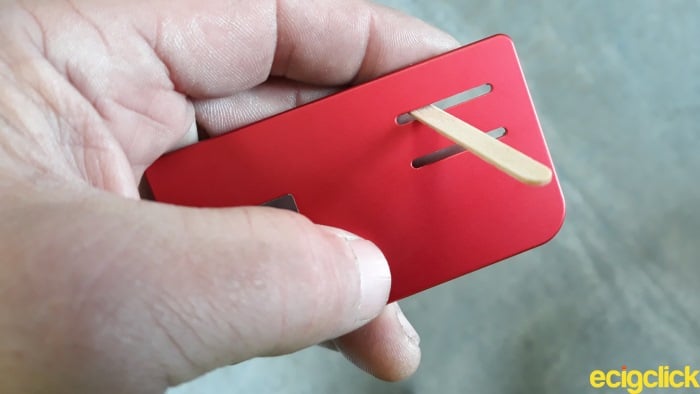
Fire Button
The Mulus very much mimics just about every box mod on the market with one exception.
The fire button has been incorporated into the upper left of the resin front panel, this poses something of a negative Neil, which I’ll expand on later.
It’s responsive but at the same time feels a bit loose and fragile.
Aspire Mulus Kit Button Functions
The Aspire Mulus doesn’t use the classic five clicks on, five clicks off.
That’s different lol!
- Press the fire button five times to lock or unlock the device.
- While in locked mode, hold the fire button for two seconds to power down the device.
- With the device switched off, press the fire button five times to power up.
- During use, press the fire button three times to lock the + and – buttons.
Accessing output modes
- Press and hold + and – buttons for two seconds to enter output mode.
- Use the + and – buttons to scroll through wattage, bypass and voltage mode.
- To select an output mode press the fire button.
- During wattage or voltage mode use the + and – buttons to alter the parameters.
Holding a finger on the + or – button will cause the parameters to change much quicker.
Once the display reads its maximum output of 80W a single press will reset the value to 1.0W.
You can effectively “round robin” the output.
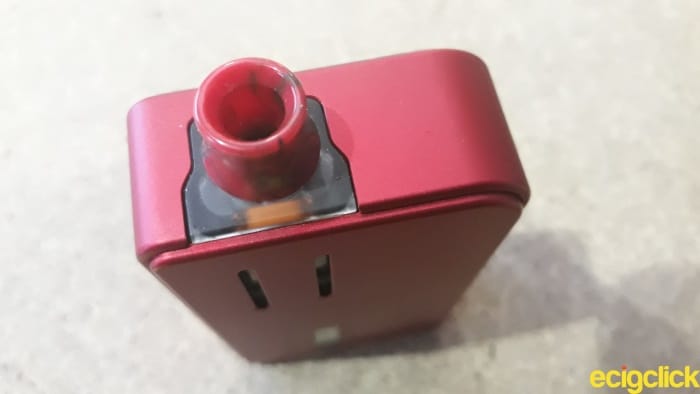
Pod Design
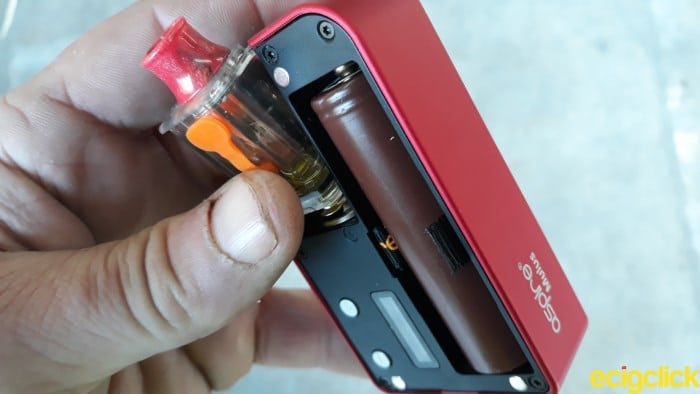
The fact that I’m reviewing the 4.2ml capacity (non TPD) version obviously influences this observation.
The Mulus features one of the most substantial pods I’ve come across.
Made from a strong toughened acrylic, it looks able to take a few knocks and last for a considerable amount of time.
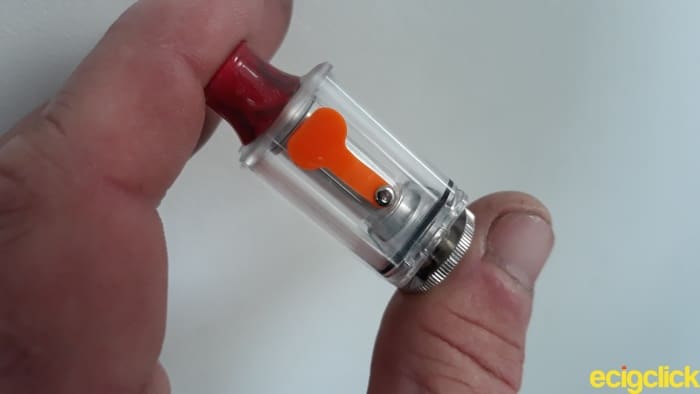
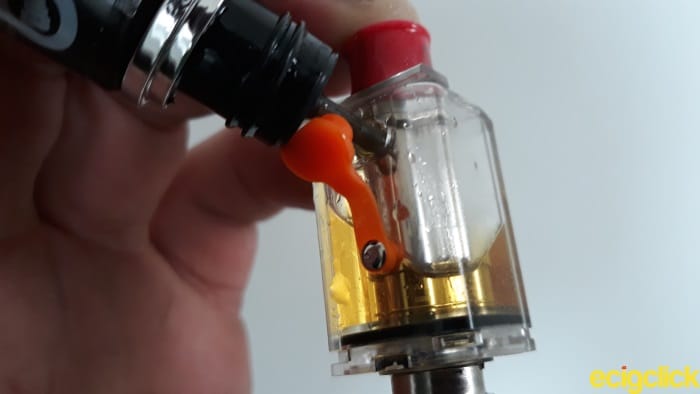
What differentiates this pod from others is the silicon seal or stopper.
I no longer need to reach for a magnifying glass or use nail extensions! (They belong to the Wife, by the way lol!)
Aspire have clearly paid attention here.
They’ve removed some of the frustrations often found with open pod systems.
They have also employed their trademark orange colour scheme.
Installing the Pod
The 510 connector for the pod has been spring loaded.
You will still need to take that extra bit of care when the airflow adaptor is employed – it then becomes more of a tight fit.
The best way to remove the pod is to push down on the drip tip then pull forwards.
When inserting the pod, place it at an angle of 45deg, push down and slide back into place.
Filling the Aspire Mulus Kit
- Open and remove the battery cover.
- Lift the silicon seal and add e liquid into the pod through the fill hole.
- Replace the silicon seal ensuring a firm fit.
- Close the battery cover using the magnetic contacts.
Although not stated in the instruction manual, I found filling easier with the pod removed from the device.
How does the Aspire Mulus Kit Perform?
Many people associate Aspire with their popular Nautilus range of tanks and associated coils, two of which come boxed with the Mulus.
I’m going to start my tests with the pre-installed 2S 0.7ohm mesh coil.
Installing the Nautilus Coils
- Open the battery cover and detach the pod from the main body.
- Pull down on the used coil and remove from pod.
- Unscrew the used coil from the airflow control adaptor.
- Screw a new coil into the airflow control adaptor.
- Push the new coil firmly up into the pod.
- Replace the pod securely back into main body.
- Close the battery cover using the magnetic contacts.
Nautilus 2S 0.7ohm Mesh Coil
It has an output rating of 20-25W.
Being a sub ohm coil I opted for a 70VG/30PG ratio using Vampire Vape Rhubarb and Ginger from their Shortz range of e liquids.
With the airflow adaptor securely in place and set to wide open.

Cloud production was fantastic offering thick and fluffy white plumes usually assigned to dedicated sub ohm tanks.
The sweet spot for this flavour profile was found at 22.5W (3.9v).
The rhubarb and ginger were combining very well with just the right amount of kick from the koolada.
Upping the output to highest recommended setting of 25W caused the ginger to start giving a burnt taste.
I could have been asking a little too much of the mesh coil. Reducing airflow down also had a significant impact on flavour.
This was a much more muted affair, one that didn’t work as effectively.
To conclude, this coil is very well suited to a fully open airflow structure.
Expect anything in the region of two days battery life from the single 18650.
Installing the Tigon coils
- Remove the battery cover and detach the pod from the main body.
- Pull down on the used coil to remove from pod and replace with a new one.
- Replace the pod securely back into main body.
- Close the battery cover using the magnetic contacts.
Tigon 1.2 Ohm Coil
The Aspire Tigon is a hybrid “pen” style device with the ability to target both MTL and DTL vapers alike.
This coil has an output rating of 10-12W
Being designed strictly for a mouth to lung vape I cracked open some Riot Squad Sweet Leaf Tobacco with a 50VG/50PG ratio.
Running at 10W (3.5V) there was no doubt the Tigon coil meant business in terms of restricting airflow production.
This was your classic mouth to lung experience, delivering performance ideally suited to the virgin vaper in spades!
A Magic Vape?
This coil produces the magic towards the end of the exhale. I picked up some wonderfully subtle alterations to the blended tobacco.
The vape was also very smooth and cloud production mirrored that of a standard lit cig.
Moving up to the maximum recommended output of 12W saw the flavour drop off slightly. It didn’t quite resonate as well as before but would be more than acceptable for the first time flirter.
During the course of a nine hour period and vaping quite heavily, I managed to get through a single pods worth – battery life was depleted by 25%
Tigon 0.4ohm Kanthal Coil
This coil has an output rating of 23-28W
Wow! Upon installation the coil was showing a reading of 0.4ohm. Bang on!
Wick Addiction Lemon Tart was used to test this sub ohm coil. Hoping to bring out the subtle nuances associated with this personal favourite I began at 25W (3.1v).
Although the airflow to the coil was slightly restricted, I actually found it perfect for my everyday needs.
At this output and with a 70VG/30PG ratio the cloud production wasn’t quite living up to expectation.
The lemon appeared in a saturated form producing a very sweet taste on the tongue. I was struggling to pick out any of the bakery notes from this tarty profile.
Not the best depiction or representation of this e liquid.
Higher Wattage A Better Vape?
Stepping up to the maximum recommended output of 28W (3.4v) saw a marked improvement to the overall vape.
The coil was now providing just enough warmth to the lift those previously absent bakery notes.
Pie crust was punching its way through and there was more sharpness and clarity from the lemon curd.
Cloud production was also improved.
This had become the profile I know and love.
After nine hours of heavy vaping and approximately 10ml of e liquid later the single 18650 battery called it a day.
Nautilus 1.8ohm BVC Coil
This one gave me a few teething issues to begin with. Being a screw type coil it needed the airflow adapter installed.
This coil has an output rating of 10-14W.
Riot Squad Cherry Fizzle, a 50VG/50PG ratio was used for the purposes of testing.
This BVC coil only functions with the Airflow control adaptor wide open. There’s very little difference while adjusting it.
In this respect it’s a very loose MTL set up and not particularly well suited as such. I could quite comfortable direct lung on it without loss of flavour, which was actually very surprising.
For such a low powered coil I was also impressed with the cloud production.
The cherry and cooling agent were punchy, vibrant and consistent during a full days use. The sweetness only really dropped off when the pod needed replenishing.
Running the coil between 10-14W saw very little difference to the overall vape quality.
Leaking and Gurgling
This Nautilus coil turned out to be the joker in the pack.
Testing at 10W, I initially encountered some gurgling from the pod as well as juice reaching my tongue.
Upon investigation I noticed a small amount of leaking. The leaking continued during the course of the test at random moments which was mildly frustrating.
After nine hours of pretty heavy vaping, the battery was showing very little sign of use!
You’re going to get at least 12ml of juice from a single charge.
Chances are the battery will last anything up to three days.
Aspire Mulus Kit and Erroneous Ergonomics
No matter which way you hold the Aspire Mulus there’s every chance you’re going to block those airflow slots.
Of course there’s a work around but it takes getting used to.
This may have been a conscious decision on the part of Aspire, as in, to separate this device from the traditional box mod design.
A way of reminding users that this is an AIO pod kit.
However, and because of the size of the kit, it kind of spoils the form factor altogether.
To rely on the comfort of ergonomics is to stifle any airflow in this case.
On the Inside Looking Out
Removing the magnetic battery door can sometimes be a pain. More so to those like myself that are devoid of any fingernail length!
However the contacts are strong enough and it snaps back into place effortlessly. The Lava Flow resin front panel is very durable.
It’s been knocked a few times, accidentally dropped on its side and after a week shows no scratches.
No sign of damage – good stuff.
Aspire Mulus Kit Pod Performance
Impeccable.
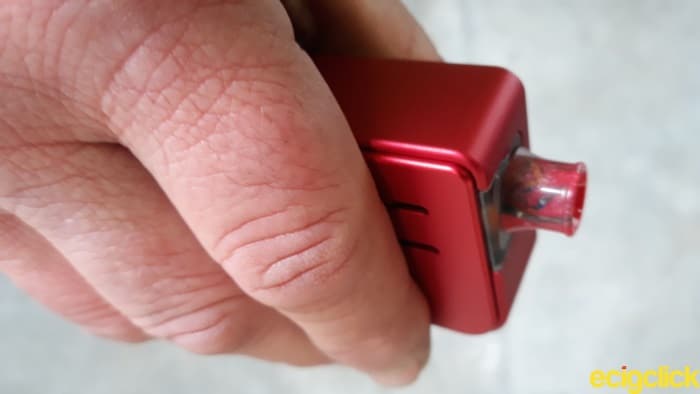
When removing and inserting, the drip tip is your best friend! Simply push down on it to seat into the spring loaded 510 connector.
As silly as it sounds just make sure the fill port is facing you – it won’t fit any other way.
Don’t expect to achieve a remarkably fast firing speed from this device. Despite using an external 18650 battery there’s still a lag between hitting the fire button and vaping.
The form factor might lead you to believe otherwise.
Lest we forget this is a pod based system.
Battery Performance
I was never given a reason to go beyond 28W while testing the Aspire Mulus kit.
To all intents and purposes any 18650 battery is capable of running a device up to 80W. The basic math shows that I’m duty bound to receive terrific performance.
The included sub ohm coils will see at least two days moderate vaping and the MTL coils will undoubtedly last longer.
At this point I must stress that I never attempted to use USB charging.
External batteries should always be maintained via an external charger. That’s not to say you can’t use this feature.
I’m just not able to say how long it would take to restore a battery to full strength.
Aspire Mulus Kit Coil Performance
With the exception of a minor leaking issue from the Nautilus BVC coil I’m very impressed with both flavour and cloud production from the Aspire Mulus.
I received a very smooth and quiet vape from all of them.
I did encounter the occasional gurgling from the pod upon first fill. It tended to subside when the coils were set to their maximum wattage limits.
Generally speaking this yielded the best results with the exception of the Nautilus mesh coil.
We can’t rule out those “break in” periods either because all four coils were consistently performing in less than an hour.
These are the ratios I would recommend for the included coils:
- Nautilus 2S 0.7ohm mesh 50VG/50PG – 70VG/30PG
- Tigon 1.2ohm 50VG/50PG
- Tigon 0.4ohm 60VG/40PG – 70VG/30PG
- Nautilus 1.8ohm 50VG/50PG
Pros
- Plug and Play simplicity with pod and coils.
- Strong aluminium frame and durable resin front panel.
- Easy to read display in all light conditions.
- Incredibly easy filling system.
- Battery life for days, Bro!
- Lightweight.
Cons
- Can be awkward to hold without blocking the airflow / juice window.
- May be prone to leak on occasion.
- Not the most pocket friendly pod system out there.
Aspire Mulus Kit – Final Review Verdict
Aside from a few ergonomic issues I struggle to find a way to fault this kit.
Whether using the airflow control adapter or simply plugging the coils in it took literally seconds to be up and running.
The Aspire Mulus offers by far the easiest fill system on an open pod system, in my opinion.
The single 18650 battery will see you right for days on end which is always a welcome bonus.
Moreover, you can expect fantastic flavour and cloud production with all four coils. They are perfectly suited to this pod design.
The Nautilus mesh coil was giving as good as any dedicated sub ohm tank out there.
I would thoroughly recommend this to someone that has experience with a few pod systems already.
To those that have already gained experience from using external batteries, it’s a bit of a jump for a virgin vaper because of safety requirements, yet remains an ideal starting point nonetheless.
Have you used the Mulus kit? Have any question about the device? Let us know in the comments below!


Very good review site……Read so many on here…. Now have the Mulus……Loads that I like about it but still confused on a few things…..50/50 e-liquids……Do I need to set the wattage….And the volts ???….Noticed the display said 13.0w at first…..But 0.0v……Coil fitted is the 0.7 Nautilus…..Airflow almost closed as I like a tight-ish drag……Any suggestions ?
Did up the wattage to 22.0w….But volts still stayed at 0.0v….. Tried it and the flavour was really strong…. Also have about thirty 70pg/30vg liquids…. Can they be used in the Mulus ?…..Thanks
It’s compatible with all nautilus coils, and I have to say, best external pod mod out there
Thanks for taking time out to read the review, Daniel.
Speaking of Nautilus coils (and thanks for confirming compatibility) they also work an absolute dream in the Aspire Rover 2 kit which I recently reviewed. 😁
this kit does not seem like many are interested in it i have seen very few reviews.No well known reviewers have even touched this product yet i am guessing its a real lemon of a device i was gonna buy one but cannot find a decent video review of it at least not in English anyway
Thanks for taking the time to read the review, Neil!
Many of the video reviewers have a backlog of products to look at. It can take longer for them to hit your screen. Hope you’re able to find one soon.
Yeah.. The Mulus IS a real lemon of a device and I really enjoyed reviewing it.
It does reminds me of a billet box in style and for a pod based system it really kicks butt for flavour and cloud production.
Thanks again,
Neil
Hi, Kelly!
I’m not sure if the Mulus kit is compatible with all Nautilus coils. There’s a chance they will work with the included coil adaptor but I haven’t tried this, as yet.
The kit provided me with a very smooth and cool vape across all four coils. I was particularly impressed with flavour and cloud output.
Were it not for a minor ergonomic issue I would have no hesitation of giving a straight 10!
Yup! Really is that good.
Thanks for taking the time to read the review, glad it’s been of help.
Neil Cozens
This is the most thorough review I’ve seen of the Mulus device! I’ve been debating whether or not to buy one, and I’m so glad to see reviews of each coil provided in the kit. Do you know if it is compatible with all Nautilus coils? Such as Nautilus X or AIOs? And is the vapor warm like the Breeze NXT, or cooler like the AVP?