The BP Mods Pioneer RTA review…and this one’s a kind of collaboration with Dovpo.
Rebuildable Mouth to Lung Tanks…there seems to have been an explosion of these in the last 12 months, and I couldn’t be happier!
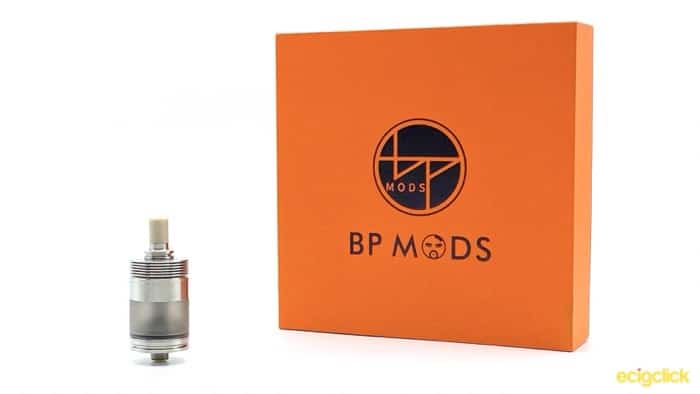
The BP Mods Pioneer RTA was something that I wasn’t expecting, so I’m excited to try a new RTA with absolutely no preconceptions of what it was going to give me.
What Can We Expect From the BP Mods Pioneer RTA?
BP Mods is a name I hadn’t come across before, indeed the Pioneer RTA appears to be their first product. Doing some Googling it appears that they are a group of “high end modders“.
Whoever they are, they have teamed up with Dovpo for the construction of their first atomizer, a name that should need no introduction.
Dovpo has been around since 2006, and have done quite a few collaborations with other companies and individuals.
I recently reviewed the Blotto Mini, designed by The Vaping Bogan, Gaz reviewed the Signature Clutch, co-designed by Mike Vapes and Signature Tips, and Neil has reviewed their Mono SQ DNA75c, also designed by Signature Tips.
So they definitely have experience partnering up to make designs into reality!
With the Pioneer RTA, BP Mods and Dovpo are taking another look at how you fine tune the airflow on a mouth to lung tank. You can read about the differences between Mouth to Lung and Direct Lung vaping here.
Rather than just using an airflow control ring, or inserts below your coil, they have decided to make the 510 pin an integral part in the airflow. So let’s take a look to see if they succeed!
This was sent over to me free of charge from Dovpo (thank you). As usual this will not affect my review in any way, and I shall report back honestly on what I find.
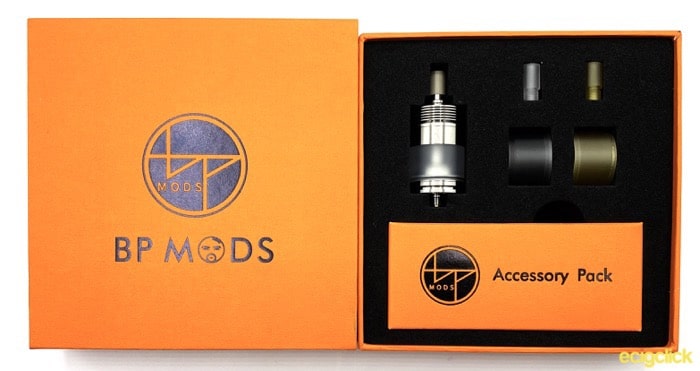
Inside The Box
- Pioneer RTA
- 2 part drip tip – PEEK (preinstalled), Clear and Ultem
- 3 tank section – Clear (Preinstalled), Ultem and PCTG
- 3 Airflow Pins – 1.2mm (preinstalled), 0.8mm and 1.5mm
- Spares Bag including two coils and O-Rings
I presume there will be a manual included, but as mine was a review sample I did not have one.
Also Supplied
- DL Conversion Kit – 2 Airflow Pins, Chimney Section, Wide Bore Drip-Tip
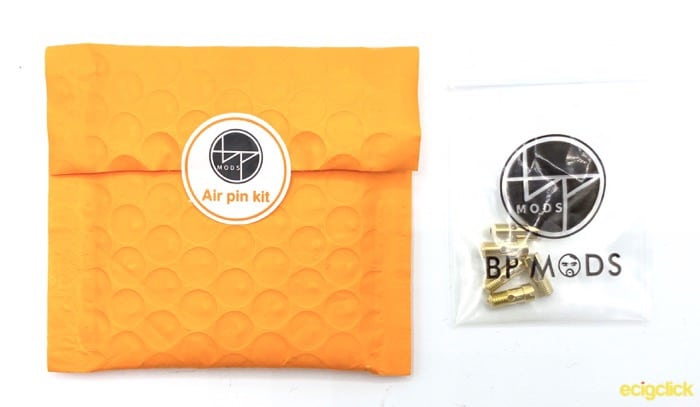
- Airflow Pin Set – 5 Additional Airflow Pins
Specs
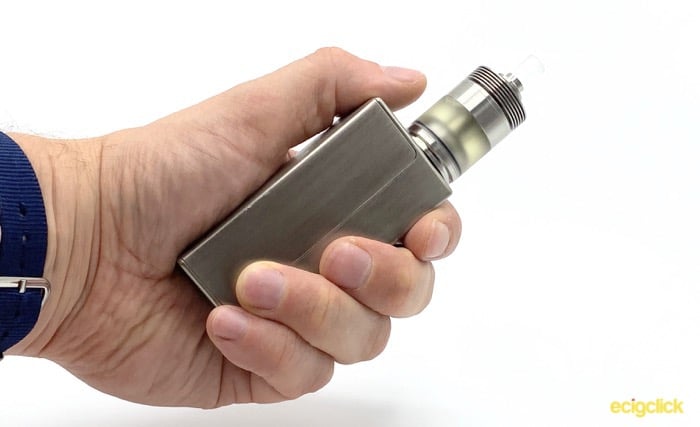
- Dimensions – 22mm x 42mm
- Weight – 38.5g
- Coil – Rebuildable Single Coil
- Deck Design – Two post
- Airflow – Bottom Airflow
- Material – Stainless Steel
- Capacity – 3.7ml
- Special Features – Changeable Airflow Pins
Design and Build Quality
Opening the very smart bright orange box, you are struck by how beautifully laid out everything is. It feels like a presentation box, and it definitely adds to the high end feel.
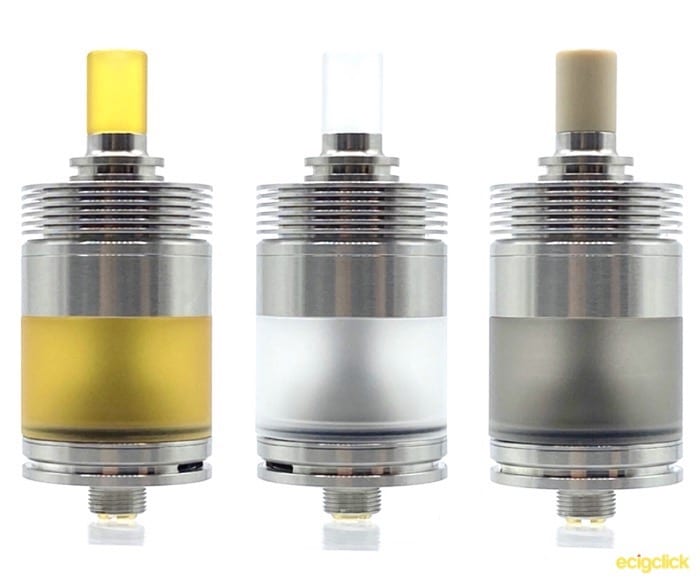
You can immediately see that you have various different colour options, and we’ll get into more detail on those later.

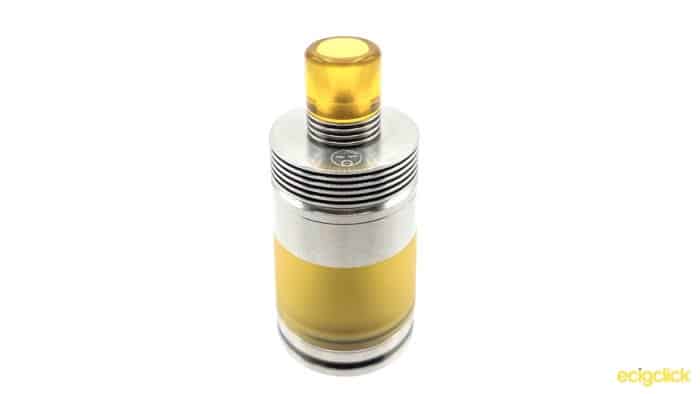
The Pioneer comes in two colours , stainless steel, that I received and black. Though there are rumours there’s going to be a Titanium edition in the future.
BP Mods Pioneer RTA Drip Tip
It’s a very narrow bore drip tip, definitely aimed at mouth to lung vapers!
It’s constructed in two parts with a double o-ringed metal section with two heat fins at the bottom.
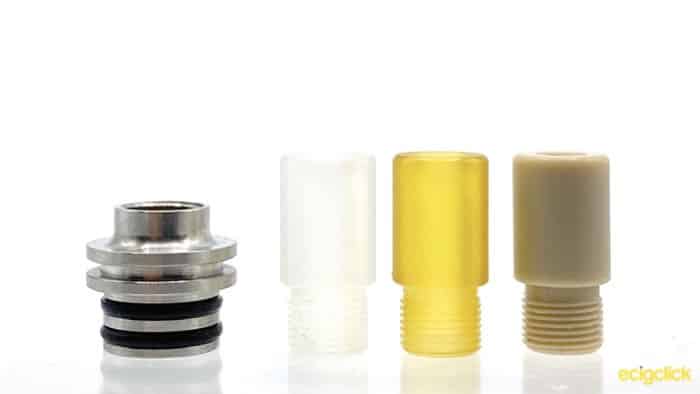
Into this is screwed the plastic section that is your mouthpiece. Out the box it has a peek mouthpiece installed, but you can unscrew that and screw in either a clear or Ultem piece.
Being such a narrow bore, one thing I was worried about was condensation collecting, and ending up with a wet vape as liquid travels up the drip tip.
BP mods has cleverly thought about this, and to mitigate the risk have designed the drip tip and top cap in such a way that they keep a consistent bore all the way down.
With no gaps for condensation to collect, this should hopefully not be a problem. But it’s definitely something I will investigate.
BP Mods Pioneer RTA Top Cap
The top cap is totally flat on top, with just “Designed by” and then the BP Mods logo surrounding the drip tip.
Gotta say it’s a little weird having that face staring at you whenever you have a vape!
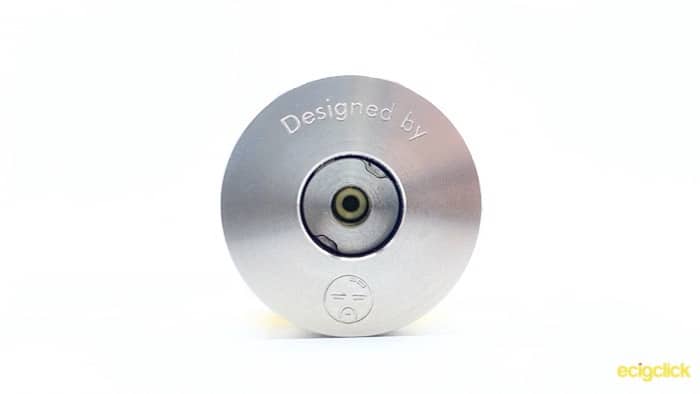
They went a little overboard on the heat fins in my opinion, but it’s certainly a look! You have 6 heat fins that take up quite a lot of the height of the tank.
The top cap is a bayonet fit, so it only takes a quarter turn to remove it.
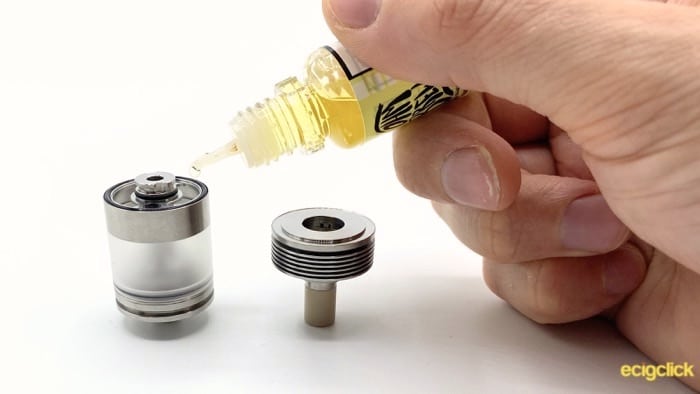
BP Mods Pioneer RTA Tank Section
Under the top cap, the next metal section has your two large fill ports.
The chimney and evaporation chamber are all made in one piece.
The chamber itself has threading on the bell section, to screw down onto the deck.
I found that this was a bit temperamental, and I would advise reverse screwing it slightly when you go to screw it down, otherwise it’s a little too easy to end up cross threading.
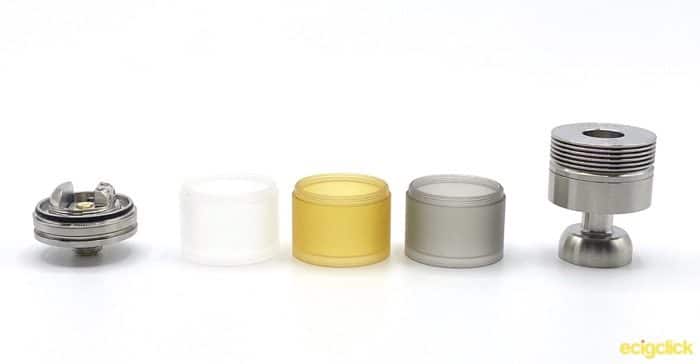
Your main tank section is made of PCTG, Ultem or a clear plastic (probably PC). Because there’s no metal at the base holding it in (like you would have with a glass tank) the tank is threaded and screws on to the top section.
Because you’re dealing with threaded plastic, be careful.
Do not rush screwing one of these on, as if you end up cross threading it you will strip all the threading away pretty quickly and render that tank useless.
BP Mods Pioneer RTA Deck
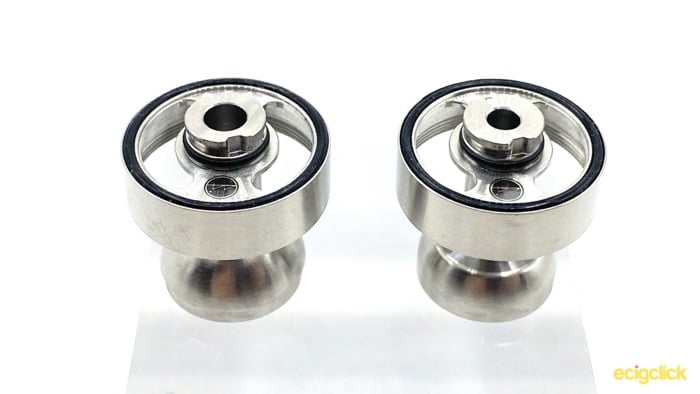
The deck is a simple two post deck, with flat head grub screws.
You have pretty small post holes, so you are going to be limited in the size of coil you install, but as a mouth to lung tank you’ll be fine.
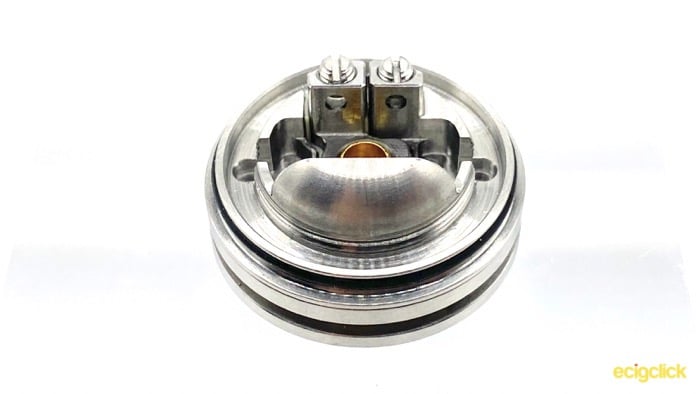 Airflow comes up through the gold pin you can see here, we’ll go into more detail on this later.
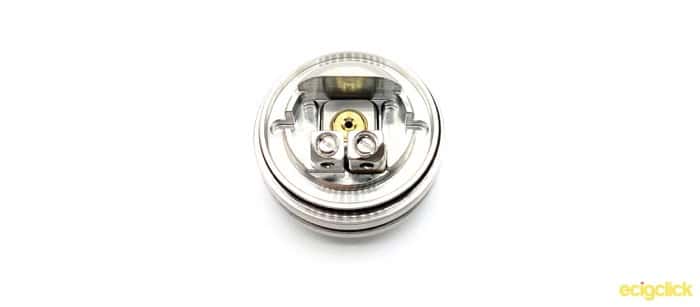
On the other side of the posts you have another block of metal that reduces the chamber down even further. This is formed so it will fit into the bell cap of the top section perfectly, and means you are going to be left with a very reduced chamber size.
Hopefully this will translate to a really flavourful vape!
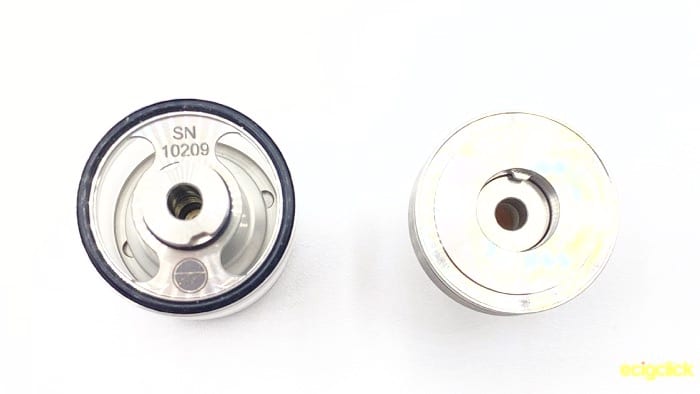
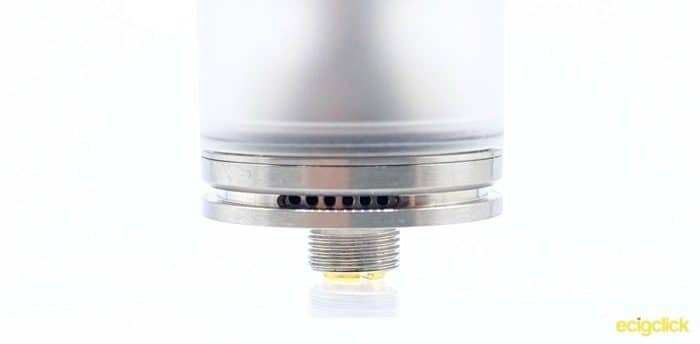
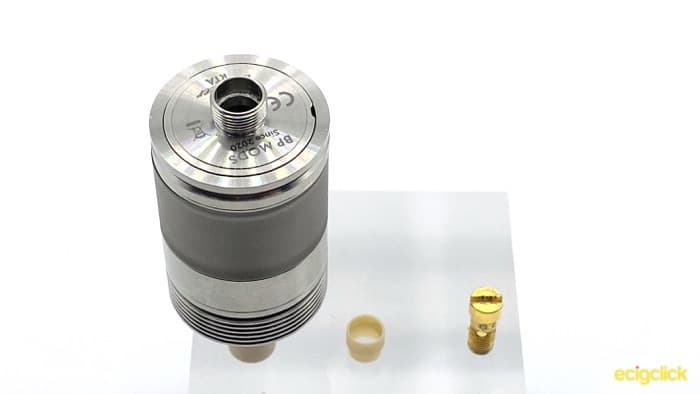
BP Mods Pioneer RTA Base
The base of the tank has a protruding gold-plated 510.
You also have your regulatory marks and the name of the company and the RTA.
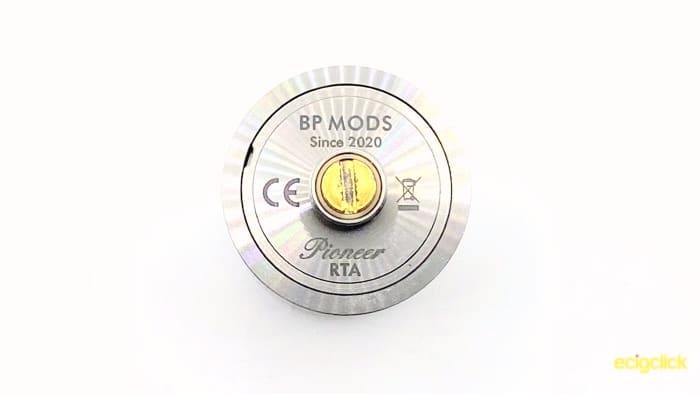
Your external airflow control ring also sits right at the bottom. It’s a single slot, and you have the option of either a cyclops style hole, or 6 tiny holes to tailor your airflow.
There’s no knurling or anything to grip on this, which combined with how low it is makes me worry about how easy it will be to adjust. I’ll look at that further when I get to testing it.
BP Mods Pioneer RTA Airflow Control
Although you have an airflow control ring, the main control of your airflow is actually through the 510 pins.
The air comes in from the external AFC, then goes into the 510 and up through differently sized apertures depending on the pin you have installed.
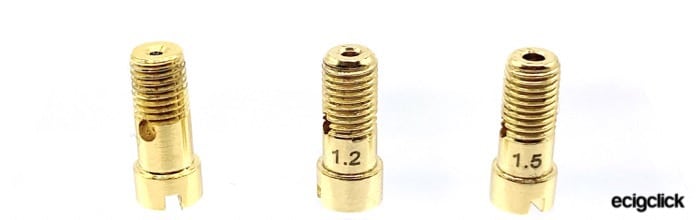
You get three in the box as standard, 0.8mm, 1.2mm and 1.5mm.
For this review I was also sent the Airflow Pin Kit, which gives you a further 5 at 0.9mm, 1.0mm, 1.1mm, 1.3mm and 1.4mm.
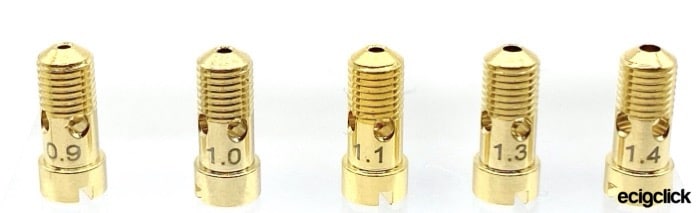
I am a big believer that for a mouth to lung tank, the best way to control the airflow and get the perfect vape, is to control the size of the hole right before your coil.
We’ve seen various different ways of achieving this, the most common being differently sized inserts. However the problem with these is that it’s usually impossible to change them whilst you have a build in place.
What BP Mods has done, is allow you to remove the 510 pin from the base by unscrewing it.
This allows you to change the airflow configuration even whilst you have a build in, and a full tank of liquid.
BP Mods Pioneer RTA – DL Conversion Kit
Another optional extra that you can get is the DL Conversion Kit.
This kit gives you a new evaporation chamber, with a wider chimney, a wider bore 510 drip tip (once again, to keep the bore consistent all the way up) and another two airflow pins!
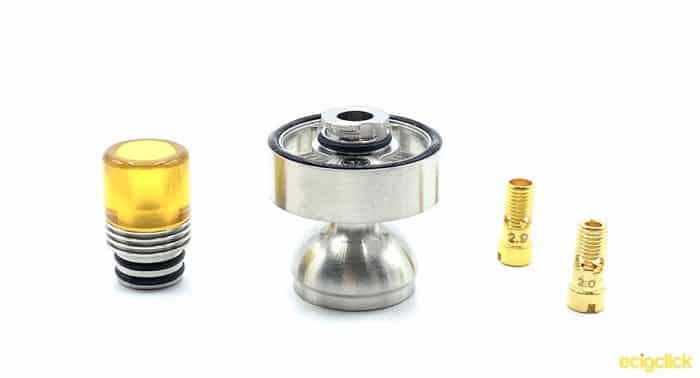
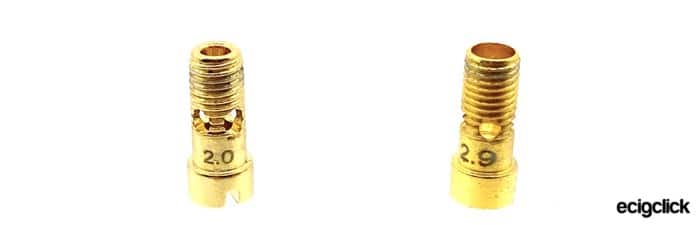
In this case the pins allow far more airflow through, being 2mm and 2.9mm bore.
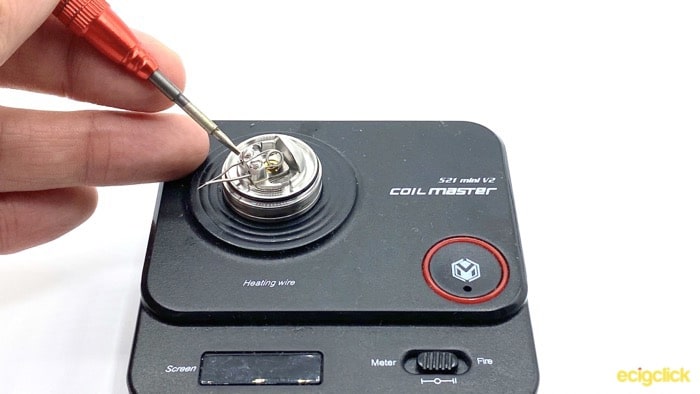
How To Build The BP Mods Pioneer RTA Coil
- Unscrew the flathead post screws (you will need a small flat head to do this, as they are very small!) Place your coil legs into the post holes, and clamp them in place by screwing down the screws
- Cut your coil legs as close to the back of the post as you can to avoid them shorting out
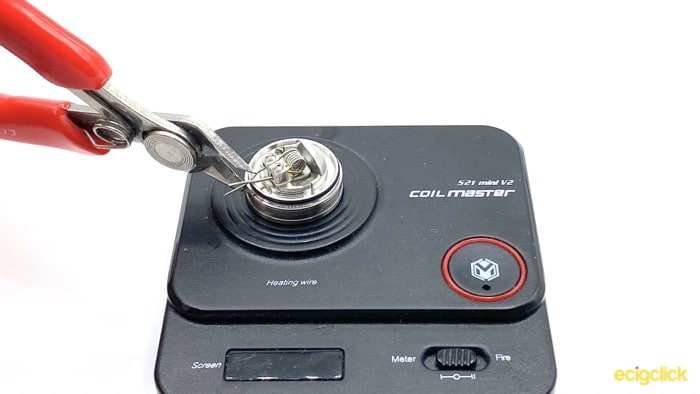
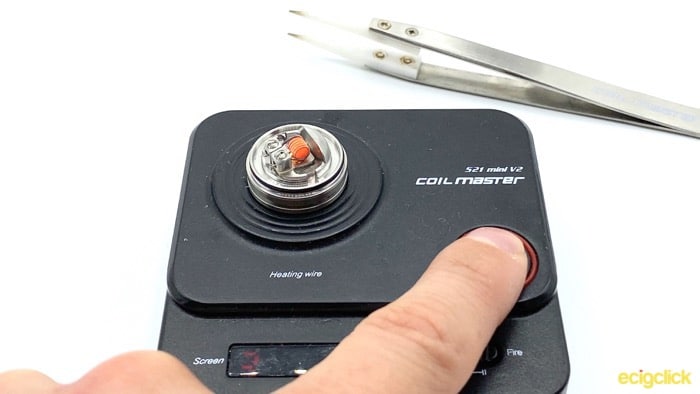
- Position your coil, and dry fire it to remove any hot spots, raking with ceramic tweezers as needed
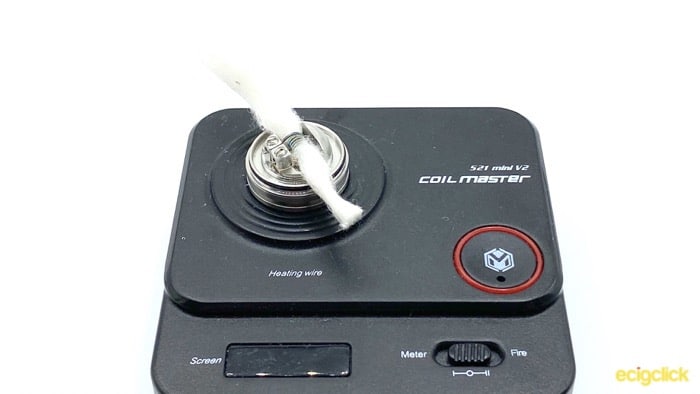
- Feed the end of your cotton through your coil
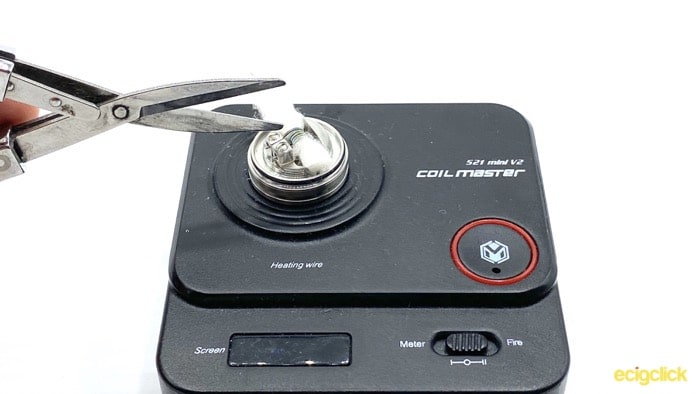
- Cut the cotton, I found that if you rest your scissors in the gap between the deck and the outside of the tank, this is pretty much perfect
- Fold your wick in to sit in the juice wells, make sure that the gap is totally covered by cotton

- Saturate your cotton with plenty of e-liquid
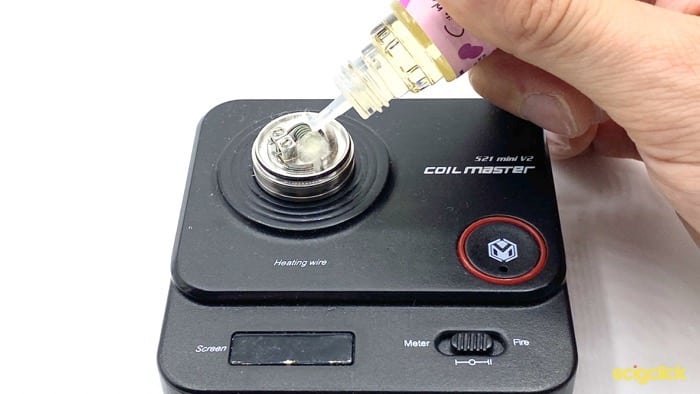
Reassemble the tank and fill up
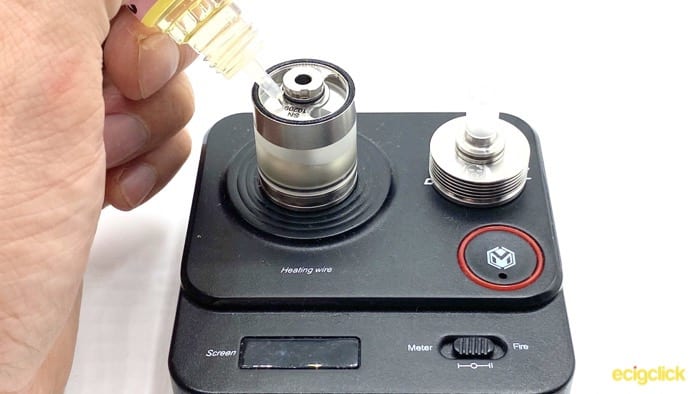
How To Fill The BP Mods Pioneer RTA
Give a quarter turn to remove the top cap, and fill through the large juice holes on top.
How to change the Airflow Pins
Changing the airflow pins seems simple enough, you unscrew the 510 with a flat headed screwdriver.
Remove the airflow pin, being very careful not to lose the PEEK insulating sleeve.
Replace it with your desired pin, and screw it back in.
I did find that this was more fiddly than I thought it might be.
Because you are screwing the pin into the free floating positive post of the deck, it’s easy to accidentally push this up too far, or not get the threads to catch the first time.
It actually becomes easier to do this when you have a build in place, as the coil will help to keep the positive post in place.
It still wasn’t always the easiest, and I did have times where I thought I had screwed it in correctly only to have my mod tell me I was shorting out somewhere.
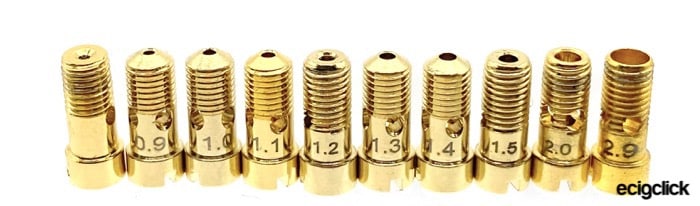
With the DL conversion kit and the additional pins, you have a whopping 10 to choose from!
How Does the BP Mods Pioneer RTA Perform?
Although I have the DL conversion kit, I am going to be reviewing this in its stock configuration.
I will include my thoughts on the conversion kit and the airflow pins, but as they are optional add ons, I think it’s only fair for the review to focus on the standard kit.
For these tests I’ve used both 50/50 e-liquid, Berry Ice by SVC Labs, and 70/30, Fruity Flavour by El Cheapo.
You can read more about PG/VG here.
BP Mods Pioneer RTA Airflow Control
My first slight criticism of this tank is the airflow control ring.
As I suspected, it is almost impossible to get a grip and turn when it is on a mod. In fact I found that on some mods it refuses to move at all, as it has touched down onto the top of the mod.
You can solve this by unscrewing the tank slightly, but even then, it is a pain to actually get it to move.
For this reason I left it fully open on the cyclops slot for the majority of my testing.
The airflow pins give you more than enough control over the airflow to make the AFC ring a little bit superfluous.
Airflow and Cloud Production
Using the smallest airflow pin (0.8mm) this is tight! On a 1-10 scale where 10 is fully unrestricted and 1 is the tightest draw imaginable, this is sitting at a 1.5.
If you enjoy your cheek sucking MTL draws, then this may well be for you.
Whilst I like to a really tight draw on occasion, it’s not something that I want to vape all day.
Changing to the 1.2mm gave me a vape that I was much happier with – on the 1-10 scale this was now a 3.
Moving up to the 1.5 and you are still firmly in mouth to lung territory, but it is noticeably less restrictive – 4.5 on the scale.
With all three airflow pins I was impressed at how smooth the draw is and there’s not a hint of turbulence.
Cloud production is on a par from what you would expect for a mouth to lung tank, it’s not huge, but perfectly satisfying.
BP Mods Pioneer RTA Flavour
The first build I put in was my standard testing build for mouth to lung tanks, a microfine fused Clapton in stainless steel, reading around a 0.7Ω.
It gave me pretty good flavour, but nothing exceptional.
So I decided to try it out with a simple round wire build, a far more “traditional” mouth to lung coil. This build had a resistance of 1.0Ω.
Amazingly I seemed to be able to get more flavour out of a simple coil than my standard fused clapton. I think running this at lower wattage is definitely the way to go to get the best out of this tank.
Liquid in Drip Tip
Remember what I said about having a really thin drip tip being a recipe for getting liquid condensing in your mouth? I’m pleased to say that this was actually never a problem.
The work they have done to make sure that the bore of the mouthpiece is continuous all the way down the tank, really seems to eliminate this issue.
For comparison, I decided to try this drip tip on another tank, and sure enough, I had liquid condensing and coming up the drip tip.
Leaking
Leaking is something I had a problem with for a while during my testing.
It was OK in use, but anytime I went to fill it up, I would always end up with quite a lot of my e-liquid coming out the airflow.
As with most cases of leaking, this is all down to wicking.
It took my a little bit of experimentation to get my wicking right on this one, and I found that more wick was better, especially with the 50/50 e-liquid.
Impressively though, I never got any leaking when I changed the airflow pins. Only during refilling.
DL Conversion
The DL conversion kit definitely allows you to open this up quite a lot. It’s not a totally airy Direct Lung vape, it’s still got quite a bit of restriction.
The 2.0mm airflow brings it to a 6 on the 1-10 scale, and the 2.9mm give you a 7.5.
The drip tip that it comes with perfectly suits the DL kit, and it continues the good work they did with the mouth to lung version. The bore is the same all the way up the length of the tank to the drip tip.
I was able to get a decent vape from this, but I can tell that it needs some serious rethinking on my part to get the most out of it.
Having said that, I’m confident that a bit of persevering and experimentation will allow you to get a really full flavoured restrictive lung vape.
Additional Airflow Pins
These don’t drastically change anything, but they do allow you a little more control to really fine tune your vape.
Find the 0.8mm too tight, but the 1.2mm too loose? Get the airflow pins and try the 0.9mm, 1.0mm or 1.1mm.
Update – Any other issues?
As one of our commenters noted, it can sometimes feel a little challenging to screw the top section with the chamber, onto the bottom section with the deck.
In my testing I definitely experienced this, but I feel it’s more down to how you expect it to work vs the way it is actually designed.
When you go to screw the two sections together, your top section with the transparent tank piece, has to push onto the o-ring at the base by a decent amount. This isn’t the sort of design where the motion of screwing it down pulls it over the o-ring.
So firmly push it onto the o-ring, then give it a half turn in the wrong direction to make sure the threads will catch cleanly, and screw it down after that. It can feel a little weird to begin with, but it soon becomes easier.
As always, a big thank you to anyone that leaves comments on reviews, our experiences may not always be the same, but it’s always good to get different opinions!
Pros
- Lots of options
- Well machined
- Great flavour
Cons
- Threaded plastic tanks require careful handling
- Lots of leaking until you get the wicking right
- Airflow ring is a bit superfluous
- Changing airflow pins can be challenging
Final Review Verdict
It took me a little longer than normal to review this one, because there are so many different variables you can change!
For this reason I wouldn’t really recommend this to someone new to rebuildables, or someone that wants to just vape-and-go.
This tank can be really rewarding, but you have to put some effort in to learn it and tailor it to your preferences.
It’s capable of really impressive flavour, easily up there with some of the best MTL tanks of this year.
However you won’t get the most out of it until you have experimented with a few different builds, wicking, and airflow combinations.
You could say that all rebuildables require a little bit of experimentation and effort to get the most out of. Whilst this is true, the BP Mods Pioneer RTA requires a fair bit more in my experience.
The different coloured tanks and drip tips you get are a really nice bonus, and normally the sort of thing you would expect to be offered as a post purchase option. So having those options from the start is great.
That’s not to say there aren’t additional options you can get . I’ve already mentioned the DL conversion kit and the Airflow Pins that you can buy separately.
But there are also differently designed top caps, and engraved airflow rings to really personalize the look of your tank.
This is an impressive little tank, and whilst I’m not actually a massive fan of how you change the airflow/510 pins, once you have found what you like you can more or less forget about it and just enjoy it.
Is this an RTA you’re interested in or are using?
Let me know your thoughts or ask any questions in the comments below…


Nice, honest review. I started received this tank, 2 days ago. I did a build yesterday and completely agree with all your comments. However, 2 things I have noticed is that the deck gets easily flooded on a refill. I have started to fill the tank from the bottom, however this isn’t ideal, but certainly solves the problem.
I have also found it quite difficult to thread the atomiser to the chamber. I was surprised this wasn’t mentioned in your review.
Thanks for that, anyhow.
Cheers.
Hi thanks for reading the review!
You make two very fair points about this RTA.
In regards the flooding of the deck, I found that this was down to the wicking. I did mention in my review that I had a lot of e-liquid coming out of the airflow when I filled up. A bit of perseverance and I managed to minimise this such that it wasn’t an issue anymore. But it definitely irritated me to begin with!
As for screwing on the chamber, I think the issue here is that the clear section has to seat down quite a long way onto the o-ring before the threads engage on the chamber/deck. It feels like it should start screwing in straight away, whereas you actually need to push it a fair way onto the o-ring before the threads catch.
You’re right to highlight this as something I could have mentioned though, as I can see it being a little weird until you get the knack of it.
Thanks for the feedback, and glad you appreciated the review!
Will