The Eleaf iStick Pico X is ANOTHER update to the old classic the Eleaf Pico.
 Most of us at some point in our vaping lives have used a Pico kit! There are that many versions of them that becoming a collector could involve getting a second mortgage to fund them all!
The iStick Pico X comes as a kit or you can buy the tank or mod on its own too.
The mod is not too far removed from the original Pico mods – a maximum output of 75W and uses a single 18650 battery.
What is a big difference is the mod material and for some reason this seems a lot smaller than the original Pico. In fact I just checked on the Eleaf website to confirm this but madly the Pico X is actually bigger in all the dimensions specified!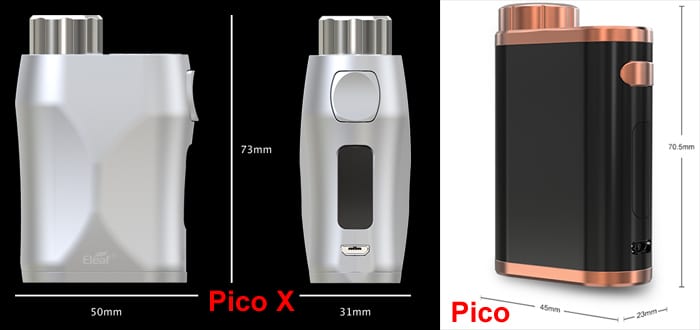
The outside of the mod has a rubberised type coating and bulgy type contours to make it feel much comfier in the hand.
Another new feature is the Atomiser recognition – basically if you have the mod power set too high for a coil or tank you have just installed it will recommend a safe power level to start at to save damaging the coil.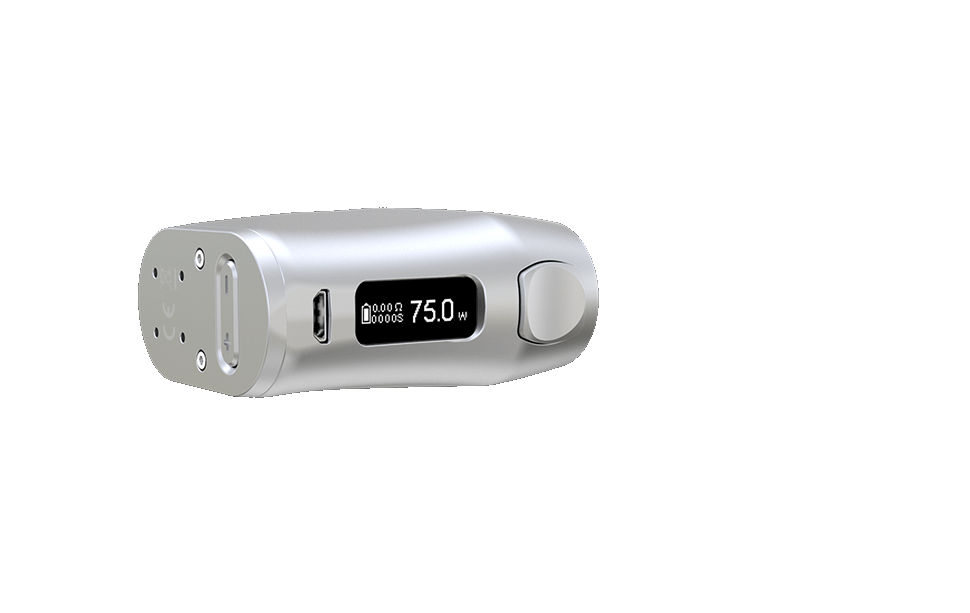
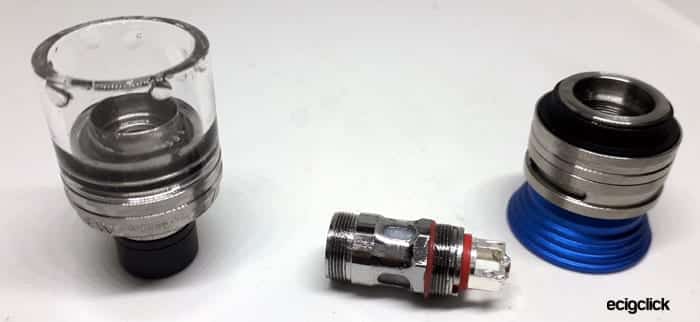
The tank is the Eleaf Melo 4 tank which I have reviewed before in the Eleaf iStick Melo kit. I loved this tank – but this time there are some lovely new mesh coils included too!
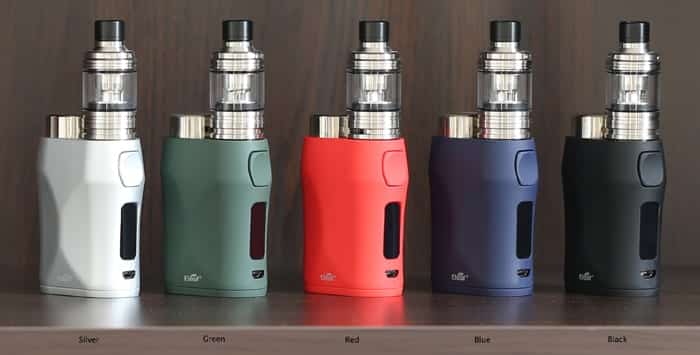
There are 5 colours to choose from – Silver, Green, Red, Blue and Black.
Who Is This Kit Aimed At?
For me this isn’t quite a “Starter Kit” as the tank includes the 0.15ohm mesh coil. This is a Sub Ohm tank for DTL (Direct to lung) vapers and not really for those who want an experience like smoking a cigarette.
Also you will only be able to use a maximum of 6mg nicotine strength e-liquid which might not be strong enough for new vapers quitting the ciggies and a MTL (Mouth to lung) style kit would be more appropriate. We have some guides to help you choose:
- Direct to Lung (DTL) and Mouth to Lung (MTL) vaping styles.
- Sub Ohm vaping guide for beginners.
- Beginners guide to E-liquid.
- Guide to Variable Wattage / Voltage E-Cig devices.
This kit was sent to us for the purposes of review and as always I will report back honestly on my findings with the device in my possession.
Common Fault!
So before I get too stuck into the review for this kit – I will talk about the Common fault which is appearing on the iStick Pico X Mod.
I was asked about whether mine had the fault by others on some forums and I checked and yes there it was…
Basically when you use this mod you become sadly too familiar with the screen shown below:
Yep every time you put the mod down – even for a few seconds – when you pick it up it asks if you have installed a new coil.
Not the end of the world but gets quite annoying and was enough to put some people off buying this kit too.
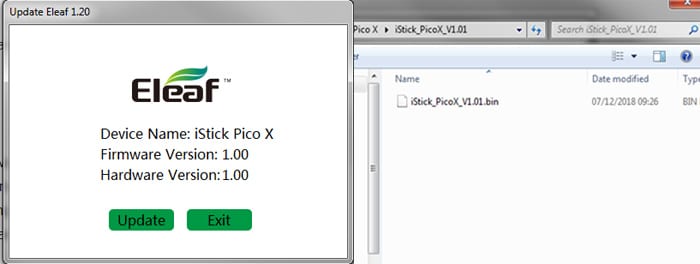
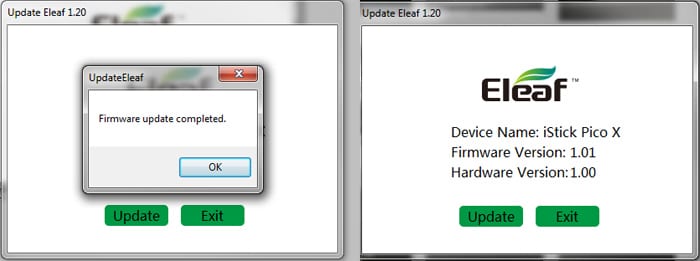
A quick message to Eleaf via Facebook explaining the situation resulted in Eleaf suggesting a Firmware Upgrade – the download page is https://www.eleafworld.com/istick-pico-x-with-melo-4 . Scroll to the bottom of the page and you will see the download buttons for either Windows or Mac devices.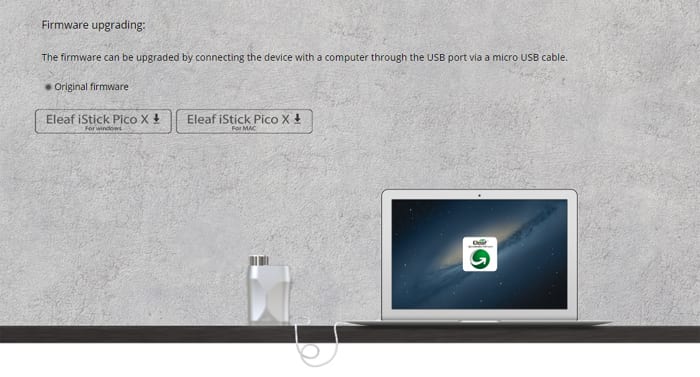 So I will now upgrade the firmware and the rest of the review will be on the upgraded firmware.
I will also add that “so far” this seems to have cured the fault – woohoo!
Bear in mind if you have the version V1.00 software you will probably have to do this upgrade very early on.
To check the version of firmware you have installed – go to the Menu as described in the “Set Up Guide” part of this review.
Performing Upgrade
- Download the applicable software and “unzip”.
- Open the “Update Eleaf” program.
- Connect the Pico X to the computer via the USB cable. There may be a delay whilst the correct software drivers are found.
- Click the “Update” button and find the “bin” file which was downloaded from the Eleaf website.

- Click on the “bin” file and then “OPEN” and wait for the confirmation that the firmware has been updated.

- The main page of the update software should show the Firmware version as V1.01 now.
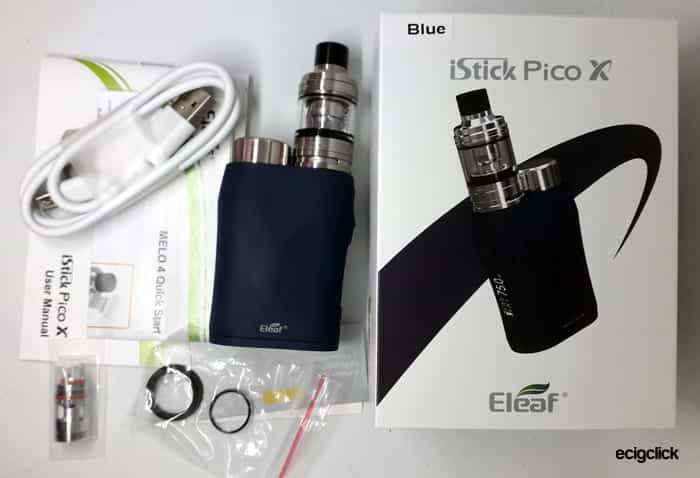
What’s In The Box
- Eleaf iStick Pico X Mod
- Eleaf Melo 4 tank (22mm)
- 2x EC-M 0.15ohm mesh coils (1 already installed in the tank)
- QC USB Cable
- User manual
- Spare parts
Features
Eleaf iStick Pico X Kit Specs
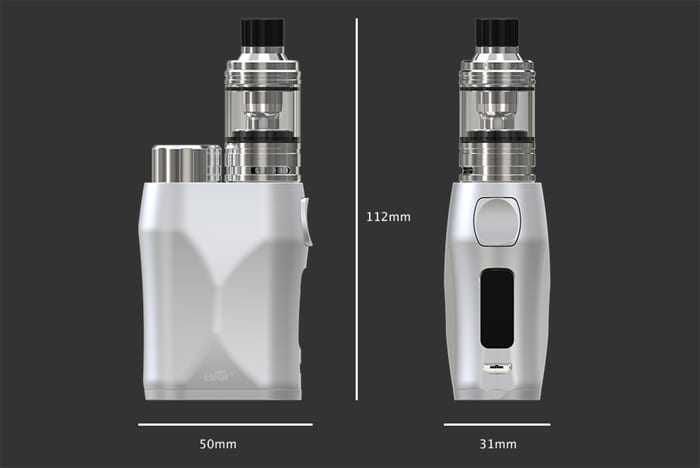
- Size: 50x31x112mm (including tank)
- Battery: 1×18650 (not included)
- Output: 75W max
- Resistance range: 0.1-3ohm (VW/Bypass) / 0.05-1ohm (TC)
- E-liquid capacity: 2ml
- Display: 0.69in
- Mod compatible with tanks of 22mm and below
- User modes: VW, TC, Bypass, M1/2/3
- Intelligent wattage recommendation system
- Coil: EC range – EC-M (mesh) coil included
- Slide top fill tank (locking top cap optional)
- Bottom adjustable airflow
- Firmware upgradeable
Build Quality & Design
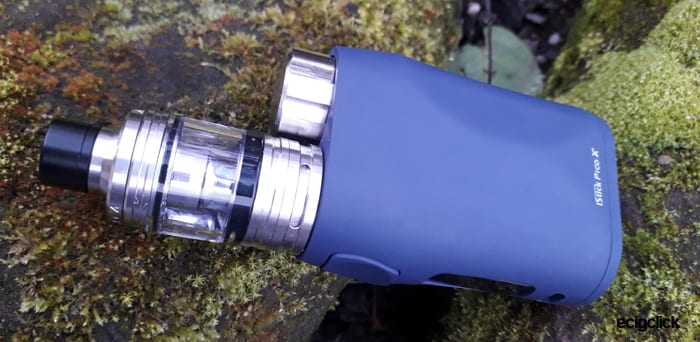
I received the Pico X kit in the Blue colour.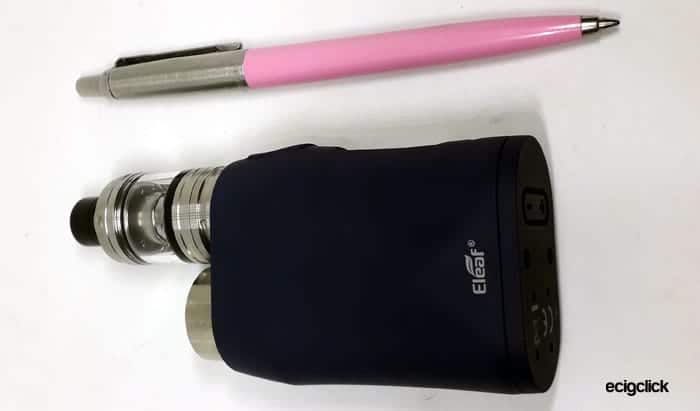
This is such a small kit almost like a miniature with the little tank and tiny mod!
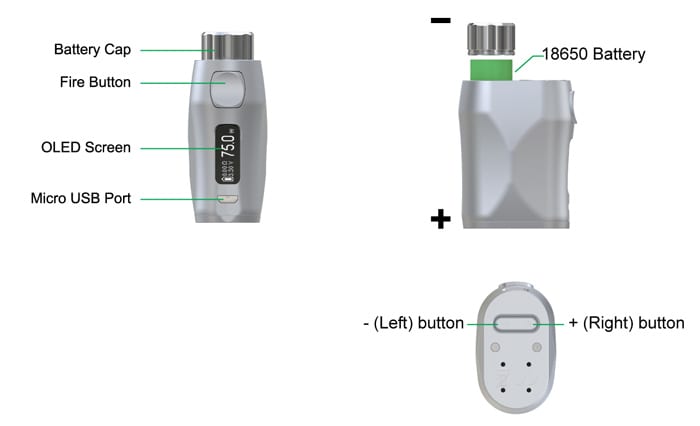
Eleaf iStick Pico X Mod
The coating of the mod is a kind of rubber which covers all of the mod but does look weird around where the battery cap screws in.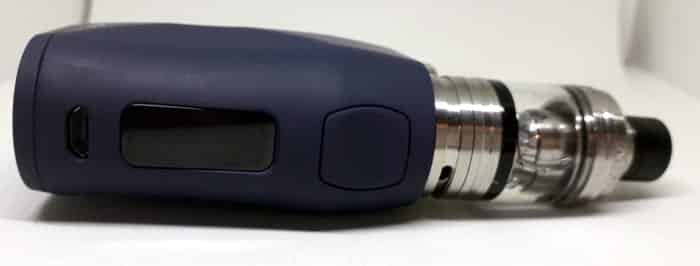
The battery cap again sadly does limit the maximum tank diameter you can use on here to 22mm. Not a problem with the kit tank but anything bigger and you will need a new mod.
It is not a case of simple “overhang” but the battery cap actually is in the way. You may be able to buy some kind of heat sink to raise the tank base above the battery cap but the cap is 1cm taller than the top of the mod.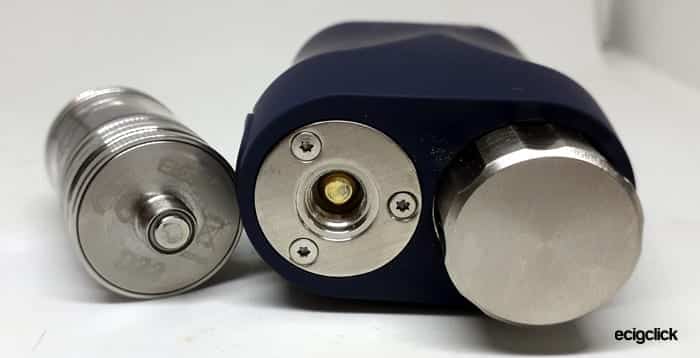
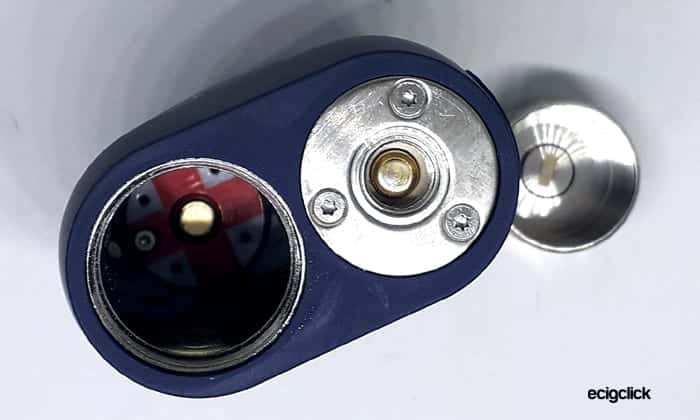
The 510 connector is spring loaded and held in place with 3 screws – you can only see the screw heads with the tank removed.
The threads of the battery cap are a bit creaky – they squeak and vibrate and almost made me heave. If you are sensitive to metal scraping noises this could make your teeth itch a bit!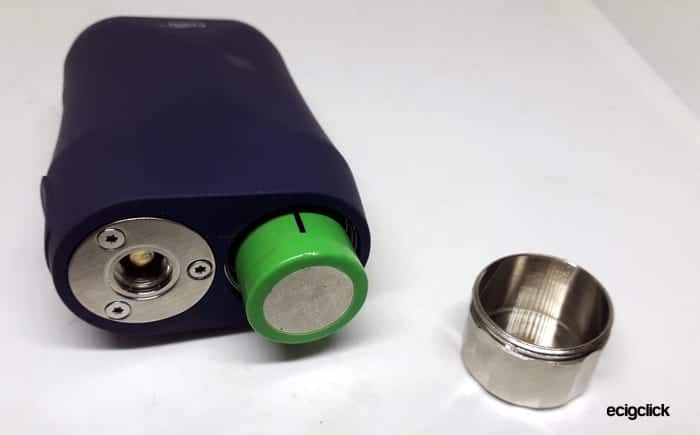
The fire button has a lovely shape to it and is perfectly responsive and in an intuitive position – you don’t seem to miss pressing it if that makes sense.
Although small (0.69in) the screen is clear and bright the only issue is the icons for the menu which are teeny weeny.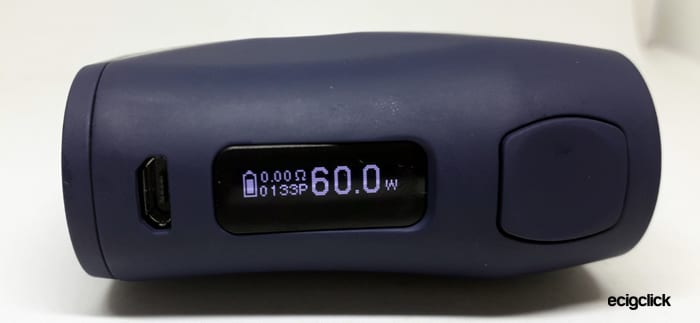
Below the screen is the USB port which I used for upgrading and that worked perfectly.
On the base of the mod are the “+” and “-” adjustment buttons. Although they don’t appear to be recessed like in other Pico mods I have had no issues with the mod adjusting itself when being placed on a desk.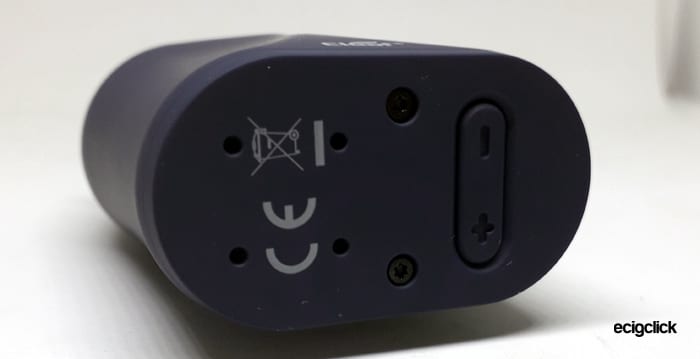
The base also has the required legal logos, 2 exposed screw heads and some battery vent holes.
Eleaf Melo 4 Tank
I have reviewed this tank before and it is pretty much the same apart from a different coil.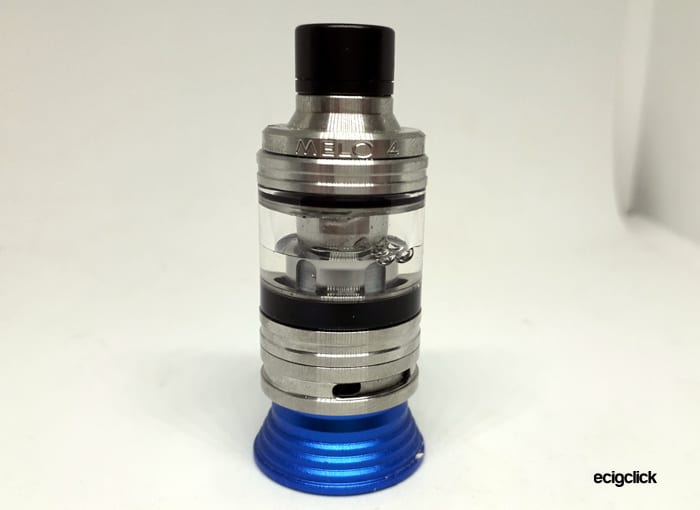
I did get a leak initially and dismantling the tank to investigate I found the pre-installed coil was loose – so might be worth you checking that before filling up.
This is a tiny little 22mm diameter tank with a really cute small drip tip. The drip tip is a 510 connection with O-rings. There is a slight raised platform where the drip tip sits but it doesn’t look too horrendous with a different tip installed.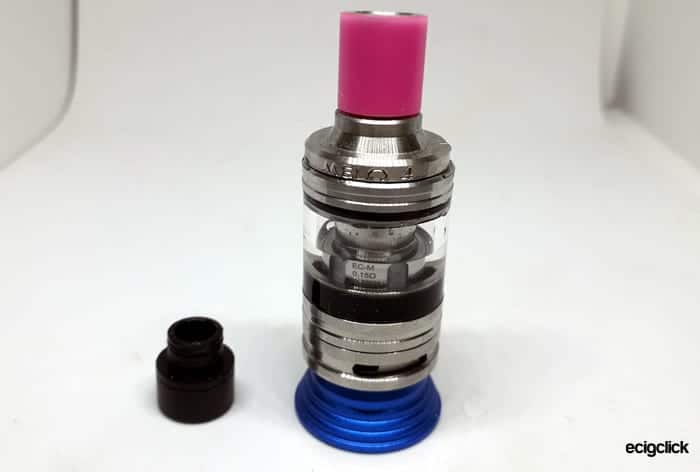
On the base of the tank is the airflow control ring and this moves smoothly without being stupidly loose.
Top Cap
The top cap slides open for refilling but there is some resistance so hopefully this shouldn’t come open accidentally. There is a locking top cap version available.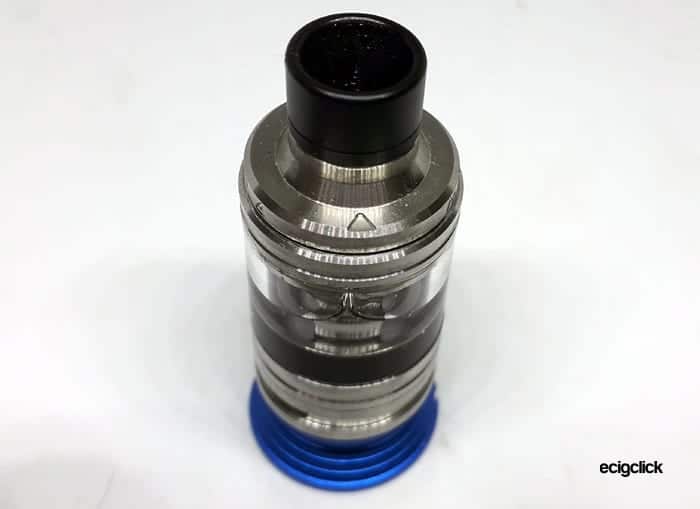
The fill port is a good size and I have topped up with 10ml and 80ml bottles. I found removing the drip tip made topping up easier especially with larger nozzle bottles.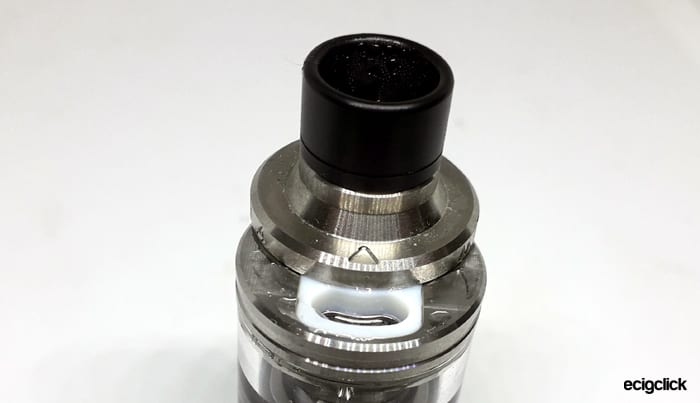
Set-up Guide
The mod and tank arrive in the box not connected so to get started you will need to install a battery, fill up the tank and screw the tank onto the mod!
Mod Basic operation
- To vape = Hold down the fire button.
- Turn mod on or off = 5 clicks of the fire button
- To lock/unlock mod = hold down “+” and “-” adjustment buttons at the same time to lock or unlock. This only locks the adjustment buttons – the fire button can still be used.
- Select power mode = 3 clicks of the fire button – select from Wattage (Variable Wattage), Bypass, TC-Ni / TC-Ti / TC SS316 (Temperature control modes) or TCR-M1 / TCR-M2 / TCR-M3 (Custom Curve memory storage slots).
- To enter the Menu = Press Fire Button and the “+” adjustment button at the same time.
- To exit the Menu = Using the adjustment buttons scroll through the menu icons until you see the “Exit” icon and press Fire button to confirm.
- Adjust power / temperature = use the up and down adjustment buttons located on the bottom of the mod.
Menu
As with a lot of the newer Pico devices the menu consists of a bundle of tiny “icons” – which are not the easiest to understand. Anyway here they are below and you use the adjustment buttons to move around the icons and when the one you require is highlighted press fire to enter that sub-menu.![]()
- Exit = to exit the menu mode highlight this icon and press the fire button.
- Sub-parameters = enter this sub menu to select which sub parameter to display on the main screen when vaping. Choose from the Puff Counter, Puff Time or Voltage.
- Stealth = this turns the screen off when vaping. Ideal for a sneaky vape somewhere dark where you don’t want the screen light showing the world you are vaping!
- Timeout Duration = this is how long the screen stays lit after vaping – you can choose how many seconds before it goes off.
- Version = this displays the hardware (HW) and firmware (FW) versions currently installed.
- Battery = this displays the voltage of the battery.
- Coil = this is used to lock the coil resistance when the coil is cold during use in Temperature Control mode.
- TCR = this is for setting custom curves and storing them to the memory slots.
Safety Features
The mod also has the following safety protections:
- Coil protection – the mod will adjust the power to make sure when you install a different resistance tank / coil it will not burn out.
- Over charge protection.
- Over discharge protection.
- Reverse polarity protection.
- Over 10 second fire button press cut out.
- Short circuit protection.
- Over current protection.
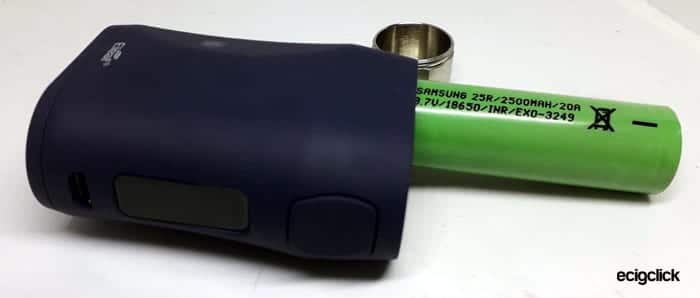
How To Install The Battery
This mod uses removable batteries.
Make sure you use a good quality 18650 battery, check for any damage or dents. If the battery wrap is damaged replace.
It is recommended to remove the battery from the mod for recharging and use a good quality external charger.
For more details read our Guide to Battery Safety.
- Unscrew the battery cap on the top of the mod.

- If installed remove the battery.
- Install the new battery observing the polarity markings – + is inside the mod and the – is on the underside of the battery cap.

- Replace the battery cap.
How To Fill The Tank
This tank does seem to get through e-liquid quite rapidly – understandable as it is only 2ml with a 0.15ohm mesh coil. Please keep a good eye on the liquid level as a dry hit from a mesh coil is revolting and it will knacker up the coil too.
- The tank has a little arrow on the top – find the arrow.
- Push the top cap in the direction of the arrow to expose the fill port.

- Add e-liquid to the fill port and observe the level in the glass.
- Push the top cap closed.
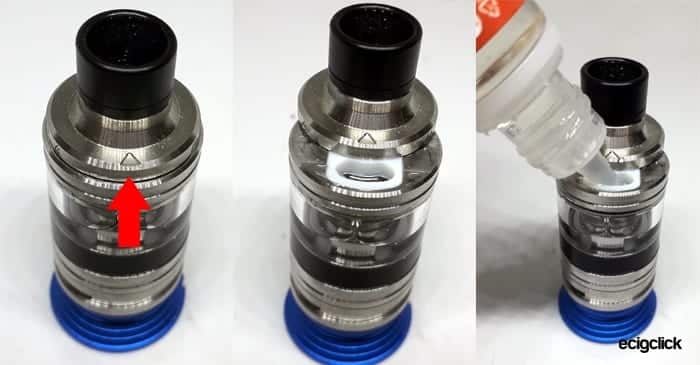
If it is difficult to reach the fill port with larger bottles remove the drip tip to aid access.
How To Change The Coil Head
- Remove the tank from the mod.
- Tip the tank upside down – it is best to pretty much have an empty tank for this. If the tank has some e-liquid in make sure to have plenty of tissue around.
- Unscrew the base of the tank.

- If a coil is installed remove this from the tank base by unscrewing.
- Screw a new coil onto the tank base.

- Replace the tank base onto the rest of the tank.
- Fill with e-liquid and leave to stand for at least 10-15 minutes to make sure the cotton in the coil has fully saturated with e-liquid.
How Does the Eleaf iStick Pico X Kit Perform?
Flavour & Cloud Production
This is a sub ohm tank so it is best to use with a higher proportion VG e-liquid and a lower strength nicotine level.
We tell you all about E-liquid mixtures in our Guide to VG and PG in E-liquid.
I am using my usual Stika Bombz Fruit Salad which is 80%VG and 6mg Nicotine.
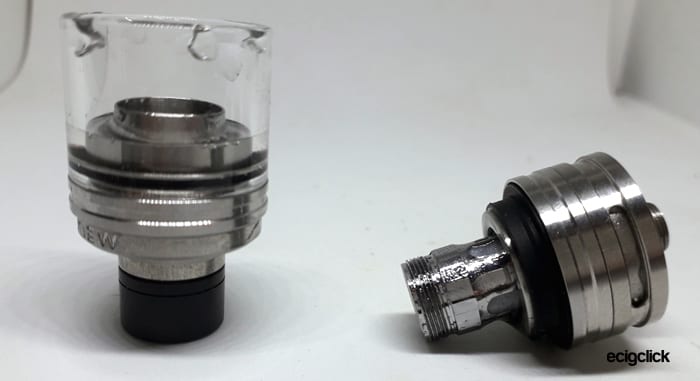
Eleaf EC-M Mesh Coil
The coil is rated to perform at 30-75W and is a 0.15ohm Kanthal Mesh.
I started out at 40W at there was a decent amount of vapour but not much flavour yet.
Moving up to 50W and this has improved a lot already.
At 60W this is more like the performance I was expecting – the vape is warm and not a dry vape and the flavour is really starting to sing out.
Cranking it up to 65W and it is even better – I really love this tank anyway and these mesh coil heads are beautiful!
I found at 70W this was still performing well – no burning taste or dry hits but was a little hot for me as the little drip tip does condense all the vapour into a small area!
60-65W is where this seems to run the best for me.
Airflow wise – fully closed is like it says on the tin – fully closed – no airflow. Fully open is still quite restricted – nothing like fully open on something like the Smok TFV12 Prince tanks which are like sucking a drainpipe when fully open.
I usually love a restricted DTL vape and I found I was using this tank with the airflow about a third closed and two thirds open.
Eleaf iStick Pico X Mod Performance
Apart from the initial fault the only other gripe I have is the “Coil Protection” function. I removed the Melo 4 tank a few times for photographs and to look round the mod etc. and every time I replaced it the mod went straight back to 30W.
However, although I moan it could be a god send if you were for instance using a very low power tank such as the Ehpro True MTL RTA – which only needs less than 20W.
If the mod was on 75W and you added that tank the mod will reduce the power level to 10W to make sure you don’t accidentally fire the tank at 75W. It does also adjust on the very conservative side. Way lower than the coil is rated for but that is better than burning out a coil accidentally.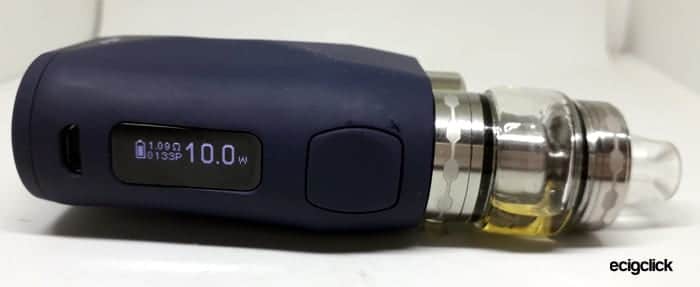
Scrolling through the power levels is quite annoying. A single press of the adjustment buttons thankfully adjusts in 1.0 watt increments. But if you hold the buttons down you will find yourself at either end of the power scale within a nanosecond. So you will generally find yourself doing the single button presses.
As mentioned several times the menu icons are awful – you struggle to even see what they are let alone instinctively select the correct one. You will get used to it but someone who wants a super easy device will struggle to start with.![]()
I tried the Melo 4 tank on my Voopoo Alpha One mod and at 60W on there the performance seems to be the same as it was on the Pico X mod. In the absence of any fancy gear to test the mod output this test to me showed the performance to be pretty much the same.
UPDATED – 03-04-19
I gave the Pico X mod to my friend – she started to use it yesterday and really loved it.
However today it has died…
She said all day it has been turning itself off and now it wont turn on at all even with different batteries.
So the streak of my Eleaf bad luck seems to continue.
Battery Life
The battery life will vary depending on your settings and use of the mod.
But to give you a rough idea vaping at 60W with the Melo 4 Tank I got 5 hours and 326 puffs. This was using a Samsung 25R battery (2500mAh).
Even when the “Weak battery” warning was displayed the output was not affected.
Pros
- Lovely compact little mod
- Feels great in the hand
- Beautiful flavour and vapour from the EC-M mesh coil
- Easy to fill
- Reasonably easy to use
- Once initial leak was fixed (loose coil from factory) no leaks, gurgles or dry hits
Cons
- Faulty to start with – needed a firmware upgrade to fix.
- Died within less than a month of use.
- Hard to interpret menu icons – you need to keep referring to the manual to find out what each one means.
- Leak from tank when first filled – the installed coil was loose -so make sure to check this before filling.
- Squeaky battery cap threads – shudder – the noise and vibration went through me!
- 2ml tank requires topping up frequently – a bubble glass would be nice!
- Adjustment buttons on the base of the mod are tiny and you need a fingernail to press them accurately. Not for those with sausage fingers!
- Maximum tank diameter you can use is 22mm.
Final Review Verdict – Updated…
All the text below was written when I first reviewed the kit and loved it.
As you can see above this mod has now died. This is not really acceptable from a large brand such as Eleaf. Several of their devices have been failing for me lately.
What a lovely little set up this is! Despite the poor first impressions of the Eleaf iStick Pico X kit it has found its way into my heart.
The tank is a little beauty and I genuinely think Eleaf should put the Melo 4 tank in most of its kits rather than the god awful Ello range.
One downside with the tank is the 2ml glass – obviously due to the TPD regulations this kit has to be sold with the 2ml. But a nice bubble glass could make this tank more user friendly. When you have low resistance mesh coils you are topping this up a lot.
I have asked Eleaf if newer models will have the Firmware update to prevent the “New Coil” fault. I have been told there are plans to ship new models with the updated firmware but there is not a solid date when this will kick in. Therefore as it stands now – you are likely to have to update the Firmware to use this.
I will be passing the Mod onto my friend who loves her Pico’s but she is a MTL vaper so I will keep the lovely tank for myself.


