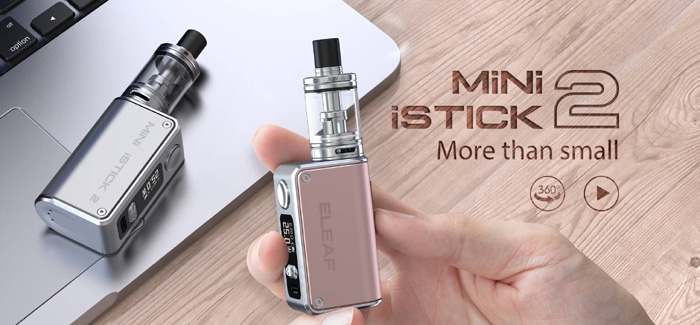
The Eleaf Mini iStick 2 Kit is an update to the original Mini iStick from 2015.
Eleaf has been around for an age and have produced some classic vape gear including the legendary Pico series, the iJust 21700, the powerful Invoke and of course the iCare range of pod kits.
What Can We Expect From The Eleaf Mini iStick 2 Kit?
So has the Eleaf Mini iStick 2 benefited from some major updates or is it just a bit of a facelift?
Firstly – the battery capacity is the same as the original but the output has increased.
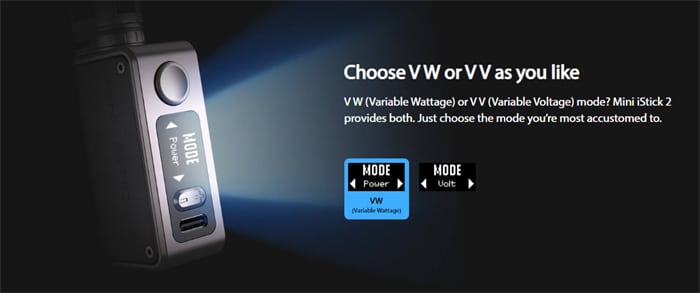
The original had a Variable Voltage output and the max wattage was 10W. However the new version has Variable Wattage and Variable Voltage adjustment from 1-25W / 1-5V.
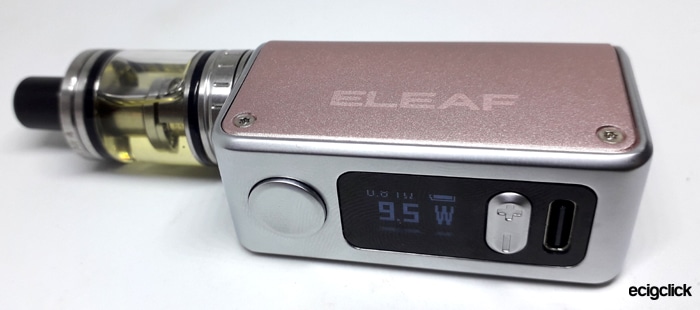
Plus there is now a USB Type C port which will recharge the 1050mAh battery in around 30 minutes at a fast 2A charge rate.
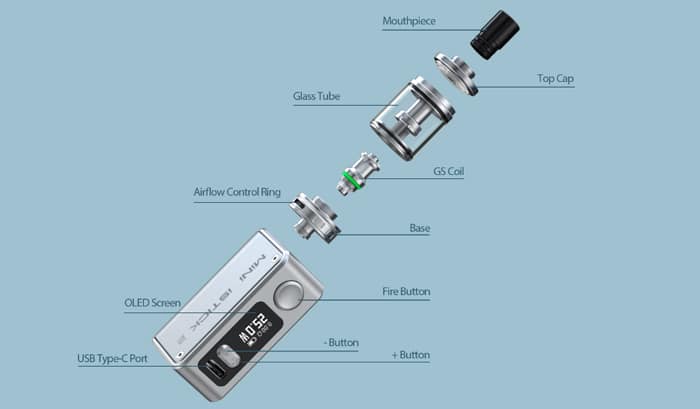
Also the screen has changed location – on the original it was located on the top of the mod – but for this version it is now mounted on the side of the mod below the fire button.
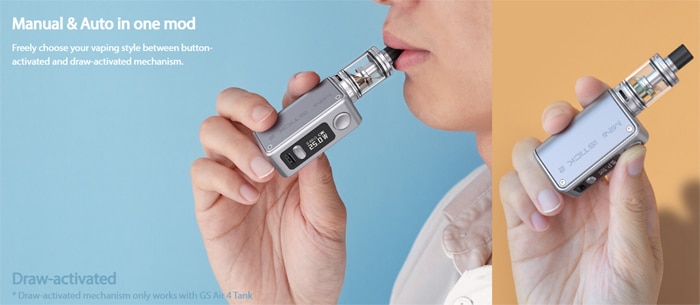
Activation is either by pressing the fire button or you can use the auto draw feature which senses the vacuum as you inhale and switches on the fire operation automatically.
The mod and tank both have a standard 510 connection so you can use both of these with other 510 compatible devices.
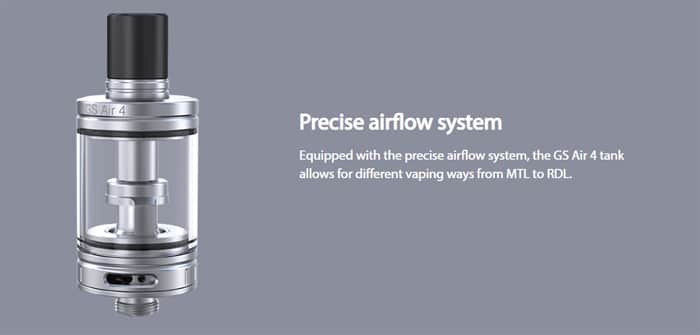
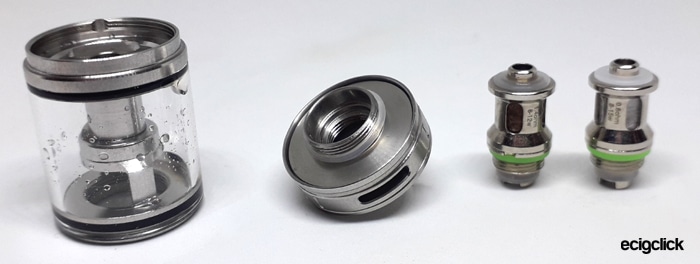
Included in the kit is the GS Air 4 tank which is the third update to previous GS Air tanks.
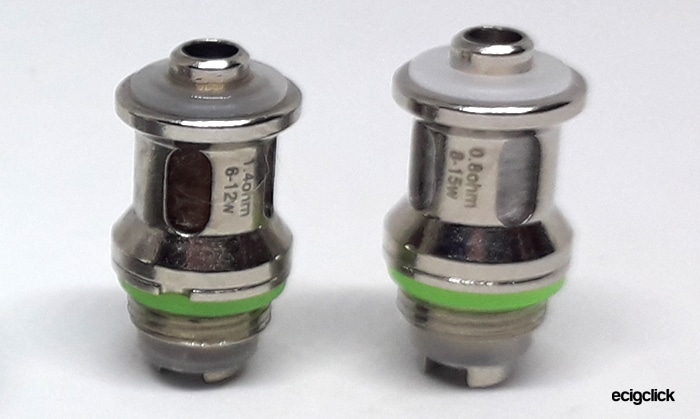
All of the existing GS Air coils are compatible but the kit includes the GS-A 0.8ohm (AST) coil and the GS Air 1.4ohm Kanthal coil.
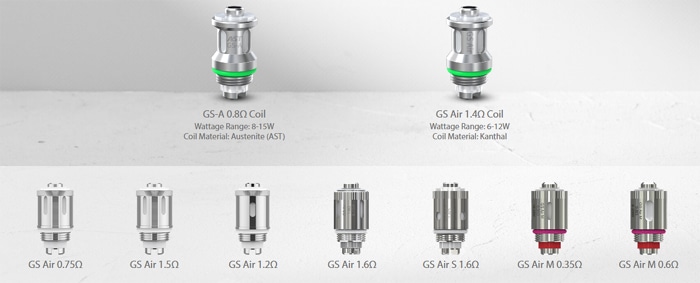
AST is an “Austenitic Stainless Steel” material which apparently has a longer coil life – found on a lot of Joyetech devices at the moment too.
When the mod is paired with the AST coil it has a temperature detection which will shut off the output if the coil overheats – this is usually due to low e-liquid level – and this should protect the coil from burning out prematurely.

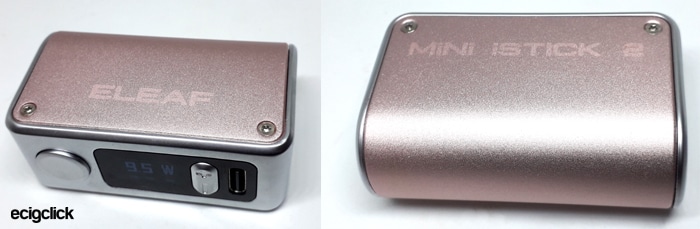
There are 4 colours to choose from: Grey, Green, Rose Gold and Black.
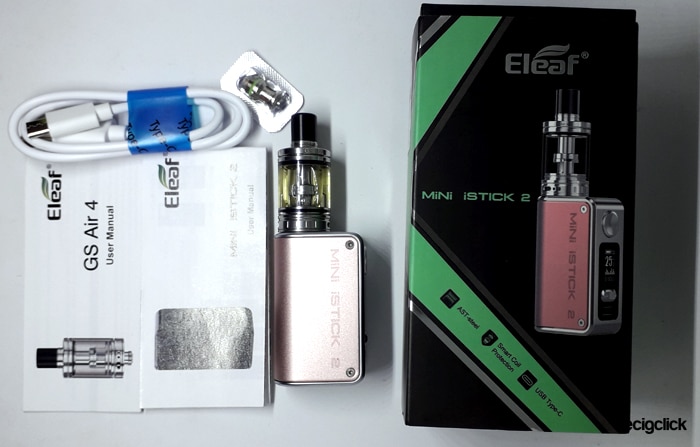
Inside the Box
- Eleaf Mini iStick 2 mod
- GS Air 4 tank
- GS-A 0.8ohm coil
- GS-A 1.4ohm coil
- USB Type C cable
- User manual
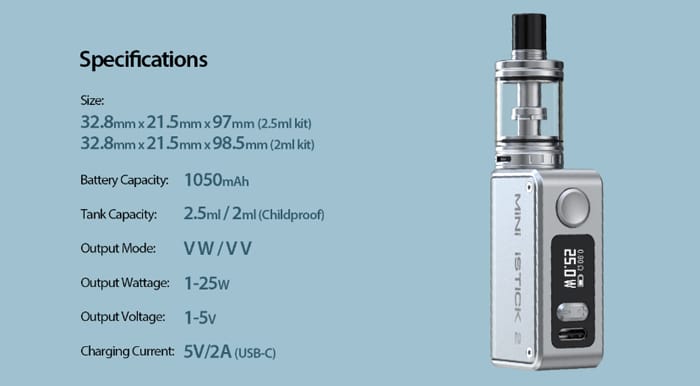
Eleaf Mini iStick 2 Kit Specs
- Size: 32.8×21.5x97mm (standard kit) / 32.8×21.5×98.5mm (2ml kit)
- Output: 1-25W (VW) / 1-5V (VV)
- Battery: 10500mAh (internal)
- Display: OLED screen – size not specified
- Resistance range: Not Specified
- E-liquid capacity: 2.5ml (standard) / 2ml (TPD / Childproof)
- Type C USB – 2A charge rate – 30mins approx charge time
- GS Air 4 Tank: Refillable, replaceable coils
- Coils: GS Air coil range
- Button or auto draw fire
- Smart coil protection – detects when coil overheats due to low e-liquid level and cuts out the fire operation (0.8ohm GS-A Coil only)
- AST coils available for longer coil life
- Top fill cap – childproof version available
- Bottom adjustable airflow
Eleaf Mini iStick 2 Kit Design and Build Quality
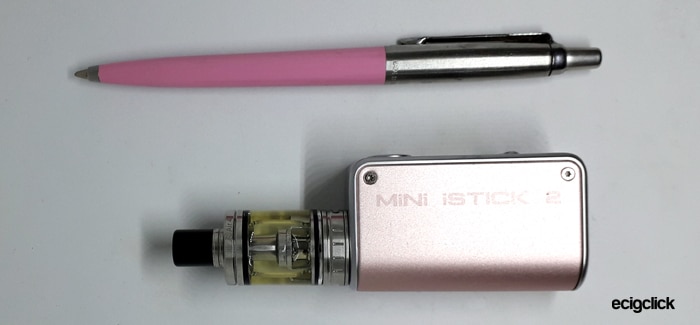
I received this in the beautiful Rose Gold colour – exactly the model I would have chosen myself!
Also worth noting as this is a review sample I was sent the 2.5ml non childproof version.
In TPD regulated areas a 2ml Childproof tank is supplied in the kit.
The packaging is pretty classy as usual with Eleaf and no damage to any of the contents either. To prevent any electrical issues the tank and mod are packaged separately.
Also worth noting no coils are installed so you will have to take a look at the Quick Start Guide below.
Eleaf Mini iStick 2 Mod
The first thing that strikes me is how similar the kit is to the Vapefly Galaxies 30W kit.
The Eleaf kit however does look classier and is slightly smaller.
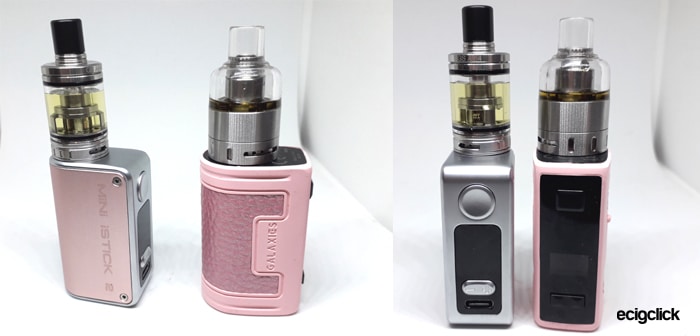
This mod consists of the metallic coloured C shaped side panels and then a frame from the top to the bottom in a brushed silver finish.
Each side of the coloured panel has logos – these are etched in very faintly – so they are not brash and in your face. One side says “Mini iStick 2” and the other simply “Eleaf”.
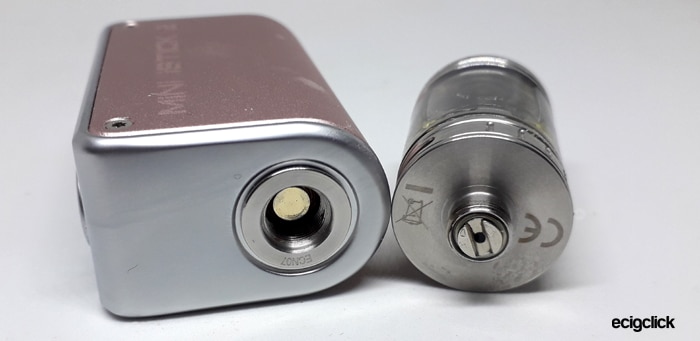
The base of the mod has 3 venting holes and the required legal logos.
Eleaf Mini iStick 2 510 Connection
Working down from the top – the top of the mod has the 510 connection which appears to be a screw in collar.
The internal pin is spring loaded, and is very tight, screwing the included tank into this is quite squeaky and yukky.
I even tried the pod from the Vapefly Galaxies 30W kit and the same occurs, the tank threads are squeaky and the last turn is extremely tight – moving against the spring pressure.
This tightness also means you end up accidentally over tightening the top cap or bottom cap of the tank – wherever you grip it.
The Vapefly pod is 22mm in diameter and this significantly overhangs on the Eleaf mod. The included tank is approx 18mm diameter – I would say you could possibly get away with 20mm maximum tank diameter on here.
Removing the GS Air tank can often result in the bottom cap unscrewing from the rest of the tank as the mod threads are so tight – so watch out!
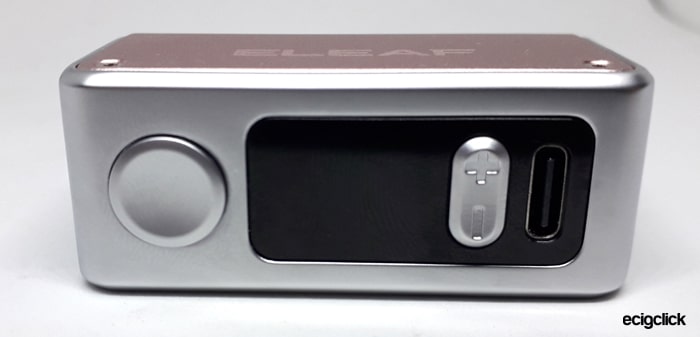
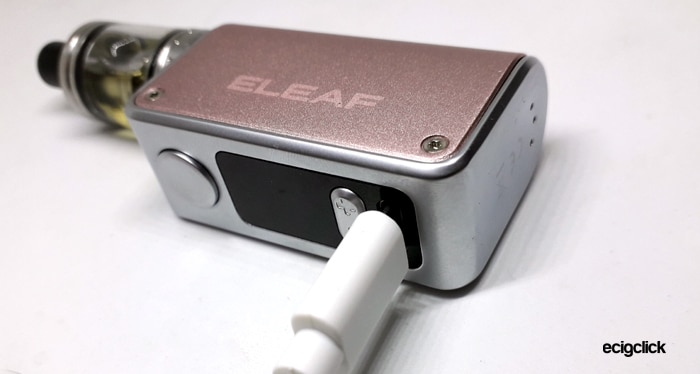
Eleaf Mini iStick 2 Display Panel
At the top of the panel is the fire button – and man does it rattle!
When I first removed the mod from the box it was rattling away and I genuinely thought something was loose on the mod, upon checking it over I located the loose thingy and it was the fire button – oops not a great start.
Although it rattles like a keyring, the fire button is responsive and quick to activate so it does not affect the performance.
Below the fire button is the screen – this is an OLED screen but the size is not specified. It is only a black screen with white text but it is pretty clear to read with the resistance reading on the top, the power level in large text below and a battery capacity indicator icon to the right side.
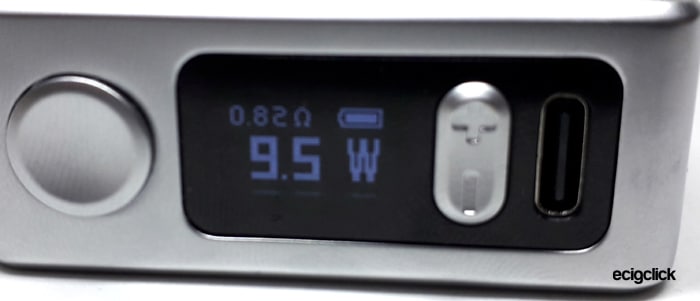
Next are the adjustment buttons a simple “-” and “+” jobby, these feel more solid and respond quickly with a nice click.
At the base of the display panel is the USB Type C port and I have had no issues with poor connection.
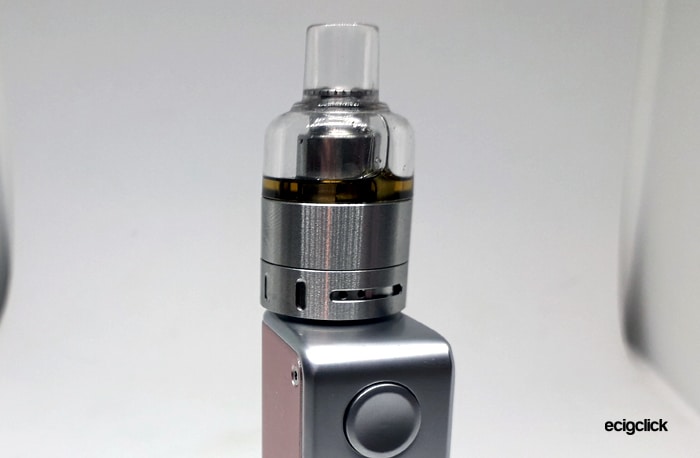
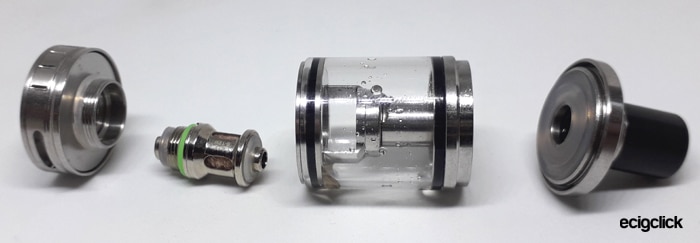
Eleaf GS Air 4 Tank
I have used one of the GS Air tanks in the past – the GS Baby tank found in the Pico Baby Kit and was impressed with the GS Air 0.75ohm coils.
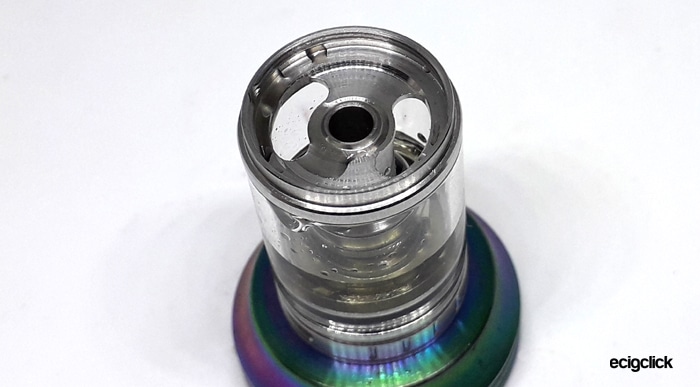
On the top of the tank is the removable drip tip which sits in a raised flange (haven’t used that word since school and it had quite a different meaning then… 🙂
The drip tip is a standard 510 fitment and I found other tips fitted in here fine.
Filling is taken care of by removing the screw top cap – this can be quite hard to unscrew as the gasket on the underside of the cap really seems to squash and grip well.
With the top cap removed there are 2 large kidney shaped fill ports which suited my 10ml bottles fine and there was no issue whatsoever with airlocks.
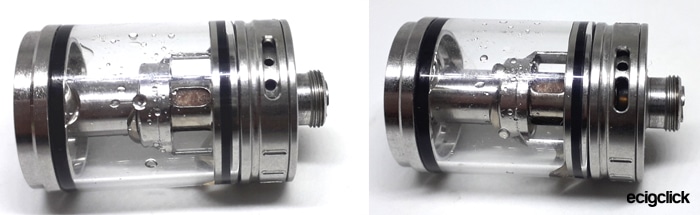
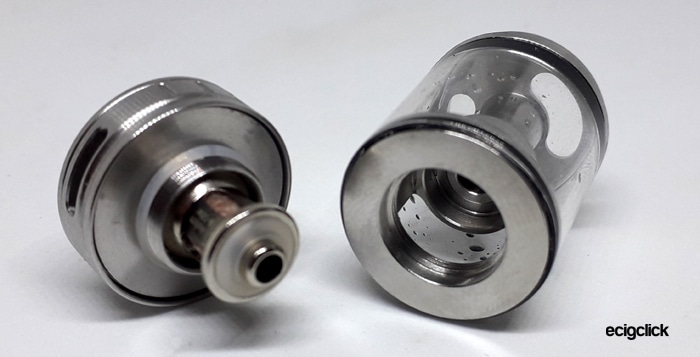
The tank base unscrews to give access to the coil and the coil screws into this base. The coil then locates against the chimney section inside the tank.
A nice touch is the airflow adjustment on the base of the tank – this has holes and a large slot to really give a wide range of adjustment.
Even better each of the holes is a different size which again gives you more control of the incoming air.
The bottom of the tank base has a 510 connection and the required legal logos.
Eleaf Mini iStick 2 Kit Quick Start Guide
The kit arrives without any coils installed – so you will need to install a coil, fill and charge to get up and running.
Panic not – I will go through this step by step with you below!
Eleaf Mini iStick 2 Basic Operation
- Turn On / Off = press the fire button 5 times quickly
- Vaping = hold down the fire button when inhaling or inhale on the tank to trigger the auto fire system – this is not very reliable though.
- Airflow adjustment = rotate the airflow control ring on the base of the tank – there are holes for restricted airflow or a large slot for more airflow – simply turn the ring until the required airflow inlet is showing.

- Smart Coil = to activate the AST smart coil protection press the fire button and the + button at the same time to either activate “on” of turn off “off” the smart protection mode. When the AST coil (GS-A) coil is installed the fire activation will cut out if the device senses the tank is empty or coil is overheating to prevent coil damage.

- Entering the “Setup” menu – press the fire button 3 times, use the + and – buttons to navigate through the sub menus and press the fire button to enter each sub menu and also to confirm choices.

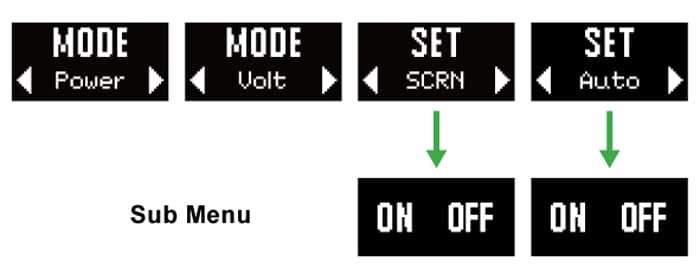
- Stealth mode = you can activate stealth mode (i.e. the screen does not light up when vaping – in order to not draw attention to your vaping in a dark area – for example the cinema when permitted). Enter the “Setup” menu, select the “Set” sub menu and scroll to the “SCRN” sub menu. Scroll through to select “ON” for screen on when vaping or “OFF” for the screen to stay unlit when vaping.
- Auto or Fire button activation = enter the “setup” menu and scroll through to the “Set” menu. In the “Set” menu scroll to “AUTO” and again select “on” for draw activation / button activation or “off” for fire button activation only. Auto fire only works when using the tank included in the kit.
- Switch between VW and VV = enter the “Setup” menu. Press the fire button to select the “Mode” sub menu, use the + and – buttons to cycle through the available modes and press the fire button to confirm the choice.

- Lock buttons = press and hold down the + and – button at the same time to either lock or unlock.
- Rotate screen = press the fire and – button at the same time to toggle between the display orientation.

Eleaf Mini iStick 2 Protections
 Low battery – if the battery charge is below 3.3V the screen will display “low volt” and the device will turn off until recharged. I saw this message and it worked – also subsequent fire button presses show the message “Lock”.
- Weak power – if the voltage drops below 2.9V the screen will display “weak power”.
- Short circuit / too low resistance – if the coil is below 0.1ohm resistance or a short circuit occurs the screen will display “short”. Replace the coil and check and clean all connections.
- No Atomiser – the screen will display “check coil” make sure tank and coil are correctly installed. With no tank installed this message appeared as expected.
- Over time – if the vaping time exceeds 10 seconds the fire operation will cut out to prevent overheating or damage. The screen will display “over 10s”. I have managed to get this protection to kick in and it worked correctly.
- Overheat – if an electrical fault occurs or the device overheats the screen will display “too hot”.
- AST Smart Coil protection – if using the GS-A coil and the AST protection mode is activated the display will show “Dry-proof” if the coil has become dry from low liquid level or overheating. The output will stop until the tank has been refilled and the coil has cooled. I tested this and report back further in the review.
 Low battery – if the battery charge is below 3.3V the screen will display “low volt” and the device will turn off until recharged. I saw this message and it worked – also subsequent fire button presses show the message “Lock”.
Eleaf Mini iStick 2 How To Charge The Battery
This kit uses a USB Type C charging port and can be charged at up to a 2A charge rate.
- Using the included USB C cable connect the small end into the USB port on the mod.

- Connect the large end of the cable into a suitable USB outlet.
- The charging progress will be displayed on the screen.
Using my USB port on my PC which I think is 0.5A – I forgot to keep checking if it had charged!
I did look after 45 mins and it was charged – so the 30 min charge time promised could be accurate!
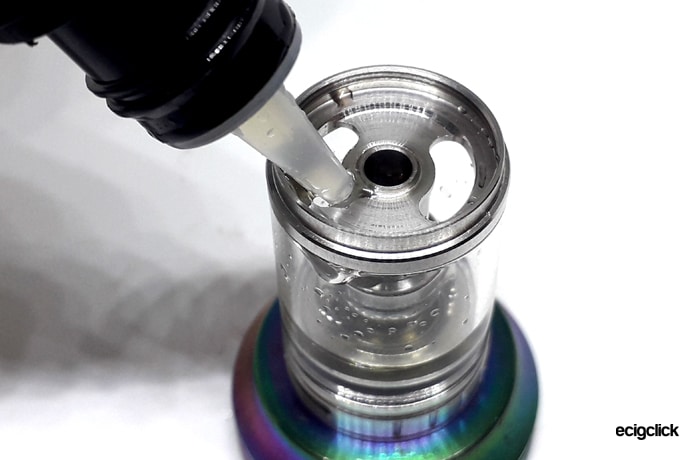
How To Fill the Eleaf Mini iStick 2
- Unscrew the tank top cap. (Childproof versions have a button to press and a slide top cap)
- Insert the e-liquid bottle nozzle into the fill port.

- Add e-liquid whilst watching the level through the clear section of the tank.
- Replace the tank top cap.
- If this is the first use or a new coil leave the device to stand for 10-15 minutes for the coil wicking to absorb the e-liquid. Also before pressing the fire button do a couple of inhales on the mouthpiece. This is called Priming and will help prevent coil damage.
How To Replace the Coil
- Remove the tank by unscrewing it from the mod.
- Turn the tank upside down and unscrew the tank base section.

- If a coil is already installed unscrew it from the tank base.
- Install a new coil and screw it into the base.
- Replace the base onto the tank.
- Fill the tank and leave to stand for 10-15 mins for the coil to fully absorb the e-liquid.
How Does the Eleaf Mini iStick 2 Kit Perform?
As this is mainly a MTL (Mouth To Lung) kit I will be using a 50/50 VG/PG e-liquid – Crazysaltzzz Bubblegum 11mg Nic salt strength.
- MTL V DTL – A Guide To Vape Styles
- VG and PG in E-liquid – all you need to know
- Beginners guide to E-liquid
I was going to attempt to try a thicker e-liquid with the 0.8ohm coil to see if it will cope – but sadly I did the AST Coil Protection test and buggered up the only 0.8ohm coil I had. Doh – muppet.
GS-A 0.8ohm Coil (8-15W Recommended)
50/50 PG/VG E-liquid
I started at 9.5W and already the taste is way better than I was expecting at the lower power range!
It is worth noting though this still is underpowered as there is a lot of gurgling indicating there is e-liquid not being vaporised.
At 15W the vapour is pretty hot so I found my sweet spot was around 13-13.5W.
The flavour is super impressive and there is warmth and a lovely throat hit.
This is the kind of MTL vape I absolutely love. It is very moreish!
GS Air 1.4ohm Coil (6-12W Recommended)
This was the first coil I tried and to be honest I was not impressed sadly.
The first tank full I used between 10-12W. All was great.
After the second tank full I was getting a burnt taste and dropped the output to 11W. This continued and I ended up dropping down to 10.5W. My e-liquid turned brown and I also had a big leak from the tank base sadly.
After that even at 10.5W the flavour was marred with a burnt tinge – which was pretty unpleasant.
The e-liquid I am using is the same one I have been using for over a year and I never have an issue with it gunking up coils in any of my pod kits and as it is 50/50 VG/PG it should be thin enough to wick properly.
There are large wicking ports on the coil so this shouldn’t be a wicking issue at all.
I can only assume I have a dodgy coil as I haven’t used it above the recommended wattage, it was left overnight for the coil to prime and the e-liquid is tried and tested as coil friendly.
Sorry Eleaf as there is only one of these coils I can only give this low marks.
Eleaf Mini iStick 2 Airflow
There are so many different airflow settings you can use – there is a slot for wide airflow and also different size hole inlets you can cover or uncover as you please.
It is worth noting the wider open the airflow is the less responsive the auto fire is.
You can close down the airflow to a tiny trickle – and work your way through to the slot airflow which is a restricted DTL setting.
Even on fully open this is pretty restrictive – so no wide open gusts of air here. However this is quite noisy and for such a small stealthy kit the fully open setting will alert those in your vicinity that either Darth Vader is approaching or that you are vaping.
I tended to stick to the smaller of the 2 airflow holes for both coils.
I would say this suits those who want a true tight MTL airflow up to a very loose MTL airflow.
Eleaf Mini iStick 2 Mod Performance
In the main the mod worked well, it recognised the GS Air coils pretty accurately and even picked up the Vapefly pod resistance correctly.
The auto draw activation is a bit hit and miss. I found it was pretty reliable on the 1.4ohm coil but with the 0.8ohm coil it was struggling.
Even with the 2 smallest airflow holes open there is still a slight inconsistency to the firing and you end up gasping for breath after a vape.
Otherwise no issues in performance and fire button activation is super quick.
AST Smart Coil Protection – 0.8ohm Coil Only…
I thought after doing the battery life timing I should give this a try to see if it does actually work.
This mode only works if you activate it – have a look at my Quick Start Guide above to tell you how to do this.
So I basically vaped the tank dry and kept firing to see if the protection would kick in before the coil was damaged. Sadly I do not have a spare coil if this one does get burnt out.
The tank had been totally dry for at least 10 vapes before I got the “Dry Proof” warning to kick in.
I allowed it to cool and added more e-liquid to see if the coil was knackered – I left the device to stand for 15 mins to try and saturate the dry wicking.
The first few vapes were absolutely rank! Very burnt hit territory! But I did persevere just in case the cotton needed more soaking. The cotton showing through the wicking ports is still very white – not the orange / brown colour the 1.4ohm coil showed.
I left the tank overnight and tried again and to be fair the burnt taste did subside slightly but it was still there. Although the vape was OK it still had a bit of a yukky taste for the tank full after. I had to stop using it as the taste was not nice.
The maximum temperature setting for this protection to kick in seems too low. It did kick in and wouldn’t fire until things cooled down but unfortunately the cotton in the coil had already become damaged by then.
To say I am gutted is an understatement as I only had 1 of the 0.8ohm coils and was really enjoying vaping on this kit before I did the test.
Eleaf iStick Mini 2 Kit Battery Life
Obviously there are many variants affecting battery life, the output level you have selected, the coil installed and even your own vaping frequency.
But to give you a guide with the 0.8ohm coil at 13.5W I got around 8 hours of vaping.
I did try to time this with the 1.4ohm coil installed but this coil burnt out after only a few tank fulls sadly.
Pros
- Very cute little kit
- Lots of different air flow settings
- 0.8ohm coil is incredible for flavour, warmth and throat hit
- Mod is responsive with no major faults
- Good battery life
Cons
- Mega rattly fire button!!
- AST Coil Protection isn’t great – it did damage the cotton making the 0.8ohm coil taste yukky.
- 1.4ohm coil seemed to be faulty
- Had a big leak from tank base
- Tank to mod threads seem very tight
- Auto draw activation is pretty hit and miss and varies with airflow adjustment too.
- Maximum tank size of approx 20mm is a bit restrictive
Eleaf Mini iStick 2 Final Review Verdict
I will be honest – I felt very disappointed with this kit with the 1.4ohm coil. This was the first coil I used and it performed badly.
But this little cutie reeled me back in with that epic 0.8ohm coil. The flavour was immense even at the lower power levels. You could go up to a really quite hot vape and the throat hit was super satisfying.
I have plenty of gripes with this kit, the mod 510 threading, the weird draw activation and the tin can full of nails rattly fire button did not impress me.
Unfortunately testing the AST Coil Protection did damage the coil as it didn’t protect from burning – so make sure to keep an eye on your e-liquid level at all times. Do not rely on this protection as you will knacker up your coil.
But with the 0.8ohm coil and the great range of true MTL airflow this kit won me over. I am shallow – if something gives me a vape I really enjoy then I can overlook some of the other issues.
In my eyes Eleaf should ditch the 1.4ohm coil and throw in 2×0.8ohm and a lot of people would love this kit more. If they had the overall review marks would have been higher from me!
In the “Replace if lost or damaged” category I would have put this at 0 before the 0.8ohm coil – thankfully now I have used it this soars into a 10 out of 10 all day long.
So is this a vape kit your using or thinking of buying?
Please let me know your thoughts and opinions in the comments below…


