Today I’ve got my hands on a simple, starter device – the Geekvape Wenax K2 pod kit.
 The Geekvape Wenax range goes from strength to strength!
And I can’t help feeling this is the manufacturers way of stemming the flow of disposable vapes gate-crashing the vaping industry.
That’s because the Wenax series has always catered for the same kind of audience. The new or casual vaper.
We’ve recently looked at the Wenax Q pod kit and the Wenax K1 has been previewed by our Shell.
The Wenax K2 is the tenth to feature in the series and it has an improved battery life and LED indicator when stacked up against its predecessor, the K1.
 Personally, I’m all for these kinds of starter pod kits. They have all the portability and aesthetics of a disposable vape but much better value when it comes to money and longevity.
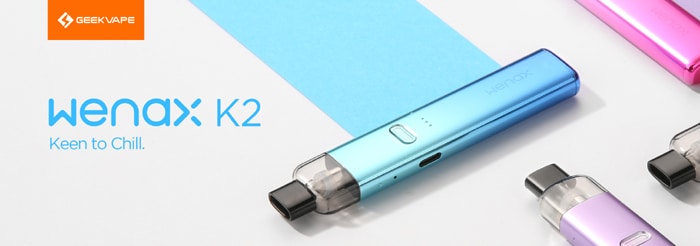
The Geekvape Wenax K2 is ‘keen to chill’. Let’s find out if that’s true, shall we?
What Can We Expect From the Geekvape Wenax K2 Pod Kit?
An improvement over the original K1 pod kit.
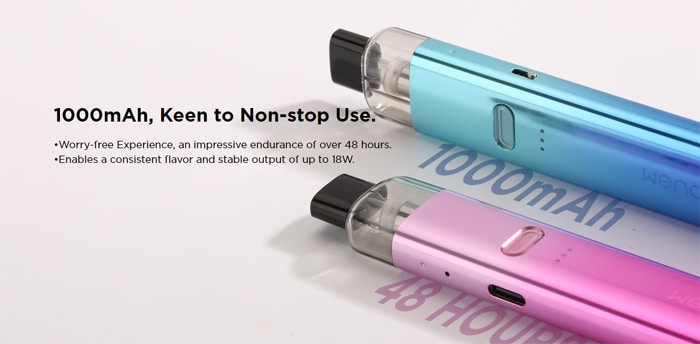
It now features a stable 18W of power, delivered to the same pod/cartridge as the K1. The battery capacity has been increased from 600mAh to 1000mAh and the single LED has been replaced with a trio of multi-functional ones.
Although the OLED screen of the Wenax Q has been ditched, the adjustable airflow slider has been retained.
So it seems the Wenax K2 has been designed to fit in somewhere between those two devices – An incredible ease of use continues.
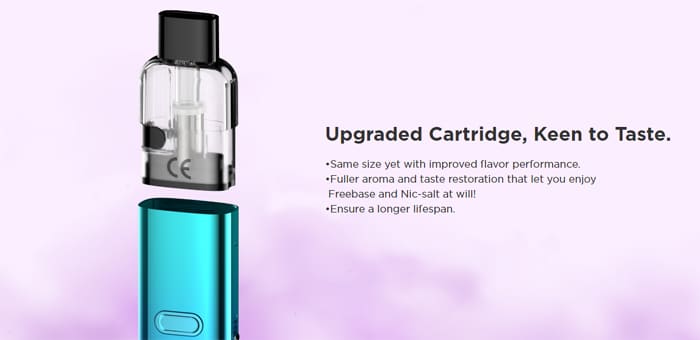
The side filling pod is sealed so no chance of leakage, holds 2ml of E-liquid and said to last for anything up to 10 refills. Under moderate use, the Wenax K2 should perform for 2 days use before needing a top up charge via the type C USB port.
 .. Don’t mean to dis the disposable but I’d say these stats say it all, don’t they.
The Wenax K2 offers us 3 levels of power adjustment (up to 18W), depending on the coil installed.
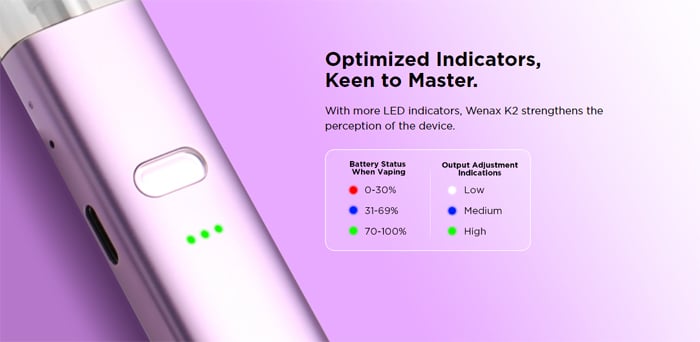 A trio of LEDs inform us of current battery life, power output or if there’s any fault being picked up.
To avoid a few of the latter, the device can even be locked against accidental use. Good stuff!
 Talking of use, it can be used in either auto draw or button activation mode if that’s something you’ve become used to.
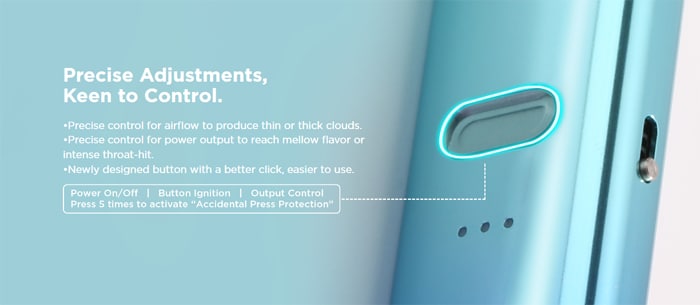
The adjustable airflow has been designed to cater not only for the MTL (Mouth To Lung) vaper but the RDL (Restrictive Direct Lung) user too. We tell you what these terms mean in our Guide To Vape Styles.
.. Suits me just fine.
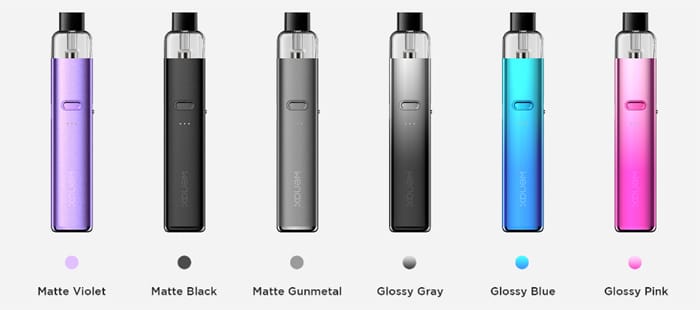
It’s available in a range of colours. In either a gloss or matte finish. Pick from Matte Violet, Matte Black, Matte Gunmetal, Glossy Gray (under review), Glossy Blue or Glossy Pink.
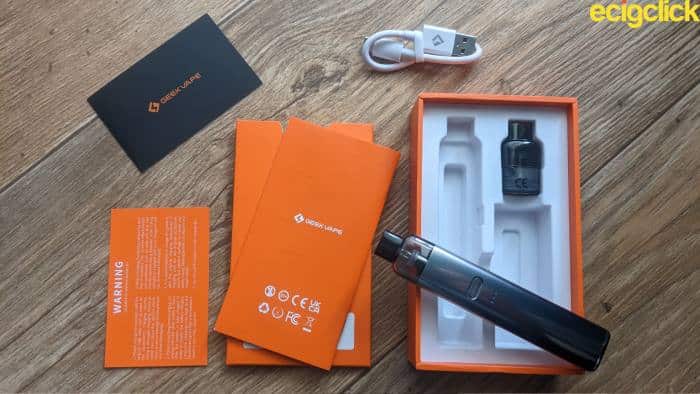
Inside the Box
- Wenax K2 device
- 0.8ohm pod (installed)
- Spare 1.2ohm K1 pod
- Type C USB charging cable
- Instruction manual
- Warning card
- Warranty card
 Geekvape Wenax K2 Pod Kit – Specifications
 Geekvape Wenax K2 Pod Kit – Specifications
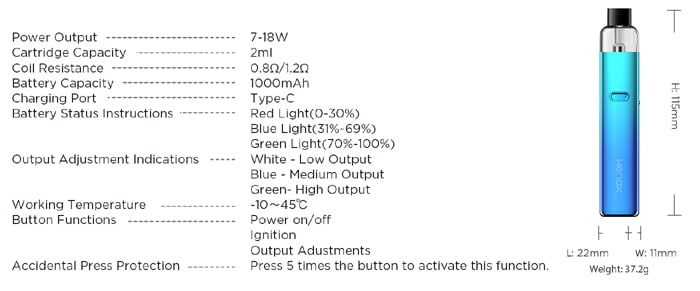
- Size: 115x22x11mm
- Output: 7-18W – 3 power level settings
- Battery: 1000mAh (internal)
- Display: LED indicators
- Resistance range: 0.6 – 2.0ohm
- USB Type C port
- Pods: Refillable, fixed coils
- Compatibility – compatible with Wenax K1 pods
- Capacity: 2ml
- Top fill
- Draw activation or button fire
- Adjustable airflow
 Geekvape Wenax K2 Pod Kit – Design and Build Quality
 Geekvape Wenax K2 Pod Kit – Design and Build Quality
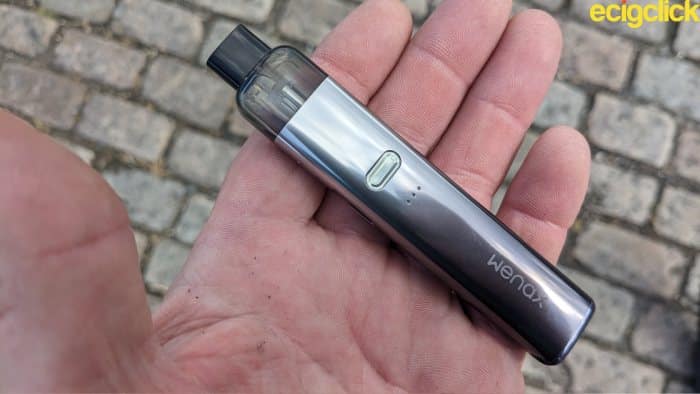
It’s a slim and lightweight device, that’s for sure. It has all the attributes of a disposable vape but with a heap of functionality to boot.
I’ve got hold of the Glossy Gray version which in all honesty does feel a bit greasy in the hand. It’s also prone to finger prints but the Aluminium material feels up to the job in terms of wear and tear.
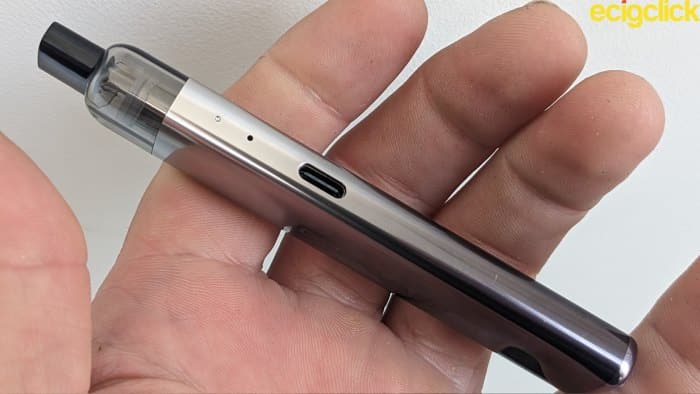
Battery Section
The activation button has been inverted. That makes a change but still accessible enough to the touch. It’s also very quiet in use.
.. Not that I endorse the use of vaping products in a library or at the Opera!
 Underneath the activation button is a series of horizontal LED’s. More on these later.
A recessed type C USB charging port has been positioned on one side of the device, together with a single fixed airflow slot for the ultimate MTL experience, I hope.
In all fairness it doesn’t matter where the USB port is placed on the Wenax K2. You won’t be standing this one vertically for long. It’s too narrow.
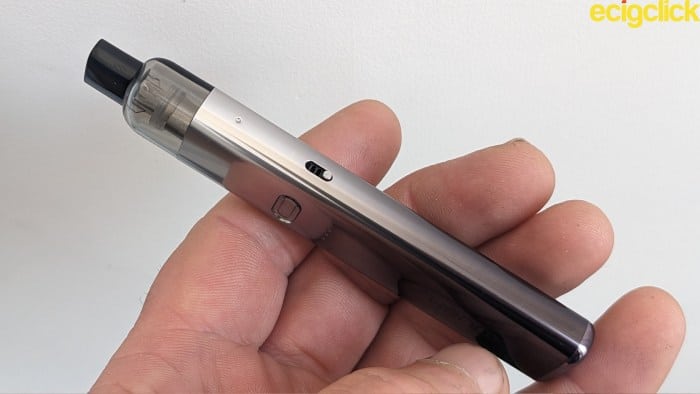
 The adjustable slider is situated on the other side. It’s the same arrangement as the Wenax Q pod kit. Leave it wide open for a more RDL vape or close it down for a tighter MTL experience.
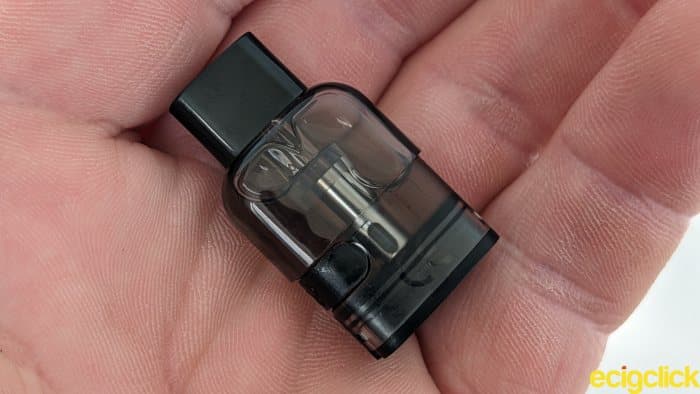
Pod Section
 Pod Section
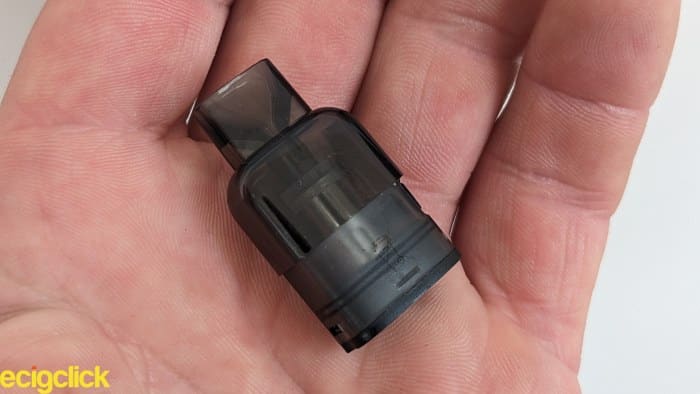
Sealed for your satisfaction!
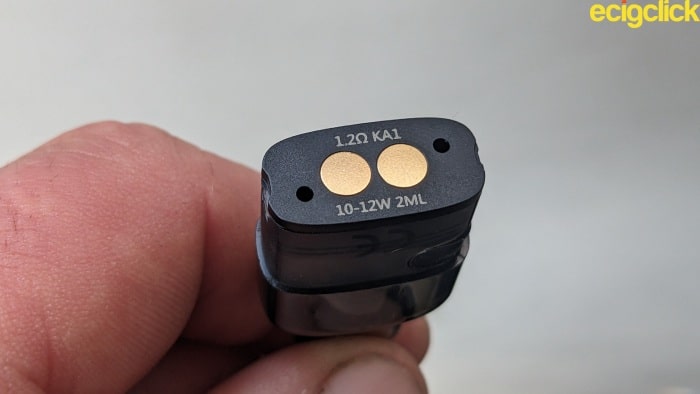
Or at least against the potential for leakage. I’m uncertain as to whether mesh or a round wire coil has been used but between the two provided, power ranges between 10 – 16W.
 The pod attaches to the battery section by snapping into place. Either way round. There are no magnets in use but it easily passes any drop test.
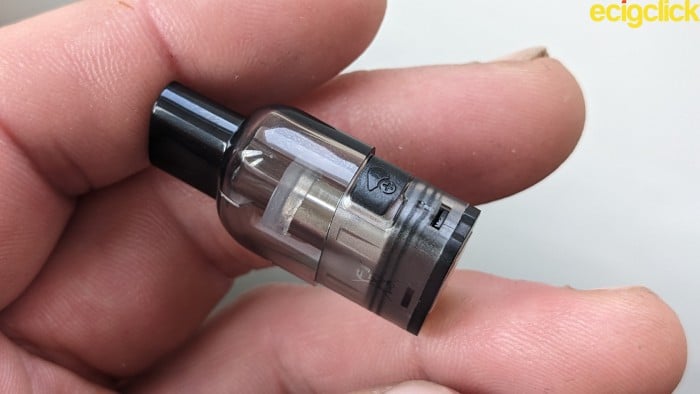
I don’t know what it is but I like the shape of these pods. The flatness and contouring is a natural progression of the battery section. The majority of the E-liquid content is visible thanks to the tough, clear PCTG material used.
The mouthpiece is clear on the K1 pod but Black Plastic on the K2. Maybe a response to condensation visibility but either way, comfortable enough in use.
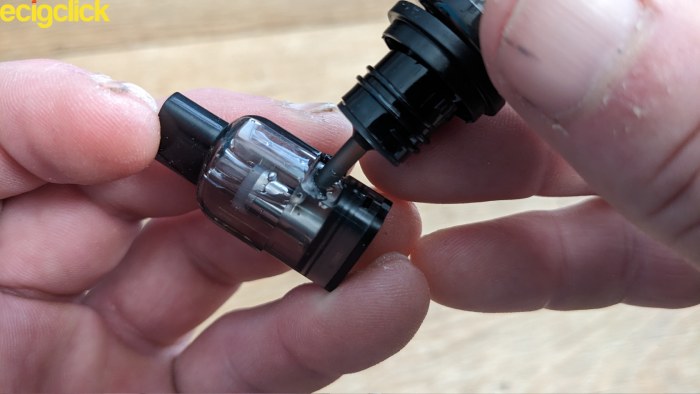
I’m not the biggest fan of side filling pods and the silicone stopper on this one is just as fiddly to use for these fat fingers. I also suggest using 10ml bottle nozzles too.
 With no air release valve you could be in for a world of hurt using anything other.
Scoping out the underside of the pod, we can see alternate air intake holes, another reason why it’s reversible inside the battery section.
But there’s also dual notching on either side. So pod placement still remains important in terms of creating a MTL or RDL vape.
The side with the deeper notch is designed to increase airflow while the other reduces it.
Line either side up with the fixed pinhole slot on the battery section.
Quick Start Guide – Geekvape Wenax K2 Pod Kit
How To Fill the Pod
The kit comes with the 0.8ohm K2 pod already installed. Remember to remove the isolator sticker from the base after filling.
- Remove the pod from the battery section
- Lift the silicone tab from the side of the pod
- Push the bottle nozzle into the fill port opening and gently squeeze E-liquid in to the fill chamber
- Press the silicone tab firmly back into place ensuring a good seal
- Pop the pod back into the battery section
 Press the silicone tab firmly back into place ensuring a good seal
It’s not vital that you fill the pod to the brim but always make sure the cotton wicking holes are fully submerged.
When filling for the very first time, let the E-liquid soak into the cotton for around 5 minutes.
How To Operate
- Press the activation button five times to switch the device on or off. The LED indicators will flash from right to left. They flash left to right when switching off.
Press the activation button 3 times to toggle between power settings.
- White LEDs – Low power setting
- Blue LEDs – Medium power setting
- Green LEDs – High power setting
While the device is on, press the activation button 5 times to lock the device. It’s still possible to auto draw while the device is locked and you can also make power adjustments.
To switch the device off, press the activation button a further 5 times.
While vaping, the LEDs breathe Green, Blue or Red depending on remaining battery levels.
- Green LEDs: 70% – 100%
- Blue LEDs: 69% – 31%
- Red LEDs: 30 %- 0%
Inbuilt Safety Features
The Geekvape Wenax K2 pod kit has several built in safety features. Pay attention to the following LED warnings.
- Low battery – Red LEDs flash 5 times
- No pod – Red LEDs flash 3 times
- Pod short – Red LEDs flash 8 times
- Over vaping – Red LEDs illuminate for 3 seconds
- Over heating – Red LEDs illuminate for 10 seconds
How To Charge the Geekvape Wenax K2 Pod kit
- Connect the smaller end of the supplied type C USB charging cable into the side of the battery section
- Connect the larger end of the cable into a suitable USB outlet
- One LED will breath Red while at 0% – 30% charge
- Two LEDs will breath Blue while at 31% – 69% charge
- Three LEDs will breath Green while at 70% – 99% charge
- Once fully charged the LED’s remain a solid Green. Time to remove the charging cable.
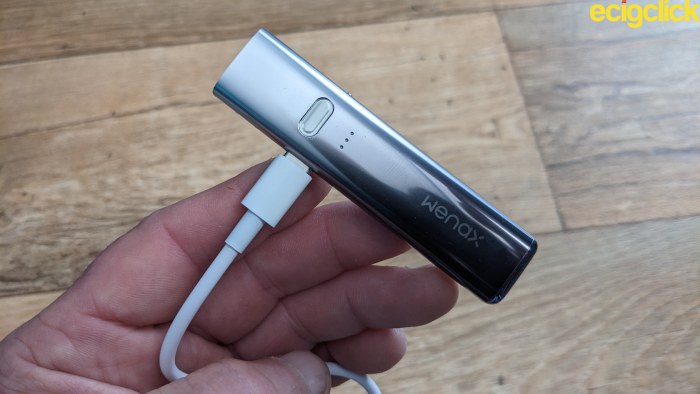
So I found it took 20 minutes for the Red LED to turn Blue. It then took a further 35 minutes before switching to Green and another 25 minutes to illuminate solidly.
One hour twenty for a battery that holds out for 12 hours? I can certainly live with that!
If you are desperate for a vape while charging, make sure the device is switched on.
How Does the Geekvape Wenax K2 Pod Kit Perform?
0.8ohm Wenax K2 pod (12-16W)
I tested the pod using IVG Raspberry Pear, a 50VG/50PG ratio with 10mg salt nicotine included.
 Straight off the bat, power to the coil was instant. That impressed me and also the response from the coil which would have been pulling 16W to begin with.
There’s actually quite a bit of clout behind that coil at 16W.
I got fantastic flavour with the airflow slider set wide open and a great RDL vape to suit. All the fruitiness and blending of the E-liquid was in check and so was the inherent sweetness of the vape.
On this airflow setting the inhale was very quiet and the inhale silky smooth. The added bonus is that by closing the slider down and relying on the fixed airflow slot, a classic MTL vape can be achieved.
Again, flavour is fantastic and consistent from start to end.
I never bothered messing around with restriction between fully open and closed because any differences were negligible.
But it’s as a RDL vape that the 0.8ohm Wenax pod really shines for me. Awesome flavour and respectable vapour production.
1.2ohm Wenax K1 Pod (10-12W)
This time I opted to use Elfliq Strawberry Ice Cream. It’s another 50VG/50PG E-liquid ratio containing 20mg salt nicotine.
So I wanted to see just how close the Wenax K1 pod could come to emulating the flavour of a disposable vape. The Elfliq range has been designed to do just that.
 I’m pleased to say the K1 pod does a stellar job! The inhale is as quiet as a disposable vape, the MTL draw is identical and even the vapour production is a perfect replication.
When the airflow slider is set wide open it is just a tad on the airy side for my liking because the auto draw is sometimes intermittent. It may not respond to the lightest of inhales.
Adjusting the slider to around mid position does make a slight difference to the MTL draw but it really needs to be totally closed off, reliant only on the fixed airflow slot on the side.
When you do that, it’s a terrific experience and one perfectly (and I mean perfectly) suited to someone new to vaping. It’s the kind of inhale to encourage a new vaper, not discourage put it that way.
The flavour is awesome. The Strawberry variant tastes exactly as I’ve come to expect, totally consistent throughout as it wraps itself around the cooling agent.
Even the icy cold nature of the vape is sharply focussed. To the point of stinging the tonsils in exactly the same way as a disposable vape.
Yes, you can RDL vape on the K1 pod but bear in mind it’s a very restrictive lung hit. The restriction therefore naturally guides the user towards that classic MTL vape. And it worked on me.
.. I’m an ardent RDL vaper too, so that says something!
Battery Performance
I guess if you compare it to the capacity of a disposable vape it’s on par. That’s to say you can expect double the lifespan – and that’s exactly what I got.
Twelve hours regular use was pretty damn good, in my opinion. And I do tend to chain vape quite a lot too. So I managed roughly a day’s use. Impressive.
It’s highly likely the battery will last the newer vaper for up to 2 days. Maybe even more if a very light vaper.
The battery does hold out quite well through the Green and Blue stages of depletion but there is a down turn in flavour quality, vapour production and performance once the LED switches to Red.
However there’s a way to combat that battery fatigue as you’ll read below.
Activation Button Vs Auto Draw
There’s quite a bit of difference. Power from the coil seems much more stable when using button activation to vape.
At the start of the battery’s life cycle the difference isn’t that great between button activation or auto draw, but it certainly becomes more noticeable as the battery drains.
I noticed it most when battery percentage hit the Red LED’s. Flavour started to degrade and the sensitivity of the auto draw began to diminish.
But that’s the beauty of button activation in this instance. I really think the chip does a good job at regulating power. Even as the battery reaches the end of its charge.
So for a quick boost to flavour, use button activation when in the Red. It does make a difference.
Pros
- Lightweight and extremely pocket friendly
- Great flavour from both Wenax pods
- Responsive button activation
- Decent auto draw sensitivity
- Great for MTL or RDL vaping
- Easy to use three click power settings
Cons
- LED’s aren’t readable in direct sunlight
- Unable to charge in a vertical position (subjective)
- Silicone fill stopper can be fiddly to work with (subjective)
Final Review Verdict
The Geekvape Wenax K2 is a solid and reliable little starter pod kit. No thrills functionality actually adds to its ease of use, making it accessible to the most virgin of vapers.
The adjustable airflow slider is there to make the most minor of adjustments when vaping either MTL or RDL. I never really had to use it much. I left it wide open in the case of the 0.8ohm K2 pod and closed it off entirely when using the K1 pod.
It’s a pick up and play device and doesn’t need too much tinkering to find that sweet spot.
It really does remind me of a disposable vape in looks and especially so when auto drawing, which I opted for most of the time.
Button activation worked best for me when I needed to pull more power out of the battery during the latter stages of discharge.
I’ve been actively praising the merits of this one to friends and colleagues. For the time being they’re still sold on using disposables.
Their opinions will change when they realise how much cash can be saved, long term with the Geekvape Wenax K2 pod kit.
It’s much better value for money, replicates the look and feel of a disposable and more importantly produces the same flavour and vapour production.


 The Limits?")


