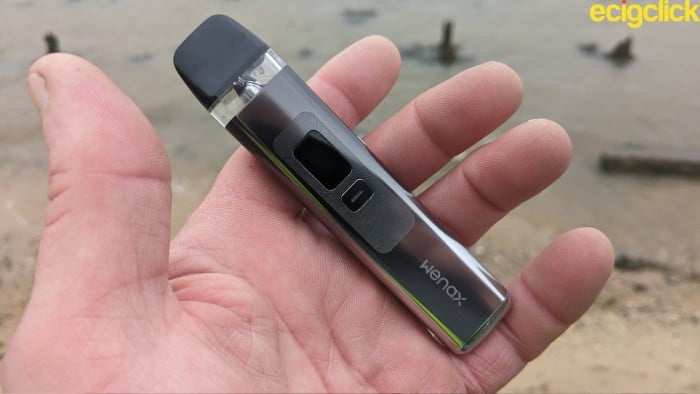
Today I’m taking a look at the Geekvape Wenax Q pod kit.
 Geekvape are probably best known for their powerful, hard hitting Aegis range of Mods. I had Geekvape to thank, in part, for switching from a humble starter pen to full on sub ohm vaping set ups.
The original Aegis Legend served me well for over six years – alas it’s since moved onto the great vape gig in the sky but fond memories remain.
Mods such as those seem very much to have taken a back seat since the advent of pod kits.
![]() However Geekvape were in a well-established, enviable position by then and basic pod kits such as the Wenax U and Wenax Stylus were swiftly introduced to coincide with their popularity.
However Geekvape were in a well-established, enviable position by then and basic pod kits such as the Wenax U and Wenax Stylus were swiftly introduced to coincide with their popularity.
Relying almost entirely on auto draw and integrated batteries they were the ideal jumping on point for many a newer vaper.
Geekvape have always succeeded in the vaping industry by listening and responding to customer feedback. They know that Pod kits are still highly sought after.
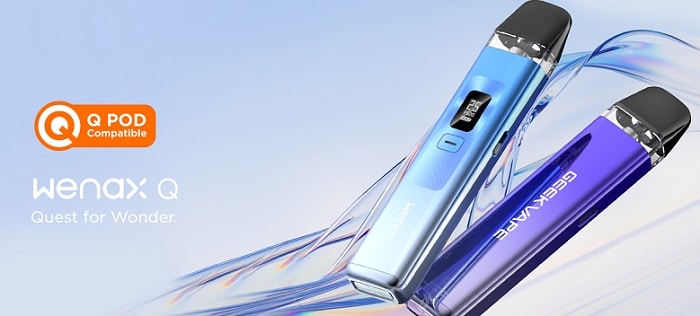
Step forwards, the Geekvape Wenax Q pod kit.
What Can We Expect From the Geekvape Wenax Q Pod Kit?
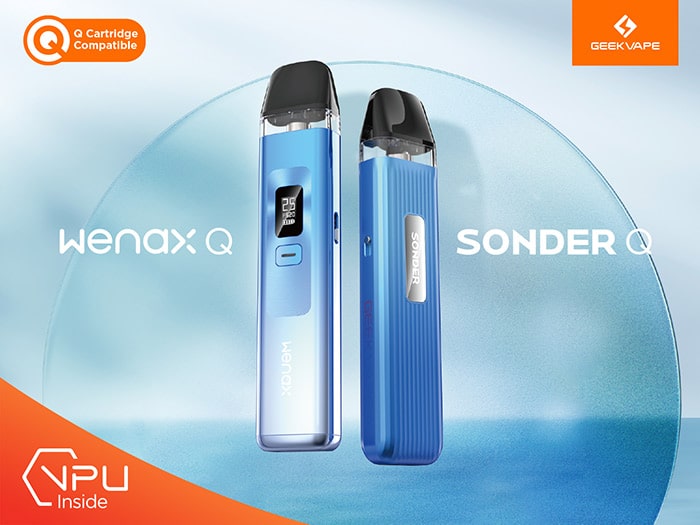
The Geekvape Wenax Q pod kit doesn’t actually feature in the Wenax series. Alongside the simultaneous released Sonder Q these are part of their new ‘Quest for the best’ line up.
 Now that we know where the letter comes from what makes this pod kit stand out?
The pods. Or more specifically the “VPU”. Yes, VPU. Not to be confused with CPU. It stands for Vapour Prospect Uncovers.
Confused? Don’t be.
It simply refers to Geekvape’s most recent advances in E-liquid heat transmission through the use of improved coil tech and non-woven wicking material.
This leads to a reduction in excessive condensation and better E-liquid absorption. In other words, a dramatically improved vaping experience of flavour / vapour production.

What it all boils down to is a tech capable of providing a mellower taste, increased pod lifespan and improved vapour production.
Naturally these new Q pods are compatible with the Geekvape Sonder Q. So far there are three coil resistances to choose from and expect the VPU tech to be constantly updating.
Although the Wenax Q is a device designed for the new or casual vaper it still manages to feature some intuitive controls.
It can be vaped directly from the mouthpiece (auto draw) or by using the power button.
The power button is also used to adjust wattage via the HD OLED screen and to lock the device.
Other intuitive controls include an adjustable airflow slider to assist with fine tuning a MTL (Mouth To Lung) or RDL (Restrictive Direct Lung) vape. We tell you what these terms mean in our Guide To Vaping Styles.
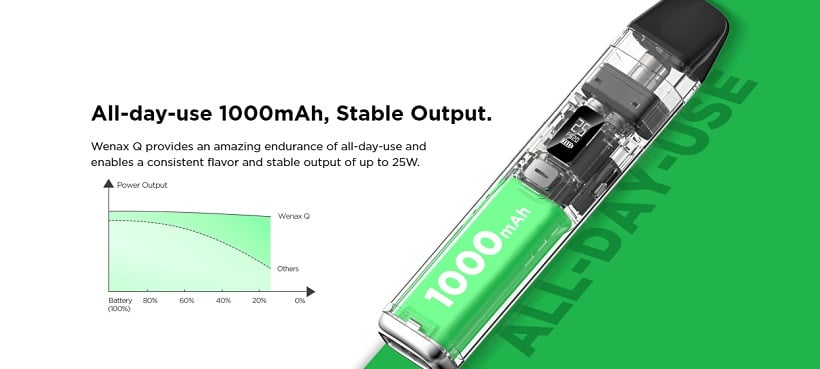
The Wenax Q is powered by a rechargeable 1000mAh integrated battery, delivering anything up to 25W watts consistently throughout use.
The device is available to users both inside and outside of the EU. The TPD and standard editions come with the same 2ml Q pods.
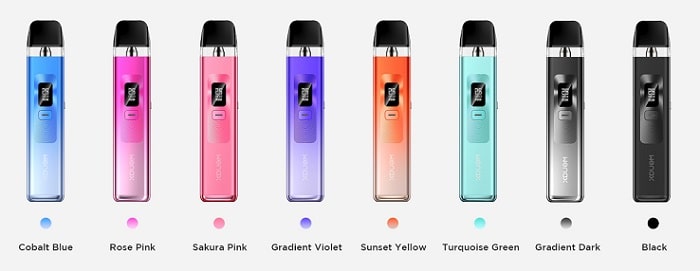
You can pick it up in a host of colour schemes. Choose from Cobalt Blue, Rose Pink, Sakura Pink, Gradient Violet, Sunset Yellow, Turquoise Green, Gradient Dark (under review) or Black.
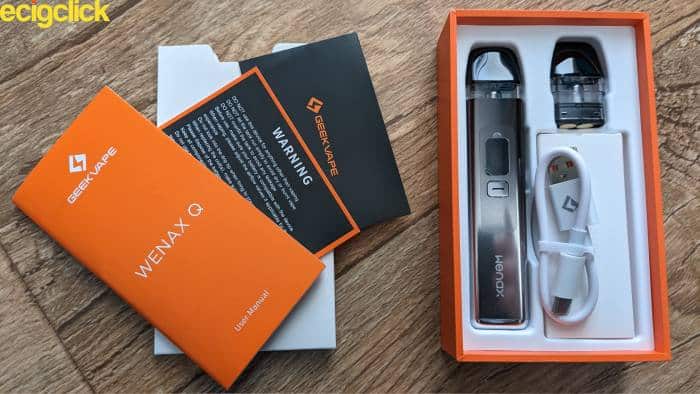
Inside the Box
- Geekvape Wenax Q device
- 0.6ohm Q Pod (installed)
- 1.2ohm Q Pod
- Type C USB charging cable
- Instruction manual
- Warning card
- Warranty card
 Geekvape Wenax Q Specifications
 Geekvape Wenax Q Specifications
Battery Section
- Dimensions: 104(H) x 32(W) x 13mm(D) (with pod attached)
- Weight: 52.1g
- Material: Aluminium alloy
- Output: 5-25W
- Battery capacity: 1000mAh (integrated)
- Maximum output voltage: 4.2V
- Charging voltage: 5V/1A
- Display: HD OLED and LED indicator on power button
- Charging: Type C USB
- Airflow: Adjustable
- Compatible: With all Geekvape Q pods
 Pod Section
 Pod Section
- Material: PCTG
- Capacity: 2ml
- Coil: Fixed / sealed
- Coil resistance: 0.6ohm / 1.2ohm
- Filling: Top fill
Geekvape Wenax Q Design and Build Quality
Battery Section
Sleek, highly polished and built to last. That’s my initial impression.
The contouring on the battery section is enhanced by the glossy finish. I particularly like how the screen and power button has been surrounded by a tiny laser etching.
It’s so finely etched it almost resembles a finger print.
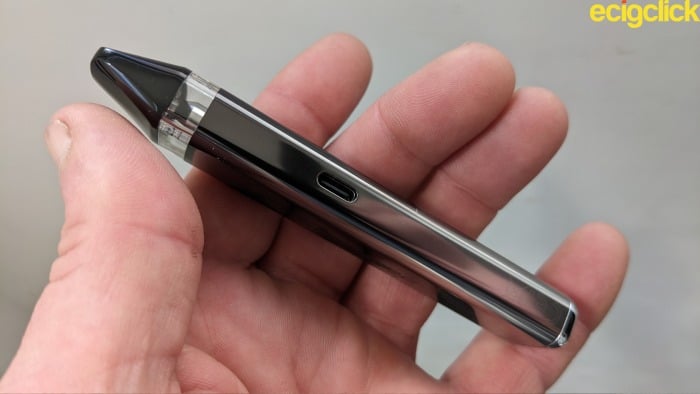
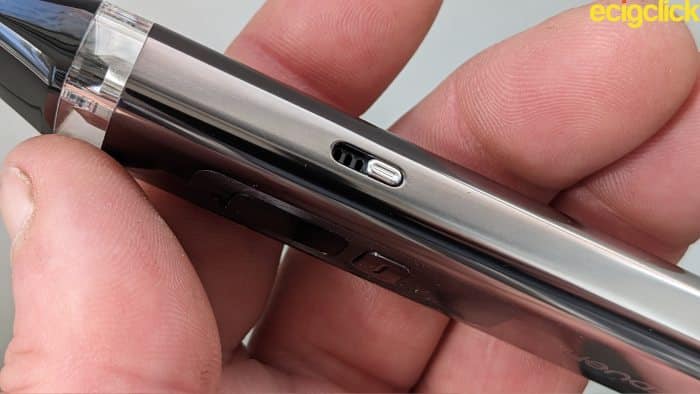
The type C USB charging port is heavily recessed on the side which does much to prevent accidental damage. My only niggle is the positioning. Chances are it’ll tip over once the charging cable is attached.
 Otherwise the device is more than capable of free standing.
Not so sure about the chrome plated finish on the base, though. It certainly compliments the overall look and appeal but will no doubt gather scratch marks in no time at all.
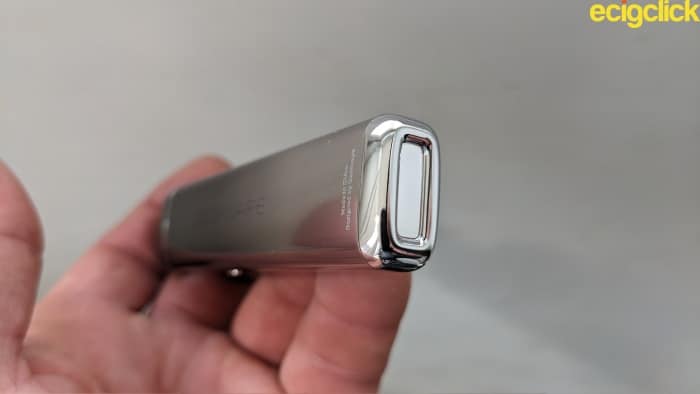 The power button is slightly raised so there’s every chance of locating it in poorer light conditions. It’s also very responsive to touch and quiet as the proverbial mouse.
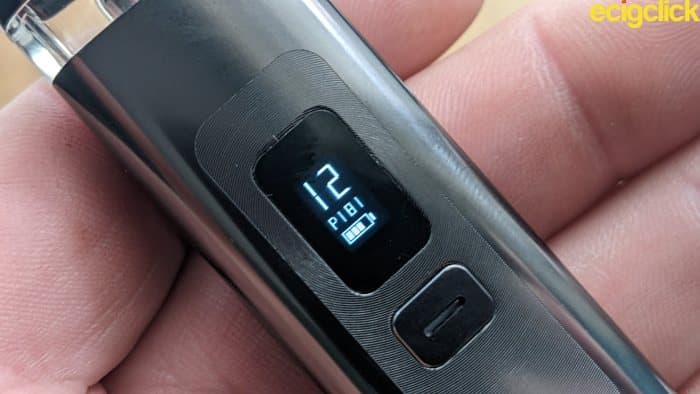
The HD OLED screen is monochrome but as you can imagine, pin sharp to view. It displays the current power in wattage, number of puffs and battery status. Pretty much all you need from a basic starter kit.
 On the opposite side of the USB port we’ve got the adjustable airflow slider. It’s actually quite tricky to operate against the high gloss finish. You’ll be better off pushing a finger nail up against it to make adjustments.
 There are three pin hole slots when fully open and these can be adjusted down to suit a more restrictive style of vaping.
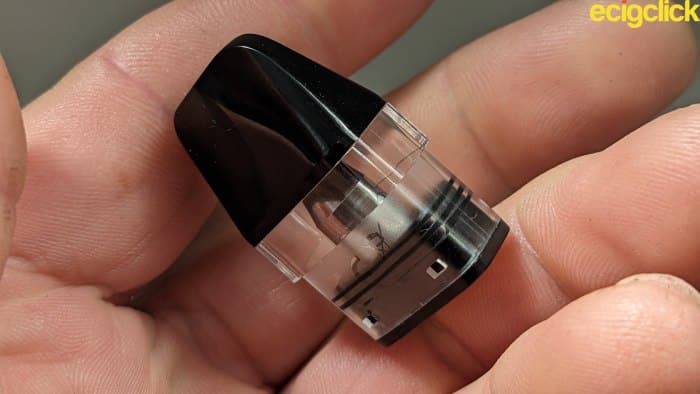
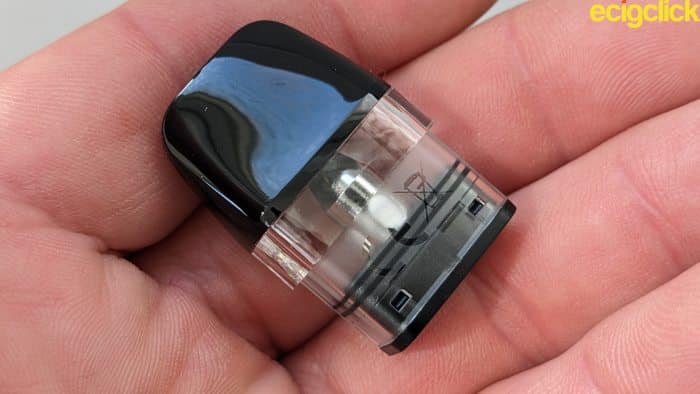
Geekvape Q Pod
It’s made from the usual toughened PCTG plastic so isn’t going to break if dropped while filling, for example.
 The bottom half of the pod has a frosted effect. That really doesn’t matter because it’s non viewable when attached to the battery section.
It connects via two magnets and can be snapped into place either way round.

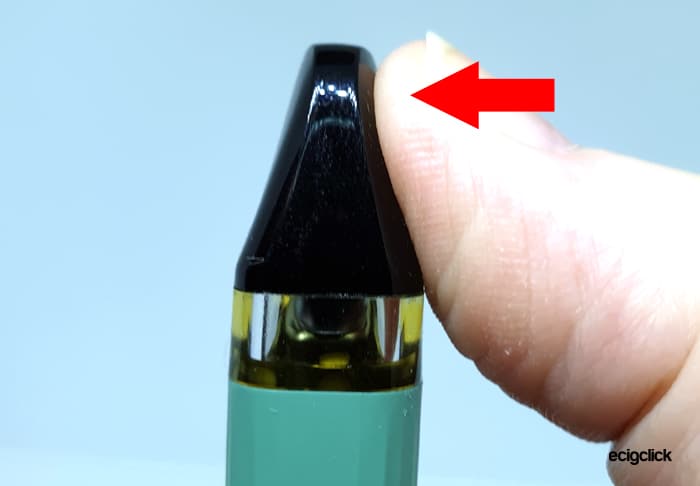
And now we come to my favourite part of the pod. It’s top filling which makes it an absolute joy to work with, in my opinion.
The mouthpiece simply snaps off to reveal the fill port. What’s great about this is that there’s no need to remove the pod when filling. Awesome for when time is of the essence.
 Airflow enters the pod from one of two ports on the base.
The opening between the 0.6 and 1.2ohm Q pods is negligible but the wicking ports are clearly different sizes. So is the bore when peering down the mouthpiece opening.
Quick Start Guide – Geekvape Wenax Q Pod Kit
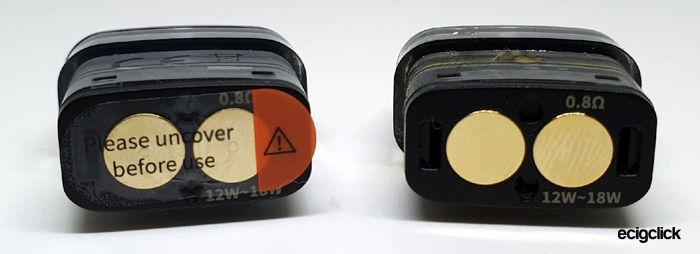
The kit comes with the 0.6ohm Q pod already installed. It also has an isolator sticker on the base. Remember to remove this once the pod is filled for the very first time.
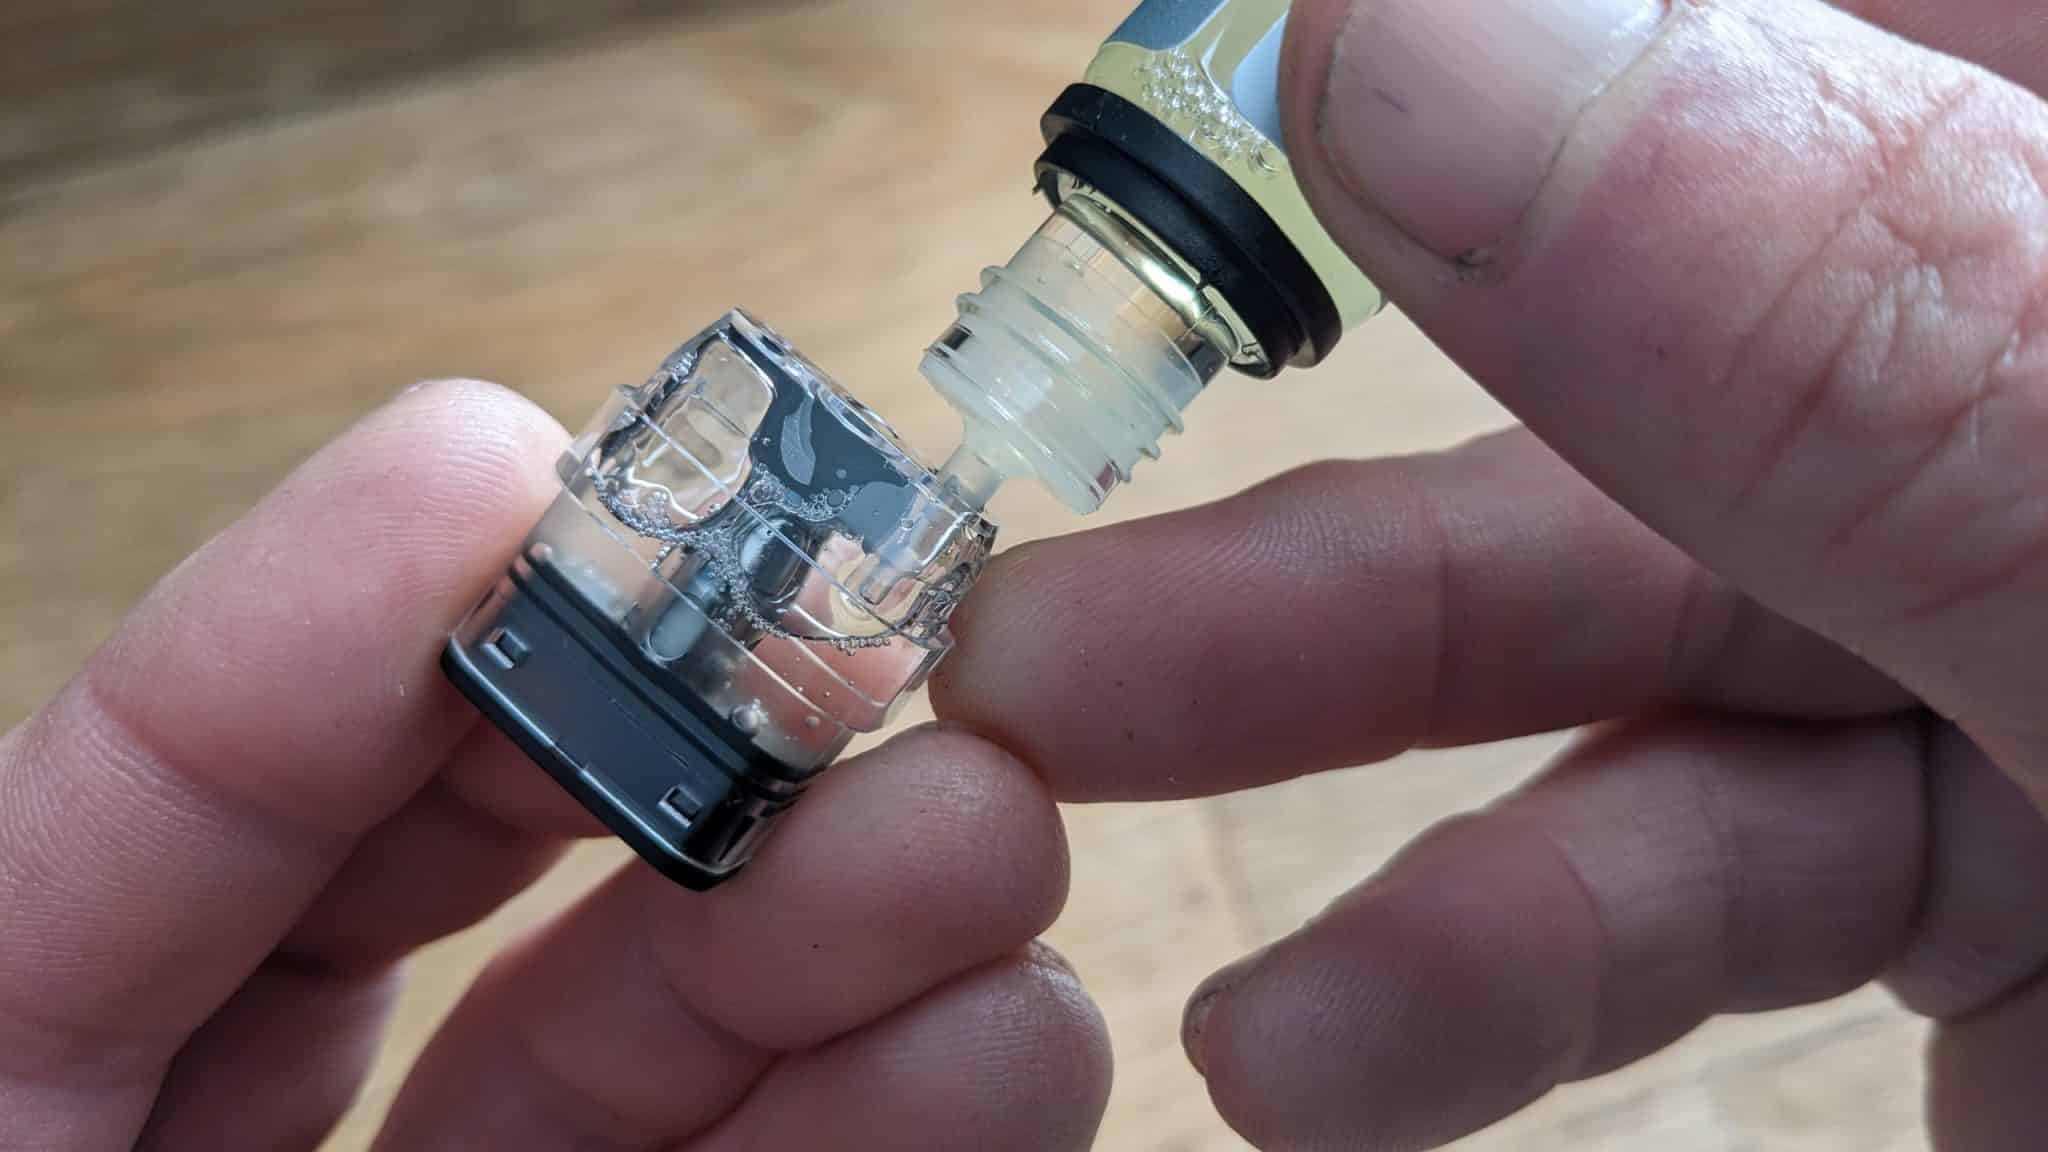
How To Fill the Q Pod
- You can leave the pod in the battery section when filling.
- Remove the mouthpiece by pushing sideways to reveal the fill port

- Push the bottle nozzle into the fill port opening and gently squeeze E-liquid into the pod chamber
 Press the mouthpiece back onto the top of the pod
- Pop the pod back into the battery section
 Press the mouthpiece back onto the top of the pod
Remember to fill the pod to at least half way so that it covers the cotton wicking ports.
When filling for the very first time, let the E-liquid soak into those cotton wicks for at least five minutes before vaping.
You can prevent leakage by not overfilling. Avoid removing the mouthpiece in between refills.
How To Operate the Geekvape Wenax Q Pod Kit
Press the power button five times to turn the device on or off. You can vape on the Wenax Q pod kit by auto inhaling (auto draw) or by using the power button.
The device will automatically detect the best setting for the installed pod but you can also make manual adjustments to power.
- Press the power button three times to enter power adjust mode.
- Press the power button to adjust wattage. The power range differs from pod to pod.
- When the device is on, rapidly press the power button five times to lock the device. It’s still possible to auto inhale and make power adjustments.
There are two ways to check battery status. Press the power button to view on screen status or check the colour of the LED on the power button itself.
Green – 100% – 70%
Blue – 69% – 31%
Red – 30% – 0%
- To reset the puff counter, pull the pod out of the battery section and hold the power button for three seconds.
Inbuilt Safety Precautions
In the event of malfunction the Geekvape Wenax Q will respond accordingly.
- The screen will prompt ‘no pod’ if attempting to operate without a pod installed.
- The error message ‘check pod’ will be displayed if the pod is incorrectly installed. This message may appear if condensate has occurred between the battery and pod sections.
- A ‘low bat’ warning will be received if the battery level is low.
- If you vape for longer than ten seconds the device will cease to function with a ‘over time’ message.
- To prevent unnecessary drain to the battery the screen will switch off after five seconds of inactivity and enter stand-by mode.
Other safety features include:
- Over vape protection – LED indicator blinks Red twice
- Short circuit protection – LED indicator flashes Red 8 times
- Low battery protection – If voltage falls below 3.2V the device stops working. The LED indicator will flash 5 times and enter stand-by mode after 30 seconds
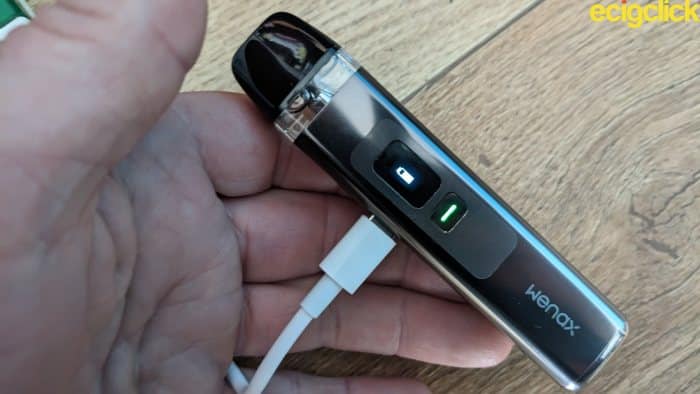
How To Charge the Geekvape Wenax Q Pod Kit
- Connect the smaller end of the supplied type C USB cable into the side of the battery section
- Connect the larger end of the cable into a suitable USB outlet
- The LED will pulse Red, White, Blue and finally Green as it passes through various stages of charge.
- The onscreen battery icon will also fill from one bar to four as it passes through various stages of charge
 Connect the larger end of the cable into a suitable USB outlet
It was odd watching the LED switch from Red to White. I’m not used to seeing that and at first I thought it was a design glitch but the process is described in greater detail in the instruction manual.
- < 25% A breathing Red LED
- 25 – 49% A breathing White LED
- 50 – 74% A breathing Blue LED
- > 75% A breathing Green LED
- 100% A solid Green LED
It took approximately 55 minutes to fully recharge the battery. The Green LED will remain on and the onscreen battery icon bars will be topped up.
How Does the Geekvape Wenax Q Pod Kit Perform?
1.2ohm Wenax Q Pod (9-13W)
I tested the pod on the recommended power setting of 12W and used IVG Blue Slush from their Bar Favourites range. It’s a 50VG/50PG ratio with 10mg salt nicotine included.

I started with the airflow slider set wide open with three pin holes exposed.
Yes, it’s possible to MTL vape on this setting but I personally found it to be too loose and airy on the inhale. There wasn’t enough restriction but the flavour was pretty damn good.
I discovered quite early doors that the airflow slider is more than capable of doing its job. That’s because when nudging it down to two pinholes I noticed a difference to the MTL vape almost instantly.
Flavour quality remained about the same but I seemed to be trapping more of the vapour before inhaling. Just as it should be with this style of vaping.
But for a truly acceptable MTL vape that slider needs to be reduced to a single pin hole slot. This is where all the benefits pull through. Vapour production is on par and akin to the smoke from a cigarette and the flavour becomes intense and saturated.
I got all the vibrancy from the Blueberry and the hit off an icy cold inhale, every time.
However, I did notice a constant ‘wetness’ to the exhale regardless of airflow setting. I wasn’t getting any E-liquid actually in my mouth but I just kept getting that sensation.
So I’m not sure what that’s all about because the pod seemed to be wicking just fine.
0.6ohm Wenax Q Pod (19-25W)
Again I used the recommended power setting of 25W to test the pod and used Serendipity Irie Vibes, a 50VG/50PG 20mg salt nicotine based flavour.
There doesn’t seem to that much difference in restriction over the 1.2ohm pod when airflow is set wide open.
I’d say it’s minimal at most, offering a very restrictive direct lung vape. At 25W I could definitely make out a discernible ‘humming’ from the device. This occurs whether auto drawing or using the power button.
That was a bit concerning and could even be off alarming to some users.
However I couldn’t really fault the flavour quality. The icy content was good and left its mark on the throat and the dairy ice cream was very tasty. I could even write too tasty because that wetness from the 1.2ohm pod remained.
So it’s a very concentrated flavour and the rum notes are nicely delivered during exhale.
.. It was quite early when I tested the pod so I also got a pleasing hit from the salt nicotine! 🙂
If you mess about with the slider and restrict airflow further, you’ll get something of a mixed bag when it comes to vaping style.
A MTL vape is possible, with all the additional perks of increased flavour but I did find it on the loose side. So this pod is definitely designed with RDL vaping in mind.
Personally, I’d leave the slider wide open for that style – It won’t disappoint and vapour production is good too.
Battery Performance
Not too shabby. I got 15 hours continuous use from the device. It took 4 hours for the Green LED to switch to Blue. When it does, the onscreen battery icon will read either 3 or 2 bars.
Six hours later the LED switched from Blue to Red and the battery icon was displaying 1 bar. I managed another 5 hours use with the battery charge at 30% and falling.
The device will cease to function when the battery charge has gone and the LED stops functioning altogether. The screen will display ‘Low Bat’ to confirm it needs recharging.
Power Button Vs Auto Draw
There is a clear difference and it’s not down to lung capacity.
Don’t get me wrong. Auto draw is both sensitive and totally reliable for a swift, cheeky vape but doesn’t have the added clout you get when using the power button.
The flavour when auto drawing is more than acceptable but dulls in comparison to a power button draw. It’s just more abundant and boosted when using the power button and any icy content is definitely enhanced.
It’s great to have either option but the difference in my opinion is night and day.
Pros
- Light weight and relatively pocket friendly
- Clear, bright screen display
- Great flavour and vapour production with either pod
- Super responsive power button
- Reliable auto draw
- Decent battery life
- Fast Type C USB charging
- Top filling is a breeze
- Auto coil detect is always a pro
Cons
- The vape has a concentrated wetness to the exhale
- Audible hum when using the 0.6ohm Q pod
- Having to repeat the 5 clicks process to turn the device off
- A bit on the tall side. Unstable when left in a vertical position
Final Review Verdict
You can’t technically class the 1.2ohm Q pod as a MTL pod. Not if you can spend the majority of the time restrictive lung vaping from it. Still, full kudos to this unassuming little coil for being able to handle either style.
The difference is marginal when using the 0.6ohm pod. I only really noticed any difference when restricting airflow. True to form the pod doesn’t take so well to MTL vaping.
However I’m not sure if it was the additional power (over twice as much), but that audible hum was a concern. So a world of difference over the much quieter 1.2ohm pod.
If I’m picky, the Geekvape Wenax Q pod kit is a tad on the tall side and I never felt 100% comfortable when standing it on surfaces for any period of time. Partially because it’s so damn slim.
It’s also important to note something. Coil detect mode only works if you leave the device alone. If you make manual adjustments to power, these are held in memory. So whenever you reboot the device it will show your personal settings.
Since it takes five clicks of the fire button to lock the device, the only way to power down is to repeat the process which is a bit annoying. In fact that’s the only way to unlock the device.
Because the device employs dual vape modes it’s also possible to auto draw while it’s locked. So it’s not 100% child proof.
I’ve been spoilt lately with some very impressive starter pod kit to review. Aesthetically the Wenax Q pod kit is up there with the best but some of the functionality alongside an incessant wetness to the vape takes some of the polish off this one, I’m afraid.


