The Kizoku Oaker MTL pen kit review and I must confess to being totally new to this Japanese based vape manufacturer but not necessarily surprising given that they’re relatively new to the scene having arrived in 2018.
To begin with it looked like they were going down the accessory route after releasing a magnetized atomizer stand but somehow attention was quickly diverted to vaping devices themselves. More specifically, MTL vaping products.

The Kizoku Techmod, a side by side mod arrived followed by two tanks, the Limit (22mm) and the Unlimit (24mm).
In both cases stock mesh coils were available but also with the option of an RBA section for the budding builder.
Indeed it seems the manufacturer has been pushing MTL tanks over their first few years in the industry. No bad thing at all, especially for the newer vapers out there.
The Kizoku Oaker marks the first venture into pen style vaping kits. The included 18mm Shima MTL tank carries the same hall marks as their other tanks in that it too has an RBA section.
What Can We Expect From the Kizoku Oaker MTL Pen Kit?
First and foremost there’s a degree of versatility.
I say this because it only looks like there are two stock coil currently available for the Shima MTL tank, both of which are compatible with the 22mm Limit tank.
However, it does appear that Aspire Nautilus coils are compatible. Cool beans!
The option of a rebuildable deck is an interesting on, effectively turning this pen style device into a mini RTA. More on this feature later.
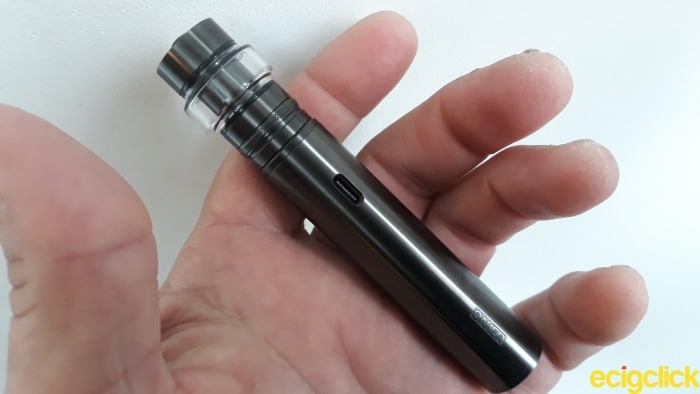
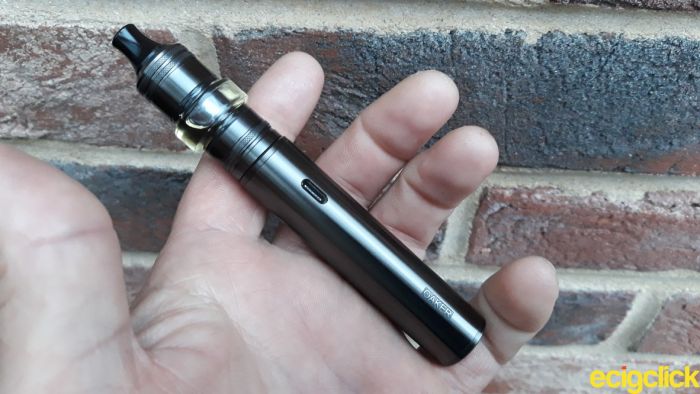
The Kizoku Oaker offers a high degree of portability thanks to the compact design and the built in 1100mah battery supports fast type C charging which is always a plus. A spare 3.5ml bubble glass has been included as an alternative to the pre-installed 2ml TPD poly carbon version.
The device relies on three step voltage via the fire button with a power range of up to 25W. Don’t expect any bells and whistles with this simplistic MTL kit.
At first glance the Kizoku Oaker MTL kit certainly appears to be tailor made for the devout MTL user as well as those making the transition across from smoking. Expect it to land in the pockets of the more casual or infrequent vaper too.
How successful is it at emulating the draw from a cigarette though? It’s time we found out.
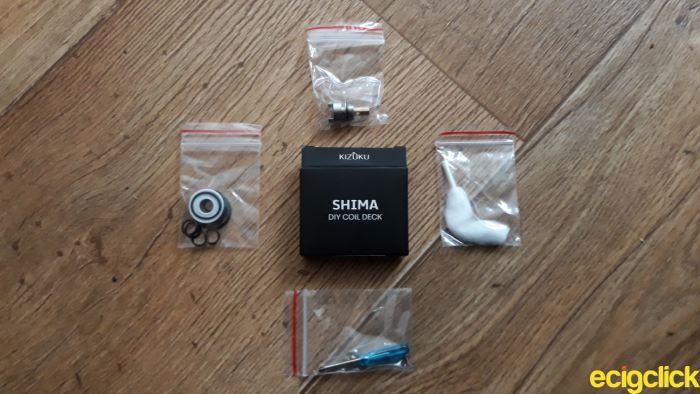
Inside the Box
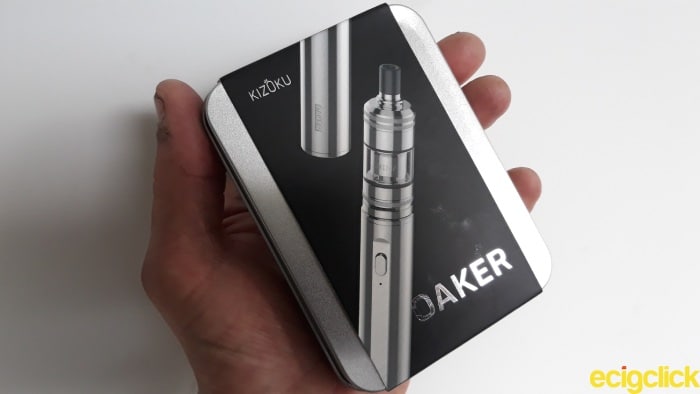
I’m not quite sure how intentional it is but the Kizoku Oaker MTL kit arrived in an aluminium casing that takes its reference from old school tobacco tins. Some of the more, shall we say, mature readers will know exactly what I mean.
I even sniffed the tin for the aroma of a once preferred blend! Sad isn’t it lol.
As far as presentation goes, Kizoku have already won me over. I like how everything sits neat and tidy inside the foam recesses.

- Oaker 19mm battery
- Shima 18mm MTL tank
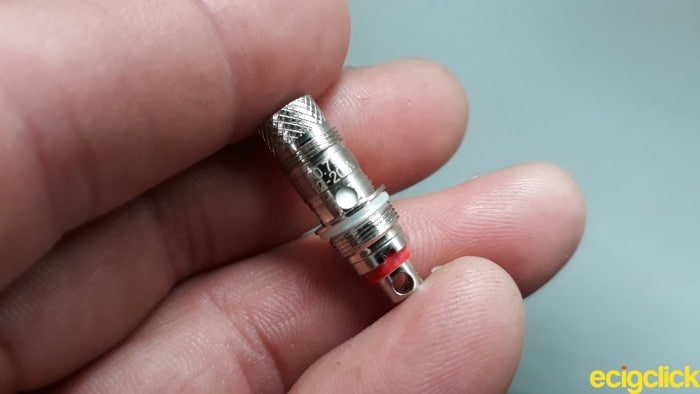
- 1 x KCL1 0.7ohm mesh coil
- Spare expansion glass tube
- Tool bag (includes the rebuildable deck section)
- Type C USB charging cable
- User manual
- Warranty card
The packing list on the sleeve is slightly confusing because there’s no mention of the charge cable and the rebuildable deck section was packed separately.
Kizoku Oaker MTL Kit – Features
It’s such a new product that I wasn’t even able to find any info regarding the device on the official Kizoku website. What I can say is that it’s available in three colour schemes. Stainless steel, Matte Black and Gunmetal so nothing garish going on here.
It seems there’s only one version available catering for both standard and TPD compliancy.
As mentioned the integrated Kizoku Oaker 1100mah battery relies on a three step voltage adjustment for altering power (voltage) levels to the coil via the fire button up to a maximum of 25W.
The tank is designed to offer a true MTL vape whether using the included stock coil or the rebuildable section. The Kizoku Shima tank utilises a top fill system and has adjustable bottom airflow.
Kizoku Oaker – Specifications
Battery section
- Diameter 19mm
- Height 80mm
- Wattage range 5 – 25W
- Output voltage 3 – 3.8V
- Input voltage/current 5V/1A
- Battery Built in 1100mah
- Charging port USB type C
Tank Section
- Diameter 18mm
- Height 51mm
- Capacity 2ml (TPD) / 3ml (standard)
- Connection 510 thread
- Mouthpiece 510 drip tip
- Material Stainless steel, poly carbon and glass
Kizoku Oaker – Design and Build Quality
Battery – Kizoku Oaker
The battery is made from stainless steel 304 so it feels very solid in the hand.
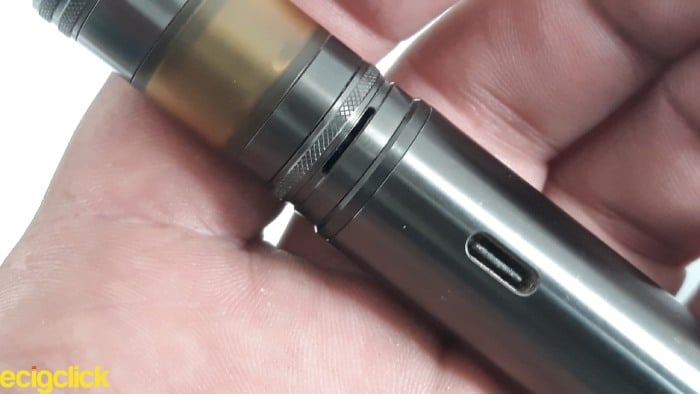
The type C USB charging port is built into the side of the battery near the top so there shouldn’t be any issues with charging in a vertical position. Happy days!
![]() The fire button is incorporated into a flattened section of the tube and is very quiet when pressed.
The fire button is incorporated into a flattened section of the tube and is very quiet when pressed.
It’s more of a muted click than the usual clicking noise. A single LED illuminator is situated beneath and when the device is powered up cycles through the three colours.
When powering the device off a single red LED appears then slowly fades away. Nice touch. It’s amazing how easily I’m pleased.. lol
How To Operate the Kizoku Oaker battery
- Press the fire button five times to power the device on/off
- Long press the fire button to vape
- Press the fire button three times to cycle through the three step voltage. A red LED indicates 3V, blue steps the power up to 3.3V and Green indicates a maximum output of 3.7V
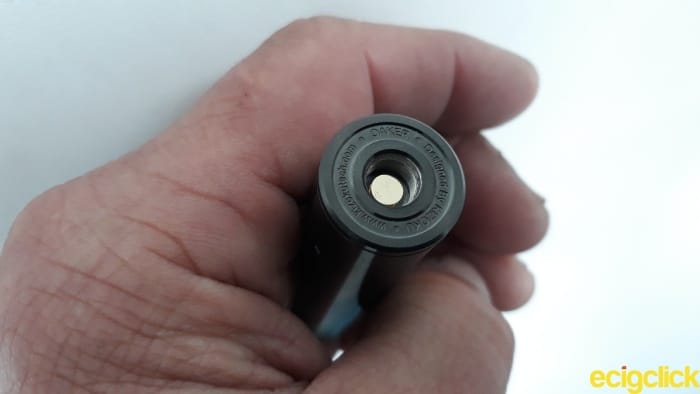
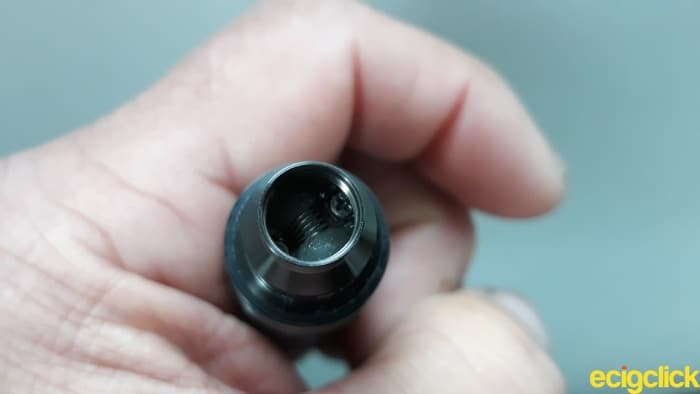
Giving the battery the once over, the 510 connector pin is indeed spring loaded and takes very little resistance to depress.
While charging, the LED colour reflects the current voltage capability and when fully charged will shut off. The battery supports a maximum 1A current and has a host of safety features.
- Open circuit. After firing the LED blinks three times
- Short circuit. The LED will flash red three times
- High temperature protection. The LED will also flash red three times
- Over vape protection. The device will cease to function if vaped over 10 seconds
- Low power. The LED will flash red for a period of ten seconds
It’s important to note that the battery will give no warning of when it’s running low.
The LED will continue to display the colour of its equivalent voltage output before blinking red for a period of ten seconds.
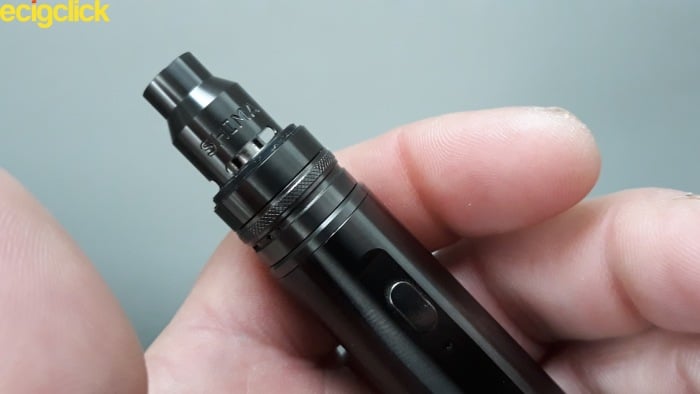
Shima MTL Tank
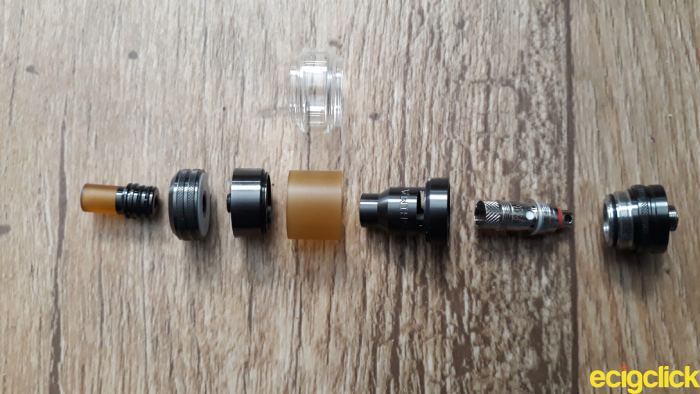
There are nine removable parts to this dinky 18mm MTL tank one of which is the airflow control ring which gives the option of pinhole or a single 10mm cycloptic adjustable airflow slot.
The stock coil screws into the deck in a clockwise manner and the threading in silky smooth, so is the threading of the inner chimney, fill port and top cap sections.

Even the threading on the poly carbon mouthpiece is meticulously designed. Double O rings ensure the drip tip sits snuggly in place. It can be replaced with one of your own.
To cap it off, the tank incorporates some rather excellent knurling that looks very pleasing aesthetically.
The adjustable airflow slots alter in size as they’re selected, each one snapping into place while doing so. Very impressive in my opinion and should allow for some subtle, balanced MTL vaping options.
The fill port is comprised of two 6.5mm kidney shaped openings, able to cater to any kind of bottle tip. Again the machine quality is on point.
..I’m beginning to sound like a fan boy before even vaping it. Dangerous move, Neil. lol
How To Fill The Kizoku Shima MTL Tank
- With the coil installed, unscrew the top cap counter clockwise
- Locate one of the two kidney shaped fill ports and gently squeeze e-liquid into the tank taking care not to overfill
- Replace the top cap ensuring a snug fit
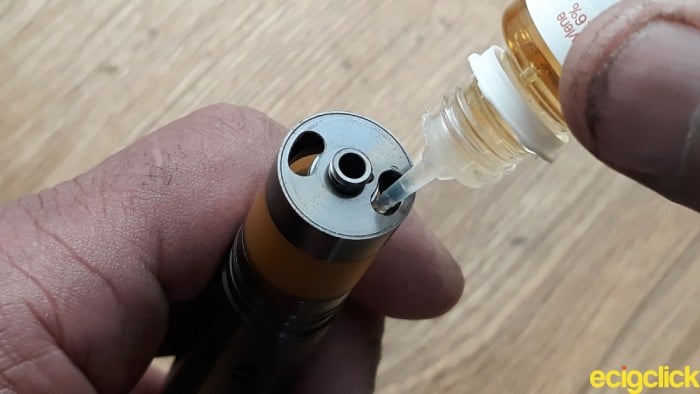
Leave the e-liquid to soak into the wicking ports for around five minutes prior to vaping.
How Does The Kizoku Oaker Perform?
Kizoku Oaker KCL1 0.7ohm mesh coil
As this is a MTL tank I opted for a 50VG/50PG juice ratio. I also avoided the use of aniseed, citrus or cinnamon inspired flavours because they’re known to cause cracks with poly carbon material.
So I used 88 vape Rolling Leaf, a tobacco E liquid profile with freebase nicotine content.
 When vaping with the adjustable pin hole slots fully open I got a very airy MTL experience and a very restrictive DL one too, although that’s not something I would recommend.
Flavour replication was OK but nothing special being slightly mute and diluted.
 Closing two of the airflow slots created a different vape altogether. I was still able to get an extended inhale but the tightness of the draw certainly emulated that of a cigarette.
Your classic MTL vape if you will and very satisfying. Cloud production was very discreet meaning no furrowed brows when out and about in public places.
So back to the flavour on this setting and the tobacco blends fused harmoniously, lingering in a pleasant way on the palate and with the power set to 3.7V (green) a nice warm vape was created. There was plenty of sweetness to keep things driving along.
I would say restrictions range from 20%, 30%, 70% and 90% depending on the choice of the four settings on offer.
Yes! I did write 90% there. That’s far too tight for any kind of vape to be honest and it didn’t work for me.
Kizoku Oaker – Cycloptic airflow setting
I’m hoping this will be more suited to the rebuildable section because there’s nothing worthwhile about vaping the cycloptic airflow wide open.
I got very little flavour attempting a MTL vape and there must’ve been a mere 10% restriction, tops. It’s just too airy a draw.
That’s OK if the tank is rigged for a semi restrictive direct lung vape but it clearly isn’t because I tried – and the flavour and cloud production remains poor.
Shutting down the airflow to around mid way there was still too much airflow. I would hazard a guess in the region of 25% restriction this time and again creating another airy, uncomfortable MTL vape. The flavour was just too diluted for me to retain interest.
Under the tightest of restriction the cycloptic airflow provides a decent MTL vape but the flavour just isn’t that great, unfortunately.
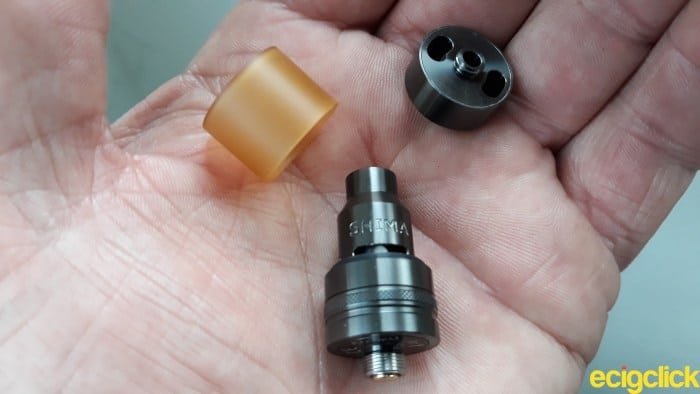
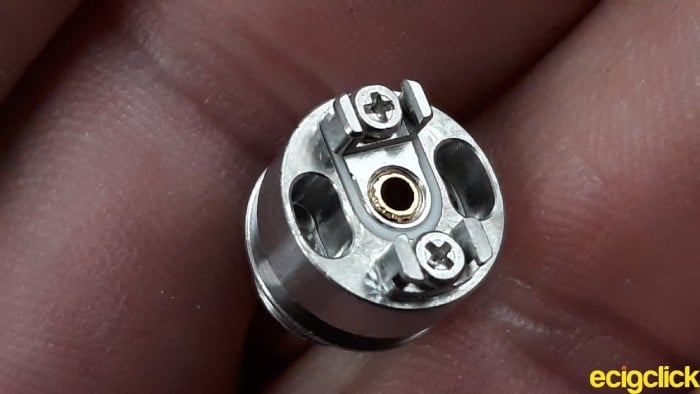
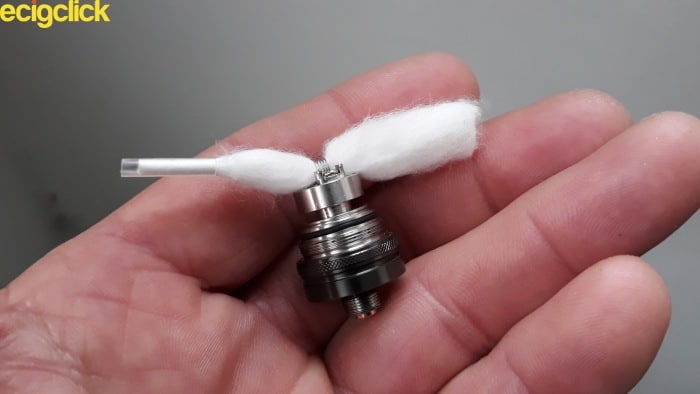
MTL DIY Coil Deck (Mini RBA section)
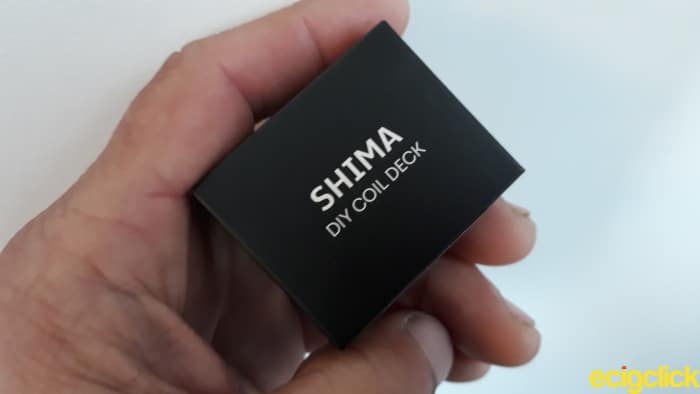 The Kizoku Shima DIY coil deck comes packaged separately and includes spare washers and a silicone seal for the MTL tank along with:
- Single cotton aglet
- 2 x replacement screws
- Mini screwdriver
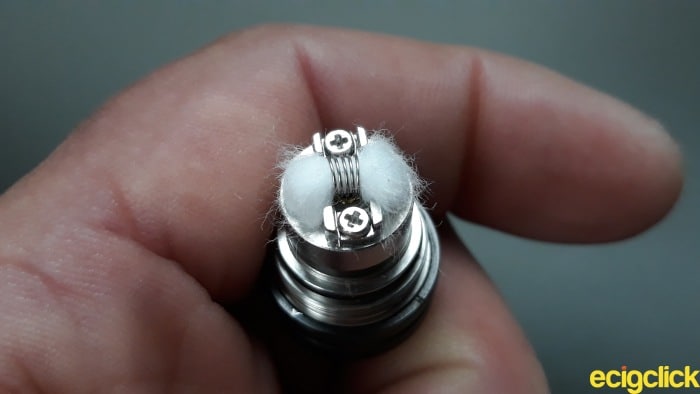
- 2mm kanthal round wire MTL coil
This is a very small build deck. I’ve seen bigger ones used with pod kits so if you intend to build on the Shima DIY coil deck be prepared to take your time. Have patience. Like Me.
Ha!
Shima MTL Tank DIY Coil Deck – Installation
 Screw the Shima DIY coil deck into the base of the tank
- Loosen the post screws allowing enough clearance to insert the coil legs underneath
 Screw the Shima DIY coil deck into the base of the tank
- Tighten the post screws down making sure the coil legs have been secured
- Trim the coil legs back to the sides of the build deck. Make sure they are not protruding as this may cause a short against the inside of the removeable chimney
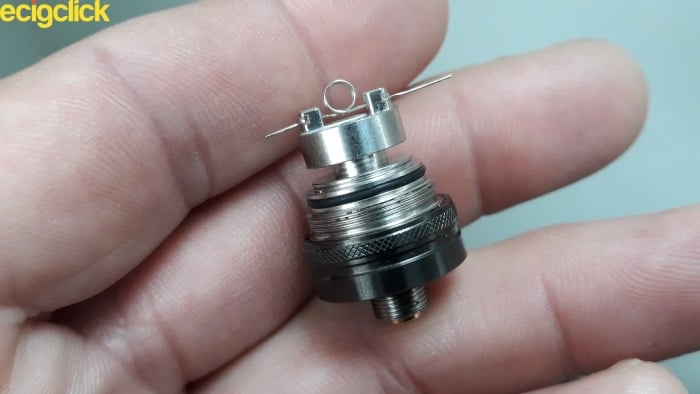 Tighten the post screws down making sure the coil legs have been secured
- Centre the coil over the single airflow intake and around 1-2mm clear of the deck
- Pass the included cotton aglet through the coil. Take your time – it’s cut to size but don’t force the coil out of position or deform in any way
 Centre the coil over the single airflow intake and around 1-2mm clear of the deck
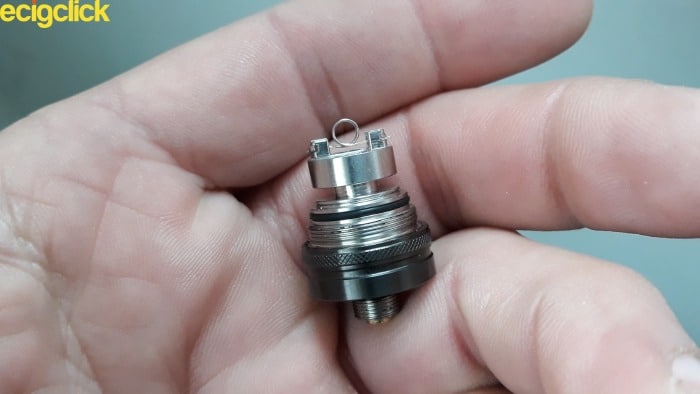
- Trim the cotton back to the sides of the DIY deck and gently thin out by raking with tweezers or an appropriate tool
 Trim the cotton back to the sides of the DIY deck and gently thin out by raking with tweezers or an appropriate tool
- The cotton must be placed, not forced into the wicking ports so don’t stuff it in!
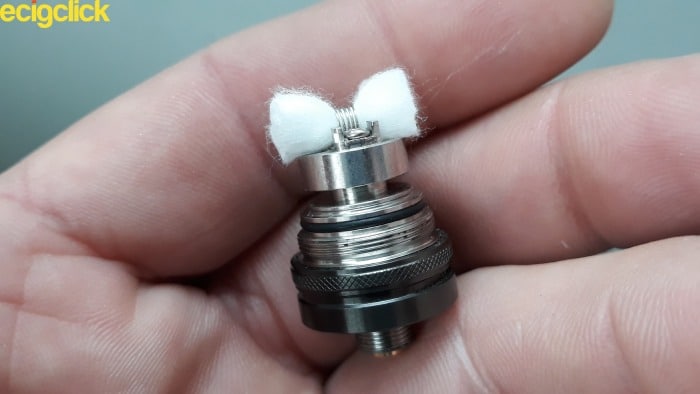 The cotton must be placed, not forced into the wicking ports so don’t stuff it in!
- Screw the DIY coil deck back onto the Kizoku Oaker battery section
- Saturate E liquid across the cotton and coil
 Screw the DIY coil deck back onto the Kizoku Oaker battery section
- Gently screw the chimney section back onto the deck of the tank
 Gently screw the chimney section back onto the deck of the tank
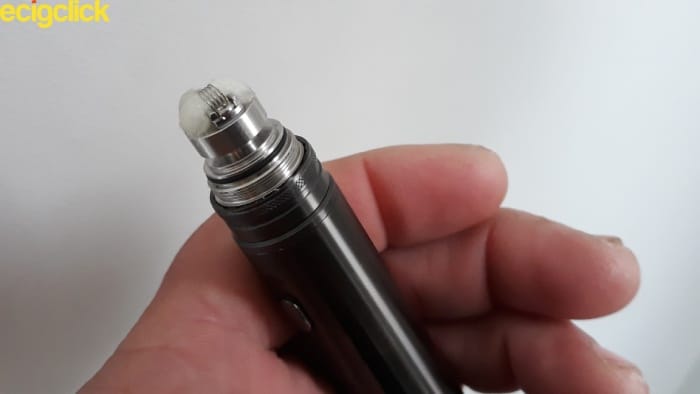
- Test fire the coil to make sure no shorting occurs.
 Test fire the coil to make sure no shorting occurs.
- Place the poly carbon/glass extension tube over the chimney section
- Screw the fill port section onto the top of the chimney section, securing the poly carbon/glass extension tube into place
 Place the poly carbon/glass extension tube over the chimney section
- Fill the tank with E-liquid through the fill port
- Replace the top cap and drip tip
 Fill the tank with E-liquid through the fill port
Allow the juice to soak into the cotton for around five minutes before adjusting airflow, power settings and finally vaping.
How Does The Shima DIY Coil Deck Perform?
As with the included stock coil I recommend using 50VG/50PG juice ratios when using the rebuildable deck because the included coil is a true MTL variant.
I discovered the 2mm kanthal round wire build had a resistance value of 1.0ohm. Set to the maximum power setting, 88 Vape Raspberry Ripple was used for testing purposes. With a freebase nicotine strength of 6mg for an additional throat hit.
Shima DIY Coil Deck – Slotted Airflow
There’s no doubt about the increased level of flavour when using the DIY deck. Even with minimum airflow restriction the raspberry was very clean, bright and popping. The MTL vape was quite airy but also comfortable.
However, altering restriction beyond half way created a much tighter draw than the KCL1 stock coil equivalent. The flavour was still impressive but vapour production fails significantly.
So the airflow options are less versatile, which is a bit of a shame.
Shima DIY Coil Deck – Cycloptic Airflow
With airflow wide open, the restrictive direct lung option makes a return. The flavour is somewhat compromised and as expected there’s little warmth from the maximum power output.
Unfortunately it’s a very poor MTL vape being far too airy. I was stuck between a rock and a hard place using this setting.
A single reduction in airflow adjustment improves things but only marginally. Flavour quality isn’t improved much either. It’s OK just not that great.
It takes maximum airflow restriction to create what I would call the perfect MTL vape. I could quite happily vape this setting all day.
There’s plenty of satisfying vapour production and the raspberry ripple flavour is just spot on, creating the right intensity combined with a sweetness that lingers on the taste buds.
Pros
- Excellent battery life and super fast type C USB charging
- Good flavour from KCL1 mesh coil and slightly better from the DIY coil deck
- No leaking from the KCL1 mesh coil or DIY coil deck
- LED’s visible in direct sunlight
- Exemplary build quality / excellent threading
- Lightweight, slim and pocket friendly
Cons
- Can be too airy or too tight for a decent MTL vape (subjective to airflow setting)
- LED needs to be positioned lower on the battery. Obscured by thumb when vaping
Kizoku Oaker – Final Review Summary
I’ve got to admit I’m incredibly impressed by the build quality of the Shima MTL tank.
So many removeable parts yet all of which come together seamlessly thanks to excellent and reliable threading.
..It’s rare for me to give so few cons with a device.
Using the stock coil, the best MTL performance was found mid restriction while using the adjustable airflow slots.
The Shima DIY coil deck also provided an excellent MTL vape with the cycloptic airflow heavily restricted.
Generally speaking the best results were obtained when restricting airflow beyond 50% across either airflow design.
I think Kizoku have done a tremendous job with their first foray into pen style MTL devices. Although there’s not a great deal to separate them, the DIY coil deck edged it for flavour value. It just seemed a little cleaner and brighter.
Not to mention the satisfaction gained from wicking the DIY coil deck correctly! lol
The power regulation from the battery was also impressive. I was hard pressed to notice much degradation as the charge dropped.
Expect anything up to two days use from the Kizoku Oaker MTL kit especially when using medium power settings.
The stock coil lasted around two weeks before showing signs of wear and tear. Bearing in mind I was vaping quite heavily that’s none too shabby.
Kizoku Oaker MTL Kit – Recommendations
Who shouldn’t the kit be recommended to! It turns out to have great versatility thanks to the inclusion of the DIY coil deck.
It’s going to be ideal for those new to vaping with a simple screw in stock coil and such ease of use. The simplicity wins it points alone and that’s what any transitioning vaper will be looking for.
Of course the rebuildable deck will be of appeal to the intermediate / advanced vaper and all those on a tighter budget. It’s going to save on the pennies long term.
I honestly thought working on such a tiny deck was going to be the one blot on this vaping landscape but even I achieved success because of the simplistic design.
The Kizoku Oaker kit only produced the occasional condensate when using the wider cycloptic airflow. In two weeks of use I didn’t encounter any leaking from either the stock coil or DIY coil deck.
Overall a very reliable little device and one I could recommend to anyone that loves their MTL vapes.
Is this a vape kit you’d be interested in getting?
Any other thoughts or opinions please let me know in the comments below!

 Vaping")


Bang kizoku ouker nya di jual ga ya ,saya punya tapi hilang ,,punya temen lagi ,,kalo bisa saya bayarin buat ganti punya dia
That coil looks awfully similar to a bvc coil, are they cross compatible?