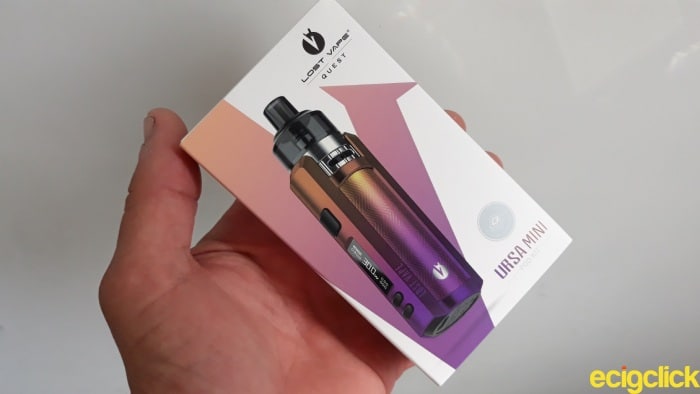
The Lost Vape Ursa Mini Pod Kit review and this is the latest in a line of pod systems from the high end Shenzen based manufacturer.
The Thelma.. sorry Thelema, boasting MTL and DTL vaping styles is one such pod kit that springs to mind. Another is the Lost Vape Orion created back in 2018, that was the first pod kit to feature a DNA chipset.
 Lost Vape was created by an adventurous group of vapers determined to create innovative and exciting ideas.
One such entrepreneur was Frank Guo. He’s the guy who established the company and responsible for the recent Lost Vape Ursa Quest Multi Kit.
Check out Flatcap Vaper’s review of that one for the full low down.
It introduced the new Quest chip, spawning five vape modes and utilising the Ultra Boost (UB) and UB PRO range of mesh coils across two separate pod tanks.
The Lost Vape Ursa Mini Pod Kit features the Quest chip of its older sibling albeit stripped back to basics.
It’s smaller and lighter, making use of the UB Lite range of coils instead.
I think it’s time we set out on a quest of our own. To find out if it delivers on power, flavour, cloud production and battery life.
..Don’t forget to bring your packed lunch lol!
What Can We Expect From The Lost Vape Ursa Mini Pod Kit?
Two coils in the UB Lite range have been included and we can expect one to provide a MTL vape and the other a restrictive direct lung hit.
There’s very little chance of getting a warm to hot vape since the internal 1200mAh battery is only dealing with a maximum 30W output. However, when using the high resistance MTL UB Lite coil we can expect extended life to the battery.
The user interface looks to cater for the newer vaper with a distinct lack of sub menu’s that even the intermediate to advanced vaper may appreciate.
Judging by the 135g net weight of the device we can also expect it to be pocket or purse friendly.
Inside the Box
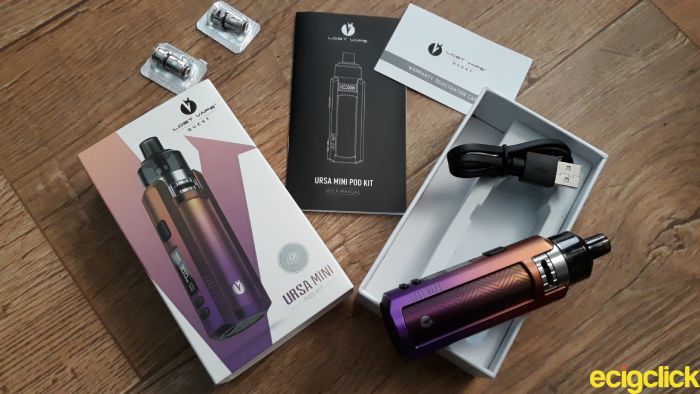
The device comes in an easy to remove slip case, sitting snuggly inside a foam inlay. Squeezed in on the left is a slim rectangular box containing additional items.
- Ursa Mini Pod Kit
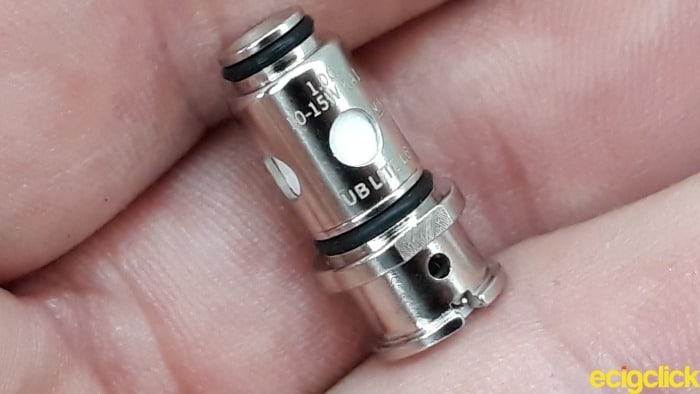
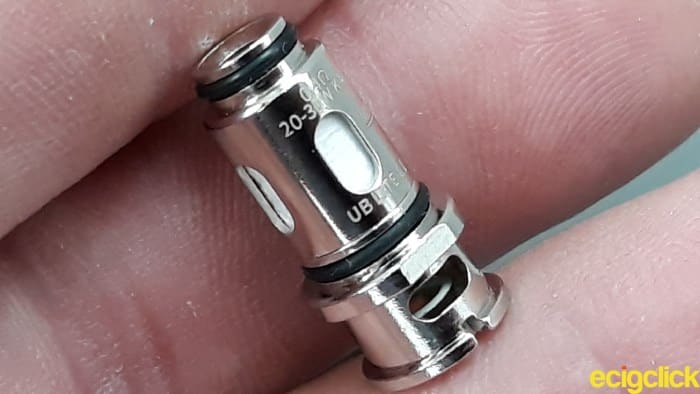
- 0.4ohm UB Lite L1 DL coil
- 1.0ohm UB Lite L6 MTL coil
- Type C charging cable
- User Manual
- Warranty card
There’s something worth noting…
The instruction manual comes entirely in English, so no multilingual fold out roadmaps to negotiate!
Lost Vape Ursa Mini Pod Kit – Key Features
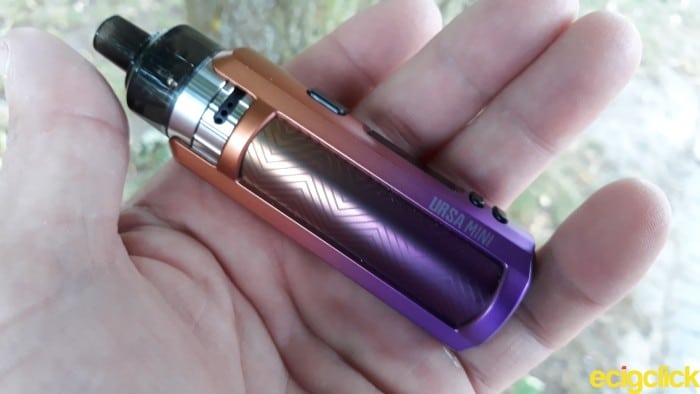
Relatively speaking, the Lost Vape Ursa Mini Pod Kit is quite compact and lightweight which makes it a discreet and highly portable device.
The fully adjustable dual airflow ports have been designed to compensate the mouth to lung, restrictive lung and direct lung vaper depending on the type of coil being installed.
Fast Type C USB charging ensures that waiting time between a spent and fully charged battery is kept to a minimum.
To make life easier for the new vaper, the Quest chipset is able to detect the installed coil and display its resistance on the 0.69in OLED screen.
I’ve received the standard version of the Lost Vape Ursa Mini Pod Kit, and this includes a 3ml capacity pod.
At the time of writing I could find no indication of a TPD issue but as we all know, other than a 2ml pod everything else will be identical.
It comes in two colour series. The Leather series consists of Mist Rose, Crystal Cream, Dark Knight and Glitter Ocean. The Phantom series offers Phantom Red, Blue, Green and Purple.
Lost Vape Ursa Mini Pod Kit – Specifications
- Dimensions 30.7 x 26 x 107.22mm
- Weight 135g (net)
- Material Zinc Alloy / Stainless steel
- Battery 1200mAh built in lithium
- Power range 5 – 30W
- Pod capacity 3ml
- Battery voltage 3.0v – 4.2v
- Screen 0.69in OLED
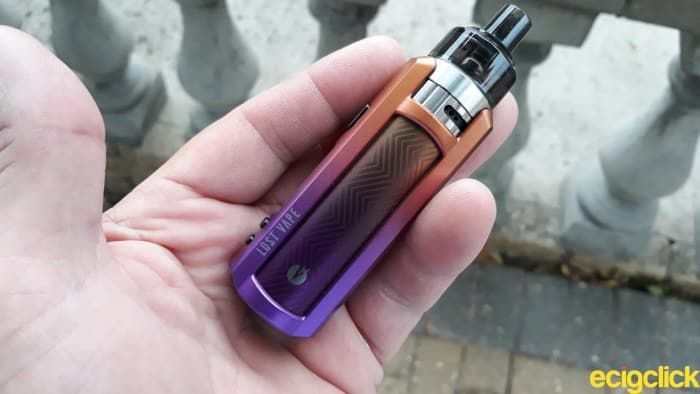
Design and Build Quality
Lost Vape Ursa Mini Pod Kit – Battery Section
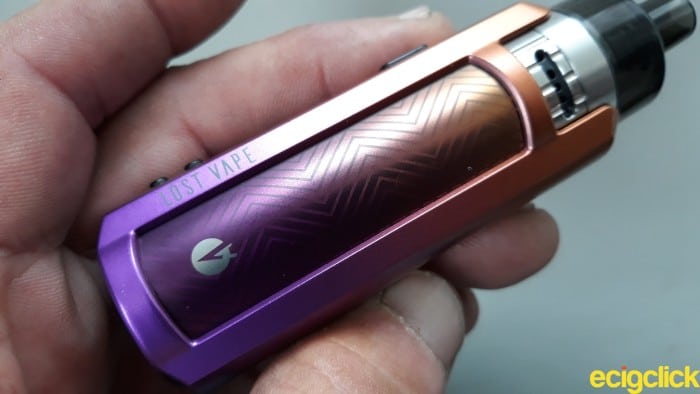
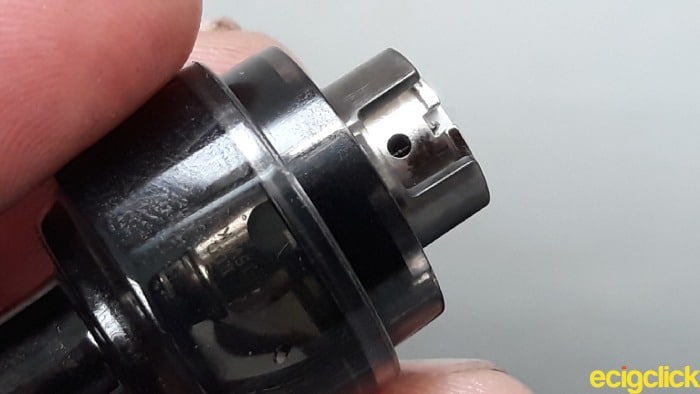
The stainless steel “H” frame gives the battery section a very solid feel.
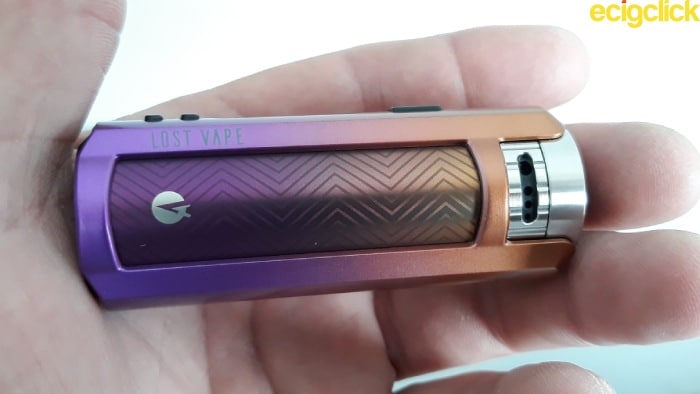
Contouring ensures no sharp edges and the spray coated multi coloured finish looks fantastic.
It’s not the scheme I would personally pick but it does demonstrate some pretty funky colour blending of purple at the base, fading to orange across the top.
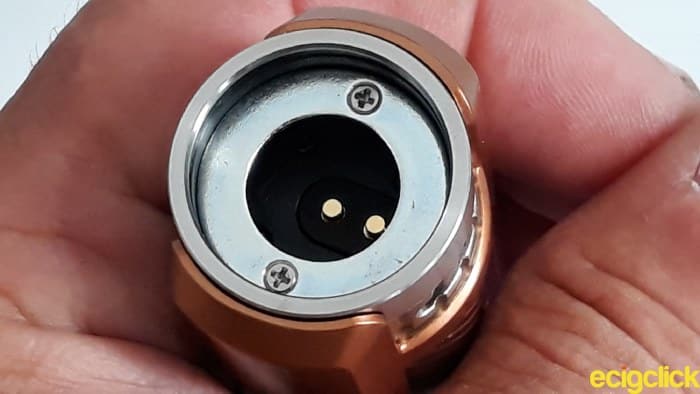
The two gold plated coil contacts inside the top of the battery are spring loaded and just above these is the 360 degree magnetic contact that Lost Vape describes as “Ultra sensitive”.
..A bit like my teeth these days!
Lost Vape Ursa Mini Airflow Adjustability
Strip knurling has been applied to the airflow control ring which also incorporates a stopper.
This means that whatever is altered on one side will be reflected on the other to give a well balance inhale.
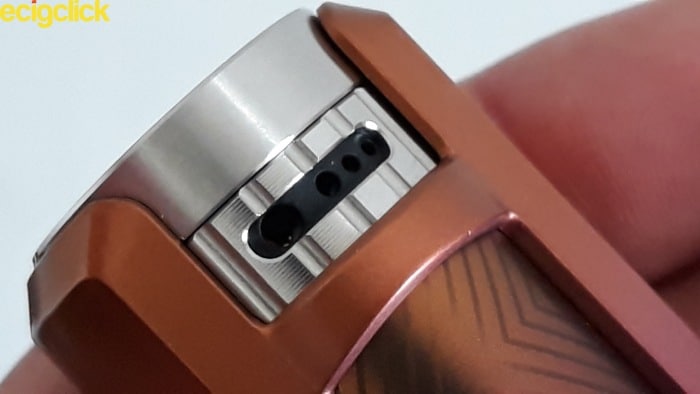
How’s the adjustability?
Turning it fully to the left will give maximum airflow. Closing off the largest pinhole should result in a semi restrictive lung vape while reducing to the single smallest slot will suit the mouth to lung vaper.
The tolerances are pretty good in all honesty – silky smooth movement.
How that holds up around the presence of e juice we’ll find out a bit later.
Lost Vape Ursa Mini – USB Type C and Functionality
Why must manufacturers insist on placing the USB port on the underside of devices?
The Lost Vape Ursa Mini Pod Kit is screaming out to be stood in a vertical position, and not only between vaping but when charging too.
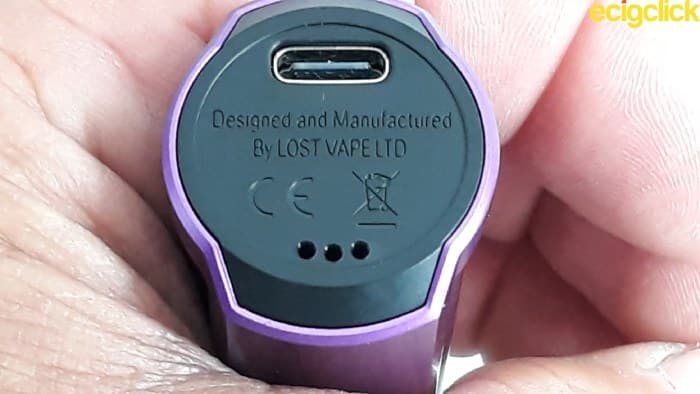
There’s no reason why it couldn’t have appeared beneath the menu buttons.
Still – we do get more than adequate venting here. Something that’s not always present with integrated batteries.
Screen and Button Functionality
The fire and menu buttons are raised from the main body.
The menu buttons are significantly quieter than the fire button.
This is where I found a slight design flaw.
The fire button is situated a little bit low for my liking. This means the thumb needs to bend at something of an awkward angle to fire successfully.
It also means some the the screen estate becomes obscured during use.

Please keep in mind I’m being subjective here. It may not be an issue for those devoid of big clumsy thumbs or fat fingers like me lol!
It’s no doubt the most direct route for circuit connectivity to the integrated battery.
Lost Vape Ursa Mini – Quick Start Guide
To operate the Lost Vape Ursa Mini Pod Kit carry out the following button sequences.
- Press the fire button five times to turn the device on or off
- Hold the fire and the + button together to lock or unlock the device
- Hold the fire and the – button together (3 secs) to reset the puff counter
- Press the + or – buttons to adjust wattage up or down
It’s still possible to vape while the device is in lock mode.
The display will time out after twenty seconds of inactivity.
A single press of the + or – button will increase/decrease wattage settings between 5 – 20W in 0.1 increments. After 20W the increments increase by 0.5W
Lost Vape Ursa Mini Safety Features
The Quest chipset includes the following safety features.
- “Low battery”. When this message is displayed the device needs recharging
- “Check atomizer”. If no coil is installed or resistance is above 5ohm
- “Short circuit”. If the resistance of the coil is below 0.2ohm this message appears once the fire button is pressed
- “Too Hot”. If the temperature of the board reaches more than 75 deg C this prompt will appear on screen. Once the temperature drops below 60 Deg C the device can be safely used again
- “Over 10s”. After 10 seconds of continuous inhale this message appears and the device temporarily stops functioning
Lost Vape Ursa Mini Pod Kit – Pod Section
As far as recent pods go, the Ursa Pod is relatively small with its 3ml e juice capacity.
From top to toe (or base) it measure 37.3mm with a circumference of 23.6mm.
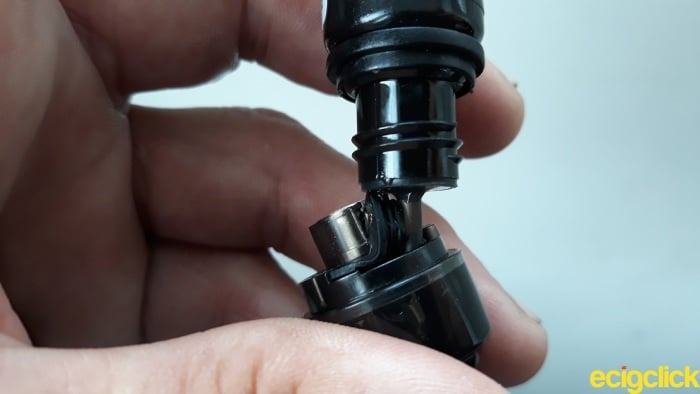
The six small magnets on the underside appear to be placed in a haphazard fashion but they make a very strong connection with the battery section.
It doesn’t matter how you snap the pod into position either thanks to the 360 degree magnetic ring inside the battery.
I had to resort to using a pin (once again) when prising the silicone stopper open.
Remember this is subjective and won’t be an issue for everyone. It’s opening measures 6mm and definitely better suited to 10ml bottle nozzles.
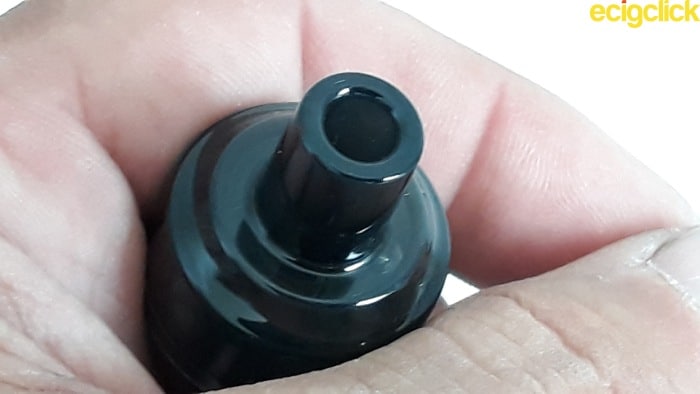
The PCTG pod is tinted but not overly so. You’ll still be able to see all of the remaining e juice without removing it which is always a huge plus in my opinion.
The moulded mouthpiece opening measures 5.4mm and with a height of 11.4mm is a little taller than I prefer. It kind of ruins the shapely look of this otherwise dinky little pod.
How To Install A Coil and Fill the Pod
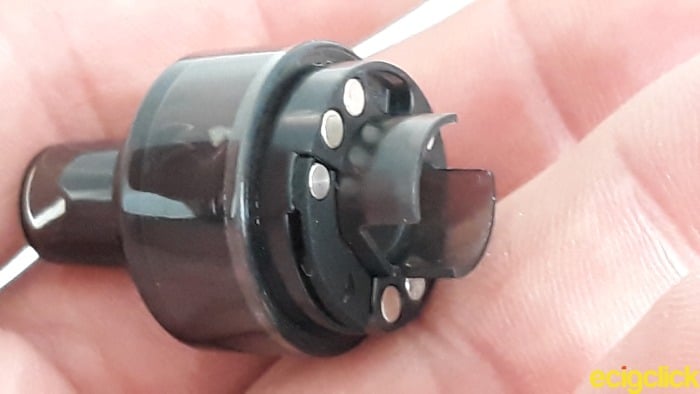
The coils are of the plug and play variety making them very easy to install. However, there is something to keep in mind..
The air intake ports positioned on either side of the coil must remain exposed. Lost Vape has made this fool proof in that they will only fit one way.
- Remove the pod from the battery section
- Push the coil up into the pod ensuring a firm seal
Next, to fill the pod.
- Lift the silicone tab on the stopper
- Position the bottle nozzle inside the pod and gently fill with e liquid until full
- Push the silicone tab back down into the pod ensuring a tight seal
- Snap the pod back into the battery section
- Leave the e liquid to soak into the cotton for five minutes before vaping
How Does the Lost Vape Ursa Mini Pod Kit Perform?
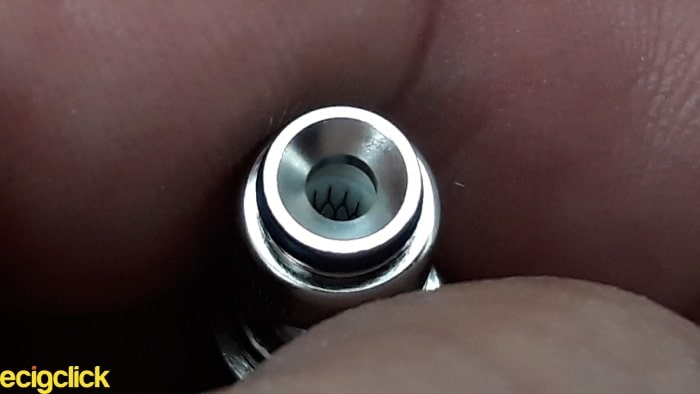
UB Lite L6 1.0ohm Mesh Coil (10-15W)
In case you were wondering, all four of the UB Lite coils are mesh. I wasn’t able to find out their material but I’d hazard a guess they’re Kanthal A1.
As expected for a standard MTL coil the bore is very narrow and heavily restricted.
For the purposes of testing I used Riot Squad Fresh Blueberry, a 50VG/50PG blend – it’s a mix of freebase and nic salt.
Throughout the test period I vaped as 12.5W – between the lowest and highest recommended wattage parameters.
The firing and ramp up speed was very impressive and even at 12.5W a fair amount of power was pumping through the coil. So no issues with coil conductivity at all.
Because we’re dealing with a MTL coil the adjustable airflow was set to just a single pinhole slot either side.
However, this still only provided me with a relatively airy MTL vape and not as tight a draw as I’d like.
As a consequence it felt as though I was missing out on a more concentrated flavour experience. Don’t get me wrong, the sweetness of the blueberry was still present and instantly recognisable. It just seemed too saturated on the exhale.
The cooling agent also punched through but the wetness kept it to the tip of the tongue as opposed to experiencing an icy cold inhale/exhale.
What of the vapour production? Minimal, discreet and very much emulating the output of a traditional cigarette so no complaints there.
As for the draw itself – actually very smooth and turbulent free but with the faintest hint of a whistle during prolonged inhales.
Although not designed as a restrictive lung vape it was possible with the airflow wide open, the wet, saturated taste remained.
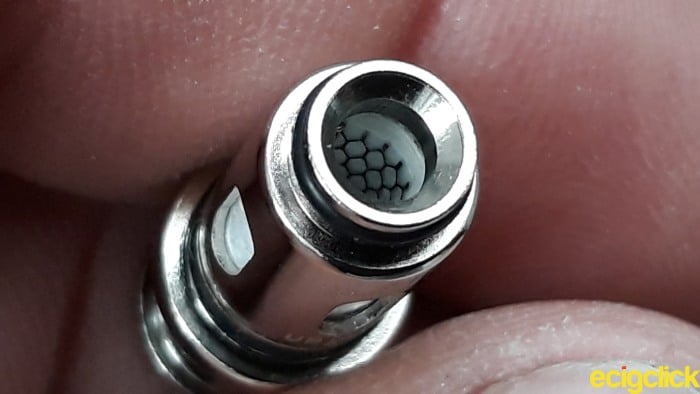
UB Lite L1 0.4ohm Mesh Coil (20-30W)
With this being a direct lung coil the bore is much wider and the mesh is spaced wider apart.
The airflow ports on the bottom are also significantly larger.
This time I used Wick Liquor Deja Voodoo, an 80VG/20PG juice ratio with freebase nicotine.
I set the power to 25W and with the airflow wide open. The first thing I noticed was the reduced speed of ramp up from the coil. It was no where near as feisty as its MTL counterpart.
Although this is a direct lung coil there’s still around 15-20% restriction making it a semi restrictive hitter by all accounts.
It also generated more noise than the 1.0ohm coil but the inhale was still very smooth and turbulent free. A little more warmth was also evident thanks to the increase in power.
As for flavour?
The saturated wetness from the previous coil had thankfully vanished. It made way for a much broader and consistent vape. Both coconut and sugar cane were present in equal measure with plenty of sweetness spilling from the exhale.
It was a balanced flavour experience where all sub notes combined and harmonised in the way the creators had intended.
Vapour production was OK. On par with many other pod kits in being quick to disperse and creating next to no fullness or impact on the throat.
Dialing down the airflow a few slots had a dampening effect to the flavour qualities. Some of that saturation returned which in all honesty I didn’t welcome.
Is it possible to MTL? Certainly not with the juice ratio I used! It caused a rapid build up of heat on the mouthpiece and there was just too much airflow present.
Worth a try, I guess..
Pros
- Lightweight and pocket friendly
- Ability to vape while the device is locked
- Clear, bright OLED screen
- Simplified menu options
- Fast firing and ramp up of 1.0ohm MTL mesh coil
- The Lost Vape Quest chip delivers the goods, consistently
Cons
- Both coils are prone to leaking at the base
- Unable to charge in a vertical position
- Fire button positioned too low (subjective)
- Not enough airflow restriction from the UB Lite L6 1.0ohm MTL coil (subjective)
- Type C fast charging is not very fast
Lost Vape Ursa Mini Pod Kit – Final Review Verdict
Please keep this in mind when switching from a DTL to MTL coil that the previous wattage is recalled.
Yes, the Quest chip will recognise the resistance of the new coil but won’t auto detect its optimal setting.
I wasn’t super impressed by the MTL coil. Why? I just felt it was delivering too much of a wet taste.
As a consequence it seemed to overload the taste buds after the exhale instead of throughout it. This made for something of an unbalanced distribution of flavour.
I’ll let you into a little secret. I found myself habitually RDL vaping this high resistance coil because the MTL option wasn’t working for me.
The internal 1500mAh battery lasted for 15 hours while using the MTL coil during which time I vaped around 6ml of E juice. The puff counter registered 385 hits.
For optimal performance I would suggest juice ratios of between 50VG/50PG – 60VG/40PG.
Although not appearing as “fire button happy” as the MTL coil, the DL alternative produced superior, broader flavour qualities. On a consistent level too which added to my belief that the Quest chipset was kicking out a steady, constant voltage.
The coil responded admirably to the thicker juice ratio thrown at it. I have to say I preferred it over the 1.0ohm MTL coil.
I managed a decent 8 hours with the coil and guzzled 8ml of E juice. The puff counter registered 183 hits.
Consider juice ratios of 70VG/30PG – 80VG/20PG with this coil.
Assault On the Battery
I wasn’t impressed with the Type C charging. Having to wait an hour and a half when usually an hour gets the job done doesn’t cut it for me. That was a disappointment.
During charging the battery icon runs up five bars before turning solid. Shortly afterwards the screen times out.
It is possible to vape during the charge period but the device does need to be on.
The battery has to be left on its side when charging so I would recommend removing the pod to ensure all wicking ports remain saturated. This is why I’ve never understood why USB ports are bottom mounted.
One of the more impressive aspects comes from the Quest chip itself. There was no degradation or loss of flavour even as the battery failed.
It’s usually quite noticeable but not in this case.
Because the clout of every inhale was the same, it caught me out on a number of occasions.
..So remember to keep an eye on that battery strength indicator lol!
Everyday Vape People
During everyday use, the Lost Vape Ursa Mini Pod kit is certainly very portable and pocket friendly. It feels lightweight and relatively comfortable in the hand.
The “H” framework does bloat it a little and the position of the fire button soon became an annoyance to me.
The screen responded fantastically in direct sunlight and the display itself is pin sharp. I had no problem reading it and the menu and fire buttons were super responsive to my demands.
The adjustable airflow was also up to scratch because not a drop of condensate gathered around the airflow slots. I found it to be one of the better features of the device for reliability.
..Not that I could find anything unreliable about the device. It’s just a shame the curse of the leaky coils made an unwelcome return.
But then Lost Vape are in very good company when it comes to pods leaking.
The Lost Vape Ursa Mini Pod kit is a worthy companion for any new vaper thanks to its ease of use and straight forward screen functionality.
Filling is easy and the battery will last a good few days with the MTL coil they’ll inevitably want to use.
There are better pod kits out there for flavour and MTL replication in all honesty but that doesn’t make it any less desirable for the newbie taking their very first vaping steps.
Is this a pod kit you’re looking to buy or already using?
Please let me know your thoughts and opinions in the comments below!

 The Limits?")


I’m not getting the right flavour with te 1.02ohom coil. Is there any pod kit which has 2coils for freebase and saltnic? Which is better than ursa mini? I want the flavour.