Looking To Start In The World Of Rebuildables?
So you want to get into RDA’s (Rebuildable Dripping Atomizers) or as they commonly known “Drippers”?
Then you’ve come to the right place.
We thought it was about time that we put together a dedicated guide explaining how to get to grips with all things RDA related so you can go out and start enjoying a dripping experience right away!
What is an RDA | Dripper?
Unlike a typical tank an RDA has a very small well and this allows you to drip a small amount of juice but the beauty is that you can quickly vape that juice off and swap to an entirely different flavour if you wish.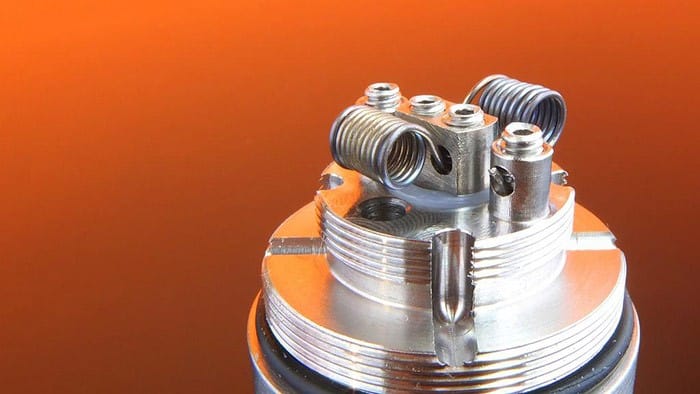 Photo by Pauly Meatballs
RDA’s are designed to maximise flavour and many will also produce massive amounts of clouds so you can enjoy some real room fogging.
RDA’s require you to make and install your own coils. There is a huge amount of variety out there in terms of which dripper to buy but some focus more on what is referred to as “flavour chasing” an example is the Wotofo Recurve Dual RDA.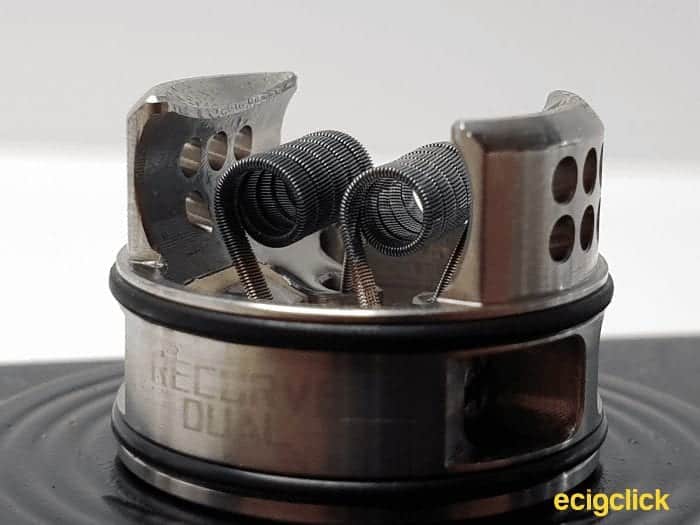
Others are specifically designed to be “cloud chasers” which maximise vapour, an example of this is the Hellvape Dead Rabbit V3 RDA. In addition there are also RDA’s which are more flexible and strike an excellent balance such as the Hellvape Hellbeast RDA.
Some RDA’s require dual coil builds meaning you must create two identical coils while others may only require a single coil or lastly offer you a choice between using both types of build.
This means that some RDA’s can be easier to build than others. It is important when you first start to pick a dripper that can be built with a single coil because building duals does require additional knowledge and a little experience.
Which RDA Should I Choose?
This will depend heavily on your preference.
We do have our picks which you can see here:
Would you like tons of clouds or are you buying an RDA purely to get the most flavoursome vape experience possible?
When making a decision I would advise that you look consider the following:
- Something with a very accessible deck – there are some RDA’s that are very compact and fiddly which makes them very awkward for newcomers and you certainly don’t want to be put off by your first purchase.
- Another consideration is the size of the screws and post holes which makes them easier to build if you have large hands or poor eyesight.
- The next thing to look at is the type of screws used because while Philips screws are straightforward to work with they can often by sharp and end up cutting the wire. Grub screws are definitely better because they don’t tend to cut wire when tightening but many will require an Allen Key which is typically included with most RDA’s that have these screws (but not always).
Three Post, Four Post and “Velocity Style” Two Post RDA’s
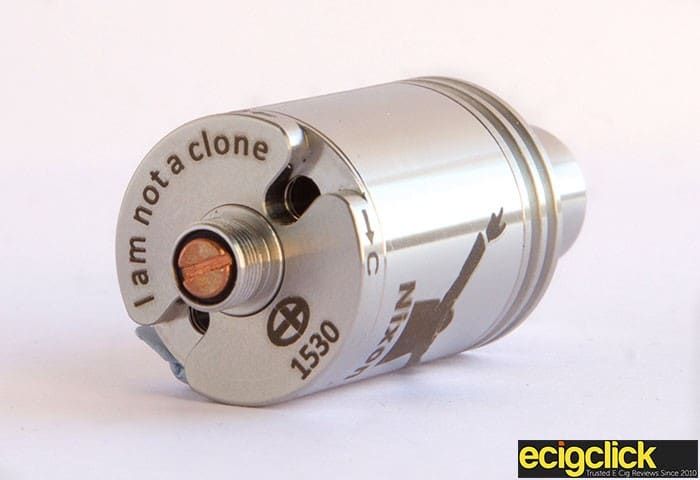
The traditional RDA type has three posts, a positive centre post and two negatives. Such as the CLT V3 mini pictured below.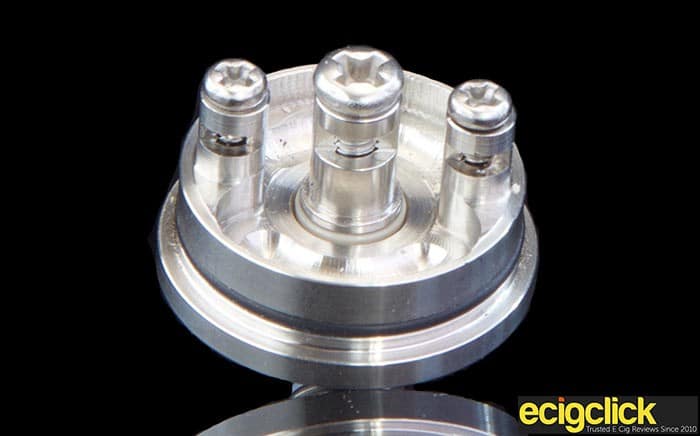
While it is straightforward to work with when making a single coil it can be more awkward when working with dual coils because one leg of each coil has to fit thought the centre post hole.
A four post RDA which is often referred to as a split centre post features two holes which makes it far easier to work with when building dual coils. It also allows for a little more room and is more convenient for users. The Mutation X V4 has a 4 post setup as pictured below.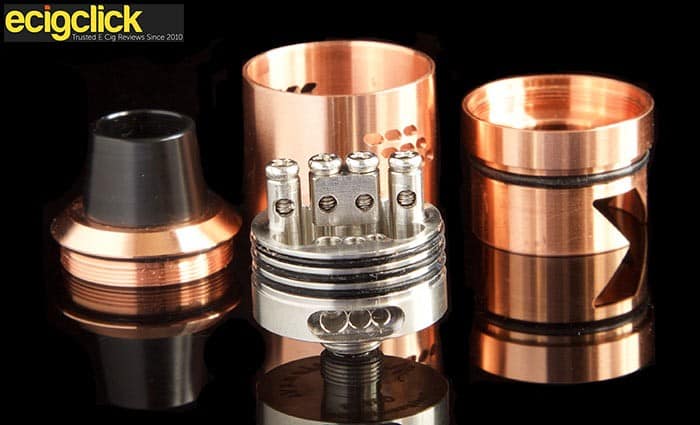
In recent months the Velocity RDA was released featuring an innovative two post design.
If you have the slightest inclination to make dual coil builds and you are a newcomer then this style is recommended since it is an absolute breeze to work with.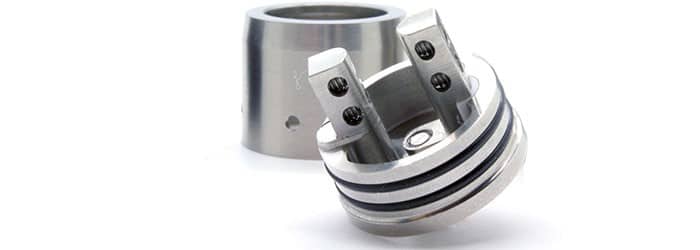
Always make sure it is a “Velocity style” design because there are still RDA’s on the market classed as two post that feature a positive and a negative post for single coil builds.
RDA Airflow Types
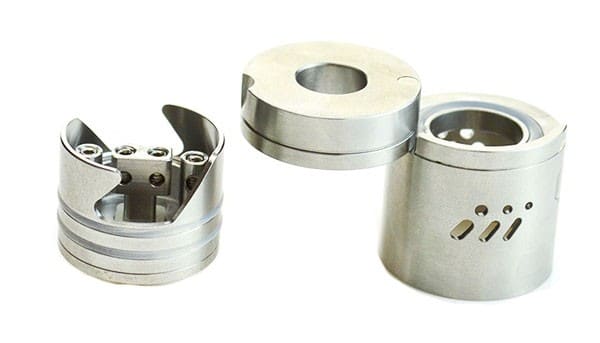
Cyclops
 Depending on the design of the RDA the airflow can vary greatly. Traditional RDA’s have one or two horizontal airflow slots commonly referred to as Cyclops style. With this kind of airflow the air comes in from the side and strikes the coil horizontally.
You do need to take care because if you overfill or tilt the RDA too much the juice will come pouring out of the airflow slots. Be mindful to vape off the juice before putting it in your pocket.
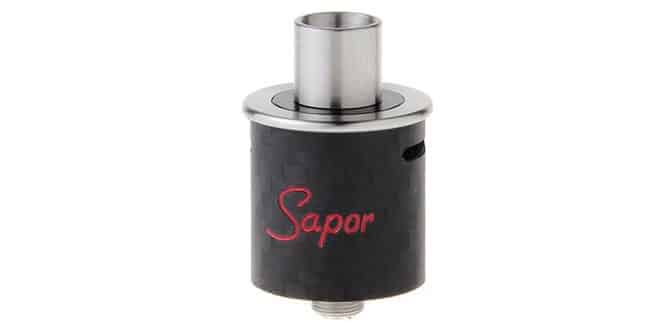
Bottom
 With some RDA’s the air comes from the base and rises up directly underneath the coil are these are referred to as bottom airflow.
If you are someone who loves flavour then this is the type of RDA you should be looking at because in my experience this typically gives you a highly flavoursome vape.
The negative of this design is that you do need to take care not to overfill because the juice will go straight down through the bottom air holes.
The best method is to lightly paint your wicks with juice so as not to cause any spillage.
Once again this RDA is only suitable to put in your pocket if you have vaped off all the juice.
Top
 This kind of airflow was initially designed to be a solution to leaking. Typically the airflow comes in horizontally at the top of the RDA before heading down to directly hit the top of the coil/coils.
Other variants feature the air holes in the top cap and simply aim the airflow downward. Flavour is usually very good but not quite on par with bottom airflow. The only way this type of RDA will ever leak is if you tip it upside down. With the air holes being right at the top you can get away with overfilling if you are a particularly messy dripper.
Behind
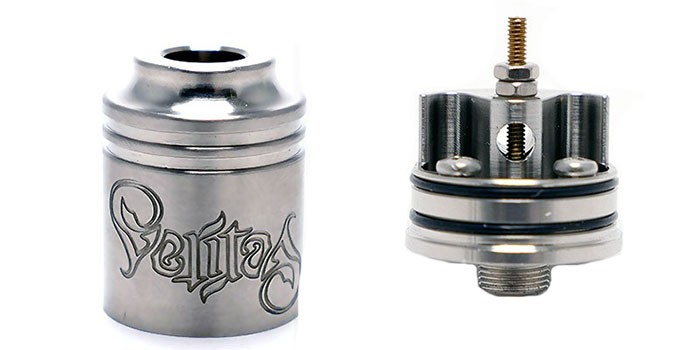 With this airflow type the air typically comes from the bottom before being directed horizontally to hit the coil from behind. There aren’t a huge amount of RDA’s that feature this airflow type but the Hellfire Raptor and Veritas are two that do.
Flavour with this airflow type is extremely good but these RDA’s are usually very expensive for an authentic product.
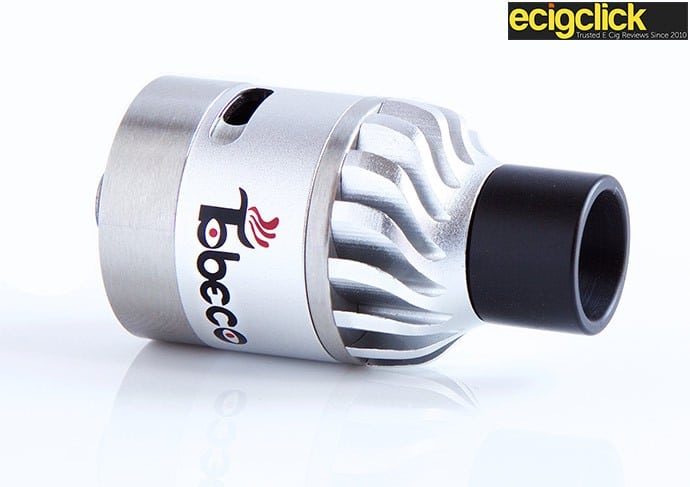
Vortex
 Vortex style airflow has only been around for a short while and it typically follows the rules of one of the above types the difference is that it is designed in such a way that the air swirls around the inside of the chamber.
The Swirlfish V2 and Vaporshark’s Vortice are two examples of RDA’s that have this kind of airflow.
What Do I Need To start?
So you’ve got a brand new RDA and you want to get started? Well there are some things you will need before you start building.
Ohms meter
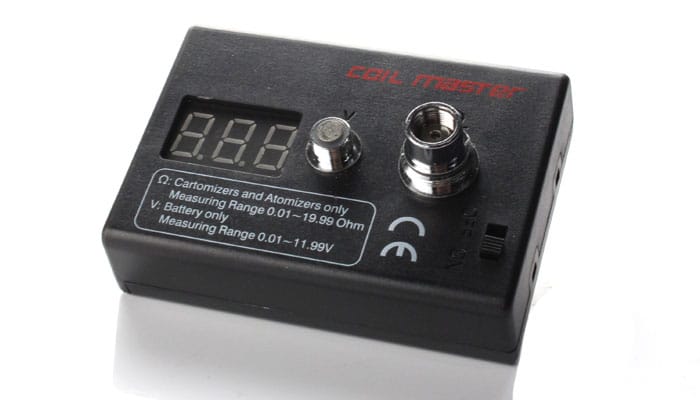 This is essential so you can build safely and get accurate readings for your builds.
You can of course use your mod to provide resistance readings but bear in mind with some you won’t get a 100% accurate reading.
Ideally a mod is no substitute for a proper Ohms Meter especially if you plan to use your RDA on a mechanical mod. Thankfully they can be picked up for anywhere between £5-15.
Amazon UK – Pick Up A Good Ohm Meter Here
USA – Shop Here
Precision Screwdrivers
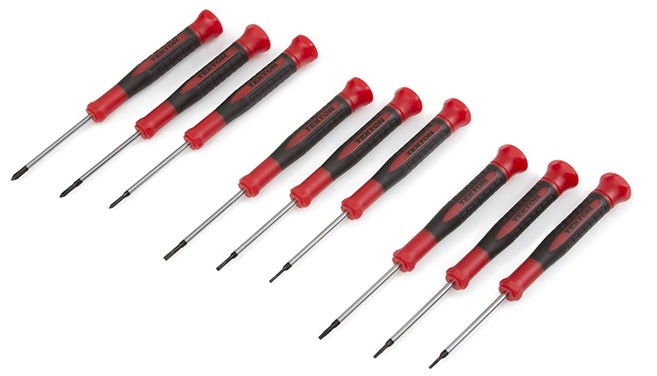 While you often do get a small screwdriver with many RDA’s it typically isn’t that good so quality screwdrivers are absolutely essential.
All RDA’s are different and come with various sized screws, some are Philips heads, others flat tops. Some are even hex screws and require an Allen key to tighten.
A good set of screwdrivers will also typically have the diameter of them marked on the box. This is helpful and for the most part you will be wrapping your coils round a 2mm or 3mm screwdriver.
Plus you can pick these up cheap in shops like Poundland and Home Bargains or from the following links below.
Amazon UK – Lots of options here
Wicking Materials
We have tested a lot of different wicking materials. The most common of course is cotton.
You can read our full vape cotton test here where we have done a side by side comparison of the most popular wicking brands.
Cellucotton or Rayon
This is a synthetic material and it is used by some people in tanks but it’s not too common anymore. While it is easy to work with and manipulate to the desired shape it does tend to result in a much rougher vape.
Many people have an allergic reaction to this type of wicking so I wouldn’t advise you to use of it. I have personally never had any issue with it, maybe it doesn’t affect me greatly but I definitely think it is much harsher on the throat when vaping.
Even though this stuff is as cheap as chips it isn’t something you should be using in an RDA.
Organic Cotton
You can buy organic cotton from Boots and other retailers but it can be awkward to shape and roll. I don’t personally think the flavour is as good as Japanese cotton.
Whatever you do don’t use bleached cotton pads because they contain chemicals.
Japanese Cotton
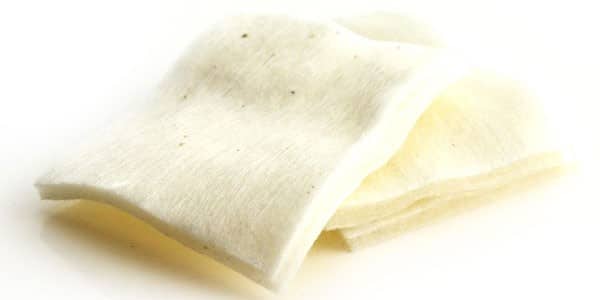 This is one of the best wicking materials you can get because Japanese cotton is naturally grown cotton. You can tell it’s authentic because it has tiny little black seeds in it.
These may pop on occasion in your dripper but it’s absolutely nothing to worry about. This cotton also has a grain in the pads that you can clearly see. It wicks better and more consistently than other materials. It’s easy to work with, cut and roll.
It is also known as Muji Cotton due to the large supplier of this cotton, Muji Online. Another variant you may come across is Goh Ken Do. You will always get very good flavour with Japanese Cotton and it wicks extremely well.
Cotton Bacon
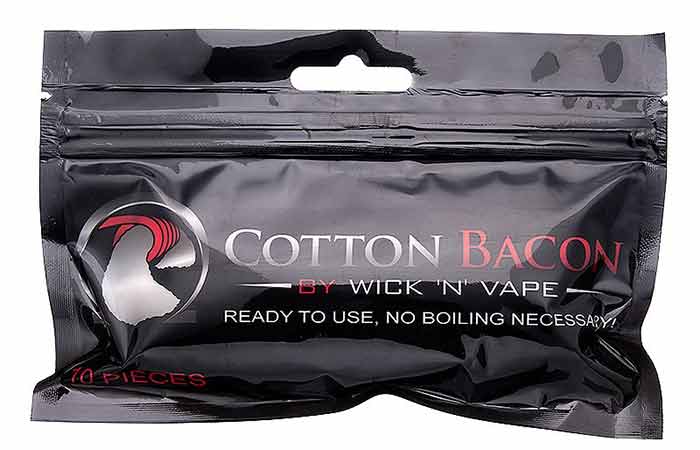 Cotton Bacon was specifically formulated for vaping. It is completely free of pesticides, dyes and foreign matter.
This type of material wicks even better than Japanese Cotton in my opinion and is very easy to work with and roll.
Flavour when using Cotton Bacon is an improvement on Japanese Cotton which is something of an achievement.
Mesh
Stainless Steel Mesh is often used in Genesis Style atomizers but it can be used in a few RDA’s but typically only those that use vertical coils. The Origen dripper is an RDA that can work extremely well with mesh.
Working with mesh is not a straight forward process and requires you to oxidise it before use or you will have nothing but shorts. The reward for working with this material is the exceptional flavour it will give you. However it is not something a beginner should ever attempt and is only mentioned here for completeness.
Coil Building Tools
Pliers or Ceramic Tweezers
Nothing fancy but they help when you need a delicate touch when getting your cotton wick into place. Also they help to grab the end of cotton when pulling it through the centre of tiny coils.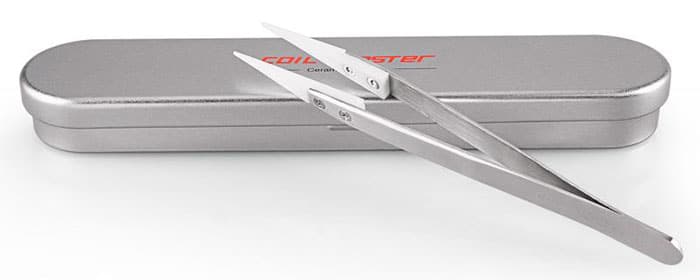
Using pliers helps you grab the coil when you need to get it into a better position inside the RDA chamber. They are also invaluable when pinching your coil wraps (more on that later) together.
Ceramic tweezers are useful if you want to pinch the coil and hit the fire button on your mod at the same time essentially allowing you to keep the coil wraps held in place while they get heated and fuse together.
You can’t do this with pliers because being metal you would end up shorting out your coil.
If using pliers you would press the fire button on your mod to heat the coil. Release the fire button then press together with pliers. Then repeat this process until everything is neat and fused together.
Great selection of ceramic tweezers on Amazon
Scissors, Wire Cutters Or Nail Clippers
These are tools needed for cutting wire and wicking material. Nail clippers can work quite well because their shape means you can get really close to the posts on the deck.
Or Consider The Coilmaster DIY V2 Kit – All You Need To Get Going In One Package
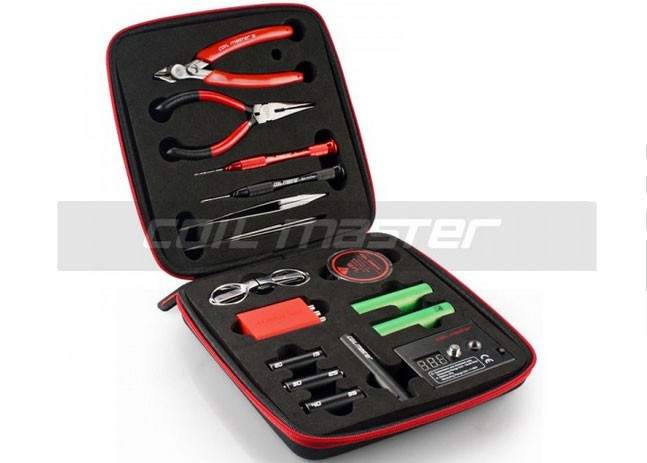 If budget allows you can also look to buy a kit that includes all the tools you need for building.
The most popular is the Coilmaster DIY V3 kit, a review of that can be seen here. Highly recommended.
You can also read our beginners coil building guide with the CoilMaster V3 kit here.
Types of Wire For Building Coils
The wire you need is called A1 Kanthal Resistance Wire. This can be purchased from companies such as The Crazy Wire Company.
There are other wire types out there such as:
- Ni200 (nickel)
- Titanium (both can be purchased on Amazon)
These are for use with temperature control mods and require additional knowledge so until you have increased your experience you should only ever be working with Kanthal.
Wire comes in various thickness and diameters.
Generally for starting you would want either a sample pack or just a 10m spool of your chosen wire. Wire is often labelled as its size in diameter and also its gauge which is displayed as AWG. I use 24 AWG (0.5mm), 26 AWG (0.4mm) and 28 AWG (0.32mm).
Regarding wire thickness:
The higher the number the thinner the wire is.
I know that sounds completely backwards but that is a given fact.
So 32 AWG is probably the thinnest wire you could potentially use and 24 AWG is the thickest you would be likely to use. Thicker wire is easier to work with and far less likely to snap.
This part is seriously important and it is important to be safe.
The thickness of any wire determines its resistance. However don’t assume that thicker wire has a higher resistance than thin because it doesn’t.
You need to think of it like pipes. Large pipes allow the flow of more water and small pipes allow less water.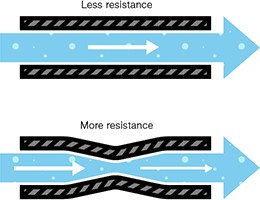
So thick wire while highly durable will actually produce far lower resistance and thin wire will produce high resistance.
Resistance of wire is also determined by the radius of the wire when wrapped as a coil and also the overall length of wire that has been used.
Thick wire works best for low resistance builds with a small number of wraps. If you wrap thick wire more times you can get higher resistances but the problem is that it requires for more power to heat up the coils so for higher resistance builds thinner wire types are more suitable.
No doubt you have also read about Clapton Coils and Twisted Wire. While both have their place, it is not advised that you meddle with these until you have built up some experience with your dripper.
Learn more about resistances here
How Do You Know What Resistance You Require?
Well this isn’t too hard to work out really. Your device will have a minimum resistance it is capable of firing but these days that is often a very low resistance. To begin with you want to be aiming for a resistance of 1.0-1.5ohm while you are still learning.
Sub Ohm
Now it’s time for the scary Sub Ohm stuff which has become far less scary these days considering the amount of Sub Ohm tanks that are on the market.
There are of course dangers to Sub Ohm vaping but they are easily avoidable dangers and most of them are to do with mechanical mods anyway. If you are using your RDA on a box mod that has numerous safety features then you have less to worry about.
Sub Ohm is any resistance beneath 1.0 ohms.
I don’t know who originally coined the phrase but it’s easier than writing “Beneath 1.0 ohms” all the time. Sub Ohm came about because mechanical mod users wanted to get higher wattage from their batteries and this isn’t possible without reducing the resistance of the coil itself. This lead to people buying thicker wire with less resistance.
Keep in mind that any Sub Ohm build will drain your battery considerable faster than a higher resistance one.
Getting back to what resistance you want; bear in mind you can make a higher resistance coil with thick wire, the only real difference is you would need to have far more wraps in your coil and it would be inefficient to use thick wire to do that since thin wire would require less wraps.
In my own case I typically build a 0.8 ohms coil with 26 AWG (0.4mm). It is sub ohm but I find it is just the right balance between heat, vapour production and flavour.
There is absolutely no reason in the world why you would have to do a sub ohm build. You can if you really want to but don’t let anyone pressure you into doing something that you are not comfortable with.
Coil Building:
This is an art in itself and there is absolutely no point in me trying to explain it in a wall of text.
It takes time, effort and experience so when first starting out consult YouTube for guides.
Practice making them first until you get some good results.
The first coil you ever make will likely be terrible. Don’t let it put you off. It is easy you just need to practice. My first ever coil looked like a piece of barbed wire but surprisingly I managed to get a vape out of it before going back and doing it again and again.
These days coiling is easier because there are loads of tools you can buy to help you with one of the main brands for this being Coil Master.
When checking out YouTube Rip Trippers has some good coil building and wrapping tutorials. He is something of an excitable character and a showman these days but in his early videos when he was much calmer he does an excellent job at explaining coil making.
In fact it was how I learnt.
Grimm Green is another American reviewer that covers coil making so do watch as much as possible before attempting to build.
Grimm Green Video – Coil Building For Beginners
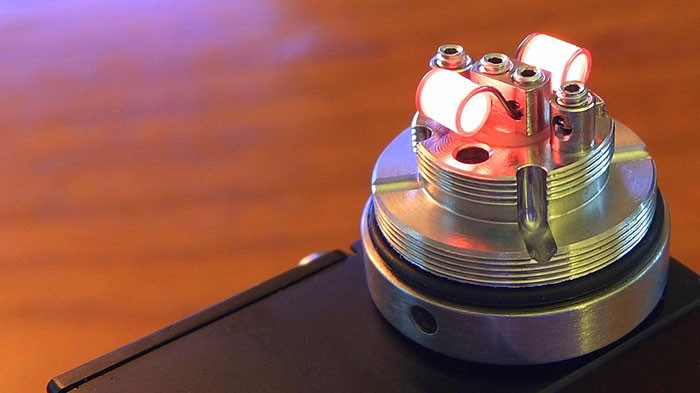
You want your coil heating evenly from the inside and it should light up in an outward direction. If it’s heating up from the edges then something is wrong.
Occasionally you will see dark spots where your coil is not heating up as well. Take a small flat head screwdriver and lightly strum the coil. Make sure not to be heating the coil when doing this or you will get a short. A little strumming should make the coil glow evenly.
Resistance will change when heating the coil and squeezing it together this is completely normal. The only thing that is a concern is if the resistance is jumping around wildly after you have finished tweaking your coil.
This typically means that you likely have not tightened up the screws sufficiently and you have a loose wire.
Be 100% certain that no part of the coil apart from the coil legs are touching the posts.
Make sure that the wire is not touching the metal of the deck and also make sure to have sufficient clearance for your coils when fitting the top cap. Not being mindful of this can lead to a short.
Just a little thing when fitting a coil and having screwed it in. Always trim the wire that pokes out of the post holes as close as you can. If you get one piece longer sticking out and it starts glowing that is perfect example of a hot leg and you want to avoid this.
Coils and RDA Airflow
In most RDA’s you want the coil as close to the air hole as possible. Positioning the coil further away from the air hole will give you more throat hit but it will also lead to less flavour.
As a rule of thumb the more airflow you have hitting your coils the more vapour you will get but by the same token huge airflow can lead to massive loss of flavour.
Wicking your coils
Rolling a wick is very straightforward and as long as it passes through your coil with a little friction you shouldn’t run into many problems. Always trim the wick level with the deck and push the cotton down lightly into the well.
Don’t put your cotton under the coil because you’ll end up tasting cotton. Also don’t over-stuff the well since you only need sufficient cotton to draw the juice to the coil.
A recent technique has been developed for wicking called the Scottish Roll method and it does a much better job of retaining the juice so you can vape in your RDA for longer.
Have a watch on YouTube because it is well worth checking out.
Dry Hits
It goes without saying that an RDA only has a small well and can only hold so much juice. At some point the wicking is going to start to dry out and the cotton may burn and leave a very harsh and unpleasant taste in your mouth for a short while if you actually vape it.
This will happen to you especially while you are new to dripping but over time as you become familiar with your RDA you will start to know how much you can vape on it before you have to drip again.
Final Advice
I advise you make only one coil to begin with. Don’t try to be clever and make a dual coil because it’s not needed and there are some very important rules and yet more safety stuff to know before you make those.
In a nutshell though just for thoroughness if you make two coils exactly the same at 1.0 ohms resistance and install them into the RDA the actual resistance is halved.
- So a dual coil would be 0.5 ohms.
- If you build a Tri Coil which is only possible in some RDA’s the resistance would be 1/3. So three coils of identical 0.9ohm resistance would have a final resistance of 0.3ohm which is very low.
- Quad coils result in ¼ of the resistance of the individual coils so four 0.8ohm coils would have a final resistance of 0.2ohm which is extremely low.
You will make mistakes when building just a single coil the first time but don’t be disheartened because it’s not something you will learn overnight.
When you take into account all the other factors such as airflow, wicking, coil types dripping is quite a learning process but it does lead to an exceptional vape if you put the time in.
We hope this beginners guide to RDA’s has been useful to you and has given you a bit of extra confidence about getting into drippers.
Dripping is a fantastic vape experience so don’t be afraid to give it a go because there is literally tons of information out there to help guide you on your way.


Someone gave me a dripper vape nd everytime I go to hit it says protection atomizer short nd this is my first dripper vape how would I put coils in nd all that can someone help me
check the insulators and if there are contacts touching where it isn’t supposed to be..
to those new wanting to jump to mechanical google exploding ecig. its people who dont know electrical or ohms law, never made a coil and jump right in get it to ‘produce vapor’ and think cool i did it, then they go out and it shorts out basically exloding the batteries and painting a bad name for all of the vape products. a regular mod will give the same power with safety measures to start and get good at building. i am an expert with electrnics and even made a few mistakes while building when i started 7 years ago. now i use both and can say it takes time to master building even with electrical and technology backround
I just got a Vgod RDA and I’m not sure what Wattage to put it on. What would you recommend?
hi i want to start vaping. because i want to quit smoking. is PULSE X SQUONK ok for begginers? since its a regulated vape i think
Hey Jonathan,
It’s not a setup I would personally recommend for those brand new to vaping.
But.. That all depends on you and what kind of a learning curve you are prepared to take. You will need to know about building coils, battery safety, ohms law and so on. It’s not necessarily something you will take out of the box, fill and vape.
Have you actually used any e cigarette/vape device before?
Thank you! I learned a lot from reading this article, and its comments. I have a RDA being shipped right now and it’s my first one. I was using a stick v8 baby, and loved it but wanted something more. I feel like I can have a little confidence now in building coils, and starting out with my new RDA.
Hi Jonny,
Thanks for taking the time to read this. I have been vaping for years off and on , but find I always get bored of it due to lack of flavor. I tried diy ejuice, over 50 different flavors of premium etc.. and finally fogured out that my vaping style and tank is the problem.
I enjoy MTL vaping and enjoy using small mini mods , which are all vapresso minis, target mini. Revenger mini, tarot nano. So I decided to buy some Rta tanks and did some research and decided vandy vape berserker mini and doggystyle would be worth a shot for flavor.
I bought a dogystyle clone called sjmy, as it was all I could find, and reviewers claimed it was just as good as the original. So , my dilemma : I am super paranoid about putting the coil on the deck properly, shortages happening while vaping because of coil legs becoming loose , thinking of the what if’s that could happen. Like if i put the chamber over the coil, and i accidently touch the coil on the chamber , then put it on without realizing it is touching the base or chamber.
I normally vape at 1.8 ohms which makes me want to use 28 gauge thinn wire to make these coils, and feel like the wire is so easy to move being this thin. Berserker mini normally uses 2.5 mm dia coils and doggystyle normally should use 2.0 mm dia coils, not to mention these tanks are very tiny. After hours of practice, i am just too scared to fire my mod with the coil on to start the hot spot removing process.
I fear that my mod would accidently somehow fail and not prevent a short circuit. Am I being super rediculous? I have watched so many tutorials, but none really have built up enough confidence for me to give it a shot. I wish I could enjoy vaping at lower resistances so I could use thicker gauge wire but even at 1.2 ohms in my kanger subtank mini and nautilis mini i found it was not pleasant , 8-10 watts is my favorite with 1.8 ohm coils on the nautilis mini.
I tried sub ohming and hated it, i want to mimic smoking but with lots of flavor. The nautilis mini just doesnt cut it, i only taste strong fruit flavors with it. I want to taste my custards, bakeries, complex recipes and mild berry flavors like strawberry and raspberry, which taste too dull in the nautilis mini.
Hi Tara,
I personally think you are worrying a little too much but that’s a good thing 🙂 If you are using a regulated mod then the chances are it will register a short if there is an issue with the build. Do you have an Ohm meter that you can use to test your coil build? Even though regulated mods will read your build it may give you piece of mind to use a dedicated meter.
Michelle recently reviewed the Berserker MTL RTA, if you have any specific questions about that then you can leave a comment on that post.
Neil also wrote this guide to coil building for beginners that you mat find useful.
Yes , I have an ohm meter, but it doesn’ seem to work properly, it keeps saying 0.02 resistance, if the tank is in there or not. People told me it is pointless to buy a cheap ohm meter after i bought this cheap ohm meter, $8 on fastech. Lol. Do you have suggestions on a proper one?
haha… Doesn’t sound too good! Coilmaster have made a few as have Geekvape. I’d suggest trying your build on one of your regulated mods though as you are building higher resistances you will be OK. As you know as soon as you put it on the mod it will tell you the resistance. If there is an issue it won’t let you fire it up.
Let me know how you get on!
Thanks for the informative article. Can I put an RDA on a vape pen such as the Rokin Nitro? If so, what are some of the specifications such as size, ohm, etc?
Hi Faye,
No it wouldn’t work, that is a vaporizer I believe with temp settings?
You’d be best off paring an RDA with a variable wattage box mod.
Wow there is so much around vaping I don’t know yet. This article came up when I googled “vaping for beginners”. This doesn’t sound like something for beginners at all. Although it’s interesting I think I’ll stick to my Vapour2 ecig for now. Don’t think I’d be able to follow all those steps when I’m even struggling with building IKEA furniture…
Hey Jess.. Yeah not for those new to vaping for sure.. You can check out our other vape guides for more info tailored towards beginners.
I feel you with the IKEA furniture though 🙂
thanks for the info. even i’ve used rda for 2 years now, this page gives me more new information. keep up the good job guys 🙂
Excellent article! I’ve been building and dripping since I started vaping (2009) I wish this was around when I started it would have saved me some of the pit falls I’m going to pass the link on to my group on FB as we have new members who are just starting out with RDA’s and RDTA’s I will recommend they read this cheers.
Good guide and great content. Keep going.
I enjoyed the article but will be sticking with pre built coils for the ease of use plus I can’t knock a nail into a piece of wood never mind try to build my own RDA ?
very helpfull article, everyone must read it before take in his hand a rda.
Very good description. I learned a lot reading this. I have been dripping for over a year and still I learned something.