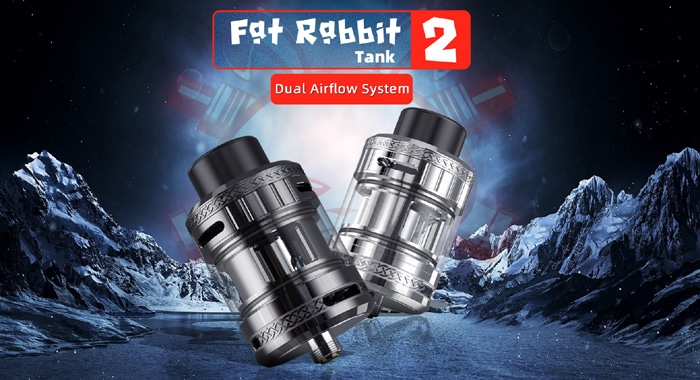
After almost 3 years since the original, here is the Hellvape Fat Rabbit 2 Sub Ohm Tank!
Previous versions came in single or dual coil RTA / Stock Coil sub ohm tank variants.

The Fat Rabbit 2 Tank is an elegant-looking sub-ohm tank that has been aimed at intermediate and experienced DTL (Direct To Lung) vapers!
Hellvape have been around the vape scene since 2016, their main offices are based in China. They really need no other introduction to the wider vaping community because of the popularity of their products!
The company are most famously known for their Dead Rabbit range of RDA’s / RTA’s and tanks. They have also released a few regulated mod devices like the Arez 120 and the recently released Hell200 Kit.
What to Expect From the Hellvape Fat Rabbit 2 Tank?
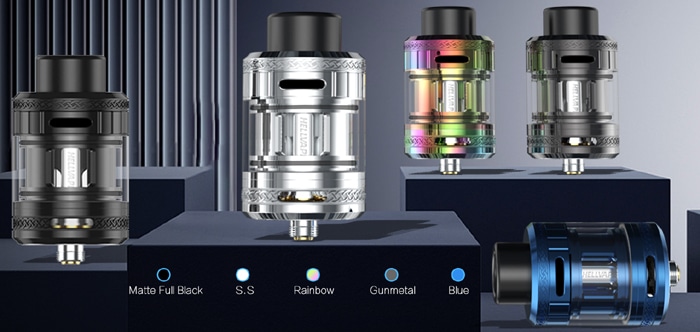
Hellvape has released this tank in 5 colours versions – Matte Full Black, Rainbow, SS (Stainless Steel), Gunmetal and Blue.
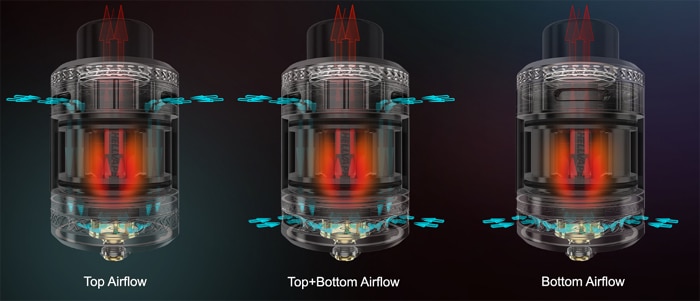
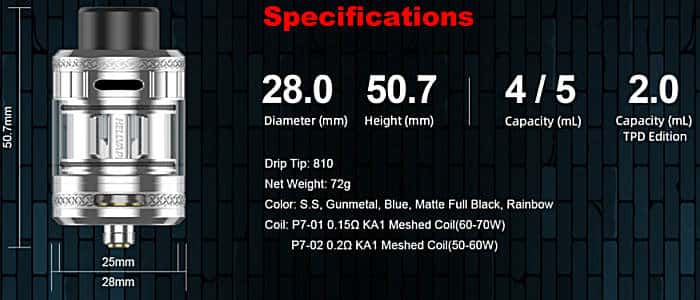
The Hellvape Fat Rabbit 2 Tank has a base diameter of 25mm and has top and bottom adjustable airflow. You can use the top, bottom or both airflow inlets to suit your vaping style.
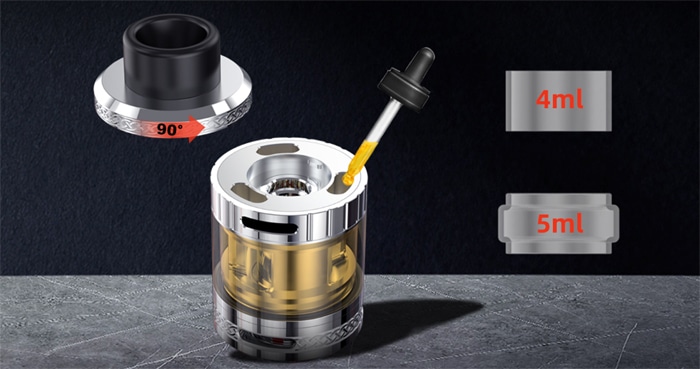
The TPD version has a liquid capacity of 2ml, while the standard version is 4ml and comes with a spare 5ml bubble glass.
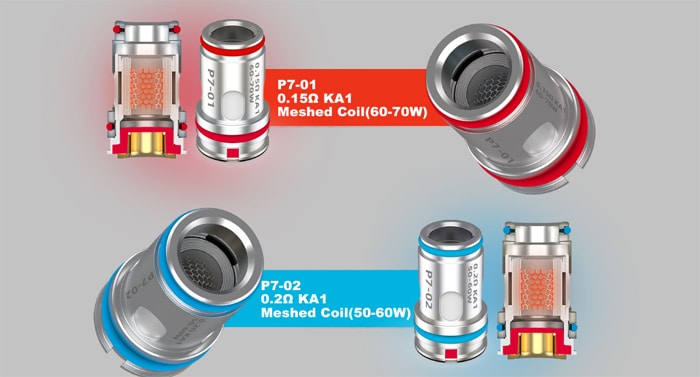
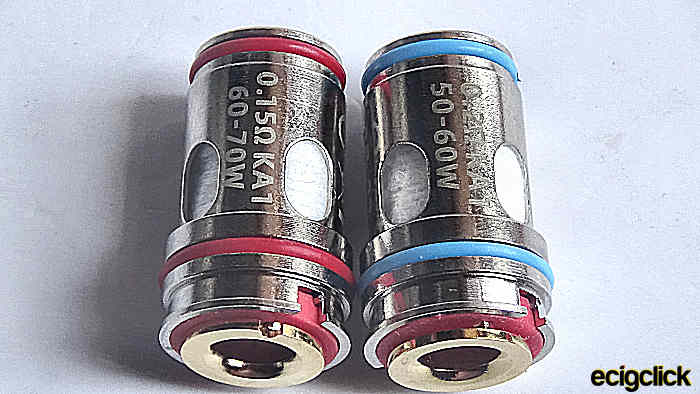
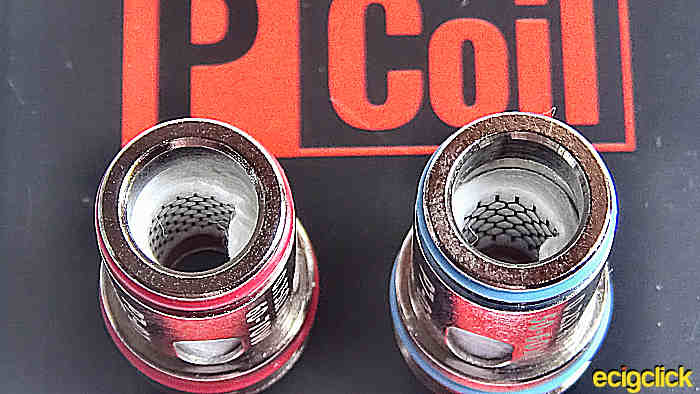
This version is not as compatible as the previous version and there are only 2 coil resistances to choose from – P7-01 0.15ohm Mesh Kanthal and the P7-02 0.2ohm Mesh Kanthal. You get both of these in the kit.
My sample of the Fat Rabbit 2 tank was sent directly to me for review by Hellvape!
As always my thoughts and views are my own, after a considerable testing period.
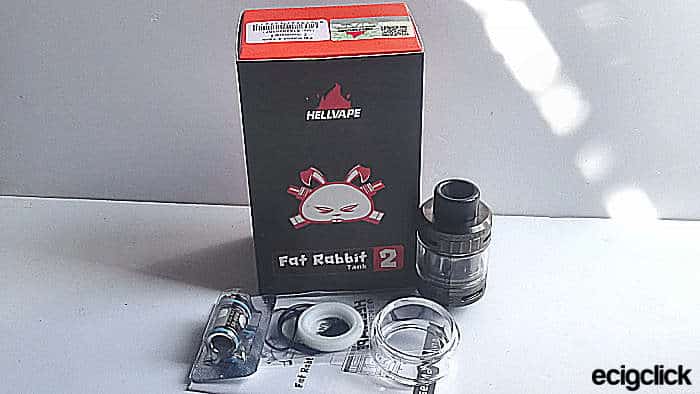
Kit Contents
- Fat Rabbit 2 Sub Ohm Tank
- 1×0.2ohm KA1 coil
- 1×0.15ohm KA1 coil (pre-installed)
- 5ml bubble glass (standard version only)
- Spares
- User Manual
Specifications
- Size: 25×50.7mm at base
- Capacity: 4ml (Standard) / 5ml (Bubble glass) / 2ml (TPD)
- Weight: 72g
- ¼ Turn cap top fill
- Top and bottom adjustable airflow
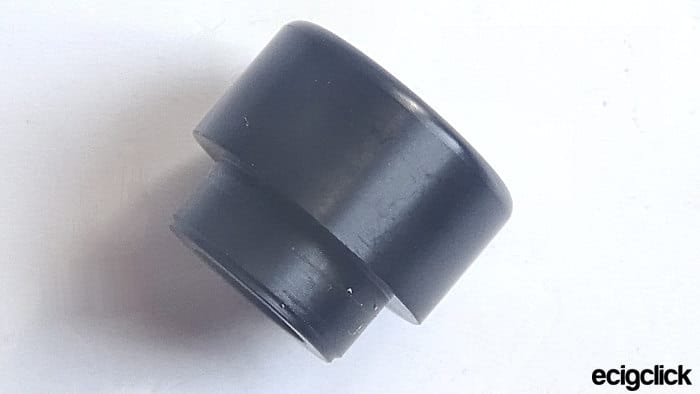
- 810 drip tip
- Coil type: P Coils
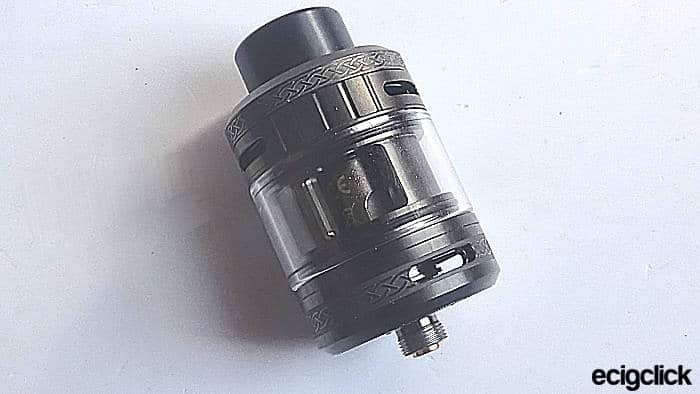
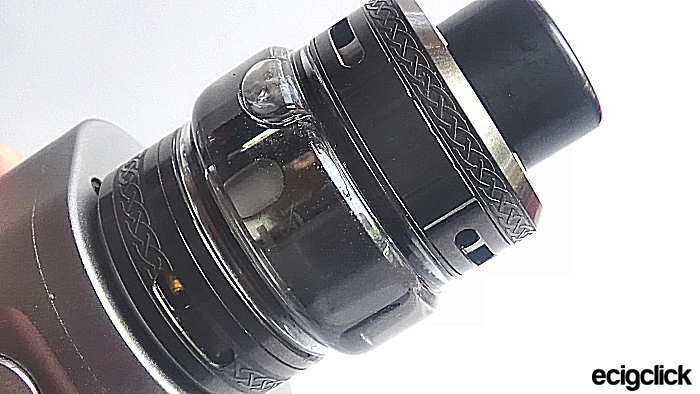
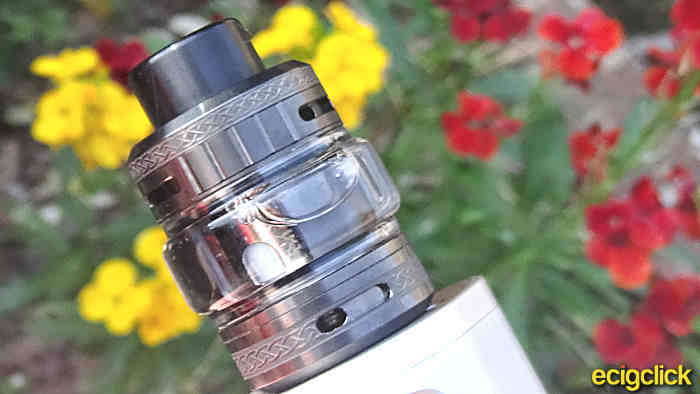
Hellvape Fat Rabbit 2 Tank Design and Build Quality
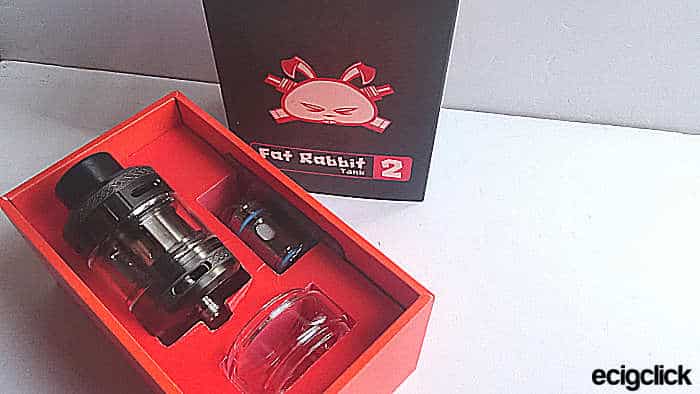
As you can see by my photos, Hellvape have sent me the standard Gunmetal version of this tank, its well presented in a card box with a foam tray.
The kit includes a Bubble Glass and spare O-rings plus 2 stock coils for you to try!
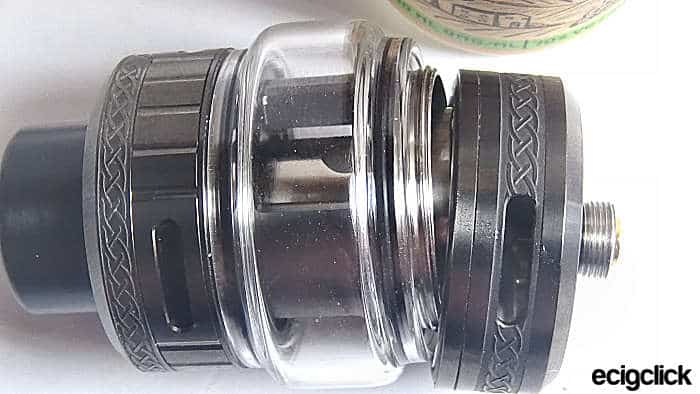
The construction materials of this tank are 304 Stainless Steel, Pyrex Glass and Delrin.
This version dismantles into 7 parts if you include the removable triple-slotted top airflow ring and the coil.
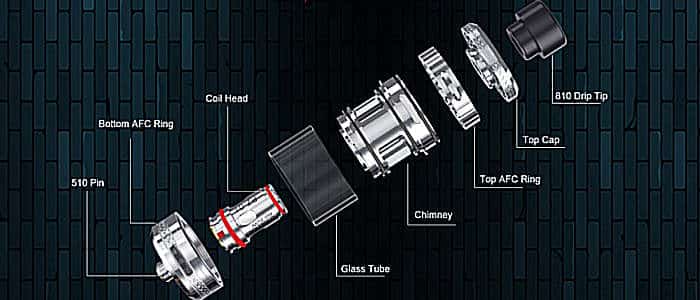
Tank Assembly
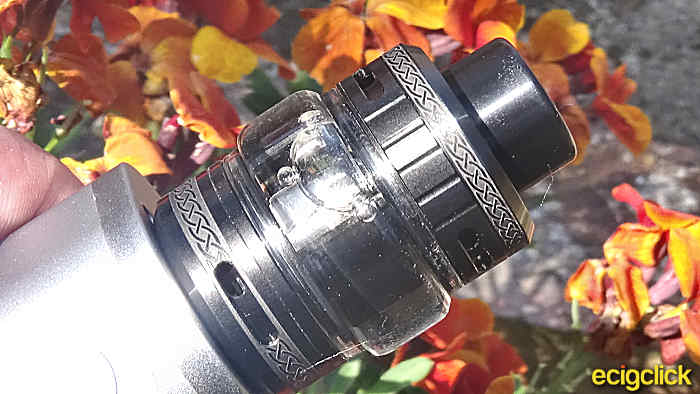
Starting at the top – this tank has a Delrin 810 mouthpiece!
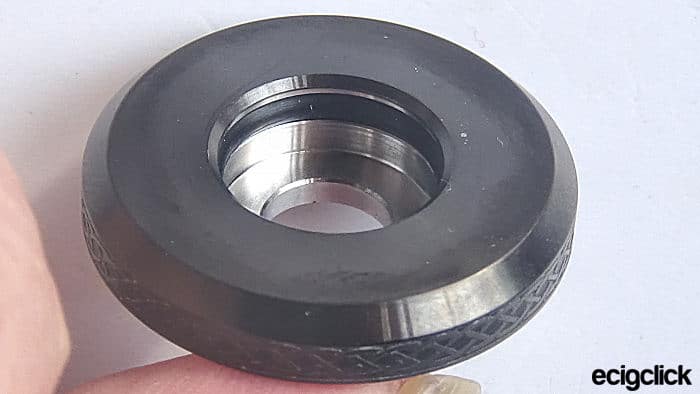
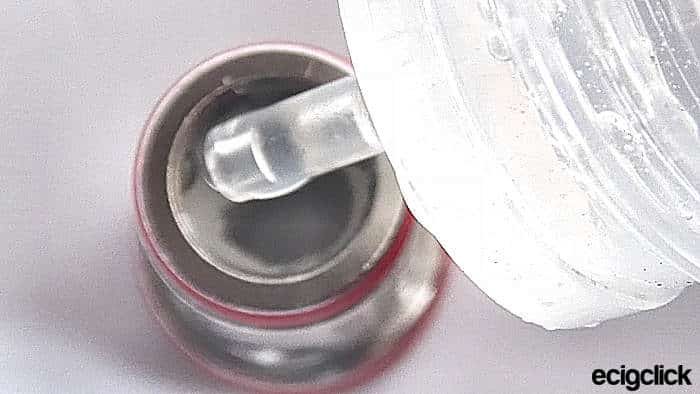
The removable stainless steel fill cap is a ¼ turn, which makes the tank very easy to fill. The cap has an embedded O-ring to stabilise the mouthpiece.
As you can see this also has a replaceable silicone rubber stopper for leak prevention!
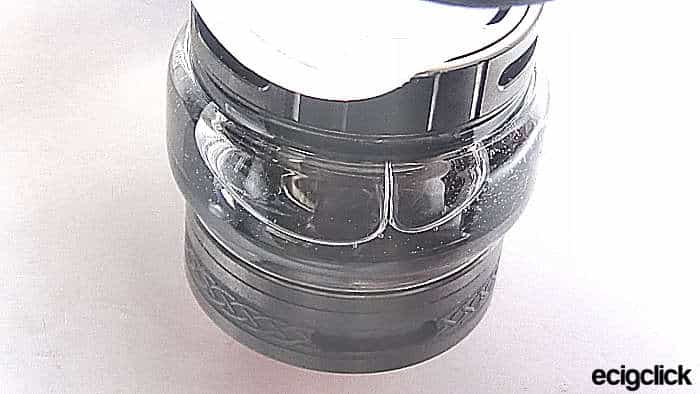
The main tank section has 3 slots for liquid filling.
At the top is one of the triple airflow adjustment rings.
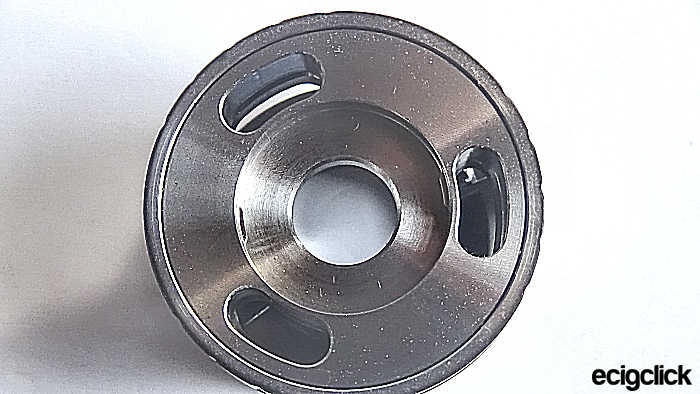
Another airflow adjuster is at the bottom of the tank, plus this section houses the coil.

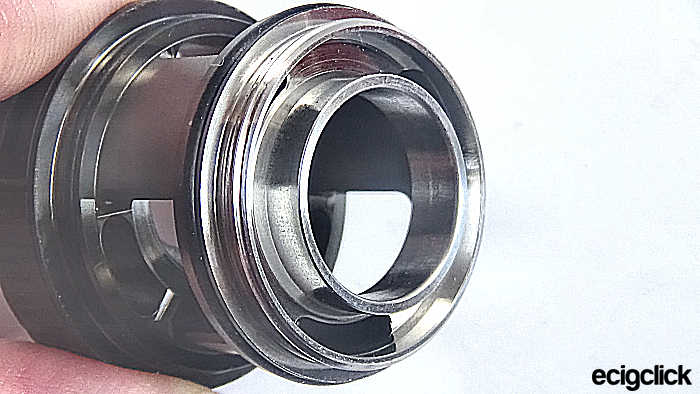
To replace the coil unscrew the 510 connection cup.
When the base connection cup is removed you are also able to replace the Pyrex glass tank.
My standard version of the tank came with a 4ml straight glass installed and a spare 5ml Bubble Glass in the box!
Coils
The Fat Rabbit 2 tank is compatible with the Hellvape P Coils and comes with 2 KA1 coils to get you started.
- P7-0.1, 0.15Ω, 60-70W (installed)
- P7-02, 0.2Ω 50-60W

Airflow
Rather like the original, the Fat Rabbit RTA version 2 has two adjustable airflow rings at the top and bottom of the tank. This allows the user to tailor the airflow to suit their personal restricted taste.
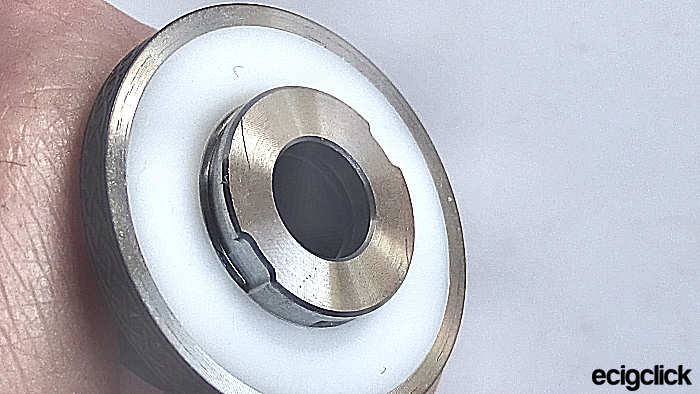
510 Base Connection
On the bottom of the base, you will see that Hellvape have printed their logo, the name of the tank along with CE and Recycle icons.
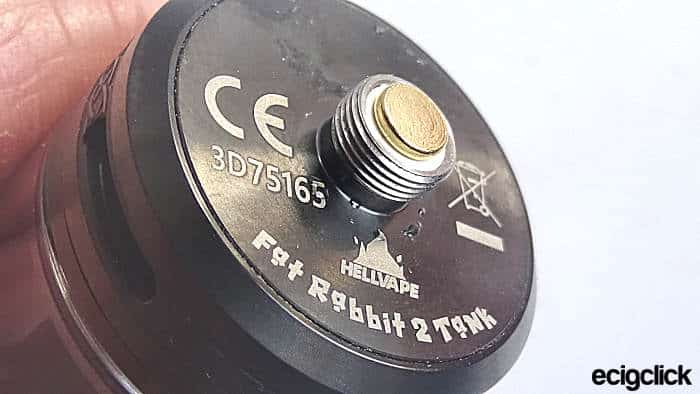
The 510 connection threading has been turned well and while the gold-plated pin is not adjustable it does protrude a little!
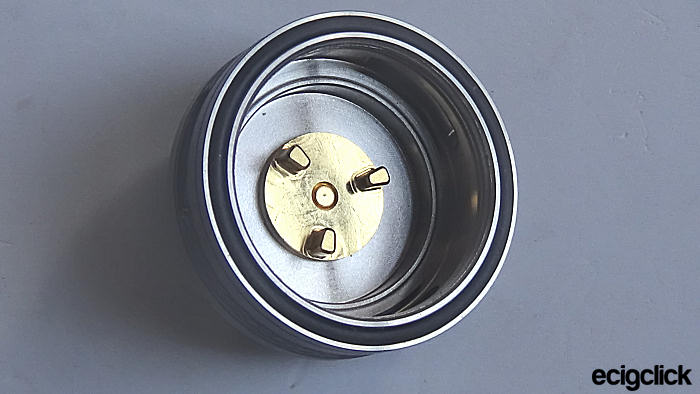
On the inside of the cup, it has 3 gold plated projections these are for coil connection.
Looking at the outside of the base it has a bottom adjustable airflow ring, with a patterned knurling to help grip the ring!
Hellvape Fat Rabbit 2 Tank Quick Start Guide
- Choose one of the coils that came with the tank.
- Unscrew the tank base
- Prime your coil with a few drops of e-liquid on all visible cotton
- Push the coil into the tank and replace the tank base
- Unscrew the top cap and fill the Hellvape Fat Rabbit 2 tank with your e-liquid
- Replace the cap and screw the tank onto a suitable device. Leave the mod and tank alone for around 3 minutes so the coil can soak up more e-liquid – Enjoy!
How Does the Hellvape Fat Rabbit 2 Tank Perform?
My own personal preference is to shy away from stock coil tanks, not because they don’t produce enough vapour or aren’t flavourful enough, I prefer to use RDA’s and RTA’s as I find them cheaper in the long run.
It’s simply easier for me to create my own coils and change the cotton every day rather than spend a fortune on stock coil heads!
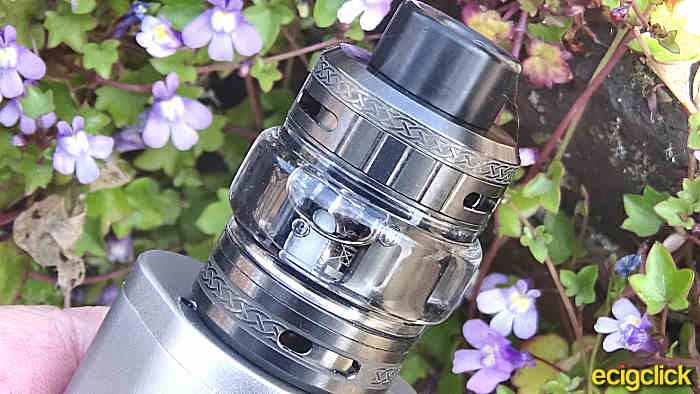
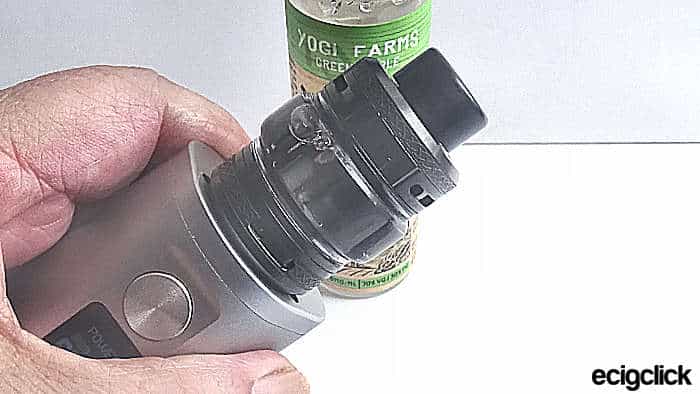
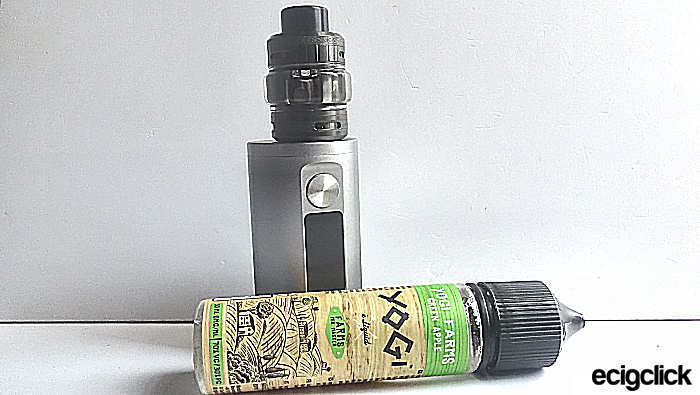
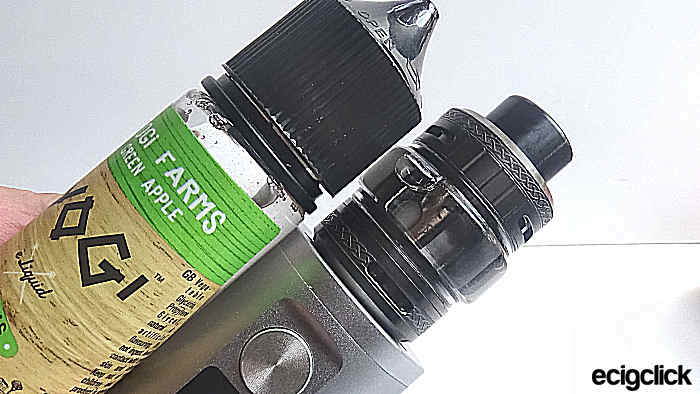
Today I’m going to use the installed 0.15Ω P coil and my liquid choice this time is Yogi Green Apple, I will also be using this tank on my Hellvape Hell200 for this review.
The Hellvape Fat Rabbit 2 Tank In Use
I have been using the 0.15Ω P coil in the Fat Rabbit 2 tank – the coil is rated at 60 to 70W!
Starting at 30W for a few toots to bed the coil in, I took the wattage to 60W in 0.5W increments. This gave me a more than adequate warm vape.
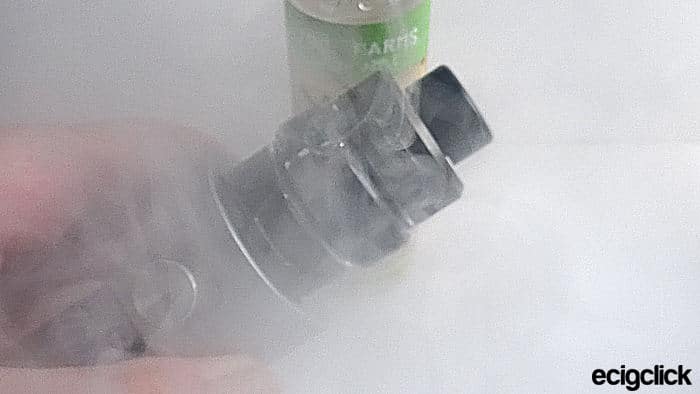
With this wattage it produced a fairly good flavour and a more than decent vapour production!
The 0.15Ω coil has lasted me 4 days so far with my style of vape. I am now on day 5 and while the vape production is still good I have had to drop back from 60 to 50W as the flavour seemed to dull a bit.
This tells me that in a couple of days I will need to change the stock coil head for a new one!

Airflow
Let’s talk about the airflow… Like the original chubby bunny I found the Fat Rabbit 2 tank airflow a delight to use, I was able to adjust both airflow rings to suit my style.
Whilst not quite as silent of a draw as the original RTA, the Fat Rabbit 2 tank didn’t provoke my ire – there’s nothing worse in my opinion than a noisy airflow or a gurgling tank lol.
The draw I have been getting from this tank is smooth no matter where I set the airflow, although I will admit when turned the airflow right down for a MTL style draw, the draw is a wee bit turbulent!
I have tested the tank on several different devices including my Geekvape L200 Classic, the Aspire Rhea, as well as my Ehpro Cold Steel 100, I even popped it on the OXVA Velocity which was a bit strange as it felt a little too top-heavy to me!
The tank handles chain vaping well but does become a little warm after a while, but being made of stainless steel the tank does cool fairly quickly.
Pros
- Great quality and design
- Fairly good flavour
- Adequate vapour production
- Delightful airflow control
Cons
I have no concerns with this tank, but if I had to give a negative – the tank does become quite warm while chain vaping!
Final Review Verdict
A good-looking tank that in my opinion fits right in with the Hellvape range of bunnies!
As I said I’m not one for stock coil tanks but I’d highly recommend the Fat Rabbit 2 Tank, as it functions just as they say in the promotional bumph.
This tank was created for those intermediate to experienced vapers, I wouldn’t recommend going straight from a disposable directly to this one!
Truth be told, I didn’t find anything wrong with this tank and I would’ve bought it to use as an out-and-about tank, but having many tanks already I can’t see myself replacing it should the unthinkable happen!
Have you purchased the Hellvape Fat Rabbit 2 Sub Ohm Tank?
Do you have any questions about it? Let us know in the comments below!


