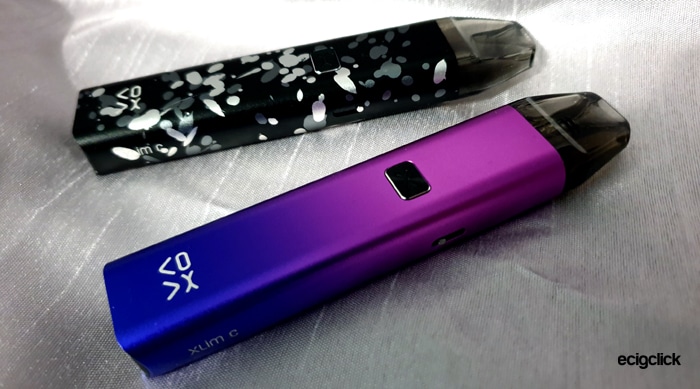
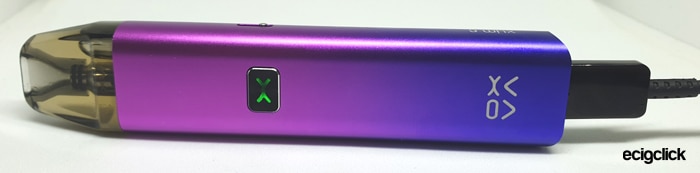
Here we have the OXVA Xlim C pod kit – the latest addition to the excellent Xlim range.
The existing kits in this range are the Xlim (V1 & V2), Xlim SE and Xlim SQ.

Yes – I will come clean – I am a massive fan of all the Xlim kits (apart from the V1!) so far and use them daily. I have not found a pod kit which kicks out the flavour like the Xlims with the 0.8ohm V2 pod and the pod life is amazing.
Will the replaceable coil version be as good? I have everything crossed that it will be!
What To Expect From The OXVA Xlim C?
So what does the OXVA Xlim C bring to the table that is different?
Well for me it is something huge – replaceable coils! Yay!
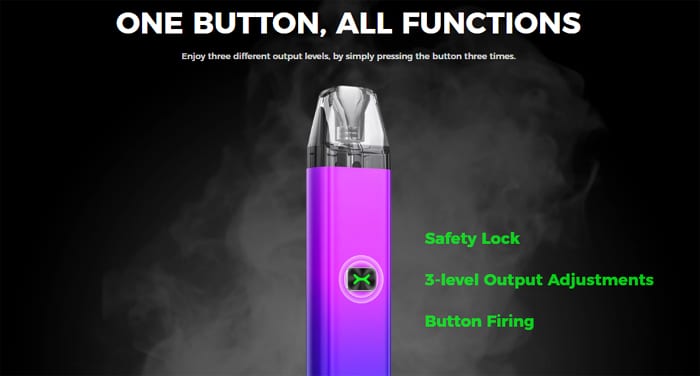
This is not the only update – there are now 3 power levels to choose from and this version has a fire button (not present on the SE & SQ versions). I do like to have a fire button as a back up in case the auto draw system should fail.
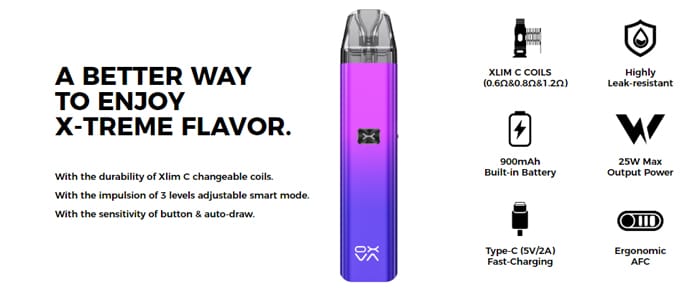
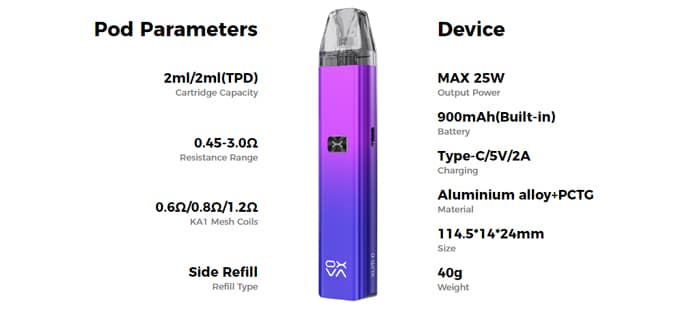
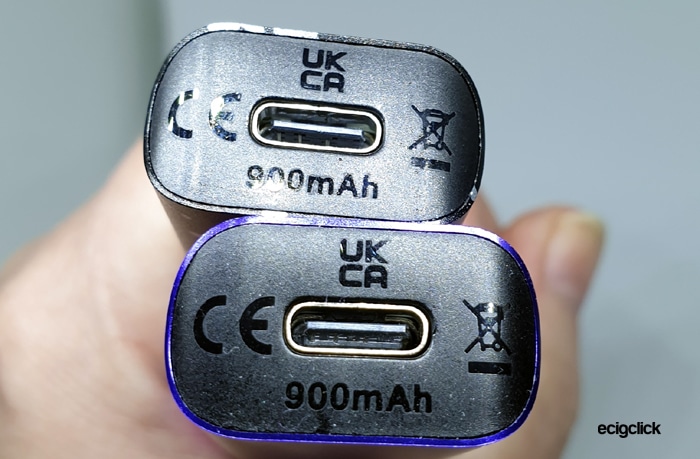
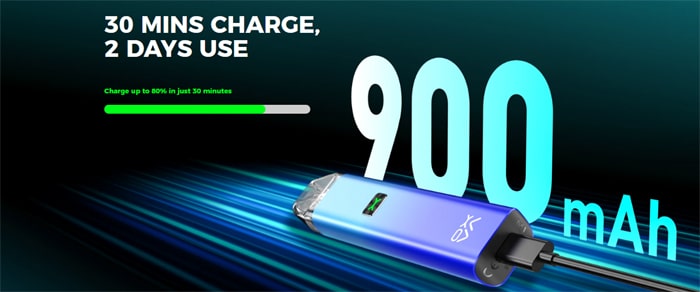
The battery capacity is the same as previous versions at 900mAh and USB Type C charging at up to 2A is provided. According to OXVA you can charge up to 80% in only 30 minutes.
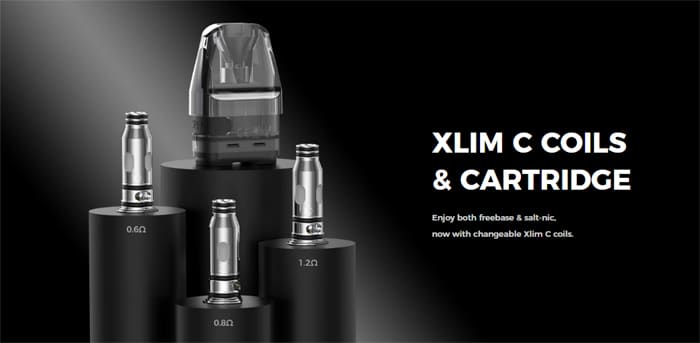
As mentioned above this time you can change the coils – there are 3 different coils available 0.6ohm, 0.8ohm and 1.2ohm. You get the 0.6 and 0.8ohm included in the kit.
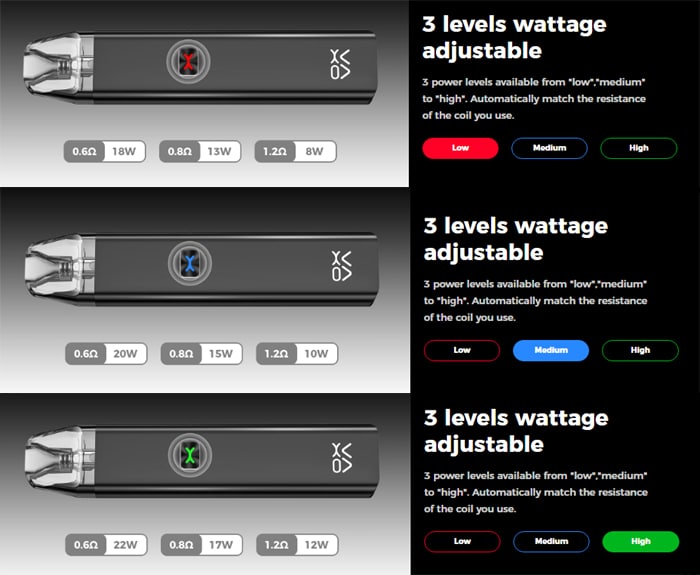
The output is specified as 25W maximum but there are 3 levels of power output to select. These power levels depend on the coil installed…
- 0.6ohm – Low = 18W, Medium = 20W and High = 22W.
- 0.8ohm – Low = 13W, Medium = 15W and High = 17W.
- 1.2ohm – Low = 8W, Medium = 10W and High = 12W.
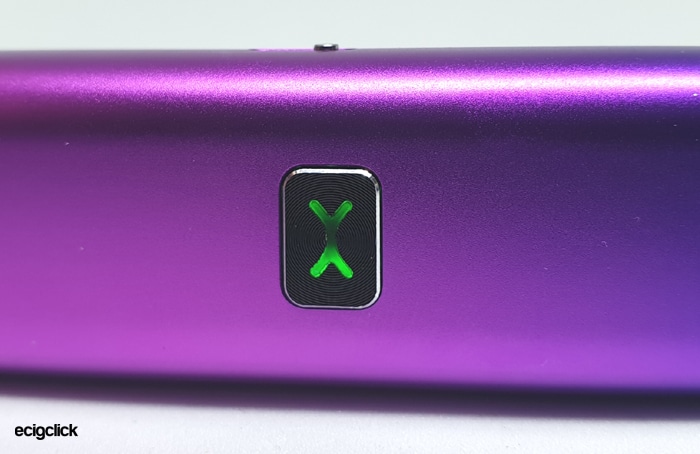
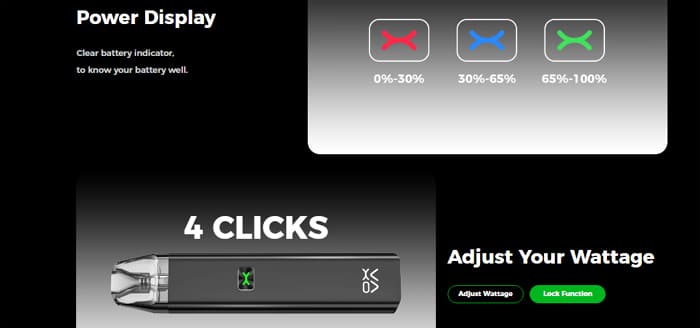
An “X” shaped LED located on the fire button displays the power selected plus indicates the battery charge remaining. The fire button allows for power adjustment, manual firing (auto draw is also provided) and you can also lock the button too.
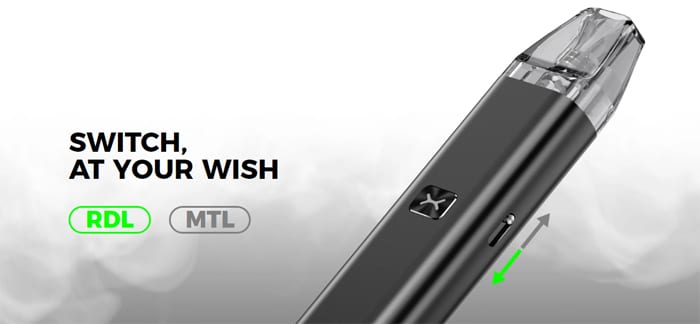
You still get the side airflow adjustment to tailor the airflow to your preference.
A side fill port takes care of refilling the 2ml pod.
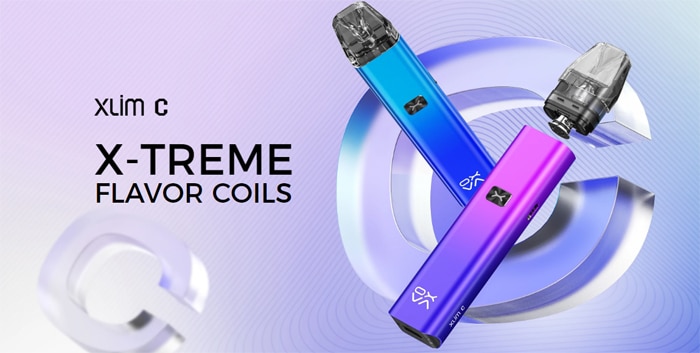
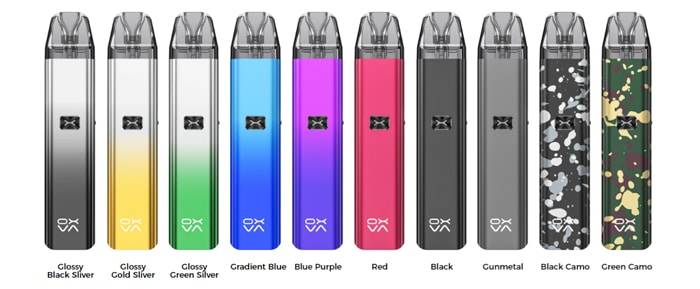
There are 10 colours to choose from: Glossy Black Silver, Glossy Gold Silver, Glossy Green Silver, Gradient Blue, Blue Purple, Red, Black, Gunmetal, Black Camo and Green Camo.
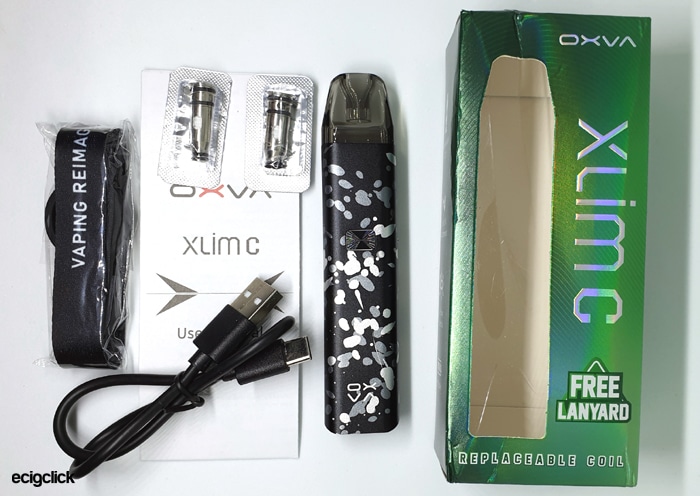
Kit Includes
- OXVA Xlim C Device
- Pod
- 0.6ohm Xlim C Coil
- 0.8ohm Xlim C Coil
- Lanyard
- USB Type C cable
- User manual
OXVA Xlim C Specs
- Size: 114.5x14x24mm
- Output: 25W Max (3 power levels)
- Battery: 900mAh (internal)
- Display: LED indicator
- Resistance range: 0.45-3ohm
- USB Type C port – 2A charge rate
- Pods: Refillable, replaceable coils
- Auto draw or manual
- Locking fire button
- Capacity: 2ml
- Side fill port
OXVA Xlim C Design and Build Quality
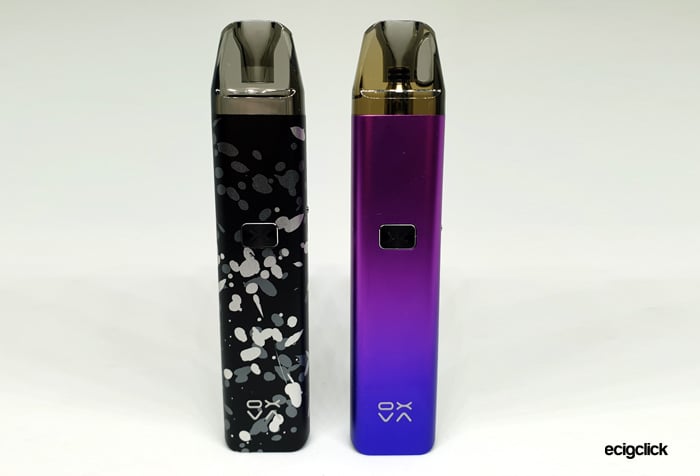
I received these in the Black Camo and Blue Purple versions.
Sadly the Black Camo box had been a bit squashed in transit but the kit was fine.
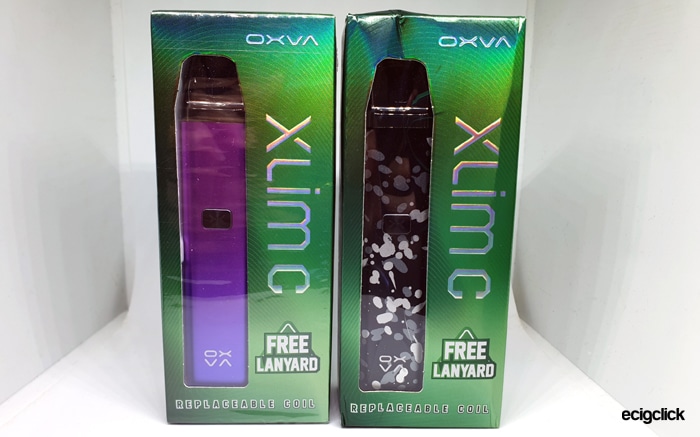
However as you will see in the photos there was a slight scratch on the front of this device.

The instructions are good, very basic and tiny writing but cover everything I needed to know!
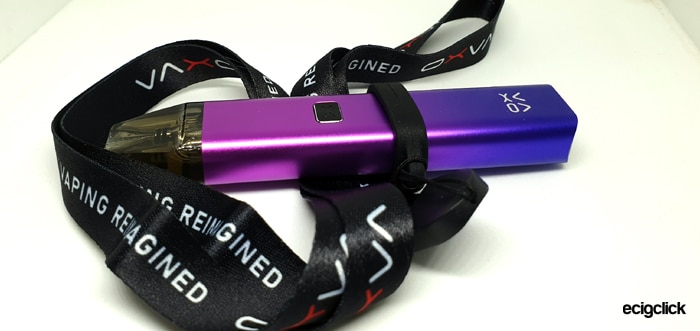
You even get a nice lanyard included which fits as shown in the image below!
OXVA Xlim C Mod
This is kind of a hybrid between the SE and the original Xlim. The original had a screen and the SE had no fire button.
I am really pleased to see the return of the funky looking “X” shaped LED on the fire button! This has been present on all of the Xlims apart from the SQ which would have looked loads better with it!
The fire button provides a means of adjusting the output, plus you can manual or auto draw fire.
Comparing this to the SE and Original this is a lot thicker and slightly taller but there is no increase in battery capacity. This also means that previous fixed coil pods are not compatible.
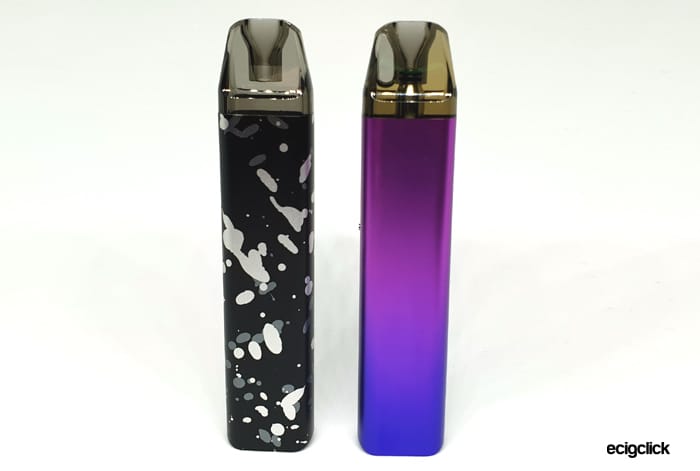
The front of the device has the OXVA logo and the rear is totally plain. A nice paint gradient effect gives this a glow and it has a metallic finish.
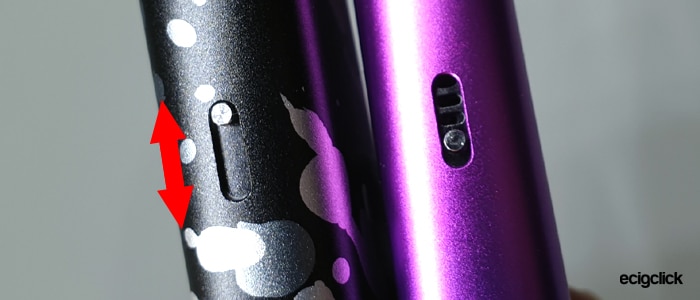
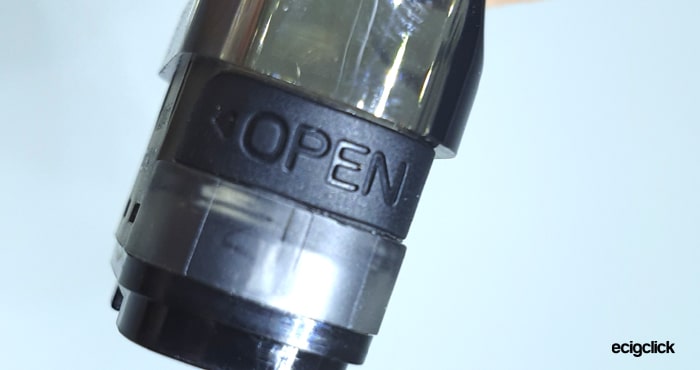
The side features the familiar slide airflow adjustment and the XLIM C text.
As with the previous models the base hosts the USB Type C port and some regulatory symbols.
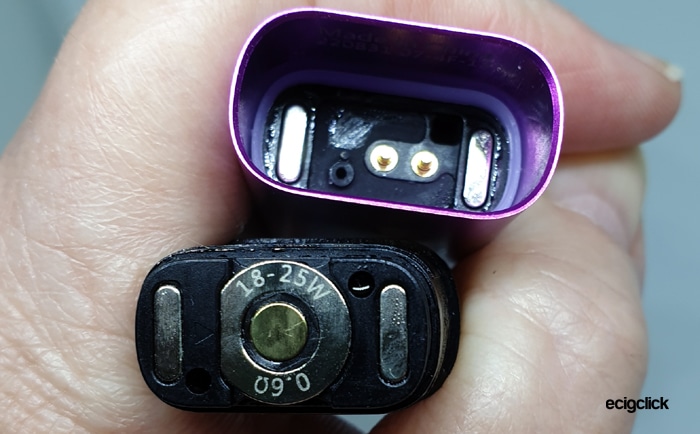
The pod compartment houses 2 spring loaded contacts and 2 strong magnets. The pod sits securely in here – no wobbliness!
A great looking device which feels every bit as sturdy as the previous versions.
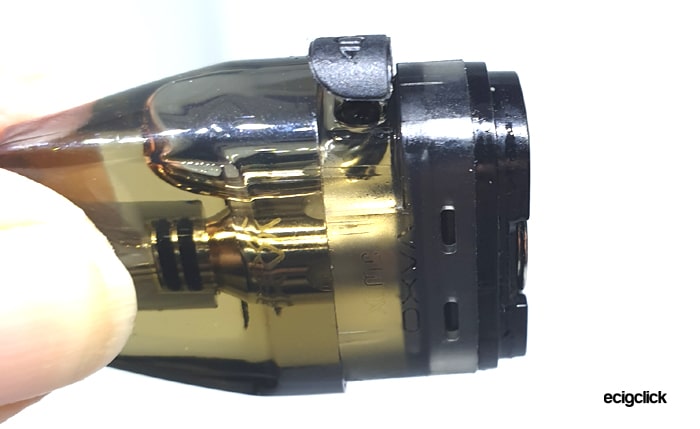
OXVA Xlim C Pod
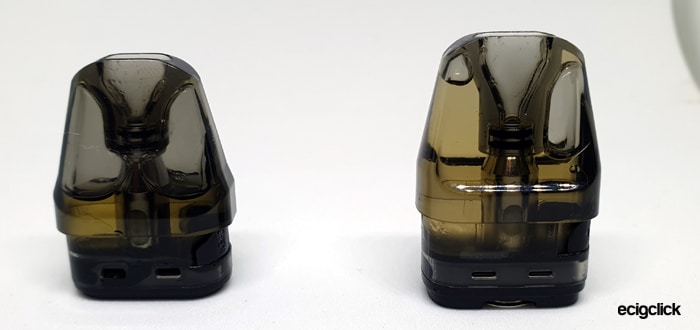
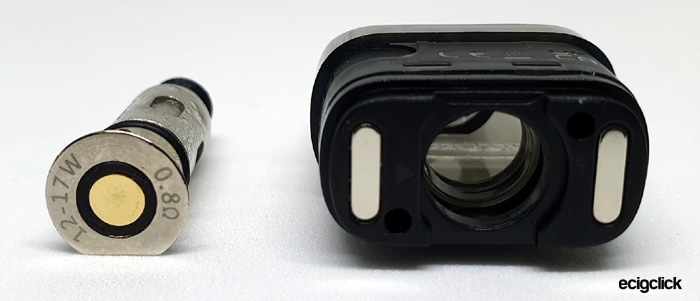
This is where a big change has happened – you can remove and replace the coils – which for me is excellent as it saves waste (you discard the coil instead of the whole pod).
Most of it is similar to the previous versions with a side fill port with a lift up silicone cover. There is even a little indent to allow you to get your thumbnail under the cover with ease.
The port measures 6x3mm so it will be suitable for the smaller bottle nozzles really.
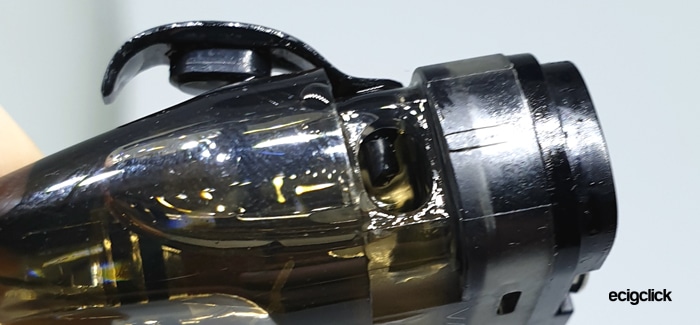
It is frosted but still clear enough to see the pod contents. When it is installed in the mod you can tip it to see the e-liquid level remaining which is great.
On the base are two magnets and the base of the coil.
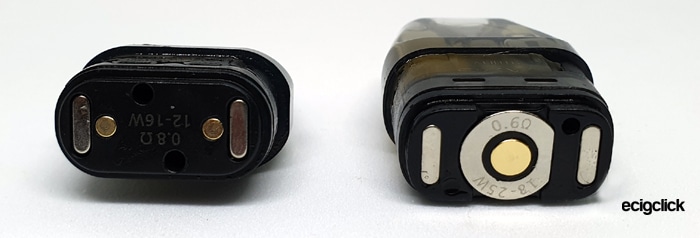
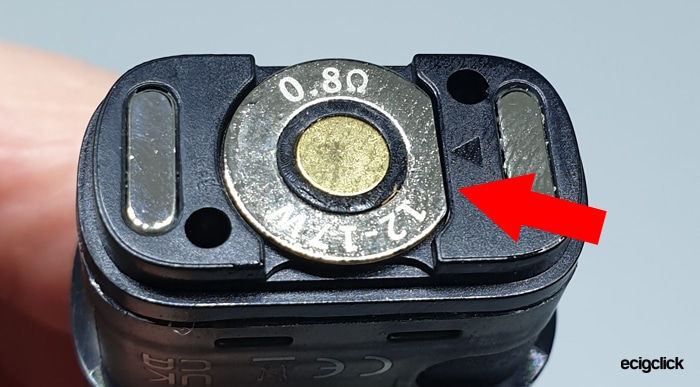
It is a Push in “pull out” coil design – just make sure to align the flat edge of the coil with the flat edge on the pod. Otherwise super simple!
The coils have the resistance printed on the base, which is much easier to see than the small text usually engraved on coils.
OXVA Xlim C Quick Start Guide
This comes without a coil installed, these are in protective covers in the cardboard box.
You will need to install the coil, fill up, charge and away you go! Don’t panic I will guide you through this in this section!
Basic Operation
- Power On/Off = press the fire button 5 times quickly.
- Lock fire button = press the fire button 4 times quickly.
- Vaping = you can use the auto draw (inhale to vape) or press the fire button to vape.
- Change power level = press the fire button 3 times quickly to adjust from High, Medium or Low power. The LED will briefly light up with the level selected – Red = Low, Blue = Medium and Green = High. Keep repeating this until the level you require lights up.
- Battery indicator = this changes colour according to the battery charge remaining whilst vaping – 65-100% = Green LED, 30-65% = Blue LED and less than 30% = Red LED.
- Battery indicator when charging = same as above and the light will go out when fully charged.
- Adjust airflow = move the airflow slider up and down to adjust the airflow to your preference.
Protections
- Low battery – Red LED flashes 10 times and the device will cut out until charged.
- Short circuit / too low resistance – Red LED flashes 3 times, clean contacts of pod and mod, if still an error change the coil. Otherwise the device may be faulty.
- High temperature – Red LED flashes 5 times and the device will cut out until it cools down.
- Over Time Protection – if you vape for longer than 8 seconds the Red LED flashes 3 times whilst vaping and the device will stop firing.
How To Charge The Battery
The charging rate is specified as 2A.
- Using the included USB type C cable connect the small end into the USB port on the mod.

- Connect the large end of the cable into a suitable USB outlet.
- The LED will cycle through the colours and turn off when fully charged.
The charging time for me using a 2A mains plug was around 35 minutes
How To Fill the Pod
- Remove the pod from the mod by just pulling it out.
- Turn the pod on its side and lift up the fill port cover. You can swing the cover out of the way for filling.

- Add e-liquid through the fill port and watch the level through the clear pod.

- Replace the pod in the device.
- For first time filling or when using a new coil leave it to stand for 10 minutes before use to make sure the coil is fully saturated with e-liquid. Vape too early and you could either bugger up the coil or get a dry hit from hell!

How To Change The Coil
- Remove the pod from the mod.
- Pull out the existing coil.

- Push in a new coil making sure the flat edge aligns correctly with the edge on the pod.

- Fill the pod as described above.
How Does the OXVA Xlim C Pod Kit Perform?
I mainly used my own e-liquid mix which is 50/50 PG/VG made from IVG Bubblegum Concentrate at 20% ratio. This is quite high a flavour ratio as I prefer plenty of flavour, but sadly this means it can be a coil killer sometimes.
I add nic salt to approx 6mg strength.
If any of these terms are over your head – have a read of our handy guides below!
- MTL V DTL – A Guide To Vape Styles
- VG and PG in E-liquid – all you need to know
- Beginners guide to E-liquid
- Nic Salt E-liquid
OXVA Xlim C 0.8ohm Coil
The power levels for this coil are Low (13W), Med (15W) and High (17W).
In my previous kits the 0.8ohm pod was best at 15-16W so I went with the Medium power level.
This was ok but not the flavour blast I am used to from OXVA.
So I went up to the high power level and BOOM that’s where the magic is! The amazing rich smooth flavour is back. Plus a great throat hit.
I have been struggling to find a pod kit which can give as much flavour as the Xlims and this 0.8ohm coil really does the trick! I bloody love it!
Sadly this does not have a puff counter like the first version but I have refilled 9 times and the flavour is still spot on!
OXVA Xlim C 0.6ohm Coil
This is perfectly happy with my 6mg Nic salt 50/50 e-liquid but is not quite as smooth as the 0.8ohm coil. I found I used this at the lowest power setting (18W) as it really felt warm and harsh on the higher power settings.
You get a massive throat hit which is obvious due to the lower resistance coil and higher power level (22W on high).
The flavour is spot on too and there is a lot more vapour!
Trying this with 70/30 e-liquid (IVG Select Bubblegum) with approx 6mg of nic salt added this was fine.
The flavour was again amazing and no issues wicking the thicker e-liquid!
Airflow
I have found the airflow to be slightly more open on this version. On the older versions I had it fully open. Whereas now I am actually adjusting it. I found about 2/3 open was equivalent to the fully open on the other versions.
Thinking of airflow in terms of score out of 10 (0 being closed and 10 being breathing fresh air) I found the following…
With both coils I would say fully open is around a 5 and fully closed it is about 0.5. The range therefore has increased for this version as the other Xlims were around a 3 in fully open.
This has definitely more of an RDL vape than before and still closes off enough for an excellent MTL vape too!
Mod Performance
This performed excellently with a super fast firing regardless of using the auto draw or fire button.
The output was consistent until the last few vapes before the battery conked out which is always great.
The charging boasts of 30 mins for 80% charge seem to be accurate as I found it took around 35 minutes to fully charge each time I timed it. This was with a 2A mains plug.
Leaks
I had zero leaks at all with either coil!
A slight mist of condensation could be found on the contacts but nothing abnormal.
Battery Life
This obviously varies according to your own vaping habits – but as a guide…
With the 0.8ohm coil I got between 6-8 hours of heavy vaping on the highest power level. This equates to around 5 pod fills.
With the 0.6ohm coil I got around 5 hours of heavy vaping on the lowest power level. This equates to around 4 pod fills.
Bear in mind each pod fill is approximately 1.5ml as I filled it when the e-liquid was level with the mod.
Pros
- Replaceable coils!
- 3 power levels
- Wider airflow range from tight MTL to RDL
- Epic flavour from 0.8ohm coil on high power level
- 0.6ohm coil feels quite powerful
- 0.6ohm coil capable of e-liquid ratios from 50/50 to 70/30
- Excellent battery life
- Charging time estimates seem correct – full charge in 35 mins at 2A
- No leaks or malfunctions
- Easy to see e-liquid level
- Really simple to use
- Able to lock fire button
Cons
- Not compatible with previous fixed coil Xlim pods
Final Review Verdict
I am a huge Xlim fan – this kit will be added to my daily rotation of the Xlims!
I can’t comment yet on whether the coils will be more economical than the pods of the earlier versions, plus I am not at a point to assess whether the coil life is as good either.
This performs exactly as you would expect, the kit contents are generous with 2 different coils, lanyard and USB cable – some manufacturers keep the contents on the stingy side to reduce costs.
Compared to my other Xlims this has the advantage of a wider airflow range (much better for RDL vapers) and obviously less waste as you just discard spent coils. Also I have not spotted any dribbles from the fill port cover which I have had on other Xlims.
It is also super simple to use, the coil changing and filling is easy peasy so I would recommend this kit to a new vaper any day.
I am so pleased that the replaceable coils perform exactly as well as the fixed coil pods – phew!
I just wish OXVA would make a larger battery kit capable of using these Xlim coils – I would buy loads of them! Something like the Origin would be perfect! (Copyright me of course)!
To paraphrase Gregg “2 GG’s” Wallace “Pod kits do not get better than this”….

 The Limits?")


Hi Michelle,
Thank you for the excellent and detailed review of this pod system. I am very happy with it too. Flavour is top-notch and airflow control allows a wide range of use. Overall, an amazing device. As you wrote, it‘s a 10 out of 10. Fully confirm. If someone would have told me years ago how good pod devices will become one day…unbelievable. 🙂
Stay safe and vape on ✌🏻
Hi Tobi much appreciated thank you 🙂
Your comment made me smile and I am so pleased you love the Xlim C – what a beautiful piece of kit, and so inexpensive huh!
Keep smiling 🙂