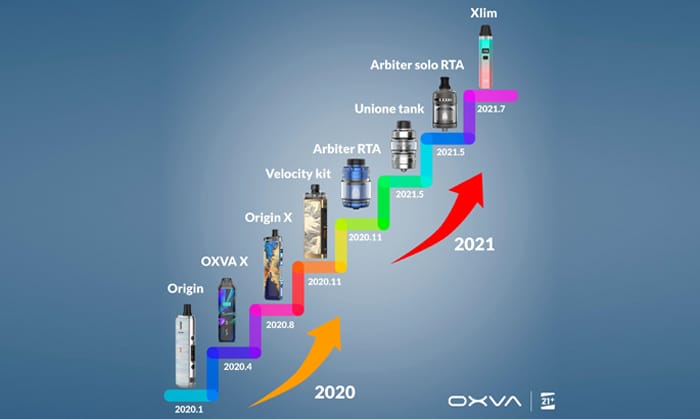
The OXVA Xlim Pod Kit is the latest release from a really popular vape brand that has only been around since 2019.
In fact I have never used an OXVA product myself… yet!
However in that short time there has been some excellent vape gear with the OXVA badge including the Origin, Origin X, Arbiter RTA, Velocity and the Arbiter Solo RTA.
All the above have been real crowd pleasers and helped to get the OXVA name well known in vaping circles.
I am sorry this is such a huge review but after testing the V1 kit I was sent the improved V2 kit – so this review covers both!
What Can We Expect From The OXVA Xlim Pod Kit…
Yes I know – another pod kit…I can hear everyone yawning from here!
However this has more features than just your basic pod kit yet is designed to be simple enough for the most technophobic vapers.
The main feature to offer simplicity is the actual pod, this is refillable but has a fixed coil.
Basically when the coil performance deteriorates over time – you just discard the pod and replace with a new one, no messing about changing coils.
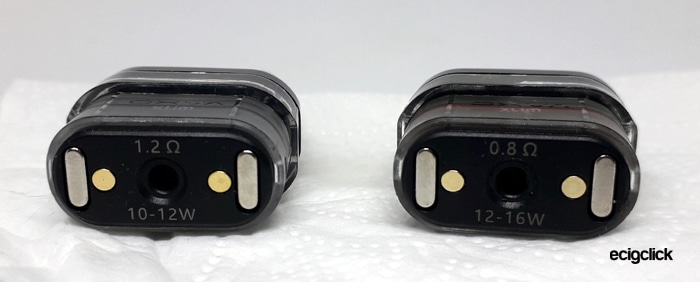
In the V1 kit there are 2 different pod types – both included in the kit – the 0.8ohm pod has an 0.8ohm Kanthal Coil and is best at 12-16W.
There is also the 1.2ohm pod – again with a Kanthal coil and is rated 10-12W.
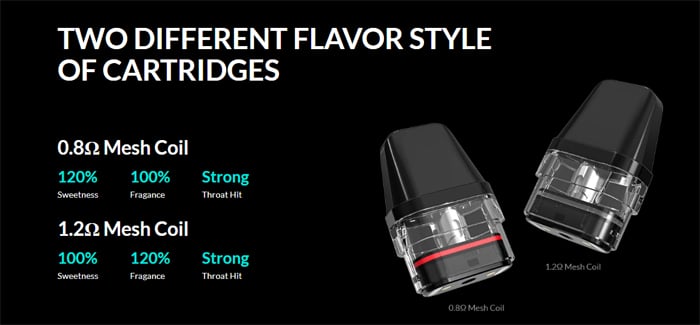
However the V2 kit has been updated with 2 V2 “anti-leak” pods in 0.6ohm and 0.8ohm.
The fill port is located beneath the removable mouthpiece in the V1 version, in standard pods this has a simple silicone check valve. If you have the V1 1.6ml PTF pod this has a push to fill valve to make it more childproof.
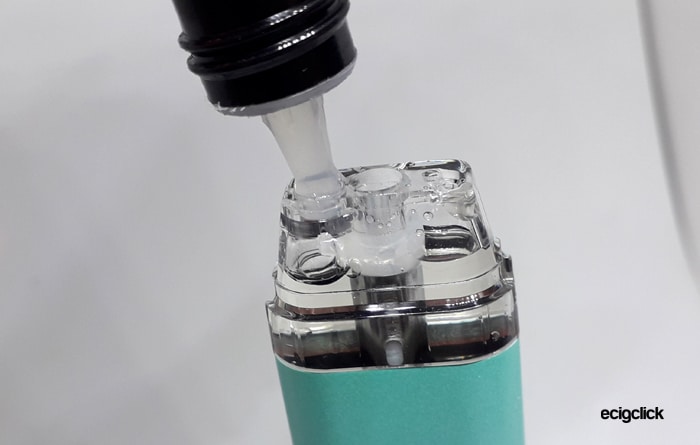
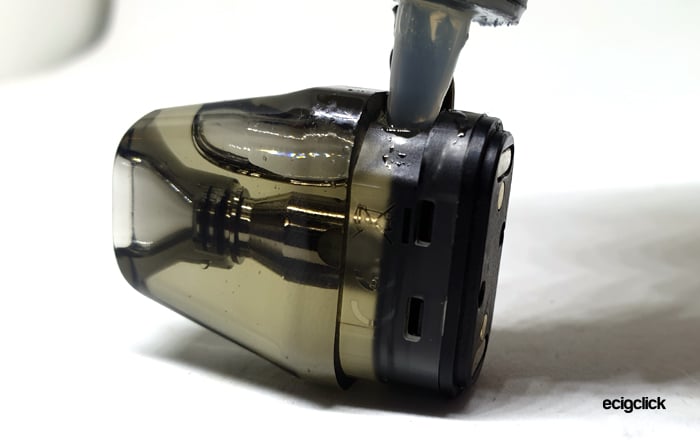
For the V2 the fill port has moved to the side of the pod near to the base.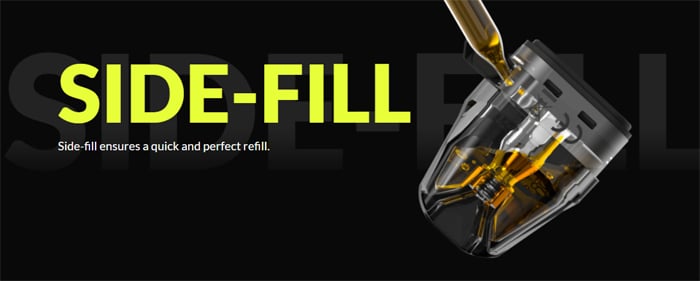
Inside the device is a 900mAh battery which you charge using the USB Type C port at a fast 1A charge rate.

The output is variable – which is what takes the OXVA Xlim a league above the standard fixed coil pod kit.
You can adjust the wattage from 5-25W and your vaping data is displayed on the 0.42in OLED screen.
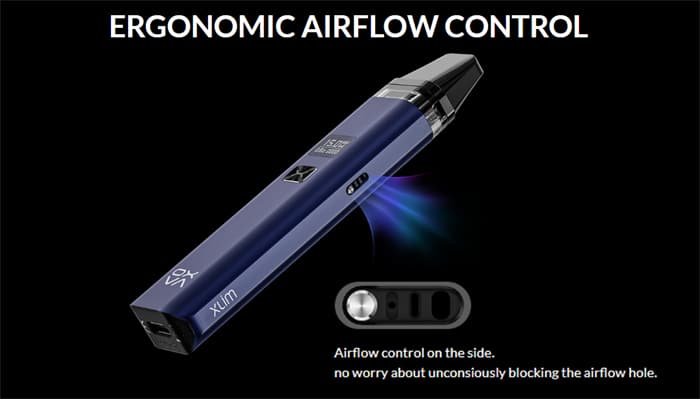
Another great addition is the slide airflow control which should mean you can tailor the incoming airflow to suit your preference.
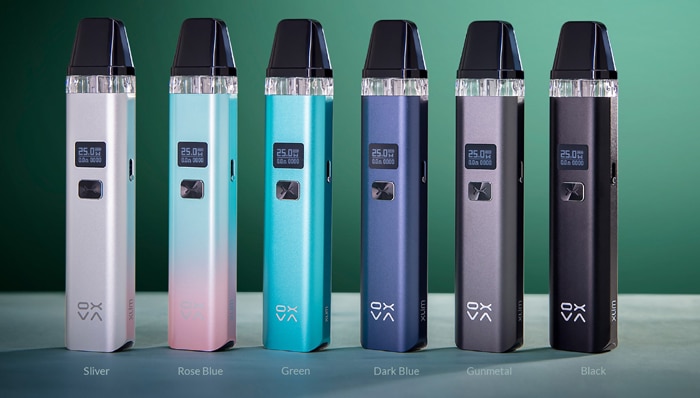
There are 6 colours to choose from in the V1 version: Silver, Rose Blue, Green, Dark Blue, Gunmetal and Black.
Plus there are 5 colours to choose from in the V2 version – Black White, Arctic Ice, Black Red, Blue Green and Green Lemon.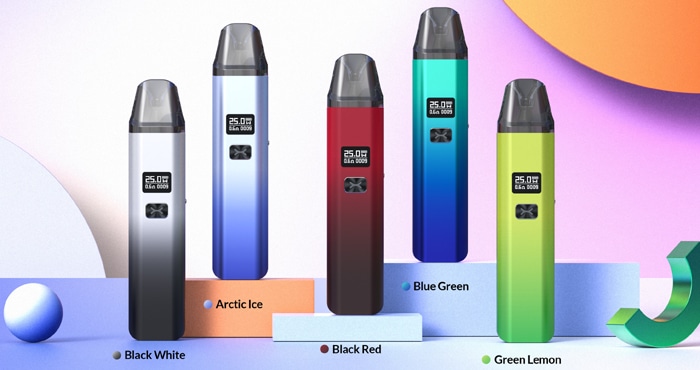
As always I will report back honestly on my findings on the devices I have in my hand – that is all I can do! Your experience may differ to mine.
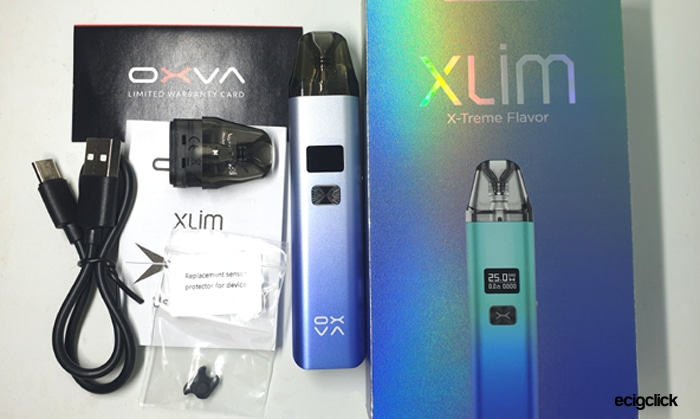
Inside the Box
Xlim V1
- OXVA XLIM device
- 0.8ohm pod (installed)
- 1.2ohm pod
- USB Type C cable
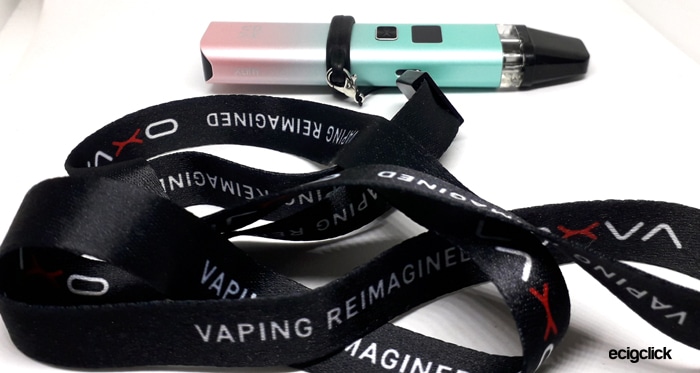
- Lanyard
- User manual
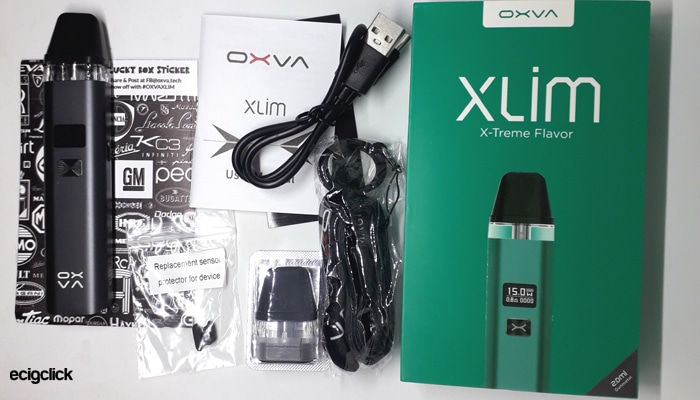
Xlim V2
This is recognised by the new Hologram effect box.
- OXVA XLIM device
- 0.6ohm V2 pod (installed)
- 0.8ohm V2 pod
- USB Type C cable
- User manual
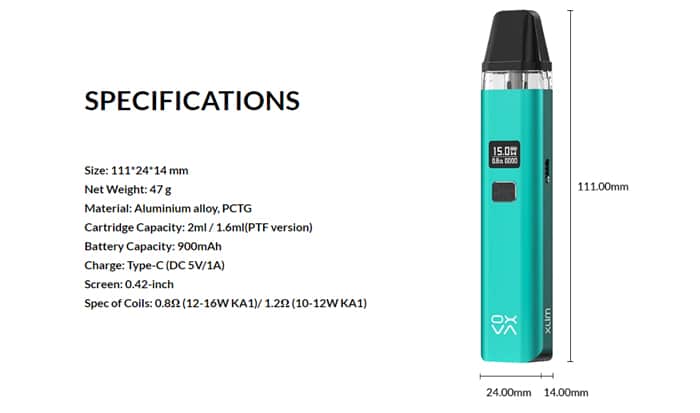
 OXVA Xlim Pod Kit Specs
 OXVA Xlim Pod Kit Specs
- Size: 111x24x14mm
- Output: 5-25W – VW (device limits output range to suit pod installed)
- Battery: 900mAh
- Capacity: 2ml (standard) / 1.6ml (childproof Push To Fill – PTF) (V1 version only)
- Display: 0.42in OLED Screen
- Resistance range: Not specified
- USB Type C port – 1A charge rate
- Pods: Refillable, fixed coil disposable pod
- Coils: 1.2ohm, 1.8ohm mesh coils (V1) / 0.8ohm, 0.6ohm (V2)
- Adjustable airflow
- Auto draw or button activation
- Top fill (V1) / Side fill port (V2)
- Airflow sensor protection cover
- V2 pods have anti-leak technology
OXVA Xlim Design and Build Quality
I received 2 of the V1 kits in the Rose Blue (my favourite) and Gunmetal colours.
I got the 2ml versions which do not have the PTF (Push To Fill) childproof system so I am not able to test that function.
The packaging was excellent with generous contents including a Lanyard, USB Cable, extra pod (not all manufacturers include a spare pod!) and a spare “sensor protector” – more about where that goes later on!
Despite being quite thick the instruction leaflet only has 4 pages per language and my first issue was trying to get the mouthpiece off to fill the pod. The instructions were not exactly helpful for this!
Inside the Gunmetal coloured box I got a “Lucky Box Sticker” which I think is a wrap for the mod?
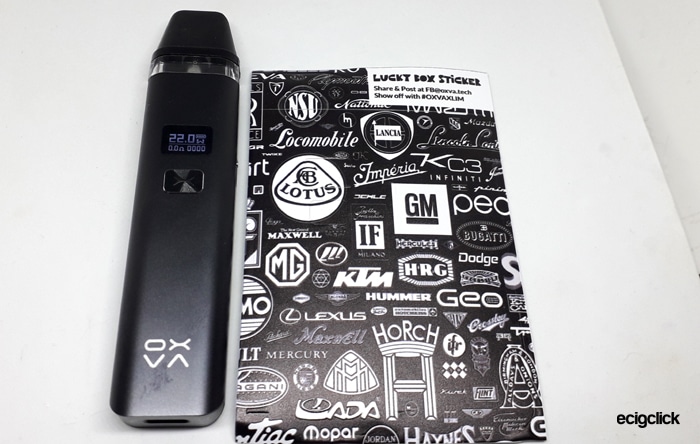
Searching the internet I found apparently only 30% of the first batch of the Xlim contain a sticker! I feel lucky!
I also received the V2 kit in Arctic Ice – there is a new range of colours for the V2.
From what I can see the V2 mod is the same as the V1 it is just an update to the pod, packaging and hopefully the instructions will be updated when released.
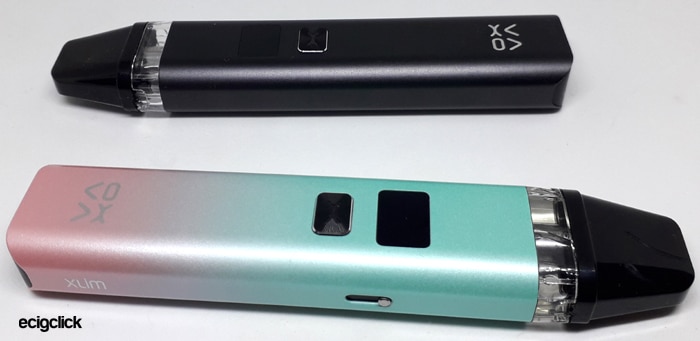
OXVA Xlim Mod
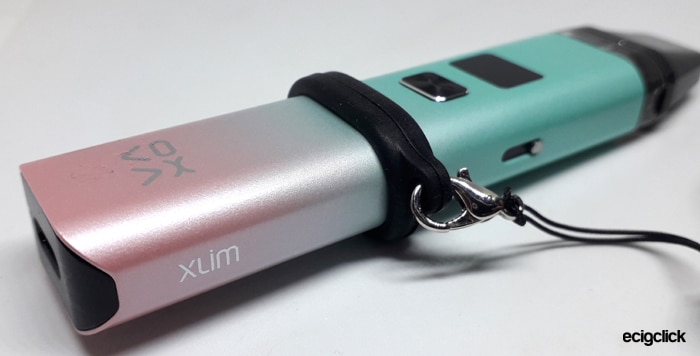
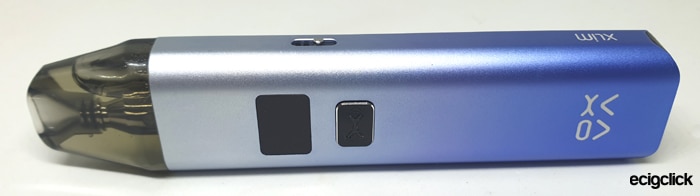
The mod body is made from Aluminium Alloy with a metallic coating.
The colour gradient effect on the Rose Blue version is absolutely stunning!

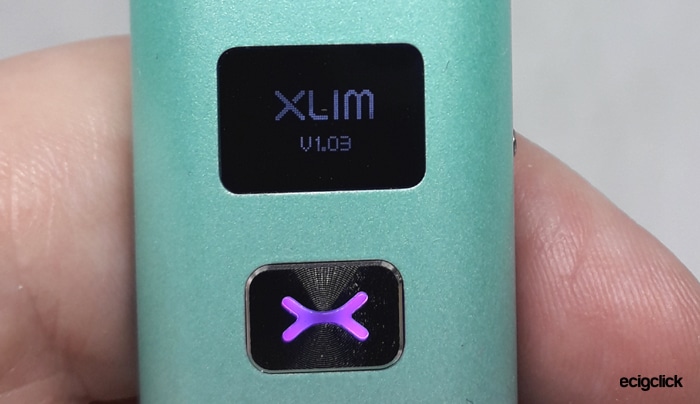
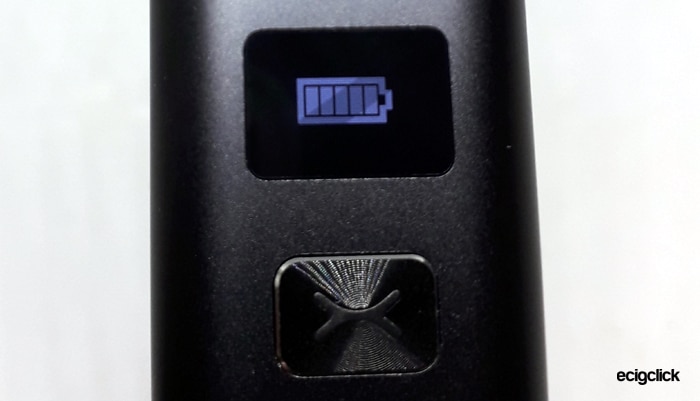
On the front of the mod is the small screen which is actually super cute and lovely resolution – even with a little “OXVA” graphic when you switch on!
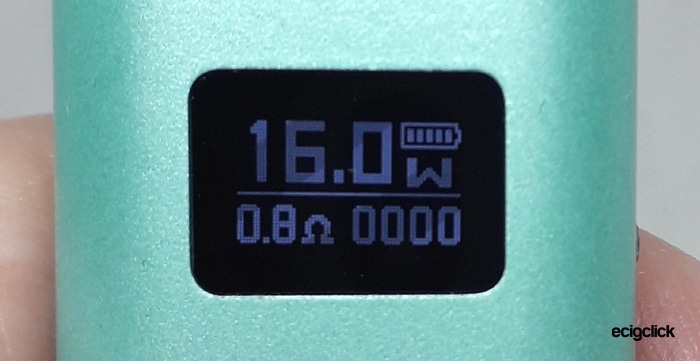
On the screen is the Wattage, battery capacity icon, resistance and puff counter.
Below the screen is the fire button which is clicky and responsive and houses the cute “X” logo which is a coloured LED.
At the base of the front is the “OXVA” logo.
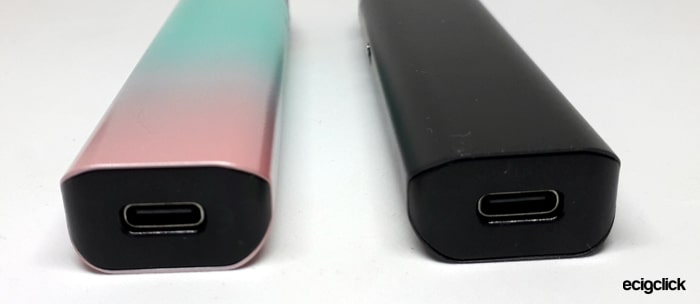
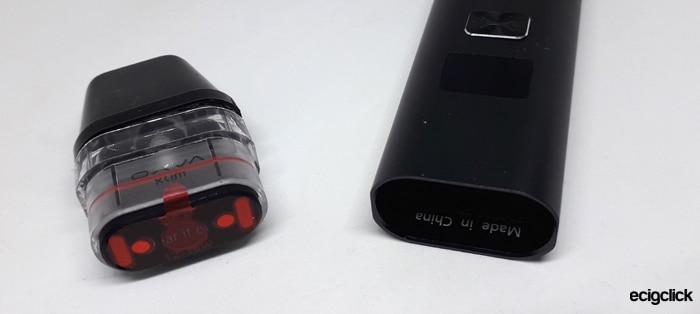
The bottom of the mod includes the USB Type C port and the required legal logos, this is a black plastic material I think.
The rear of the mod is completely plain.
On the side of the mod is the airflow selector slide switch. This has a pin head style knob which doesn’t protrude massively and the slide feels super smooth without being too loose.
At the top of the mod is the pod area with 2 magnets and 2 contacts which connect to the pod whichever way around you install it.
There are no rattles or wobbly bits and it just feels like a quality item!
Even the included Lanyard is a thing of beauty and fits the mod like a glove! It is worth noting that the lanyard is not included in the V2 kit I received.
Nice one OXVA!
OXVA Xlim Auto Draw Sensor
As mentioned above there is a spare “Sensor Protector” included in the kit.
This did intrigue me as to what it was for.
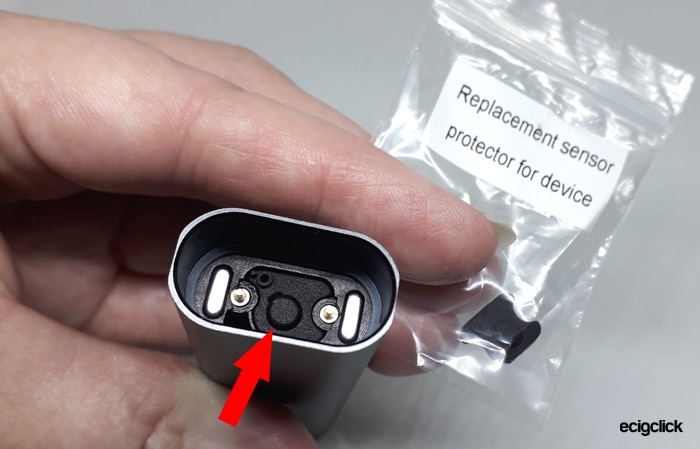
If you have a leaky pod on auto draw devices it can damage or short out the draw sensor and either prevent it firing properly or constantly fire.
Now this little cover is there to protect the battery and contacts from damage due to liquid ingress, there is already one installed and you get a spare in the kit.
OXVA Xlim Pod V1
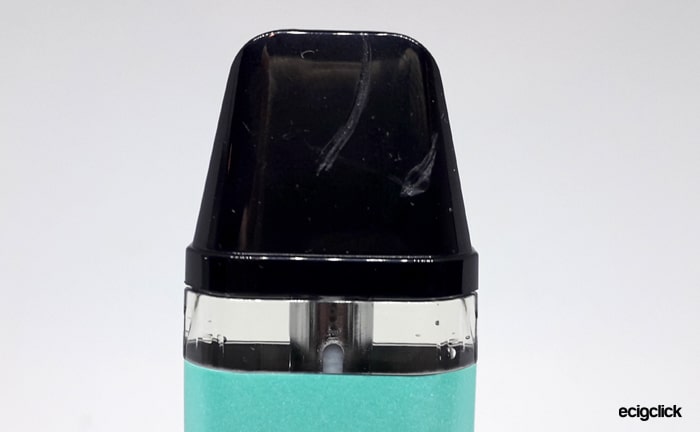
The pod sits inside the mod and about 5mm of the clear pod section is exposed to help view the e-liquid level.
You won’t be able to see that much when the level drops below this but you can tip the mod to at least make sure there is liquid present in the pod.
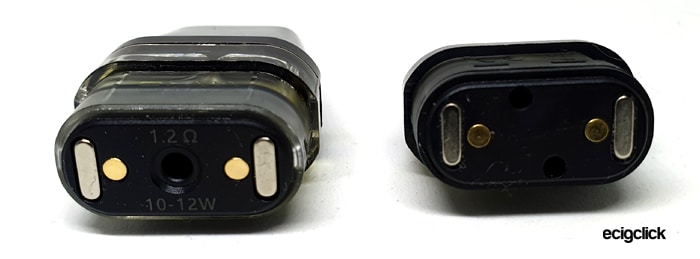
The base of the pod has the resistance and the recommended power limits printed on and there are 2 contacts and 2 strong magnets.
I have found the pod to be secure and no rattling or falling out!
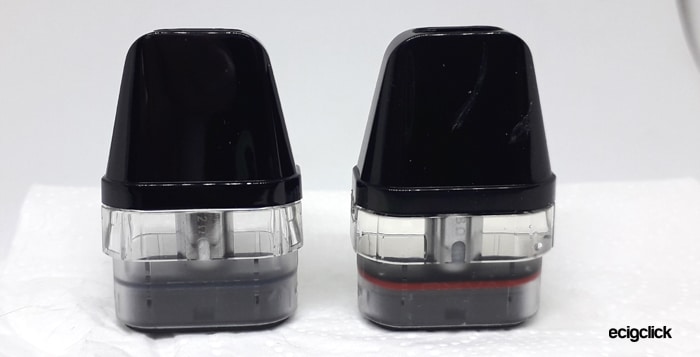
The 0.8ohm pod has a red seal band to help tell the different pods apart quickly.
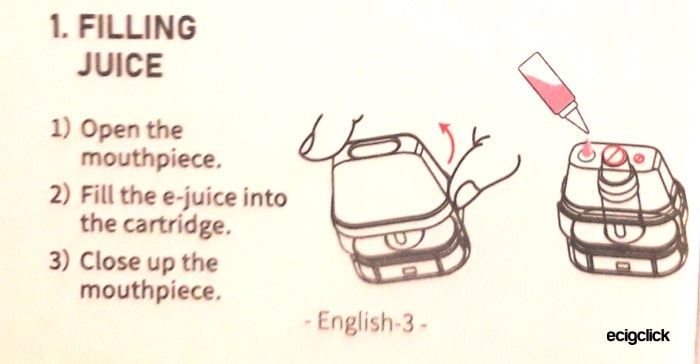
OXVA Xlim Filling – V1 Pod
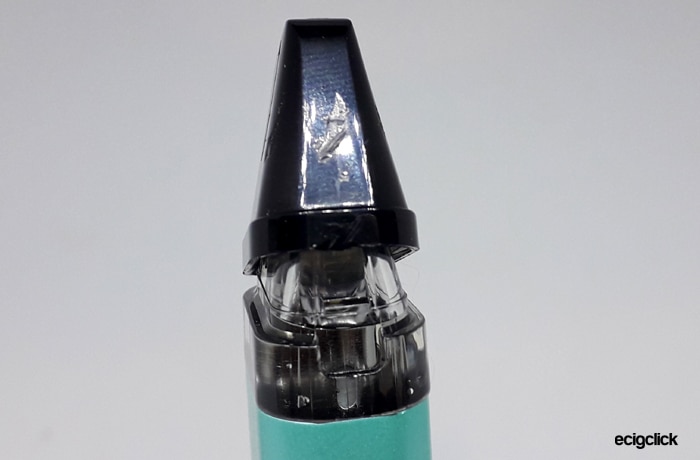
I have had real trouble removing the mouthpiece to access the fill port.
The instructions were pretty useless and my first attempt included biting the mouthpiece to try and pull it off and also wedging a nail file in the little lip below the mouthpiece.
Both of these did not work. Somehow I got it off but I can’t remember how!
The second refill is much easier and you need to wedge your nail in the little lip to pop the mouthpiece off, but for the first removal I found this super tight.
I am even trying again with the other kit I have and I can’t even get the mouthpiece off – I have tried the nail in the lip, nail file, teeth and still it won’t budge.
In the end I resorted to a screwdriver and got it off. Now that first removal has been done it is easier to clip on and off. I wouldn’t like to be out and about for that first refill!
The 1.2ohm pod is worse, I have refilled 5 times and still struggle to get the mouthpiece off! Resorting to whatever metal pointy thing I can find nearby.
So as you can tell I really dislike the refill port access, I do have dodgy hands so I might be finding it more complicated than everyone else.
The fill port on mine has a silicone check valve plus an air vent to prevent airlocks when filling. I had no issues with my e-liquid bottle nozzles fitting into the port and it works well.
But you can get an airlock, and when you stop squeezing the e-liquid in it can suck some of the liquid back out into the bottle.
Also it makes the liquid very slow to flow around the pod and can sometimes have uneven levels on either side of the coil.
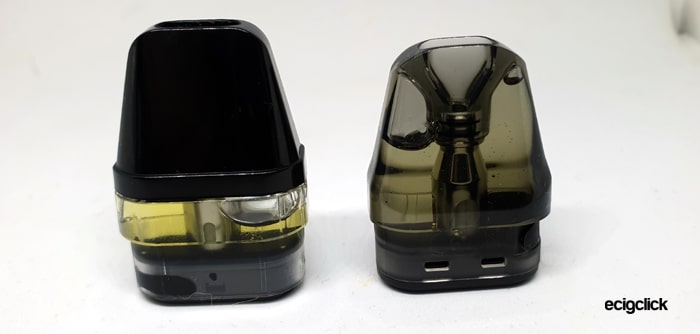
OXVA Xlim Pod V2
The pod has been redesigned for the V2 as the original pods had leaking and filling issues for many.
I have to applaud OXVA for the quick updates. Thanks also to Simon who sent me the V2!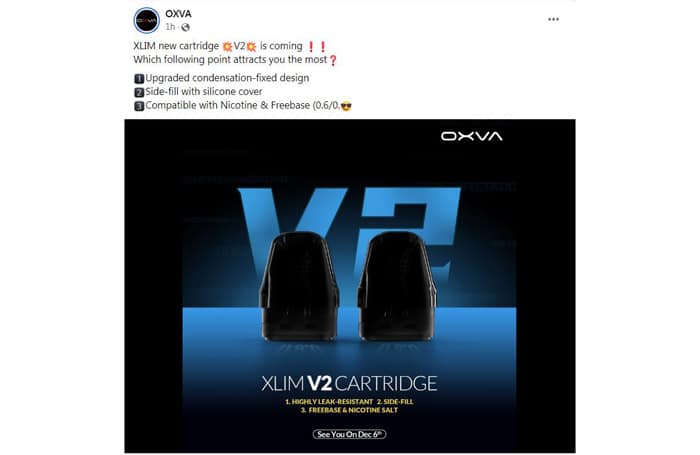
One feature that has impressed me the most is the fact the fill port is now on the side of the pod with a silicone cover.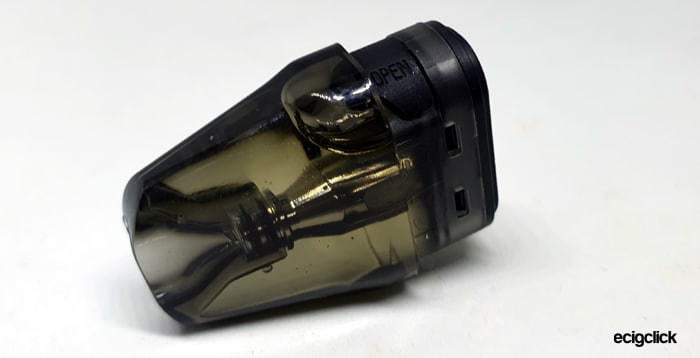
Yes it is tiny and not easy to open without nails – but it is still a massive improvement on trying to remove the mouthpiece on the V1.
I found the fill port to be OK with 10ml bottles with slim nozzles. Anything bigger is just going to result in you pouring e-liquid everywhere apart from the place you actually want it to go!
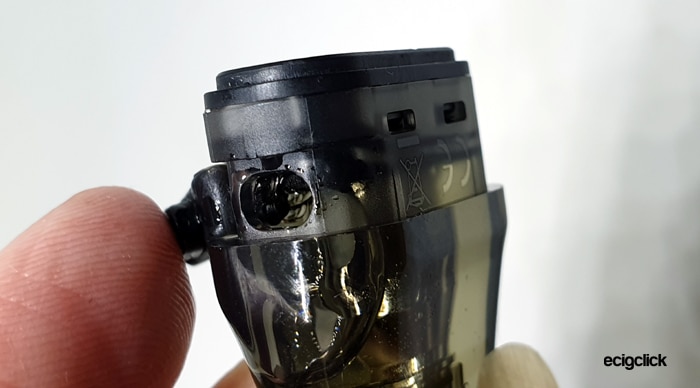
So the filling port is not great – I have had to decant my e-liquid into small nozzle 10ml bottles as none of the larger spouts will fit into the port and I am frankly sick of getting covered in e-liquid trying to fill it.
A small issue is that nowhere on the pod is there any identification as to the resistance? I only can tell them apart as the box says the 0.6ohm pod was already installed. Also there is no indication of recommended power levels to use these pods at – found this info on the OXVA website. The included instructions in the V2 kit for me still showed the V1 pods and specs.
Also the clear mouthpiece makes viewing e-liquid much easier as you can tip the pod upside down and see if there is liquid in the mouthpiece area without having to remove the pod.
I must also mention this pod has been full for about a week and not a drop has leaked!
As an update – this first pod (0.8ohm V2) is still going at 3569 puffs, the flavour is just starting to drop now. EPIC COIL LIFE!!!
OXVA Xlim – A Tale Of Two Halves…
So this has not been the easiest review I have ever done – it has been a long road to get this finished.
The reason being – put bluntly – was the pods.
Originally I received 2 of the V1 kits both with 0.8ohm and 1.2ohm pods.
Now these were terrible – with the original pods this kit was a stinker.
I had leaks, I had a pod burn out after only 5 refills and so on. They were lovely to vape on but the hassle with refilling and the other faults made me dislike this kit a lot.
Anyway we had been contacted by OXVA who were aware of this issue on early kits.
They said they would send replacement pods and also wanted us to add this advice to try to prevent the leakage – I quote…
Because of atmospheric pressure, it will cause leaking if not covering the cap immediately after filling.
So after filling, must cover the mouthpiece tightly and immediately.
Recommend liquid PG:VG is 60:40 and 50:50.
After this and the poor performance of the second batch of pods I received yet more from OXVA.
This time I got the V2 kit and a spare V2 pod. The pods have had a huge redesign to try and rectify the original issues.
OXVA Xlim Pod Kit Quick Start Guide
The V1 arrives with the 0.8ohm pod installed but this does have a protective insulator sticker on the base to prevent firing it before you fill the pod.
The V2 arrives with the 0.6ohm V2 pod installed and again you have an insulating sticker to remove before use.
If the pod is empty when you fire the mod – it will knacker up your coil and therefore the pod is totally scrap.
So fill up the pod, remove the protective insulator sticker, charge up and away you go!
I tell you how to do all these things in my guides below – so don’t panic!
The pod is held into the mod magnetically – so is easy to pull out.
OXVA Xlim Basic Operation
- Power On/Off = Press the fire button 5 times quickly.
- Vaping = either press the fire button for manual firing or inhale on the mouthpiece to trigger the auto draw firing.
- Battery indicator = the screen will display the battery charge remaining.
- Lock fire button = press the fire button 4 times quickly, the display will show the lock or unlock icon. (This is only available on later versions – early versions this function does not work)
- Battery indicator when charging = the screen will display the progress of the charging. When fully charged the screen will go off.
- Adjust airflow = move the slide switch on the side of the mod to increase / decrease the incoming airflow to your preference.
- Adjust the wattage = press the fire button 3 times – when the screen is flashing press the fire button to increase the output. Each press = 0.5W increase. If you want to speed this up hold the button down. The output available will match the coil installed – for the 0.8ohm coil you can adjust between 5-18W and for the 1.2ohm coil it is 5-13W. Once the maximum output is shown the next button press will return it to the minimum power level again.
- Puff counter = this resets when the device is turned off.
OXVA Xlim Protections
- Low battery – “battery low” displayed on screen – charge up the battery.
- Short circuit / too low resistance – “short” is displayed
- No Atomiser / open circuit – “no atomiser” is displayed.
- Over time – “timeout” is displayed if the fire has been activated for longer than 8 seconds. The fire operation will cut off to prevent overheating / damage.
- High temperature – “temp high” will display if the device overheats.
How To Charge The Battery
The charging rate is specified as 1A.
- Using the included USB type C cable connect the small end into the USB port on the mod.

- Connect the large end of the cable into a suitable USB outlet.
- The screen will display the charging progress and will turn off when fully charged.


The charging time for me using both my 0.5A PC USB port and my 1A mains charger was 1 hour give or take a few minutes which is pretty quick.
How To Fill the OXVA Xlim – V1 Pods
- This is tricky but insert a nail into the lip area and flip up the mouthpiece. The first time you remove this is it very tight!

- With the mouthpiece removed add e-liquid to the fill hole as shown.
- Watch the e-liquid level through the clear side of the pod.

- Replace the mouthpiece firmly.
- If this is the first fill allow the pod to stand for 10-15 mins to allow the e-liquid to soak into the coil. This is called Priming and is a very important step. If not fully primed you could burn the coil out and your throat lining in the process!

How To Fill the OXVA Xlim – V2 Pods
- Remove the pod from the mod.
- Lift up the cover of the fill port and add e-liquid through the port.

- Watch the e-liquid level through the clear side of the pod.

- Replace the fill port cover firmly.
- If this is the first fill allow the pod to stand for 10-15 mins to allow the e-liquid to soak into the coil. This is called Priming and is a very important step. If not fully primed you could burn the coil out and your throat lining in the process!

How Does the OXVA Xlim Pod Kit Perform?
I used a 50/50% VG / PG e-liquid in here – Bubblegum Nic Salt 11mg from Crazycloudzzz.
These e-liquids have been very kind to my coils in other devices so I do not anticipate any coil burn-out due to e-liquid.
If any of these terms are over your head – have a read of our handy guides below!
- MTL V DTL – A Guide To Vape Styles
- VG and PG in E-liquid – all you need to know
- Beginners guide to E-liquid
- Nic Salt E-liquid
Originally the performance of this kit was pretty terrible.
OXVA did contact us (before I had finished this review) to inform us that some of the earlier pods had faults.
They promised to send 2 new pods so I have had to rewrite this section as the update to the pods was (in the case of the 0.8ohm) a huge improvement.
Also OXVA sent me the V2 kit and V2 pod so I have added these to the review as well to see if the issues have been resolved.
OXVA Xlim V1 0.8ohm Pod – 12-16W KA1
I started off at 12.5W and already this is a beauty of a pod. The flavour is perfect – warm vapour and great throat hit!
At 14W the vapour is warmer and even more taste – this has a slightly drier throat hit but again is still lovely.
I went up to 16W and this gets really intense – the heat and flavour increase loads and is still a beautiful vape! However for my delicate lungs and throat I did find this to be pretty harsh with 11mg Nic salt.
It is worth noting the mod will only let you go up to 18W with this coil – which should help protect the pod and coil from damage.
The setting which suited me was 12W – still better for battery life but no compromise on flavour or warmth!
As for coil life I have filled this 10 times so far (approx 20ml) and the flavour is still spot on.
I do find this pod very thirsty for e-liquid – for 502 puffs I had refilled this 10 times. Plus the fact it is not an easy job to refill this got quite tedious.
Now the leaking situation has improved I have really enjoyed using this pod.
OXVA Xlim V1 1.2ohm Pod – 10-12W KA1
When you install the pod the mod automatically sets the output to 12W.
I first tried this at 10W and this is a lot milder vape than the 0.8ohm pod as expected and very very smooth.
I found the 0.8ohm could be a bit harsh at the higher end of the power limits.
Initially I did prefer this pod – as I use nic salts the 0.8ohm pod I felt dried my mouth out. Whereas this is just all flavour with a bit of warmth.
With the output at 12W for this pod, there is slight warmth, tons of flavour and a great throat hit!
This pod is so smooth and doesn’t leave me needing 4 gallon of squash to re-hydrate my mouth after a chain vape!
The original pod burnt out after 5 refills approx 10ml which was terrible really and I never left the pod empty.
With the replacement pod it has again had 5 refills at 343 puffs and I am detecting the odd harsh dry hit already. This really should not be the case.
Actually scrap that just had a couple more vapes all burnt and revolting.
Sorry OXVA this is not acceptable coil life at all.
I am using an e-liquid which is friendly in all other kits and I have never let the pod run dry or exceeded the maximum power limit.
Such a shame as I was enjoying this pod.
OXVA Xlim V2 0.6ohm Pod – 20-25W KA1
I did find this quite a bit thirsty compared to the higher resistance pods – which is to be expected really. I was getting around 70 puffs to one pod full.
50/50 E-liquid…
I might be pushing my luck here but am trying this pod with a 50/50 e-liquid – this time it is a concoction I have made using IVG Bubblegum Concentrate with 6mg nic salt. This pod may be more suited to thicker e-liquid as it is lower resistance but I will give this a bash first!
This coil is rated 20-25W and automatically the mod sets itself to 22W when this pod is inserted so that seems a pretty logical place to start!
As expected the lower resistance has upped the throat hit of my e-liquid even though the nic strength of this is lower than what I used for the other 2 pods originally.
Even on this pod the airflow is super tight and it gets hot when the airflow is closed right down!
Fully open is still pretty tight but not any tighter than the 0.8ohm pod.
The flavour is instant as is the auto draw again – super quick even with the fully open airflow. For me the most open airflow setting seemed to suit me the most.
I am really enjoying my 50/50 liquid on this pod with more of a throat hit!
I haven’t even increased the wattage either! Nice work OXVA!
Another great thing is that so far I have refilled this 10 times (including the 70/30 test below) – 600+ puffs / 20ml of liquid and the coil flavour is still excellent and zero leaks!
70/30 E-Liquid
As OXVA say this pod is suitable for “Freebase” e-liquid – which is generally the term used in other countries for what we call higher VG liquid in the UK.
In other countries “Nic Salt” is generally the 50/50 e-liquid with higher nicotine and “freebase” is reserved for the over 70% VG with lower nic levels. It seems odd to me as you can get 50/50 with high Nic Salt or Freebase nicotine in the UK and you can also add nic salt or freebase shots to the higher VG liquids.
So this pod in theory should be able to cope with 70/30 as it is starting to get into sub-ohm territory here but the 0.6ohm should be pretty good with either liquids.
Anyway I chucked a tankfull of the lovely Choppa Collection Bully Iced into the pod to see if it would handle this ok.
I left the power at the 22W I enjoyed with the 50/50 liquid and the flavour yet again was excellent. In fact the higher VG gives an even better and clearer flavour!
The ability to use 50/50 Nic Salt or higher VG (70%) in this pod makes it super versatile!
OXVA Xlim V2 0.8ohm Pod – 12-16W KA1
The power ratings are the same as the V1 pod but with the updated fill port.
I basically started at 16W as that was what the mod automatically set itself to, this setting was harsh with my 11mg nic salt but now I am down to 6 and this is just beautiful!
I love this pod the flavour is just excellent as with the V1 but without the leaks or stupid mouthpiece fill system!
So far I have refilled this 5 times (10ml in total) – 300+ puffs and the flavour is still super clear and crisp!
OXVA Xlim Airflow
With the airflow fully closed it is super tight! I mean sucking a melon through a straw tight!
Even with the airflow fully open it is still a very restricted MTL draw on both pods.
I tend to have my MTL devices in the sort of mid restriction setting – but the fully open on the Xlim is similar to a medium airflow on another device.
If you want a tight MTL airflow this really is the kit for you!
If you favour a restricted direct lung then this is probably going to be too tight for you.
Mod Performance – Good
The mod limits the maximum output you can have for each coil to protect from burning the coil and your tonsils out which I like.
I love the little screen – the resolution is great – you even have a little OXVA icon graphic when switching on! The display is clear and was far better than I expected it to be.
The USB port worked perfectly – it is a shame it is placed on the bottom as it does mean lying the device down to charge – which when you have a leaky pod is not great.
OXVA Xlim Mod Performance – Bad
I did have a brief fault on the Gunmetal V1 kit.
After I had refilled the pod for the 2nd time it would no longer recognise the 0.8ohm pod.
It kept saying “No Atomiser” or when it did register the pods existence it was displaying 1.2ohms??
I am unable to establish if this was a mod or pod fault, but it did rectify itself.
It is worth noting I had no leaks on the Gunmetal kit so it was not due to e-liquid ingress.
The wattage adjustment is a bit clumsy – there is only the one operating button so you have to do multiple clicks and only move up in 0.5W increments.
Obviously as I am reviewing this kit with different pods and power levels it is more of an issue for me.
In general day to day use you will probably find your sweet output and not have to adjust it again.
Battery Life
These things are always difficult to report back on as it will vary according to your own vape habits, coil installed and power level selected.
However this does have a puff counter which may help your judgement.
I timed the battery life with the 0.8ohm pod twice at 12.5W, both times it was around 9 hours, and the puff counts were 279 (1st run) and 241 (2nd run).
With the 1.2ohm pod at 12W I got 8.5 hours and 261 puffs (1st run) and the 2nd run (with updated pod) 9.5 hours and 332 puffs.
With the 0.6ohm pod at 22W I forgot to time it but I did get 115 puffs the first run and 216 on the second.
Pros
- Gorgeous looking device
- 0.8ohm V2 Pod over 3500 puffs so far – epic coil life!
- Two pods, USB Cable and Lanyard included (not all kits offer these!) – however lanyard not included in V2 kit!
- 0.8ohm pod has immense flavour, warmth and throat hit even at the lowest recommended output setting!
- 0.8ohm / 0.6ohm pods were still full of flavour at 10 refills (around 20ml of e-liquid)
- 1.2ohm pod still has incredible flavour but is far smoother and less throat hit.
- 0.6ohm pod is powerful and had zero leaks!
- Can use 50/50 or 70/30 e-liquid with the 0.6ohm pod quite happily!
- Mod limits the output selection to suit the coil to prevent damage
- Airflow is super tight – even quite restricted on most open setting – perfect for MTL vapers
- Auto draw fire is quick and responsive – best I have found on a pod kit!
- Beautiful screen display and cute LED indicator
- Great battery life
- V2 pods have a better filling method
- View of liquid level easier with V2 pods
- Can lock the fire button and just use as auto draw – ideal for bags and pockets.
Cons
- Mouthpiece removal on V1 pod is tricky – especially for the first time
- Gunmetal kit stopped recognising the 0.8ohm pod at one point – but it did rectify itself.
- Wattage adjustment with just one button might be off-putting to some who are not very technology savvy.
- 0.8ohm / 0.6ohm pods are thirsty on e-liquid
- 1.2ohm V1 pod burnt out after only 5 refills – on two pods!
- Airflow is super tight – might be an issue for those who like a less restricted airflow.
- V2 pod fill port is small and anything bigger than my 10ml bottle nozzles would not fit and spill e-liquid everywhere!
Final Review Verdict
V1 Version
All I can say is – “Nah don’t bother”! The V1 kit for me was not good – the pod design, leaks, hard to refill and crap pod life spoilt this for me! Buy the V2 instead!
V2 Version
Did the V2 pods cure all the pod issues?
Well they are a massive improvement! I had no leaks which is a great start!
The filling method is so much better but still isn’t quite perfect. The fill port is small and any bottles over 10ml would not fit into the port and cover me in e-liquid instead. Also the port cover can be a bit fiddly to replace and can pop back open.
I must add about the pod life being fantastic over 3500 puffs so far, and the flavour is just starting to drop now on the 0.8ohm V2 pod.
Would I Buy This Kit Myself?
The answer is “Hmmm”.
V1 Version
Save your money on the V1 kit and go buy the V2 instead!
V2 Version
Yes I would buy this version. The V2 pods almost cure the issues of the V1!
No leaks, easier to refill but still a bit fiddly. Also the clear pod makes viewing your e-liquid level much easier.
The mod performed flawlessly and the auto draw is one of the best I have found on a pod kit.
So far the coil life has been great too – definitely an improvement on the V1!
The flavour and performance of both included pods is excellent and I have no issues recommending the V2 kit! In fact the 0.8ohm V2 pod is vaping even better than my beloved Innokin Sceptre! I’m shocked!
I actually love the V2 Xlim!
If this review was only for the V2 the marks would be a lot higher, but I have reviewed both versions together and the V1 faults have lowered the overall score unfortunately!
So is this a pod kit you’re using or thinking of buying?
Please let me know your thoughts and opinions in the comments below!


Great review! I’ve been considering getting the OXVA Xlim Pod Kit, and your insights on the flavor quality and battery life are really helpful. Love the detailed breakdown of its features. Thanks for sharing!
why does it make a hissing noise when i press the button to power off? is this normal or is it burning my coil?
It might just be firing as you are pressing the button? Is that what you mean? If you do the 5 clicks really quickly you shouldn’t get this happening, but it even happens to me – sometimes my “clicks” are just not quick enough!
As long as the pod isn’t empty and you arent holding the button down for ages there should be no problem.
Anyone know what happened to my oxva pod?
I went to charge my pod and then some moment it was fully charged, the oled screen turned off permanently. It still functions the usual way, the led lights and etc. but the oled screen just doesn’t turns on anymore.
Sounds like a fault to me, I would try to talk to where you bought it from and tell them it is faulty see if they will exchange it for you.
If no joy I would contact OXVA direct – on their support page it says…
Tel:+86-0755-2371 2921
Customer Service Email:support@oxva.com
Often you can also communicate on their social media by sending a Direct Message – https://twitter.com/Oxva_Official https://www.facebook.com/oxva.official
V2 is simply awesome. Great build quality, pin sharp informative display and best of all a great vape. I chuck in any old liquid, set the wattage low and get great flavour. I’d recommend one to anybody.
I totally agree still using my V2 and Xlim SE daily! Haven’t found anything that compares with the flavour!
Hello Michelle
i wont to thank you for this useful review
can i use 0.6 on V1 ?
I have V1 18w max
Now you have stumped me! I am not sure and the Oxva website doesn’t say either, I will try to see if I can find an 0.6ohm pod to try.
Update found some 0.6ohm – I thought I had a V1 – and tried the 0.6ohm and it seems to read it and set the power to 22W, but I am not 100% convinced it is a V1, as I was sent quite a few as the design progressed.
So I cannot confirm that they are compatible sorry – I had a try!
I want to thank you again for your efforts , i found that my oxva xlim V1 is 25W but you can adjust the wattage only without pod
hi michelle, just using oxva slim v2 for almost a week (Thanks that i find your review that help me decide my first pods)
may i know your daily ideal watt settings?
is it 16 or 12 W ?
Thank youu
Depends on the Pod really, for the 0.8ohm 15-16W is great.
The 1.2ohm I didn’t get on with but I found it better with 12W but it didn’t last long before it burnt out.
For the 0.6ohm 22W was where I enjoyed it most.
I regularly now use the 0.8ohm V2 pod at either 15.5W in Xlim V2 or the preset 16W in the Xlim SE.
The coil life of this pod is just epic!
This review help alot
Thank you so much
Hi Michelle, Thank you for your review for us.
Very sorry for the experience of Mouthpiece removal.
I know the mouthpeice is a little hard to remove at the first time. Maybe with fingernail or tools, it would be better. And second time it will be much easier. It is a little rare because your cartridge is super hard to remove all the time.
And for the thirsty on e-liquid on 0.8ohm.
Because the Max power is 18W. Normally little pod is just 11W. But to make it has awesome flavor, We make its max power to 18W. I think you love the flavor of it.
But maybe it will use liquid faster than normal pods because of higher power.
And our power output is also real power output.
For the problem of 25W,
We will also release a 0.6ohm cartridge in November. That one can be used for 25w .
And very sorry not tell you about this in advance.
It is my fault.
We are sure it is very nice product, and we are sorry for that you don’t have good experience this time.
Best regards
Simon
OXVA