The Vaporesso Swag PX80 is the third of the Vaporesso Swag line, and it’s the only Swag pod mod.
What I like most about that, is most manufactures would have used the exact same design and shape but replaced the 510 connection with a pod connection but not here, it’s a completely new mod.
The original Vaporesso Swag kit was launched in early 2018 and the Swag 2 came in early 2019, so we’ve got a nice evenly spread range, which is nice to see. FYI the Swag range so far has been a great success, so lets hope for more Vaporesso goodness.
Vaporesso Launched in 2015, its mission is to make vapes that have a great taste concentration, easy and safe to use while looking and feeling great.
If you for some reason have never heard of the Swag kits, you may have heard of Vaporesso’s Gen, Luxe, or any of the Target kits.
What Can We Expect From The Vaporesso Swag PX80?
The first thing I always ask is what’s the power situation? The Vaporesso Swag takes an external 18650, powers from 5w to 80w and take a 2A USB-C charger.
My favourite thing about the mod is the embedded screen. At first I had no idea what that meant, but it actually means the screen is hidden…so cool!
The GTX coils are quite popular, so I’m sure many people will be glad to know it is GTX compatible and thanks to the Axon chip it can fire in 0.001 seconds, apparently.
It has Quad Leak protection and you can change the coils without it loosing all of your liquid.
Did I mention it also has a super simple and genius, adjustable airflow?
Vaporesso Swag PX80 – Harley’s Video Review
Inside The Box
- Swag PX80 Mod
- Swag Pod
- GTX 0.2ohm Mesh Coil
- GTX 0.3ohm Mesh Coil
- USB-C Charger Cable
- User Manual
- Warranty Card
- Reminder
I Also received a pack of GTX 0.8ohm Mesh Coils and a pack of GTX 0.6ohm Mesh Coil.
Vaporesso Swag PX80 Specifications
- Size: 99.7 x 24.1 x 47.7mm
- Pod capacity: 4ml (2ml TPD)
- Battery: external 18650
- Power Output: 5-80W
- Charging: 2A USB-C
- Display: hidden 0.96″ TFT screen
Vaporesso Swag PX80 Features
- Adjustable Airflow
- E-liquid Flow Control
- GTX Coil compatible
- AXON Chip
- Quad Leakage Protection
Design & Build Quality
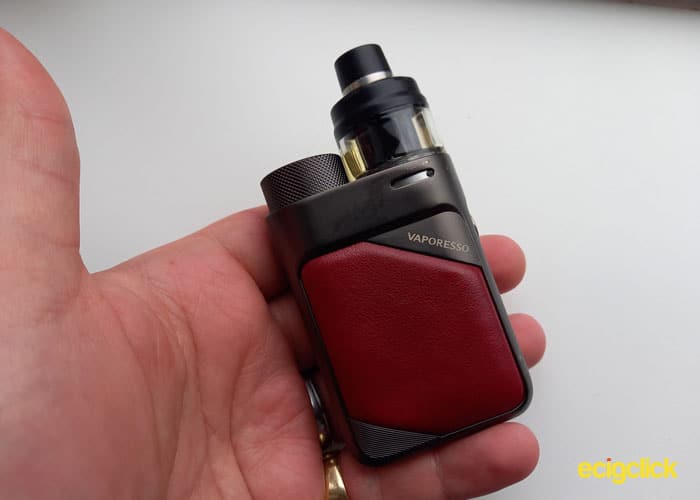
I actually received 2 of these kits, one in black and one in red.
Although I was genuinely torn between the two, I chose the red one for a change, because I always opt for black.
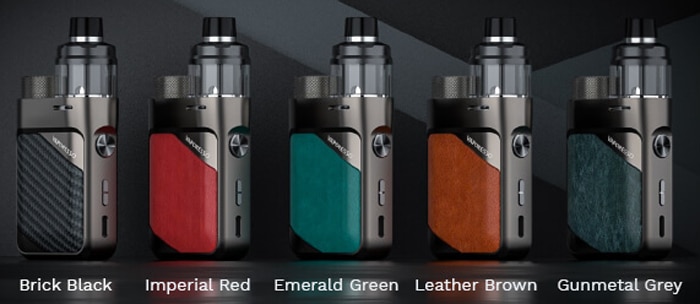
As you can see, the kit comes in 5 different colours and it looks awesome in each.
The Vaporesso Swag PX80 Mod
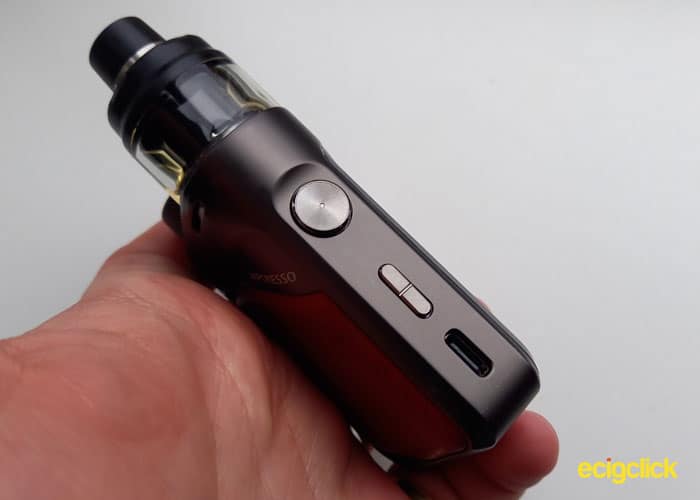
For such a little looking thing, the Vaporesso Swag PX80 mod is so well designed. The only way to describe it in single words would be compact and handsome.
I.. I… I’m sure I can’t do it justice in how awesome this thing looks!
On one side is a padded leather patch, which looks pretty cool, it’s a hexagon or gem shape. I appreciate that extra little bit of effort in the design.
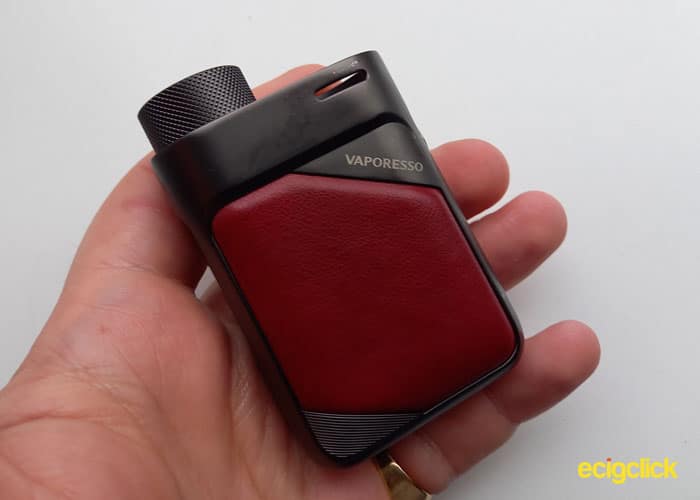
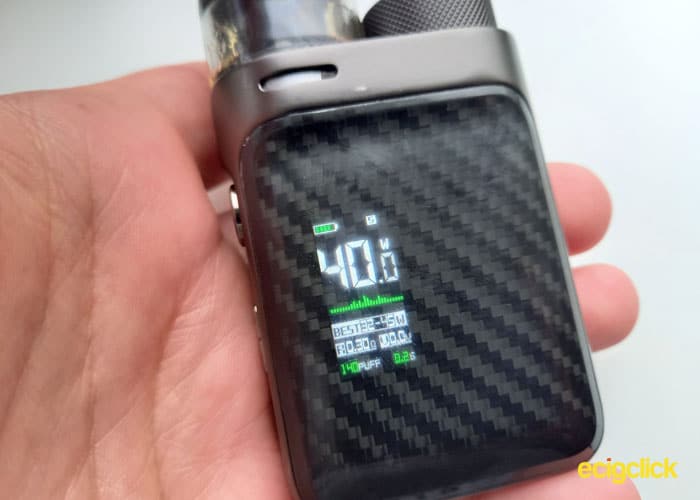
The reverse side is what looks like a simple carbon fibre sticker, however underneath that carbon fiber ‘sticker’ is the screen, we just can’t see it when it isn’t lit up.
On the other side is the fire button, power adjustment buttons and the USB-C port, the reverse side to that has been left empty.
The Vaporesso Swag PX80 Buttons
The fire button on the Vaporesso Swag PX80 is quite small, measuring at 10mm in diameter, but it can’t be much bigger without protruding out the sides.
It has a radial grip pattern and it does suit the mod nicely.
Unfortunately the fire button does have a rattle to it, which was quite disappointing.
The power adjustment buttons don’t rattle though and although they’re small they suit the mod and are still quite easy to press.
Vaporesso Swag PX80 Screen
If you haven’t already noticed, I’m a huge fan of the hidden screen, it’s so cool!
But does it work?
Yes, it works, really well.
While the screen is off you cannot see it at all, not even the boarder and while it’s on you can’t see the ‘carbon fibre‘ and even better the screen is crisp and fresh.
Okay, my camera picked up the pattern, but I promise, with the naked eye, you can’t tell it’s there.
Up in the top left corner we have the battery level indicator, which is comprised of 5 segments but doesn’t have a percentage.
In the top right is the power mode ‘S’ for Smart wattage, ‘V’ for Variable Voltage or ‘W’ for Variable Wattage.
Just above the middle on the screen is the power setting and below that is a funky looking bar chart thing… I don’t think it actually provides any information, but it dances around when the mod is firing.
In the bottom half is all the information relating to the coil and power. First off is the ‘Best’ power recommendation for the coil you are using, below that is the resistance and voltage, with the puff counter and timer on the very bottom.
I’ll say it again, I’m a fan!
If you don’t like the green colour, fear not, it has changeable themes so you can choose between Green, Blue or Pink.
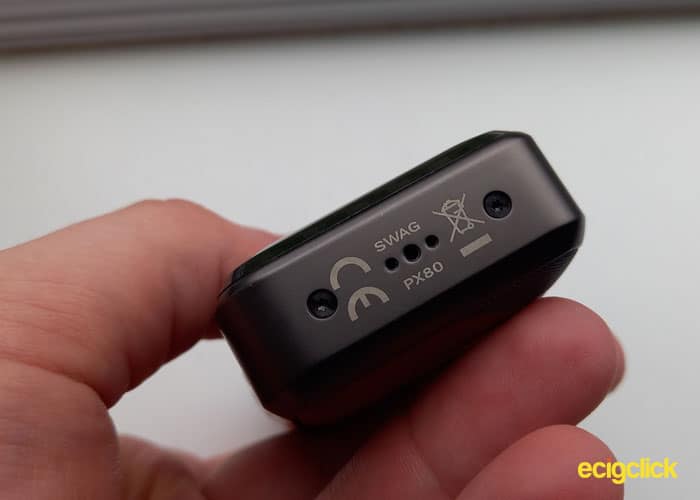
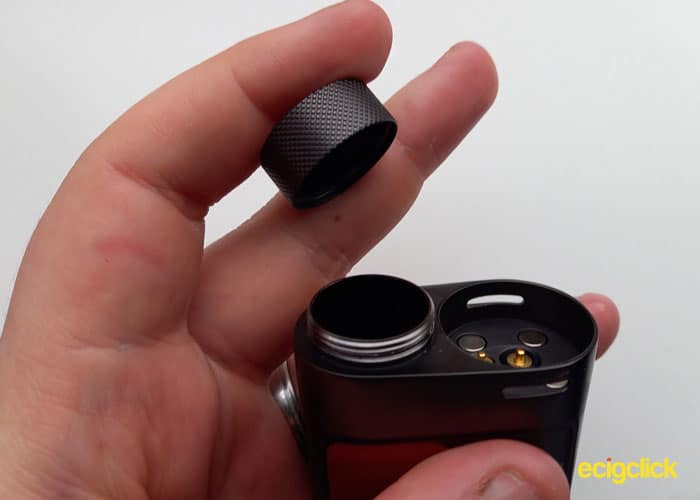
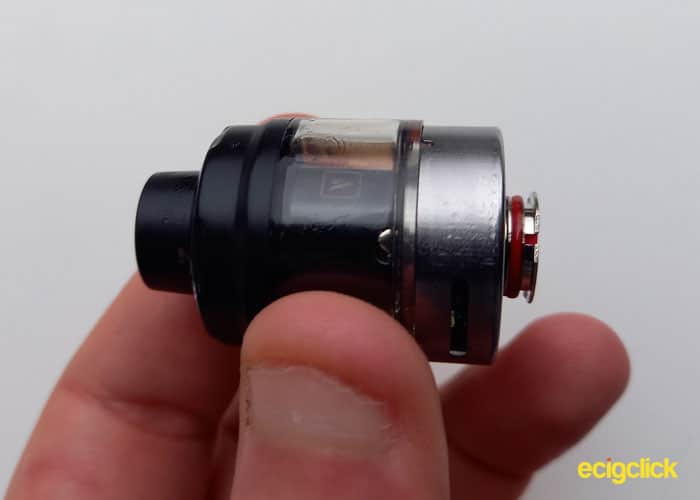
Vaporesso Swag PX80 Battery Location
The battery is located at the side of the pod, underneath the battery cap, I have to say this is one of my favourite types.
Compared to other ‘battery doors’ it has a super low chance of breaking and the combination of the knurled grip and good threads, it’s super easy to use.
Although I would be complaining if the mod had a 510 connection, because it limits the potential tank size but that isn’t really a concern because it is a pod mod.
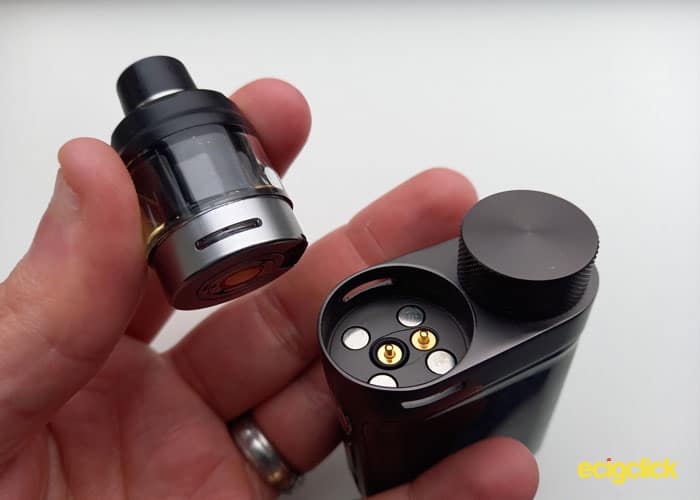
Vaporesso Swag PX80 Pod Mod Connection
The pod has a circular mental base, and is held in by 4 magnets that are placed inside the pod port, it holds it pretty firm.
There is 2 spring loaded pins just of center and there isn’t really much more to say…
Oh wait no, there is a part that is genius but yet so simple. I don’t know how all the other designers missed it!
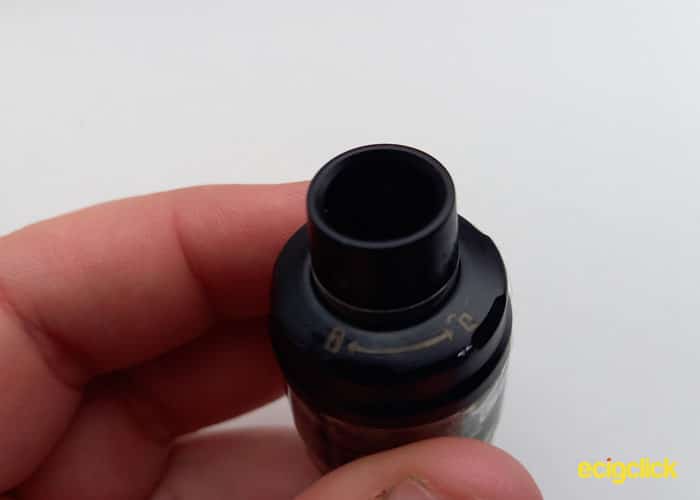
The airflow control, comprises of an airflow hole on either side of the pod, already that’s a bit different because the airflow usually just goes under the pod to the coil.
That are also matching airflow holes on the mod, so all you have to do to change the airflow is twist the pod.
When the airflow is properly matched up the airflow is fully open, from there, the more you twist it the more it will close.
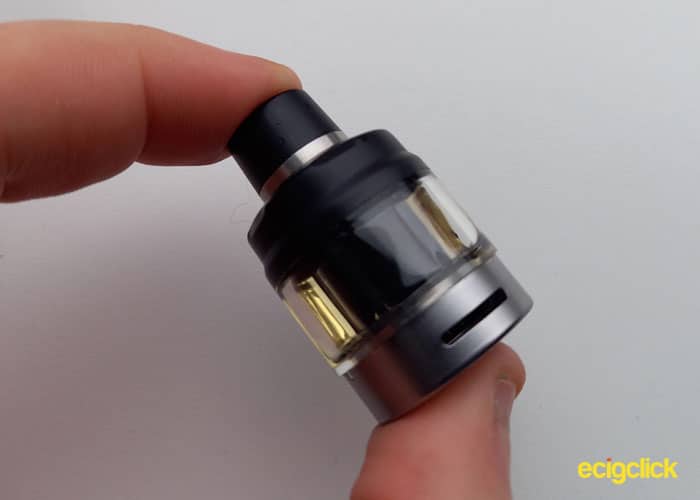
Vaporesso Swag PX80 Pod
So we’ve already discussed a few ways the pod is different to other pods (metal base and airflow inlet), other than that it just looks like another pod mod pod.
Although most pod mod pods look like tanks these days, with how the ‘top cap’ and mouth piece is formed on the PX80 pods, it give it that extra ‘tank look’.
There is one more thing we haven’t discussed though, the coil system.
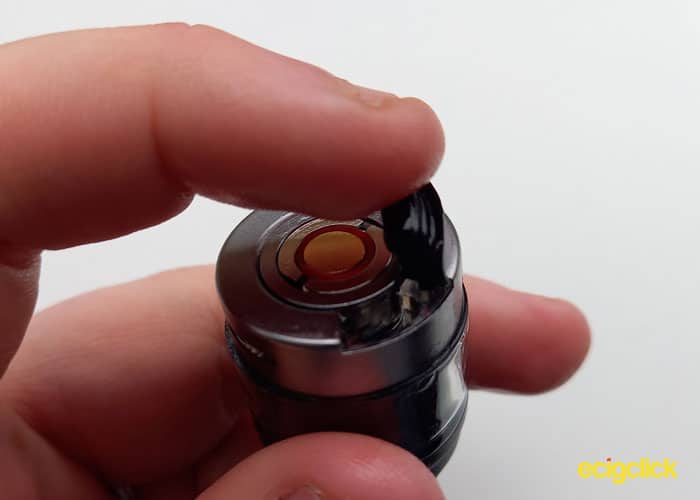
In order for the pod to have airflow inlets the coils need to be flush to the bottom of the pod, which they are… So, how are you supposed to pull the coil out if you can’t grab it? You don’t, you push it out!
When you push a coil in, it pushes the mouthpiece up, then you twist the mouthpiece to lock it in place. When it’s time to change the coil, simply just twist the mouthpiece to unlock it and push it down, to push the coil out.
I love it, it looks cool, works well and there isn’t anything to go wrong, like springs.
The Vaporesso Swag PX80 Mouth Piece
The Vaporesso Swag PX80 mouth piece stands at 11mm tall and has a slight conical shape to it.
Although it’s built in I quite like it.
Using The Vaporesso Swag PX80
Changing The GTX Coils
The pods don’t come with coils pre-installed, so we will start there…
- Remove the pod from the mod and turn upside down
- Push the coil into the base of the pod until it is flush with the bottom
- Twist the mouth piece to lock, as indicated on the top
- Fill with e-liquid and leave to soak for 4-5 minutes
To remove the coil…
- Twist the mouth piece to unlock, as indicated on the top
- Push the mouth piece down
- Pull and remove the coil from the bottom of the pod
Vaporesso Swag PX80 How To Fill
- Remove the pod from the mod and turn upside down
- Lift up the rubber seal from the bottom of the pod
- Fill through the fill hole
- Reinsert Rubber Seal and put the pod back on the mod
Vaporesso Swag PX80 Operation
- Power On/Off = Fire button 5 times within 2 seconds
- Adjust power= ‘+’ or ‘-‘
- Lock/unlock = Fire button 3 times quickly
- Menu / change power mode= press ‘+’ and ‘-‘ at the same time, use ‘+’ or ‘-‘ to navigate and fire button to select
How Does The Vaporesso Swag PX80 Kit Perform?
I used Untold Chapter 2: Candy Tide for both coils, it’s mixed at 70VG/30Pg, but is quite thin for a high VG liquid.
When I both started using the coils, the flavour was scarce and the vapour was quite harsh.
If you’re experiencing the same, stick with it a bit, it does get better.
GTX 0.2ohm Mesh Coil

The recommended wattage for this coil is 45-60w. In good tradition, we’ll start down low at 35W and it isn’t bad.
With the airflow fully open, a long drag gives us a small cloud and a hint of flavour, a bit of heavy diluted cordial pop, but for 10w under the recommended, it’s impressive.
45w is the bottom of the recommended range, and the flavour is more prominent but it’s still more of an undertone, it’s not really fulfilling or satisfying, and the cloud size is still medium.
52.5w is half way through the recommended range and I’m still not feeling fulfilled, it is very prominent but it’s just not filling the mouth with flavour.
It’s not terrible, especially for 52.5w but it’s not impressive either. As you would expect the cloud has grown a little bit too.
60W is the top of the recommended wattage and if you don’t draw as fast as you can, but take a nice big puff with the airflow fully open, you get a satisfying flavour, still not raving about it though, and the cloud is a thick medium size.
GTX 0.3ohm Mesh Coil

The recommended wattage for this coil is 32-45w. In good tradition, we’ll start down low at 25w and it is surprisingly good (for 25w).
Again I personally think it’s better with the airflow fully open. Although it’s not on every puff, it does often give a prominent flavour at the back of the throat. While the vapour production is a small cloud.
Upto the minimum recommended wattage, 32w gives an ok taste, but it seems to be distorting the flavour a fair bit. At this point I’d only been using this coil for a day and thought it could be because the liquid is too thigh, although as I mentioned, it is quite thin.
So I changed the liquid to Got Salt Peachy Promise (50VG/50PG Nic-Salt). Unfortunately that didn’t taste quite right either.
The flavour didn’t get much better, so we’ll skip to 45W, which is the top recommended wattage. Although the flavour still tastes a bit distorted, it is indeed prominent and it gives off a nice thick medium sized cloud.
GTX 0.6ohm Mesh Coil

This coil doesn’t come with the kit but Vaporesso sent a pack.
The recommended wattage for this coil is 20-30W and I’m using it with the Got Salts Peachy Promise.
Down at 20w, it does well, the vapour is thick enough but unless you take a long slow drag it’s barely a cloud.
As you go up through the wattage the flavour enhances nicely and so does the vapour production.
When you get to 30w the coil kicks out a nice flavour, it’s quite impressive for 30w and you get a small cloud.
Throughout, this coil provided a great MTL flavour.
GTX 0.8ohm Mesh Coil

This coil doesn’t come with the kit but vaporesso sent a pack.
The recommended wattage for this coil is 12-20W.
Down at 12w, it performs better [in my opinion] with the airflow fully open and being used Mouth To Lung and it’s super nice and prominent at the back of the throat, providing a cigarette like amount of vapour.
When you get to 20w the flavour starts to be recognisable Direct To Lung but it is still better at MTL providing a really nice and prominent flavour.
Vaporesso Swag PX80 Battery Life
The Vaporesso Swag PX80 takes an external battery and the most common 18650s are usually 2500mAh or 3000mAh which isn’t bad for this type of device, especially for it’s size.
It does come with 2A USB-C charging, which would charge a 3000mAh battery in about 1hour and a half but I always opt to use a battery charger because they tend to be safer and better for batteries.
However using a battery charger, always give you the perk of being able to charge a second battery while you’re using one.
The 2 coils that came with kit has a recommended wattage span of 32-60W so lets take a look at what you can expect from a 3,000mAh battery.
- 32W = 624 x 2 second puffs or a 2 second puff every other minute for 20.5 hours
- 46W = 434 x 2 second puffs or a 2 second puff every other minute for 14 hours
- 60W = 333 x 2 second puffs or a 2 second puff every other minute for 11 hours
Vaporesso Swag PX80 Does It Leak?
The Vaporesso Swag PX80 has “Quad Leak Protection”… but what exactly does that mean?
Simply put the PX80 has 3 O-rings to prevent leaking, 1 in the chimney, 2 in the base (one able the airflow inlet and one below) and the ‘self-circulation system‘.
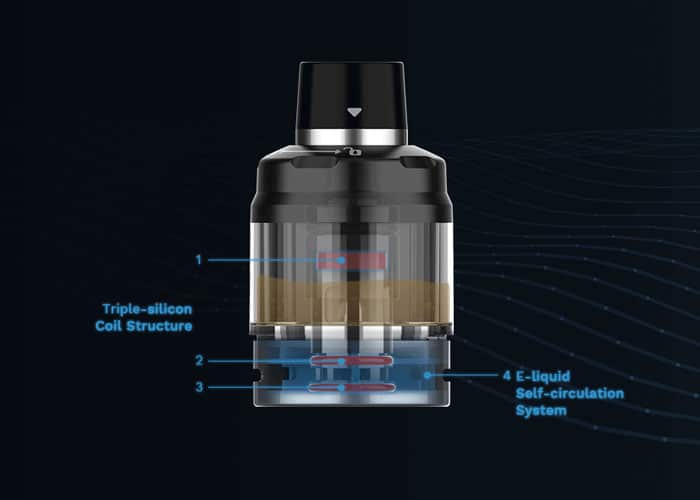
I’m going to be honest, I have no idea what ‘self-circulation system’ is supposed to mean, but I believe, it’s the fact the coil and the airflow is within the tank and doesn’t use the base of the mod like most pods do.
This should (and does) stop the condensation build up in the pod connection.
Just in case you didn’t catch that, I haven’t had any leaking or condensation build up while using the kit.
Can You Really Change The Vaporesso Swag PX80 Coil Without Losing Juice?
Yes pretty easily. The system design isn’t entirely new, it consists of the top of the chamber moving down to block the liquid flow when you remove a coil.
Typically these systems are spring loaded and in my experience they get jammed every now and then.

However, Vaporesso has completely made it their own with the pushing system, meaning it doesn’t need a spring and it also doesn’t get jammed.
This is one of those systems that need precision to work perfectly, too tight and it’s stiff, too loose and it’s practically pointless, so how did the Vaporesso Swag PX80 get on?
It worked well, I did notice, if you remove the coil and put the pod upright, if you keep running your finger along the bottom there is a very slow leak.
However the system isn’t designed for that, it’s designed to prevent e-liquid coming out when you remove a coil, and it works, perfectly every time.
Truth be told even if it didn’t work, the flow holes are fairly small, so as long as you keep the system upside down the vast majority of your liquid would be safe.
To summarise, yes it works but it’s not completely tight, so if you leave it upright without a coil in for a few minutes you may find you get a slight leakage.
Pros
- Adjustable airflow
- No Leaking
- Feels durable
- External battery and 2A USB-C
- Good / Easy Battery Cap
- Strong Connection
- Easy To Fill and Change Coil
- Simple and Easy To use
Cons
- Not the best DTL Flavours
Final Review Verdict
I love it, I really do.
I know the GTX coils are major popular so this will be a bit controversial but in all honesty the let down for me was the coils.
The two coils Vaporesso sent me extra (0.6ohm and 0.8ohm) were good at MTL but DTL was a major downside for me.
The 0.2ohm coil was OK for the power it uses, but the 0.3ohm coil was just disappointing.
The nerd side of me loves the embedded screen and the entire thing has been really well designed and built.
It’s easy to use and would be great for starters or someone looking for a little kit with an external battery.
I just don’t think cloud chasers or flavour chasers would enjoy it.


Well there is a MTL tank (2.5ml) which is sold separately … It’s a cheap accessory…
i got this the other day and im pretty happy with it, i just wish there was an option to have a proper mtl drip tip, even if they made a separately sold mtl pod i would buy, its a loose mtl draw but i think if it had a narrower chimney and drip tip it would be that much better, but im probably asking for too much lol as i know it would mean reworking the coil mechanism
All the had to do was make an insert for the drip tip so they wouldn’t have to redesign if they didn’t want to. I saw a Google image of a silicone drip tip insert and I’m looking to do something similar when I receive mine