In a break from pod kits I have got a proper box mod and sub ohm tank set up – the Vaporesso Gen 80S and iTank 2 – in for review.
Of course Vaporesso need no introduction for many vapers and their Gen range has a lot of fans. Previous models include the original Gen mod, Gen Nano, Gen X, Gen S, Gen 200 plus the Gen Fit starter kit and the Gen Air 40 and Gent PT80S pod kits.

I have not reviewed many Vaporesso kits and the ones I have are oldies – the Pod Stick, Revenger Mini and Switcher. So it will be great to get re-acquainted with the brand!
Thank you to Vape Club for sending the kit over for review, I will report back honestly on my findings of the device in my possession.
What To Expect From The Vaporesso Gen 80S iTank 2…
This is your standard Box Mod and Sub Ohm Tank kit. Some of the images below show the Gen 200 as they were released together, but have all the same components – apart from the 80S is a single battery versus the 200 dual battery.
When the original Gen 80S / Gen 200 were released, they included the first version of the iTank. Both kits have been updated to include the iTank 2 – which is what I will be reviewing.
Let’s look at the mod first…
The brain of the mod is the Axon chip, which has proved popular on many other Vaporesso mods.

The design of the mod is based on the coating of the Gen S to give more comfort and grip

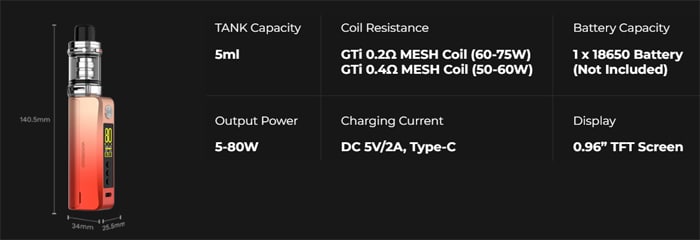
Output wise this is specified as 5-80W with multiple user modes which we will discuss later.
You will need a single 18650 battery which is not included to provide the power. There is a USB Type C port with a 2A charge rate for emergency charging.
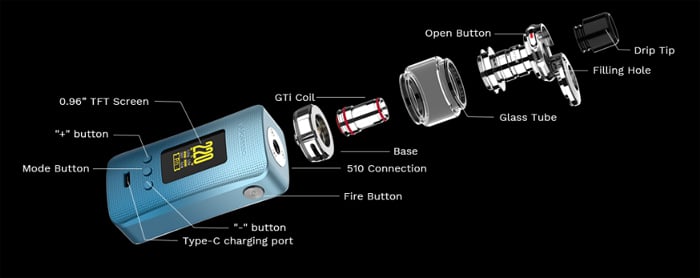
All of your vaping data is displayed on the 0.96in TFT screen.
The 510 connection on top of the mod has been upgraded, there were some complaints about previous Gen mods that the 510 plate would come loose.

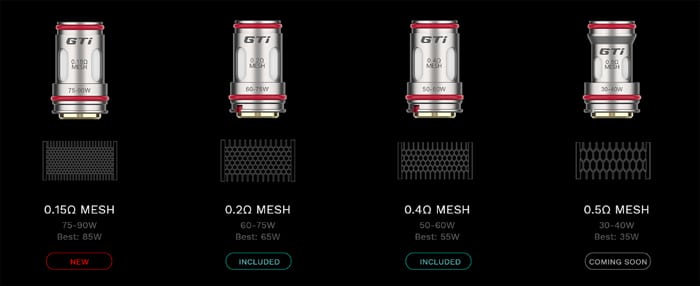
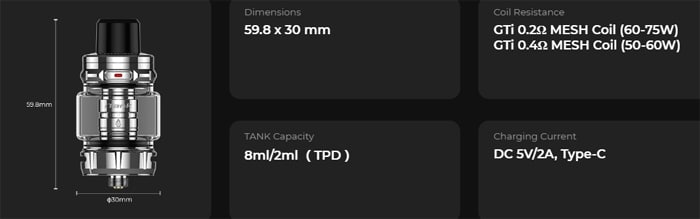
For the iTank 2 a new range of coils have been introduced – the GTi platform.
These have been updated to include the Corex Heating Tech which you can read more about here – “How Corex Tech Is Improving Flavour“.

Many recent kits have had the Corex tech which includes the Morph Mesh coil structure to give longer coil life and increased flavour.

Plus the cotton wicking material has been upgraded to a microfibre structure which promises a greater surface area and better wicking.
The GTI range so far has 4 coil options…
- 0.15ohm Mesh (available separately)
- 0.2ohm Mesh (included in kit)
- 0.4ohm Mesh (included in kit)
- 0.5ohm Mesh (coming soon)
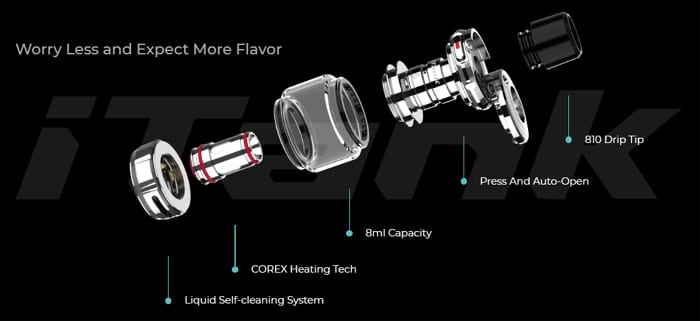
There are 2 capacity options for the iTank 2 – 8ml (standard) and 2ml for TPD regulated areas.
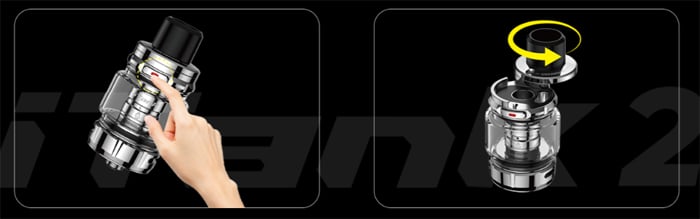
A press and slide top fill cap means filling is a breeze plus the tank base has an airflow control ring to adjust the air restriction to your preference.
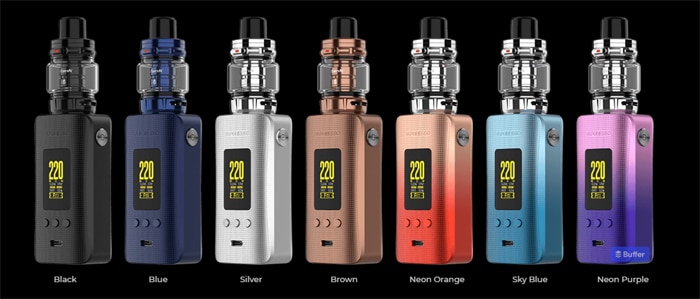
There are 7 colours to choose from: Black, Blue, Silver, Brown, Neon Orange, Sky Blue and Neon Purple.
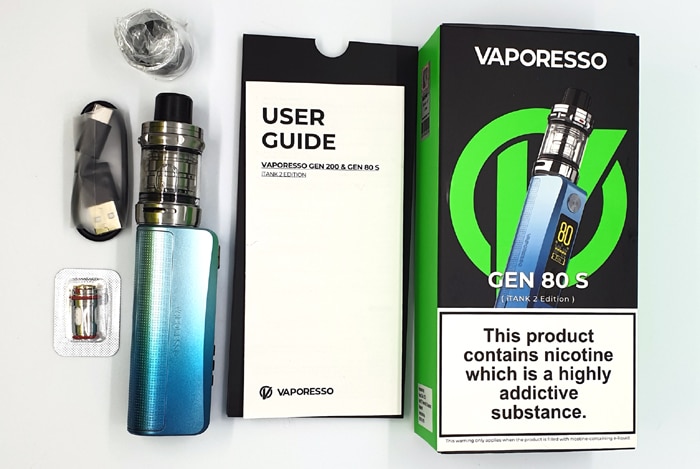
Kit Includes
- Vaporesso Gen 80S mod
- Vaporesso iTank 2
- GTi 0.2ohm Mesh Coil
- GTi 0.4ohm Mesh Coil
- Spare Glass
- O-rings
- Spare refilling Silicone gasket
- USB Type C cable
- User manual
Vaporesso Gen 80S Mod Specs
- Size: 140.5x34x25.5mm (including tank)
- Battery: 18650 (not included)
- Display: 0.96in TFT screen
- Output: 5-80W
- Type C USB charging – 2A charge rate
- Resistance range: 0.09-5ohm
- Axon chipset
- User modes: Variable Wattage, Smart, F(t), Pulse, VW Taste Modes, Variable Voltage and Bypass.
Vaporesso iTank 2 Specs
- Size: 30×59.8mm
- Capacity: 8ml (standard) / 2ml (TPD)
- Coils: GTi coil range
- Button / slide top fill
- Adjustable bottom airflow
- Corex heating tech
- 810 drip tip
- E-liquid recirculating system to prevent leaks and condensation
Vaporesso Gen 80S iTank 2 Design and Build Quality
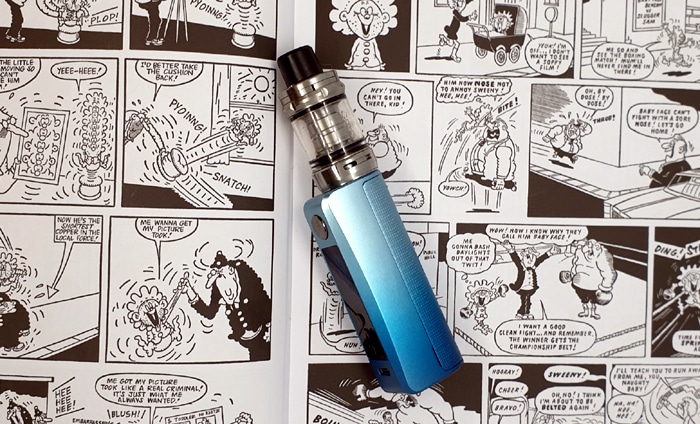
I received the Sky Blue version with the 2ml tank capacity.
The instructions are decent, but slightly confusing as this does have so many modes and adjustments. There is a lot of information to take in and the User Interface is not as intuitive as other mods I have used.
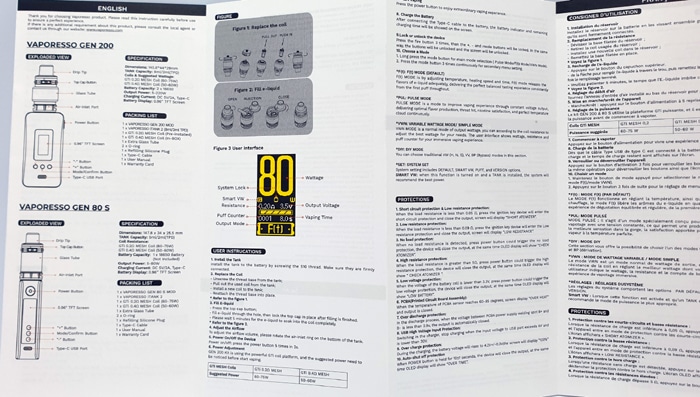
I have tried to explain them simply in the Quick Start Guide section further in this review.
You can view the instruction manual online here, which I often do as you can zoom in to see smaller text easier!
I will say the USB cable is a bit poor – look how long it is… 19cm to be exact from the tip of each connector!

Vaporesso Gen 80S Mod
Looking first at the mod and it really is beautiful!
The body is a gradient of Blue in a matte metallic finish.

The front and sides of the mod are the main metal frame and the rear is a textured removable battery cover.
You will find the one side has the “Vaporesso” text etched in and the only other branding is on the mod base!

One side of the mod houses the workface…
Workface
This has the same finish as the rest of the mod apart from there is a Black plastic panel.
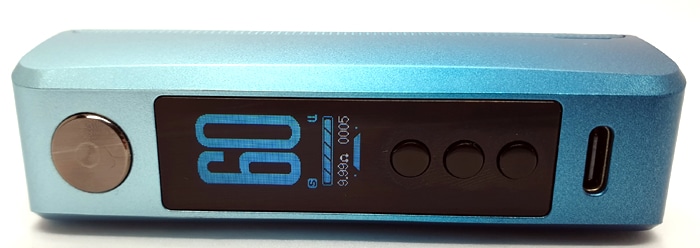
Above the panel is the circular 10mm diameter metal fire button. This has a record groove style texture and is super responsive.
Below the fire button is the Black plastic panel.
This houses the beautiful colour screen which is bright and clear to read. The actual display and theme colour will vary according to the user mode. I will discuss the screen in the “Quick Start Guide” section later on.
Underneath the screen are 3 small buttons, these are laid out vertically. The top button is the up or “+” button. The middle button is the mode button and the bottom button is the down or “-” button.

These are all very responsive but are very small without much of a gap between. So those of you with a chunkier finger might be pressing multiple buttons at once!
Finally the USB Type C port sits on the bottom of the workface. This connects perfectly with no issues. Also that means that you can charge the mod with it upright, which means less chance of leaks from the tank airflow if it were lying down.
Mod Base
There are 2 visible Black screw heads and they are surrounded by some engraving.
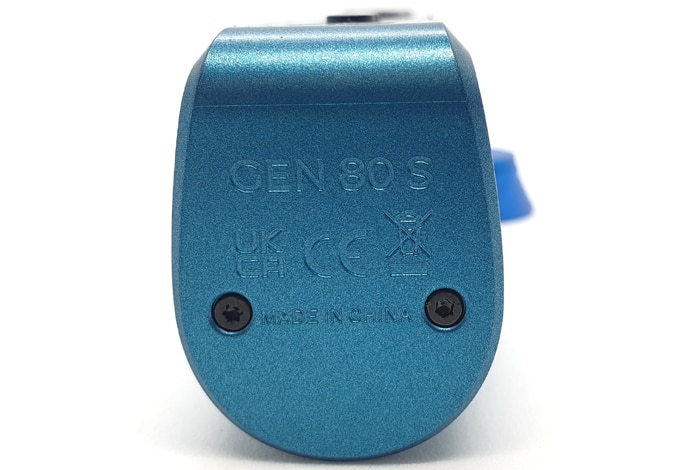
You will find the “Gen 80S” logo followed by the required legal logos and “Made in China”.
It stands up well on its base without the tank installed but installing the tank does make it slightly unstable as the tank is quite tall and heavy.
Battery Cover
As mentioned above this has a textured finish which according to Vaporesso has 3 coatings – including breathable Rubber, Metal Spray and Polycarbonate.
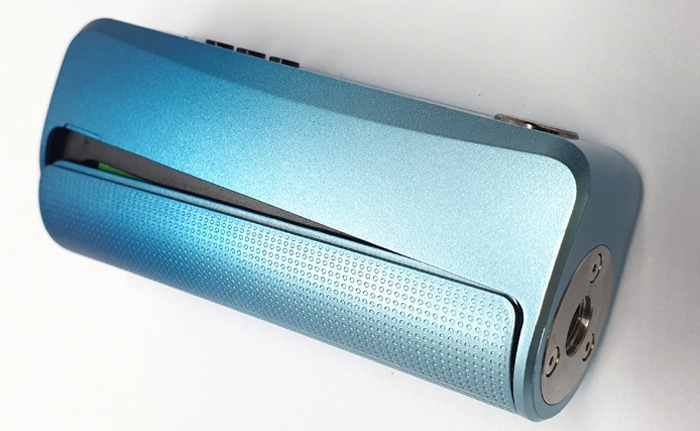
It does have a “Dimpled” texture which is nice to grip but not spongy Rubber as I was expecting.
This has the same metallic paint finish as the mod and is a “C” shape in profile.
It is secured by 2 magnets which match with corresponding magnets in the battery compartment.

A small cut-out on the side of the mod allows you to use a finger nail to prise the battery cover off. It is held on very firmly!

At the rear of the cover is an ingrained “V” for Vaporesso symbol.

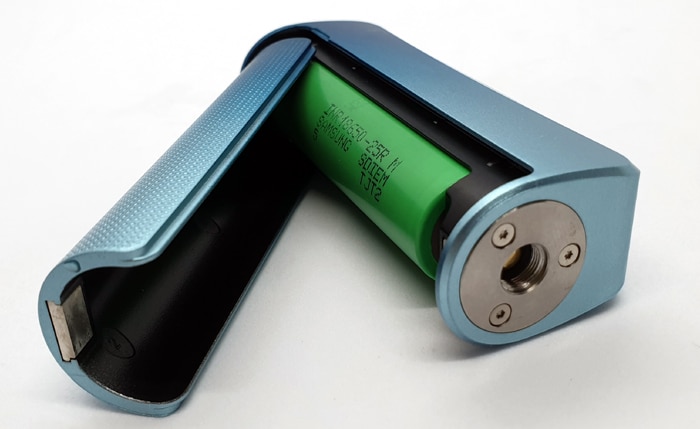
I really prefer this style of battery access, as often the battery door on some mods can wear over time and become loose or not even shut correctly. Whereas this “C” frame design seems to stay functional.
Battery Compartment
This is made from Black plastic with the magnets at the top and bottom to secure the battery cover.
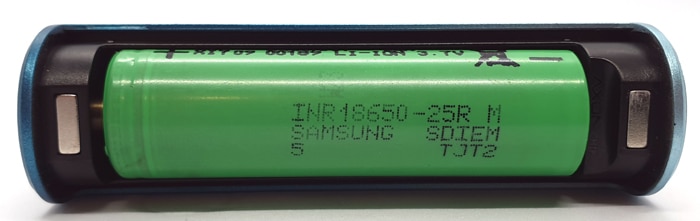
The bottom positive connector is spring loaded and does protrude a lot. Therefore when installing and removing the battery make sure to push against the positive connector to get the battery to fit easier.
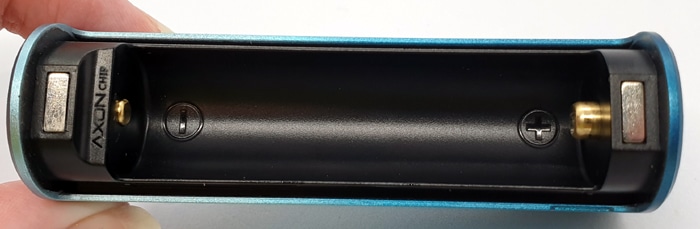
There are clear markings for the positive (+) and negative (-) poles but it is only etched into the Black plastic. I would like to see these made more prominent by the addition of colour.
Above the battery connectors is the “Axon Chip” logo – this denotes that the Vaporesso Axon Chipset is installed in the device.
510 Connector
Vaporesso have upgraded this connector as there were many reports of it becoming loose on earlier Gen models, which can render the device useless.
In fact when Neash reviewed the original Gen Mod in 2019 the 510 connector was already wobbling after only a week of use.

For that reason I was very pleased to see that the 510 connection has been reinforced with the addition of 3 screws to keep it super secure.
The threading is perfectly smooth and the centre pin is spring loaded to make sure the best contact is maintained with the tank at all times.
I would say 25mm is the largest diameter tank you could use on here without overhang. However the width is officially 25.5mm but there is a slight chamfer on the edge of the mod.
Saying this, the included iTank 2 has roughly a 26mm diameter and does look great but there is a slight overhang.
Vaporesso iTank 2
This is a pretty basic looking sub ohm tank with some nice features.
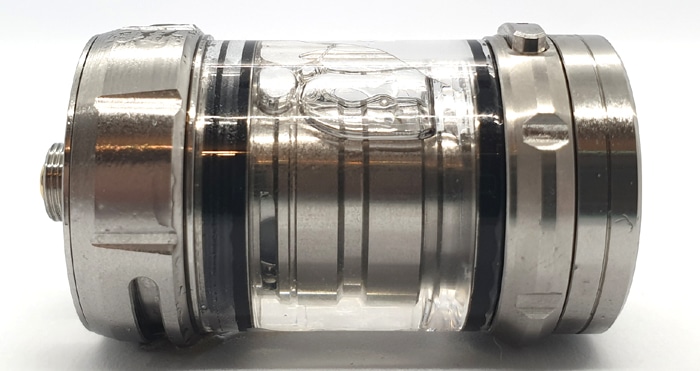
It comprises of left to right (in the image below) – the removable drip tip, top cap, chimney section, inner glass (more about this later), tank glass, removable coil and tank bottom cap.

The metal body of my tank is in Silver – which I assume is Stainless Steel.
It has a standard 810 drip tip – the one with the O-rings on the drip tip. There are no O-rings inside the tank cap – so the “Goon” style 810 tips (no O-rings) will not be suitable. However I have plenty of 810 tips so I tried another on here and it fitted perfectly. Always useful in case you break or loose the drip tip. I don’t really think it will fall out though!
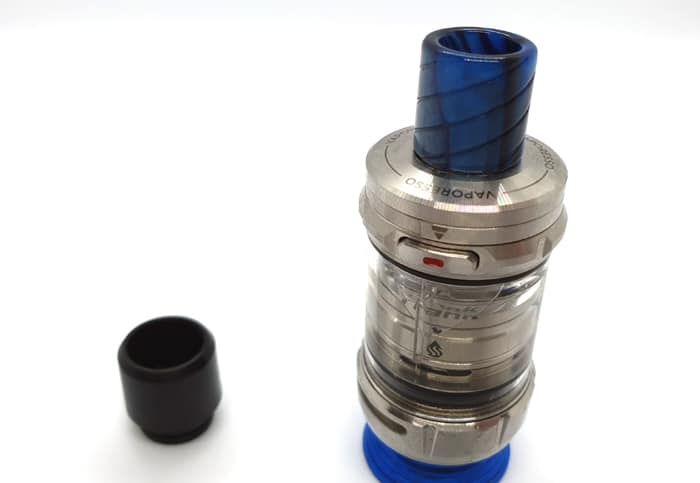
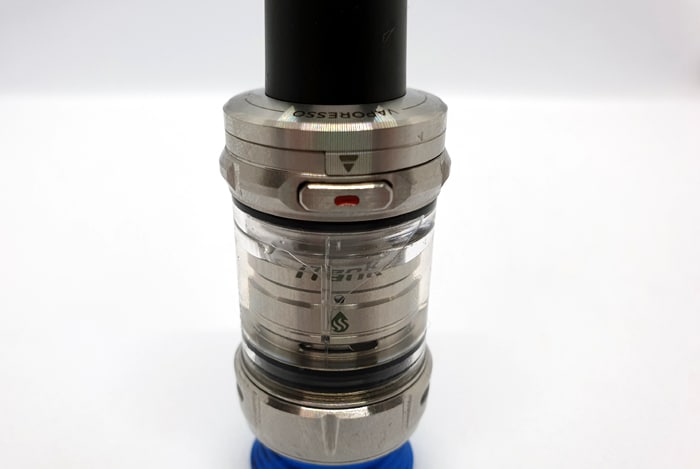
The top cap has some “Vaporesso” engraving on the top face and some chunks cut-out for grip.

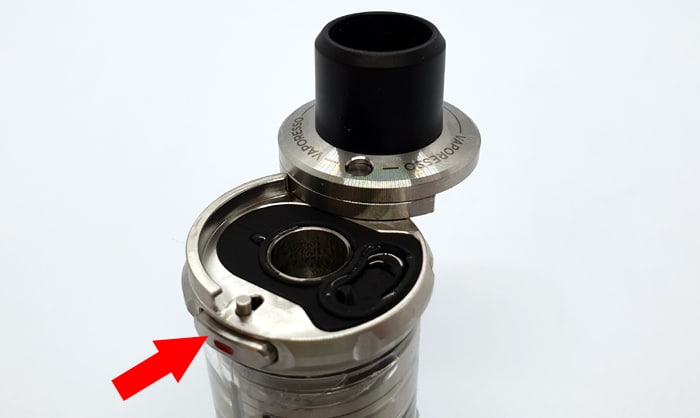
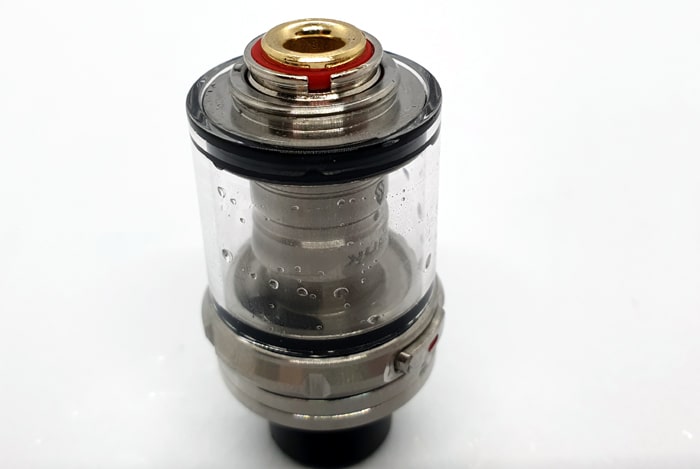
To access the fill port there is a button on the top cap of the tank. This has an etched in arrow above it and a Red “-” mark on the button itself. Simply press this and the tank top will swing open.
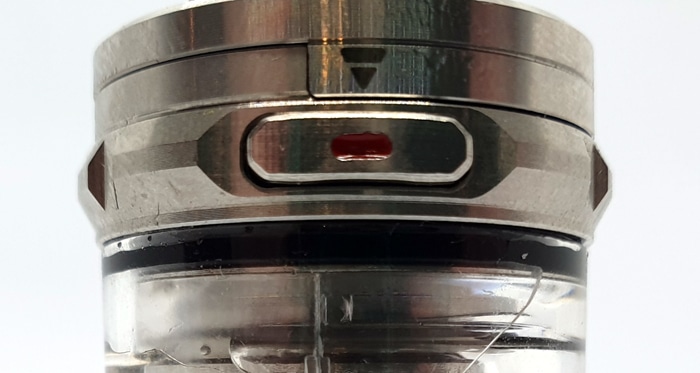
The spring open action does mean there is a slight resistance when closing the tank top. You do have to push it and wait for it to fully click into the closed position.
The fill port is a kind of “smiley” shape which is around 10mm in total length and 3mm in width. It is topped with a gasket which you must push the e-liquid nozzle through in order to fill the tank. This gasket helps prevent e-liquid leaking back out of the fill port. You also get a spare gasket in the kit which is great.
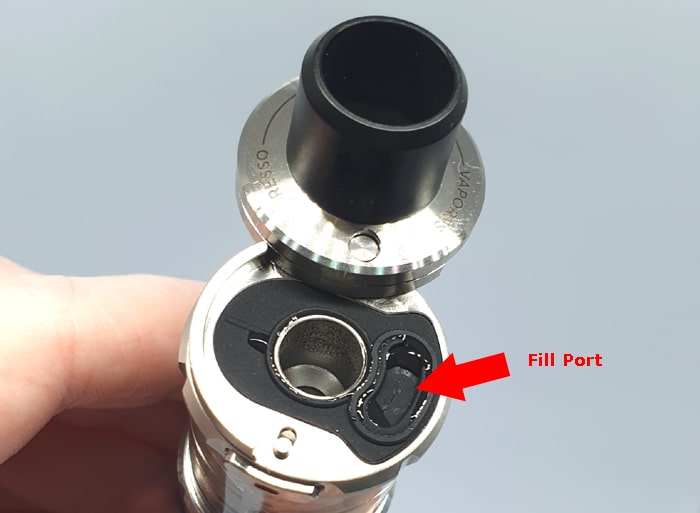
I had no issues with the port at all and as you can see I was using a large Gorilla 120ml bottle!
The Chimney section has the iTank logo engraved on and what looks like a drip symbol.
I think the engraving looks classy and doesn’t look Garish.
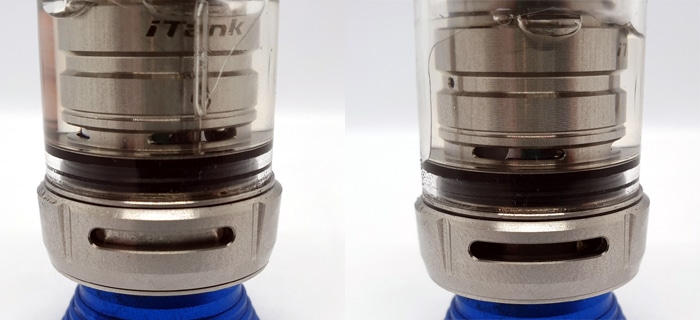
Finally the bottom cap provides the airflow adjustment. The rotating airflow control ring opens / closes off 2 large slot airflow intakes. This has just enough resistance so that it will not adjust by itself yet is still easy to turn thanks to the cut out grip areas.
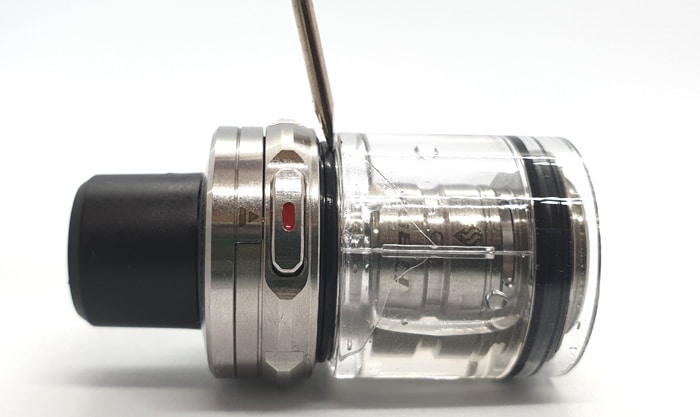
With the bottom cap removed you can access the coil. In the inside of the cap is the coil contact area which has a raised platform as the tank apparently recycles any condensation for re-atomisation.
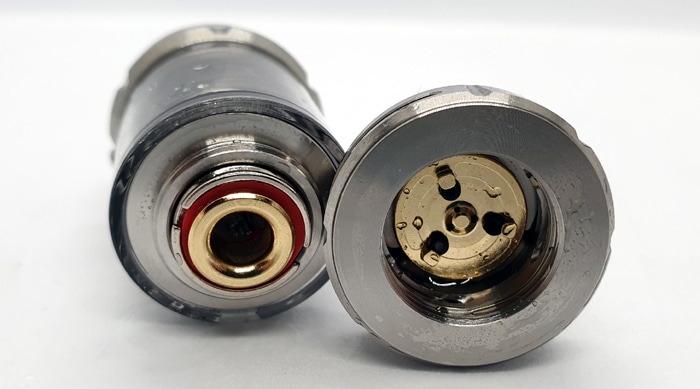
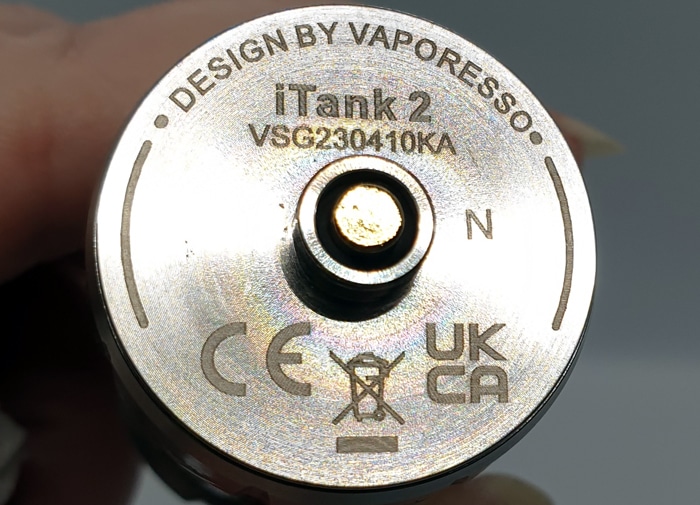
On the bottom of the tank there is lots of engraving – here you will see “Design by Vaporesso”, “iTank 2”, Serial Number and the required legal logos.
The 510 connector has smooth threads and the centre pin protrudes around 1mm and there is a good gap between the thread and 510 pin which should keep them isolated.
Replace the Tank Glass / Capacity Reducer?!?
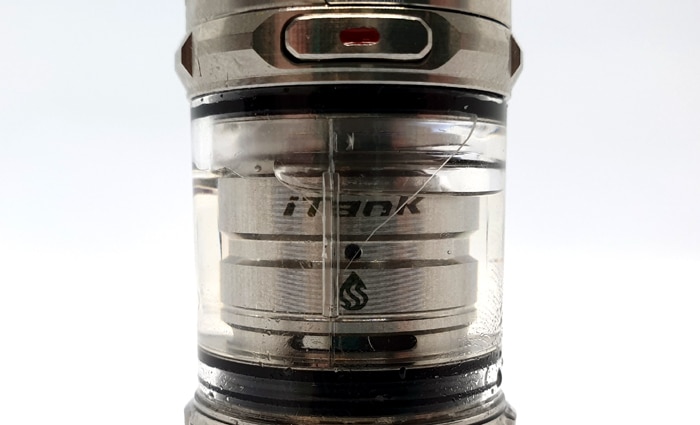
There seemed to be a bit of e-liquid on the outside of the tank after I filled it.
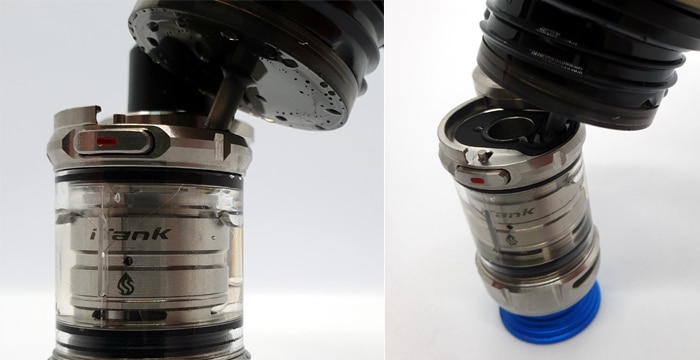
Upon close examination there looked to be a crack in the glass. No worries – there was a spare glass in the kit so I started to dismantle the tank to replace the glass.
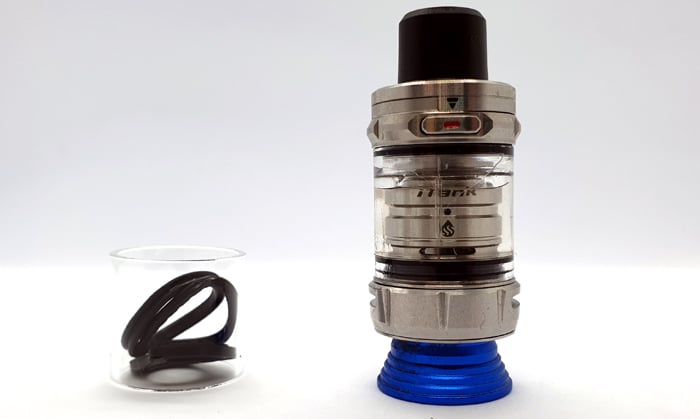
To do this you remove the base of the tank by unscrewing.
You will need a small blade to separate the glass from the strong O-ring that secures it to the top cap.
The glass will then slide off the base of the tank.
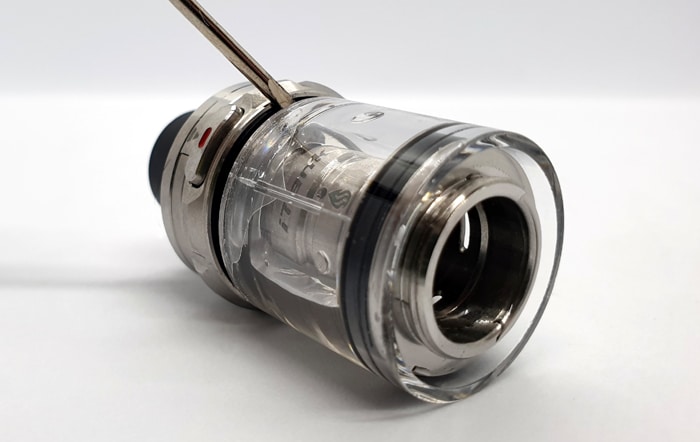
What happened next really surprised me.
There was another internal glass!!
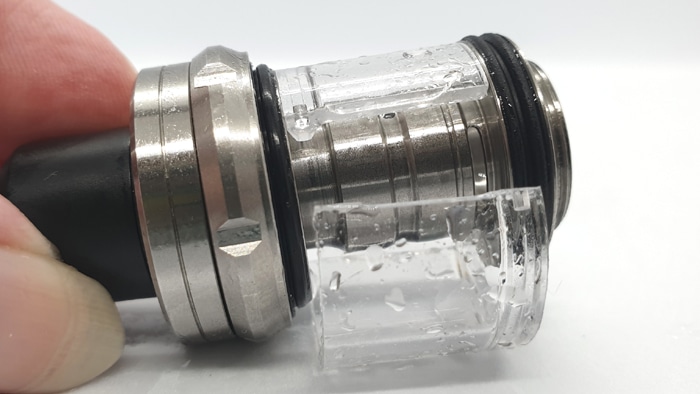
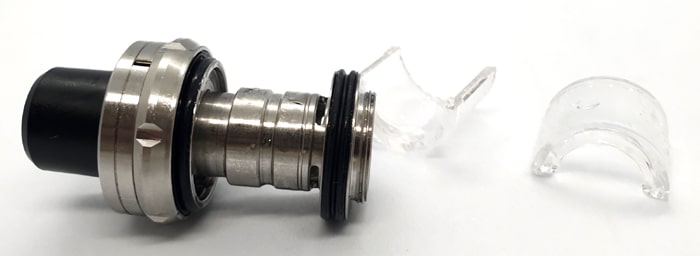
This inner glass had a seam, which when I run my thumb over it actually came apart! This was not glass but some kind of plastic and it was a 2 part construction!
I am thinking this internal tube reduced the capacity to 2ml! Confined the e-liquid into a smaller area?

When I had been filling the tank previously, it didn’t seem to be full – yet it was coming back out of the fill port! What had been happening is some of the e-liquid escaped from the inner tube to the outer tube and made it only look half full!
I was picking my brains as to whether this inner 2 piece tube section was vital to tank operation? It wasn’t used for sealing the outer glass and the coil was secured in the base – so I removed it.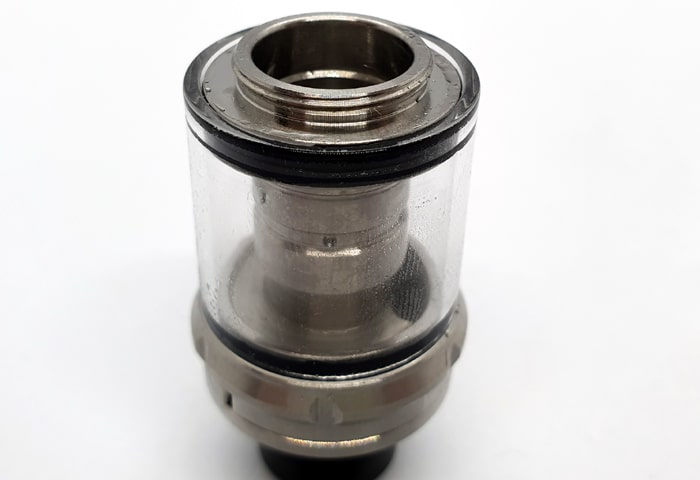
Guess what – upon assembling – no leaks – in fact this was better than before I removed the inner tube assembly! So I think I have increased the tank capacity?
I used a syringe to check this out and yes I was right – the tank was now 3ml in capacity!
Quick Start Guide
The kit arrives with the tank separate from the mod. The 0.2ohm coil is already installed.
You will need to fill the tank and install the battery – which I will cover later in this section!
Basic Operation
- Power On/Off = press the fire button 5 times.
- Vaping = hold the fire button to vape
- Adjust output = use the + and – buttons.
- Battery indicator = the battery icon on the screen displays the amount of charge remaining.
- Battery indicator when charging = the battery indicator and charging time will be displayed on the screen. However it is recommended that you use an external charger.
- Airflow = rotate the airflow control ring at the base of the tank.
- Change user modes = press the Mode button and hold until the mode icon at the bottom of the screen flashes. Scroll using the + and – buttons and when the required mode is shown leave the mod alone and it will return to the home screen.
- Advanced settings / user modes = Press the mode button 3 times for advanced settings.

- Plus you can also select “Set” in the above menu to change device settings.

- Lock / Unlock = Press the fire button 3 times to lock / unlock the adjustment buttons.
Screen
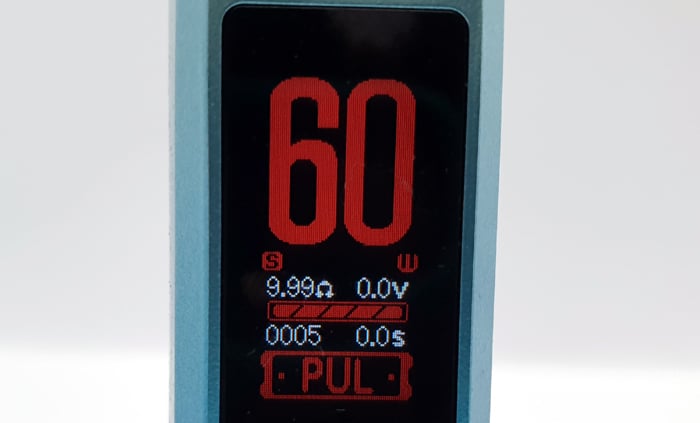
The screen shows a lot of information – which I will explain…
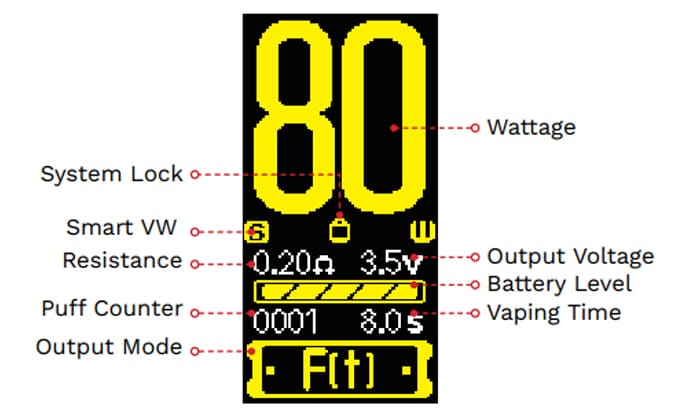
- First at the top is the power level selected in Watts.
- The “S” or “V” symbol denotes whether “Smart” or “Variable Wattage” modes are selected. Smart mode automatically adjusts the output to the optimum level for the coil installed. Variable Wattage allows you to adjust the output yourself.
- The Lock icon appears when you lock the device.
- To the side of the lock icon is the “W” symbol to denote “Wattage” which is the output unit of measurement.
- Then you have the coil resistance followed by the “Ω” symbol which denotes the resistance unit of measurement – ohms.
- The output voltage will display when vaping (not in VWN mode). This is not the full battery voltage as this device is regulated to supply the power selected.
- Below this is the battery charge remaining icon.
- A puff counter and vaping time value is displayed below the battery icon.
User Modes
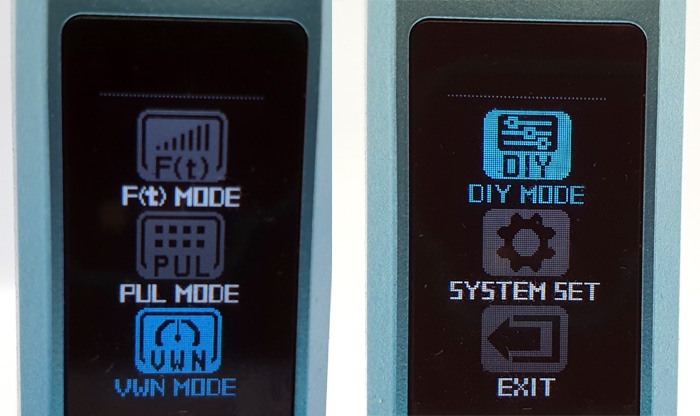
These are displayed at the bottom of the screen…
- “F(t)” – a method of automatically adjusting the output temperature and heating speed versus time to deliver better flavour. This is made possible by a series of differing voltages applied in quick succession during each vape.


- “PUL” – Pulse mode – this is where the device pulses the voltage output every 0.02 seconds to improve the efficiency of the vape and keep a more stable output.

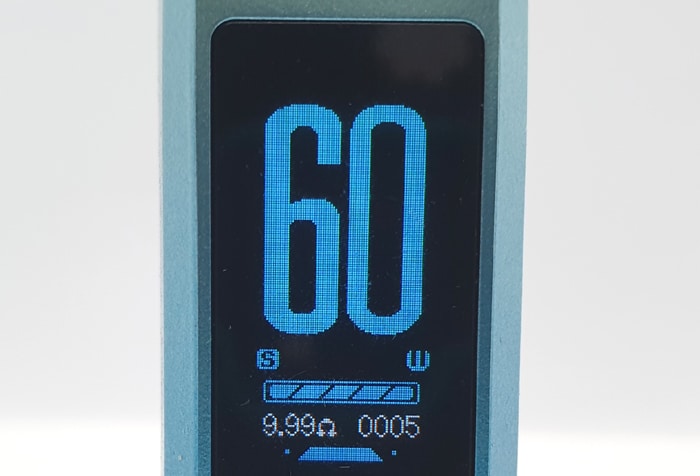
- “VWN” – Variable wattage / simple mode – this is the basic adjustable wattage output. There is less info displayed on the screen to stop things becoming too complicated.

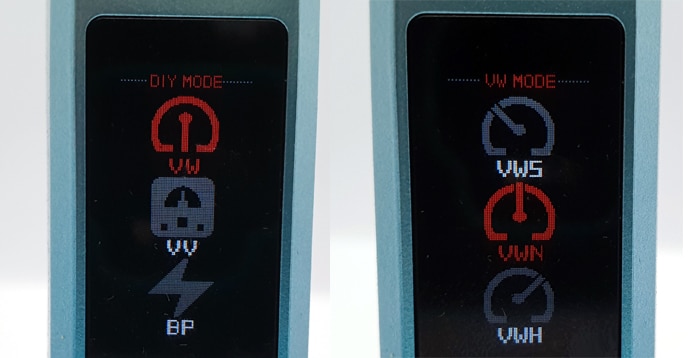
- “DIY” – here is where you can choose more advanced adjustments such as Variable Wattage taste modes (H=Hard, N=Normal, S=Soft), Variable Voltage (VV) or Bypass (BP) (unregulated mode).

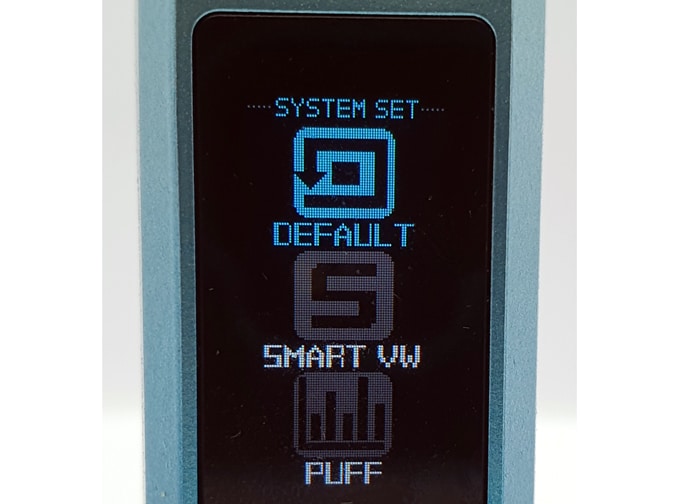
- “SET” – here you can select “DEFAULT” which resets the device to factory settings, “SMART VW” as explained below, “PUFF” – clear puff counter and “VERSION” to view the firmware version.
- “Smart VW” – the mod automatically selects the appropriate output to suit the coil resistance installed.


Protections
- Low Battery: When the battery voltage is below 3.3V it will not fire and will display “Low Battery”. Replace battery with a fully charged one. Or if unable to, then charge using the USB Type C port.
- Short circuit / coil low resistance: screen will display “Short Atomizer”. Clean all contacts and replace the coil.
- Low resistance: If the coil resistance is below 0.09ohm (also the same if a short circuit) the mod will stop the output and display “Low Resistance”. Clean all contacts and replace the coil.
- No atomiser: if the mod cannot pick up the coil resistance it will displays “Check Atomizer” and will not fire.
- High resistance: if the coil resistance is greater than 5ohm the device will not fire and will display “Check Atomizer”. Clean all contacts and replace the coil.
- Over time protection: If the fire button is held down for longer than 10 seconds the fire operation will stop and the screen will display “Over Time”. Continue vaping again.
- Overheat protection: If the temperature of the circuit board reaches 60-85° the screen will display “Over Heat” and the mod will not fire until it has cooled down.
How To Install The Battery
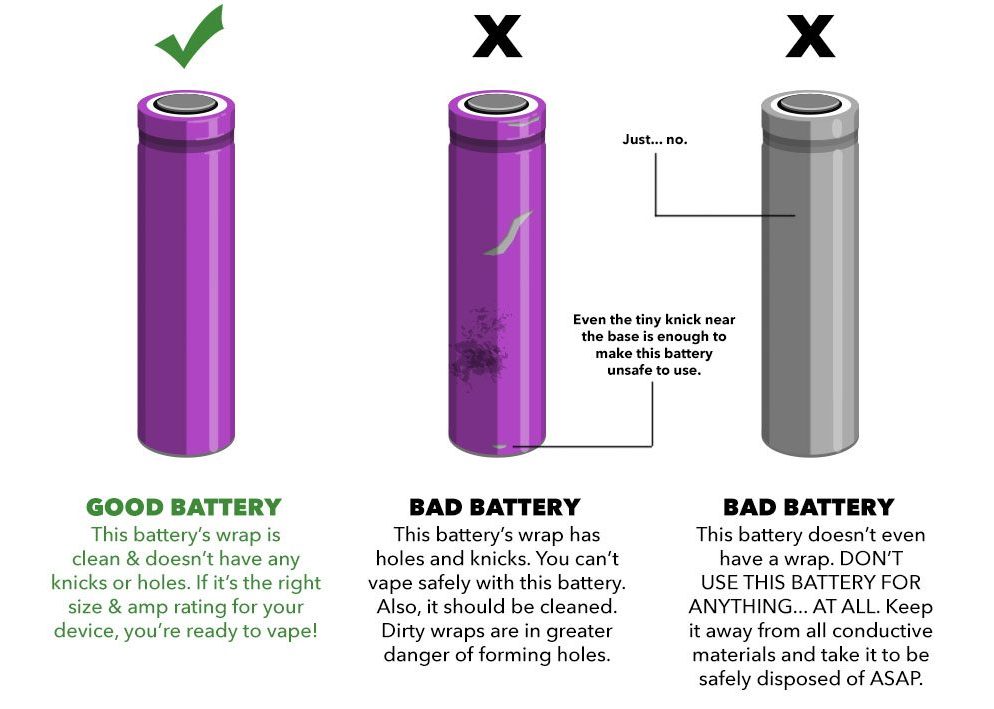
Make sure you are clued up on battery safety before using a device with removable batteries.
Do not use batteries when the outer wrap is damaged or torn. Also batteries which are swollen or dented are dangerous.
- Locate the small cut-out on the side of the mod and use a fingernail to lift off the battery compartment cover.

- The bottom connection is for the positive end of the battery and is spring loaded.
- When removing the battery pull out the negative (top) end slightly then push against the spring tension of the bottom connector to remove.
- Install the battery according to the polarity markings in the battery compartment (positive + is bottom connector and negative – is top connector – next to the “AXON Chip” logo).

- Replace the battery cover. You can attach this in 2 positions, but on the gradient finish devices it will only align in colour one way.

How To Fill the Tank
- Press the button with the Red “-” symbol on the top of the tank. The top cap will swing open.

- Insert your e-liquid bottle nozzle into the fill port to open the valve.

- Squeeze e-liquid into the tank.

- Swing the top cap back into position until it clicks.
- For the first fill or a new coil leave the tank to stand for 5-10 minutes for the coil to fully absorb e-liquid.
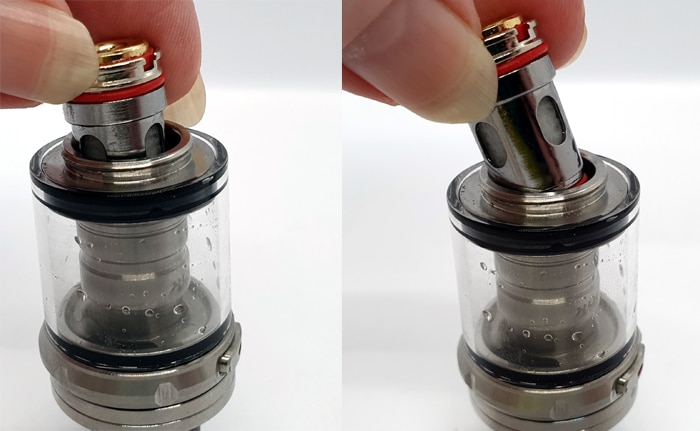
How To Change The Coil
- Unscrew the tank base.
- Pull out the existing coil. If there is a lot of resistance you might need to prise it from the base.

- Push a new coil in firmly.

- Replace the tank base.
- Fill the tank as covered above, leave to stand for 5-10 minutes to allow the coil to absorb e-liquid.
How Does the Vaporesso Gen 80S iTank 2 Perform?
This is designed for DTL (Direct To Lung) vaping, so the choice of e-liquid is important.
You will need e-liquid which has a higher proportion of VG to PG.
For instance MTL kits use 50/50 PG/VG ratios which is too thin for the coils and seals in here and could cause spitting and popping. Also the more PG, the more harsh the throat hit and at 50W + you really don’t need that.
So I would suggest a minimum of 70% VG in the e-liquid and a maximum of 10mg nicotine strength. Remember this is a high output device and strong nicotine will really be amplified by the extra power and heat.
Therefore my choice of e-liquid is the Ruthless e-juice Shortfill in Energy Drank flavour. This has a 70% VG / 30% PG ratio and I have not added any nicotine.
If any of these terms are over your head – have a read of our handy guides below!
- MTL V DTL V RDL – A Guide To Vape Styles
- VG and PG in E-liquid – all you need to know
- Beginners guide to E-liquid
0.2ohm GTI Coil
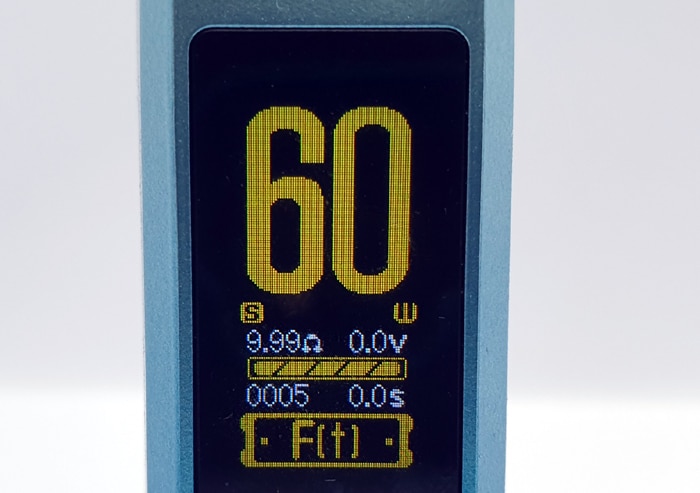
The suggested power limits for this coil are 60 to 75W.
I started at 60W and then continued to 65W which for me was absolutely perfect.
The flavour is incredible, I can taste the sweetness and even get a lovely sweet coating on my tongue after exhaling.
Not to mention the clouds of vapour – which took me by surprise as a mainly MTL vaper nowadays!
This really is a masterclass in coil technology!
I only used this on the very basic Variable Wattage setting and found the performance incredible.
I refilled this 4 times (249 puffs) but sadly when I was playing with Pulse mode I got a dry hit and after this the coil was burnt out. Totally my fault.
0.4ohm GTI Coil
The suggested power limits for this coil are 50 to 60W.
This is another super strong coil!
I found 55W to be where my preference lay – again with the airflow 50% open.
This is slightly less fierce than the 0.2ohm but still pumps out the flavour – absolutely delicious.
Sadly I either have a cold or Covid on the way (have been around people who subsequently have tested positive) and I can hardly taste anything so I had to quit reviewing at this moment in time. Hopefully I will be able to update further on the performance from this coil.
Airflow
I use a 1-10 rating system for the airflow – with 0 = fully closed and 10 = like breathing fresh air.
With the 0.2ohm coil and the airflow fully closed this rates around a 3 – but it is pretty much impossible to even get a vape in this setting. With the airflow fully open I would rate this around 9.5 – there is very little restriction at all. I generally used this in the half open position to give a restriction of around 6-7.
The airflow with the 0.4ohm coil starts at a 3 in the fully closed position but feels slightly more restricted at fully open – rating around 8.5.
Mod Performance
The mod performed perfectly no issues – just a few niggles though!
The menu system is a bit long winded and confusing, I miss the days of just one menu, whereas here even the mode has separate and sub menus.
When you are on the last few vapes before the battery conks out the output does drop dramatically. Which is pretty normal, but I would prefer the output to cut off a lot quicker than it does as the last few vapes are not very satisfying!
Also using this at higher output levels i.e. the 65W for the 0.2ohm coil does impact battery life. So I would probably suggest only using this kit for coils / tanks which do not require higher outputs. If you are a higher output vaper perhaps look into the dual battery Gen 200 version.
I felt the output was accurate and felt like 65W.
When you have all your settings correct it is a joy to use.
User Modes
I mainly used this in the very basic VW mode (no taste modes) to just get a general feeling of operation and performance.
I have to admit to not quite understanding some of the modes.
For instance with “Smart” mode selected, the 0.2ohm coil resulted in the mod setting itself to a default 40W. This is odd considering the operating range of the coil is 60-75W? Usually smart modes default the output to a figure in the range of the recommended power limits of the coil installed?
The same thing happened with the 0.4ohm coil – the power defaulted to 40W?
The vapour felt a lot stronger and hotter using the F(t) mode. There were a lot more clouds exhaled. The flavour still felt the same as with the standard Variable Wattage – I set the device to 65W with the 0.2ohm coil in both modes.
Switching to Pulse mode it dropped the output automatically. So I set it back to the 65W I was previously using. This did feel gentler than the F(t) mode but it felt very hot and I got a dry hit? Which was weird so I didn’t experiment any more with this. Sadly this experiment also burnt out the coil?
Playing with the Variable Wattage taste modes – again with the 0.2ohm coil and set to 65W – the soft mode was more subdued than the hard mode which you could feel had a bit more of a kick!
In Variable Voltage mode I set it to 3.5V as that was the output when I was using variable wattage and it felt great.
Bypass mode was way too harsh, sadly in this mode the output will be higher with a fully charged battery and will decrease as the battery drains – so it isn’t practical if you want a constant regulated output. It will vary throughout the battery life – which is not for me really. Plus it does risk burning out your coil when the battery is fully charged so I wouldn’t recommend it.
Leaks
After fixing the initial leak I encountered no more leaks at all.
The main issue was that the inner tank chamber was leaking between the chamber and outer glass making the tank look half full. However when you added more e-liquid it spewed out of the fill port and into the centre of the coil. Which resulted in a leak through the airflow inlets in the tank base.
Once this had cleared after removing the inner chamber this was leak free which made me very happy!
Battery Life
I would usually time how long / how many puffs I got per full battery charge.
Things are a bit different here as there are so many variants.
For instance the battery you choose is one variable, the output and setting you use is another and to top it all off how often and how long you vape for is another.
So as you can see this is pretty impossible to pin down an accurate timing.
What I will say is that considering the output and mode selected, the battery life is exactly what I would expect compared to past single battery mods I have used.
Pros
- Lovely looking kit
- I prefer the Silver tank, some kits use coloured tanks to match the mod which results in a garish coloured tank which doesn’t match any other devices, or a mismatch of shades. However the Silver tank looks classy and will match with any other mods.
- Has a great “C” frame styling to access the battery compartment, less chance of wear issues than a battery door system
- The flavour was incredible – 10/10!
- The device output felt accurate
- Plenty of user modes to play with
- Tank was easy to fill and push in coils were easy to change
- No leaks (after removing the tank reducer)
Cons
- The TPD tank reducer caused issues when filling and leaks. Once removed the tank was perfect.
- Mod output can drop significantly for the last few vapes – which often happens.
- Menu system is not that intuitive
- Single battery is not practical for prolonged use at outputs over 60W (which one of the included coils needed to be used at)
Vaporesso Gen 80S iTank 2 Final Review Verdict
Some of the marks on “Build quality” and “Design” were dropped due to the 2ml limit inner tank chamber. Once that was removed the tank performed perfectly. Sadly the 2ml limit is not the fault of Vaporesso but I do feel a better solution could have been found.
“Ease of use” was impacted by the menu system and confusing array of not well explained user modes.
What I cannot deny is the absolute quality of flavour the tank outputs, it was incredible and extremely delicious with the right e-liquid.
Also the mod was comfortable in the hand, looked stunning and the build quality was excellent.
After a bit of faffing this turned out to be a dream vape, if I was a DTL vaper I would however invest in the dual battery version as the 65W I used with the 0.2ohm coil did negatively impact battery life.
If you are happier at lower outputs up to 50W this is a worthwhile device indeed. But it would perhaps possibly benefit from being compatible with a 21700 battery for those using higher outputs. This isn’t helped by the fact the included 0.2ohm coil is rated 60-75W. Perhaps Vaporesso should include a different coil for use at 50W or below.
Not to mention if you are an MTL tank fan, pop your tank on here and at 20W the battery life will be excellent.
Let me know in the comments section below your thoughts on the Vaporesso Gen 80S and iTank 2 kit.
 The Limits?")


