The Voopoo Argus G2 is an update to the Argus G which I absolutely loved!
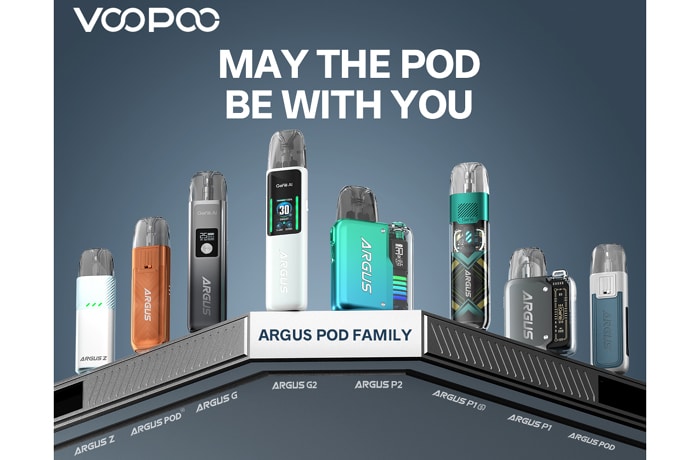
The Argus pod kit range includes some beauties such as the Argus Pro 2, Argus P1S, Argus Pod SE and Argus Z – just to name a few!
Thank you to Voopoo for sending this over for review and keep an eye out for the Argus P2 kit review which is coming soon!
This review is my opinion on the device supplied to me. Sometimes they may be samples / prototypes and not representative of retail versions. I will report back on my findings of the device in my possession.
What To Expect From The Voopoo Argus G2…
As mentioned above this is the second generation of the Argus G series.


Inside the device is a 1000mAh battery which is charged via the USB Type C port at a fast 2A charge rate.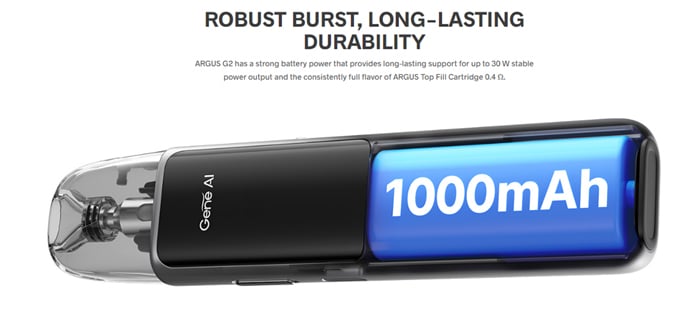
It appears to have Variable Wattage, meaning you can adjust the output from 5-30W to suit the pod installed.
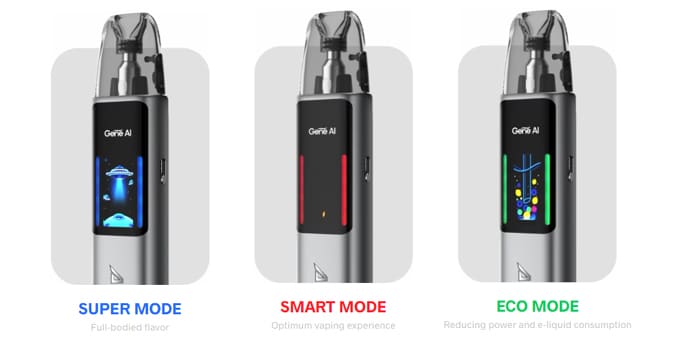
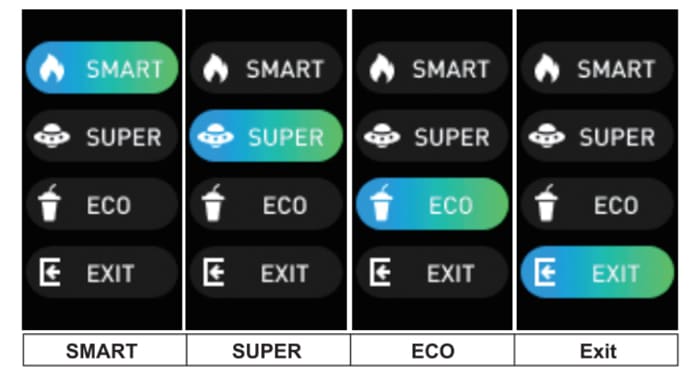
You can also choose from 3 modes: Super Mode, Smart Mode and Eco Mode. We will discuss the modes further in the review.
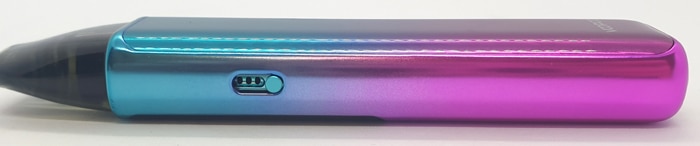
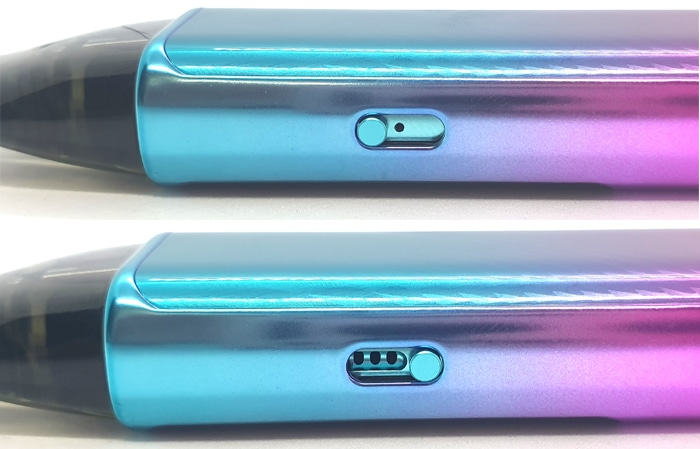
There is an airflow adjustment slider located on the side of the mod.
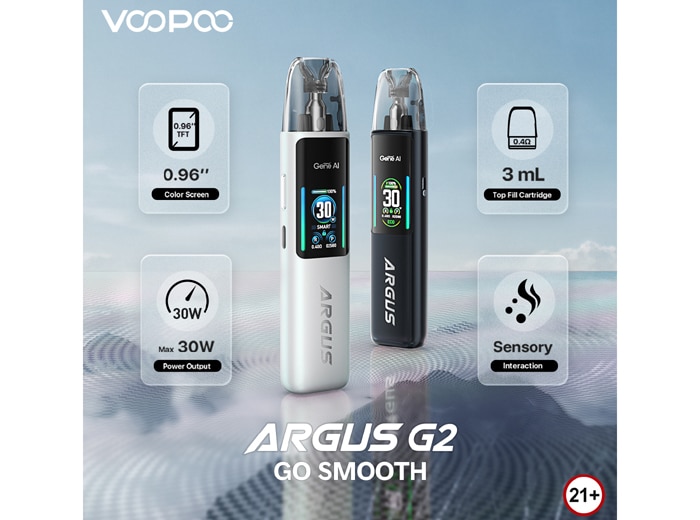
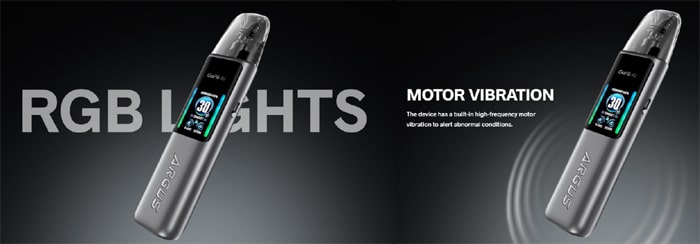
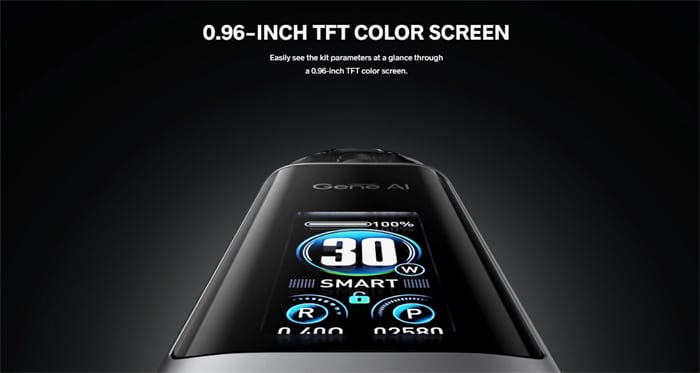
RGB indicator lights, a vibration motor and the 0.96 inch colour screen will keep you up to date with device status.
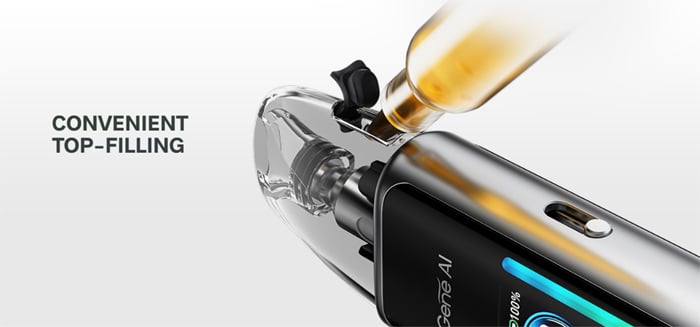
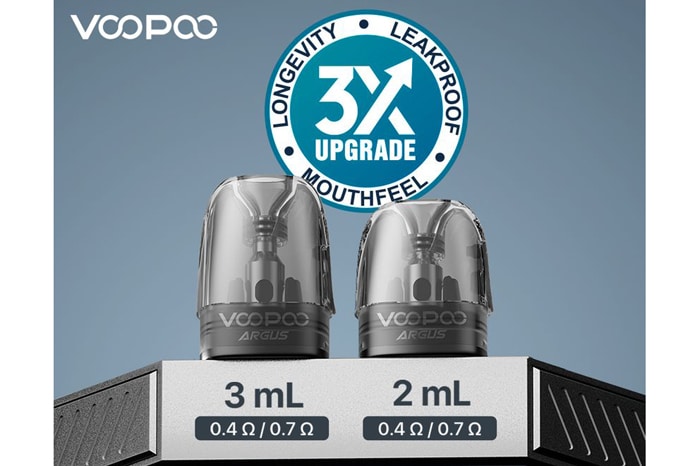
This kit includes the new “Top Fill” Argus pods, which means you do not have to remove the pod to fill.
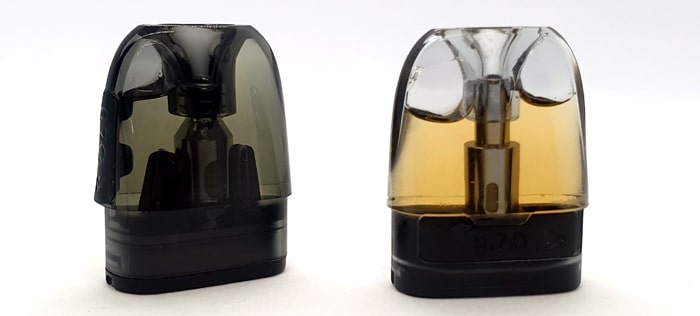
There are 2 fixed coil top fill pods available – 0.4ohm and 0.7ohm – you get both in the kit.
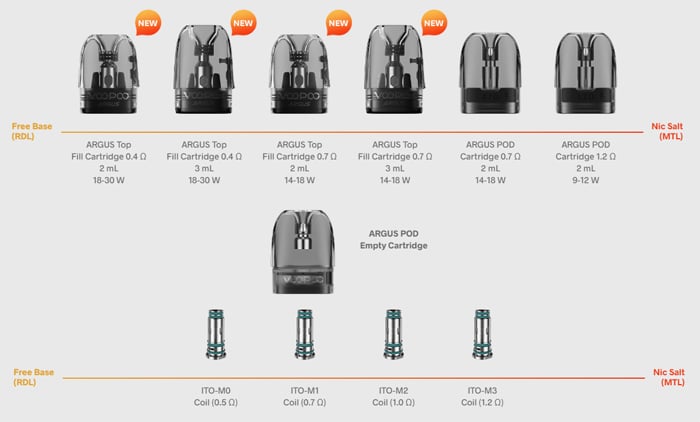
This is also compatible with the previous fixed coil Argus Pod Cartridges plus the empty pods which use the ITO replaceable coils!
In standard format the capacity is 3ml, but in TPD regulated areas this is reduced to 2ml.
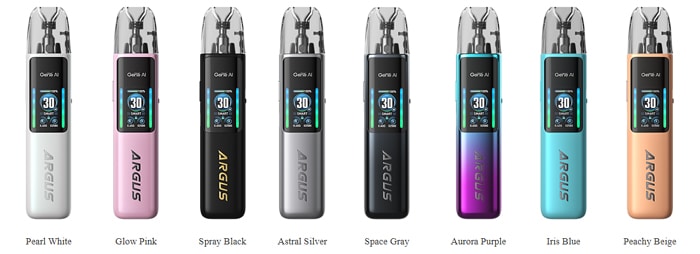
You can choose from 8 colours: Pearl White, Glow Pink, Spray Black, Astral Silver, Space Grey, Aurora Purple, Iris Blue and Peachy Beige.
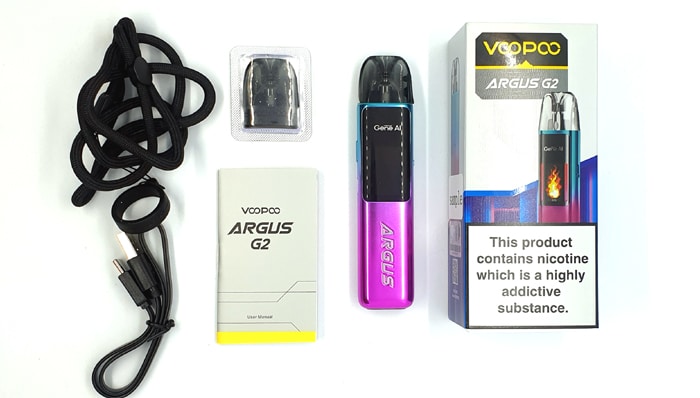
Kit Includes
- Voopoo Argus G2 device
- 0.4ohm Argus Top Fill pod
- 0.7ohm Argus Top Fill pod
- Lanyard
- USB Type C cable
- User manual
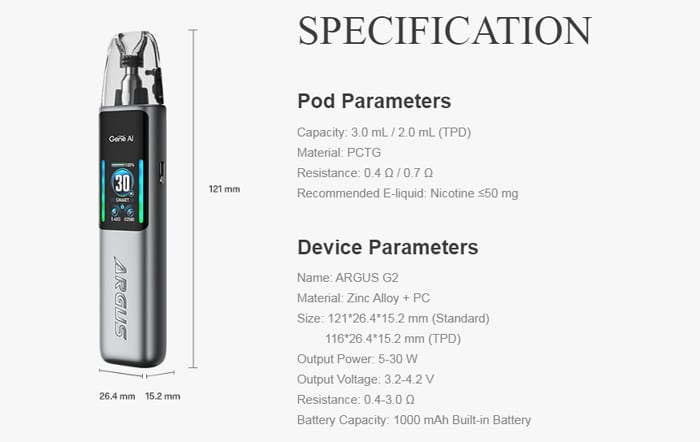
Voopoo Argus G2 Specs
- Size: 121×26.4×15.2mm (Standard) / 116×26.4×15.2mm (TPD)
- Battery: 1000mAh (internal)
- Display: 0.96in colour screen
- Output: 5-30W
- Modes: Variable wattage, Smart, Super & Eco
- Type C USB charging – 2A charge rate
- Resistance range: 0.4-3ohm
- Capacity: 3ml (Standard) / 2ml (TPD)
- Compatibility: Compatible with previous Argus fixed coil pods and empty fixed coil pods (with replaceable ITO coils)
- Adjustable airflow
- Top fill
- GENE.AI chipset
Design and Build Quality
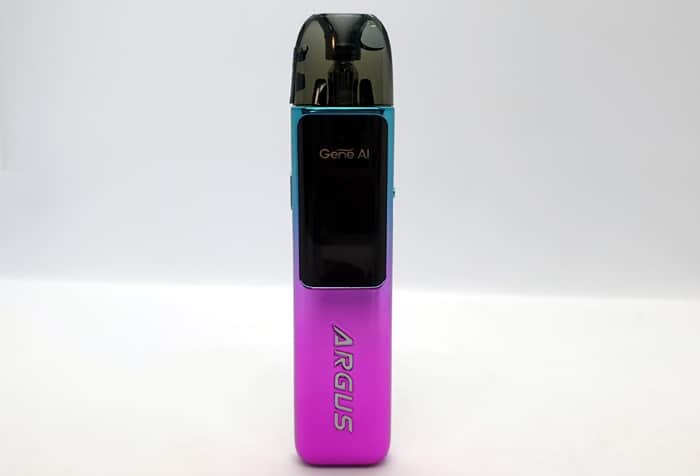
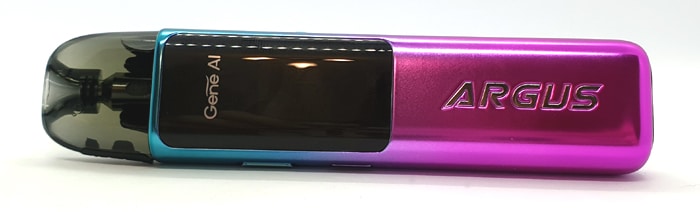
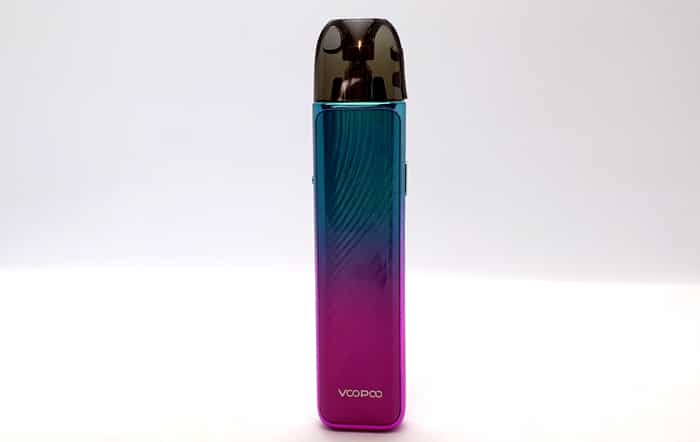
I received the Aurora Purple version which in my humble opinion looks to be the prettiest variant in the range! It is the 2ml capacity TPD compliant version.
The box is quite small but is very well laid out. Remove the card over-sleeve and you will be greeted by a cardboard box which holds all the accessories.
Remove this box and the device is sat in a moulded plastic tray. It arrived in immaculate condition so the packaging is doing its job!
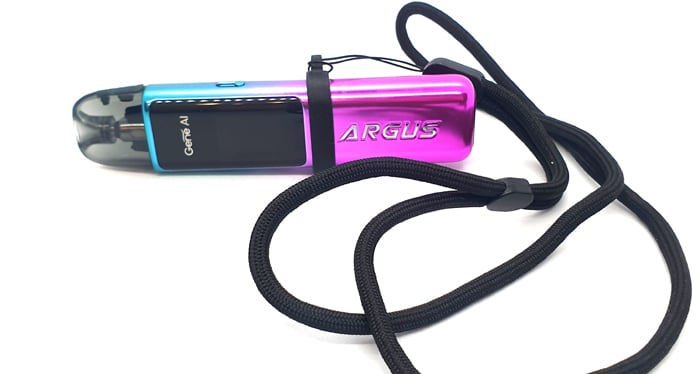
Included in the kit is a great quality Lanyard which is super easy to install.
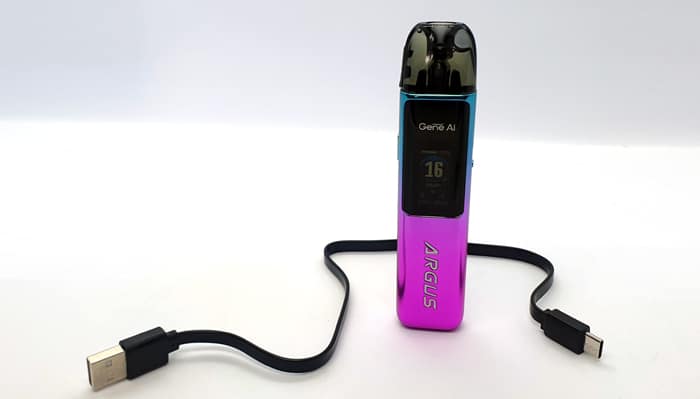
Also a flat style USB Type C cable is provided and it is of good quality.
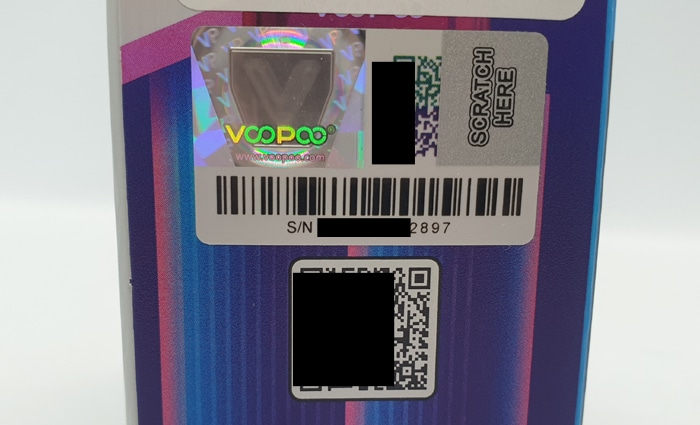
You will see a verification sticker on the side of the box to check this is a genuine product. Either scan the QR code with your phone camera or input the code into the Voopoo Security Code Page.
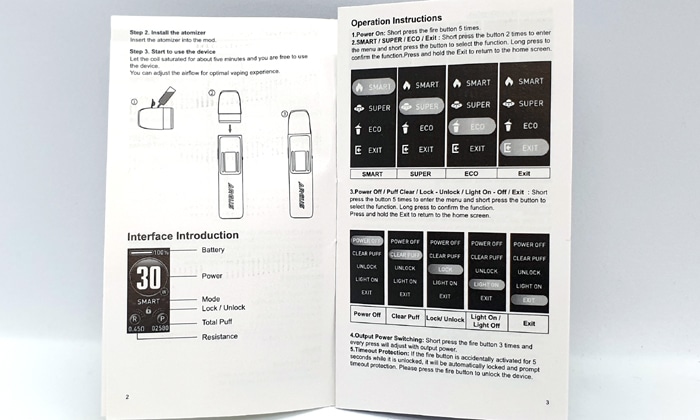
The instructions are quite small but you can also view a digital copy of the instructions here.
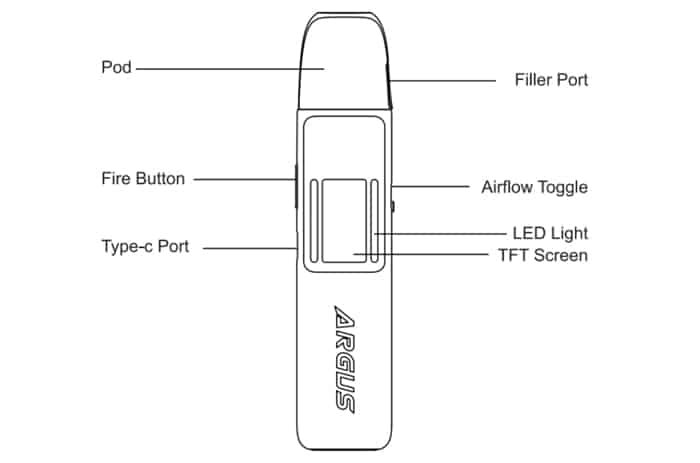
Voopoo Argus G2 Mod
This is the prettiest pod kit I think I have seen in a very long time – it is beautiful! I may be biased as I love pretty colours on kits!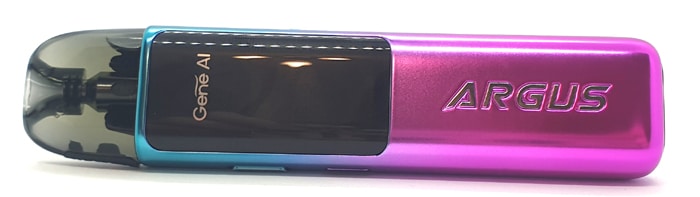
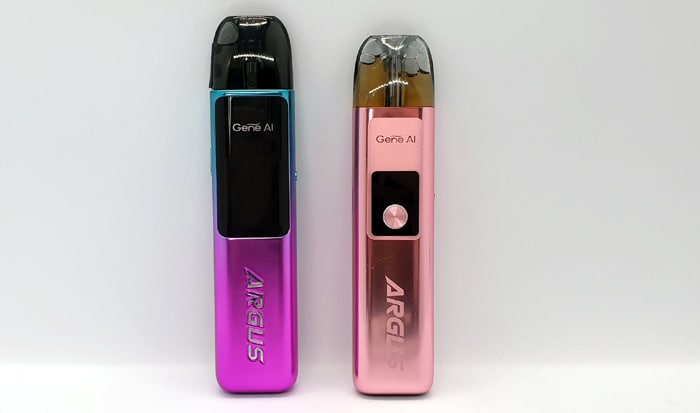
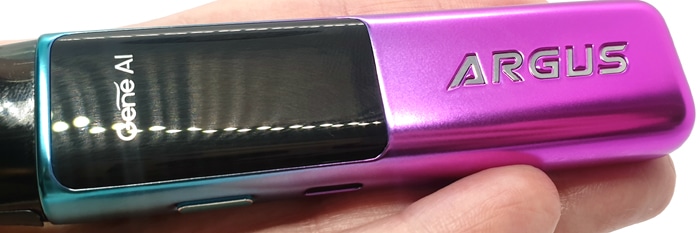
I still own my very pretty Argus G kit – so just as a comparison here they are together!
The front and sides have a shiny metallic finish and the rear has a holographic finish!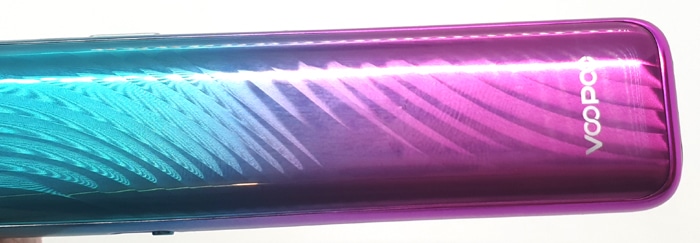
At the top of the mod it is a very pretty Cyan colour which then transforms into a stunning Magenta colour!
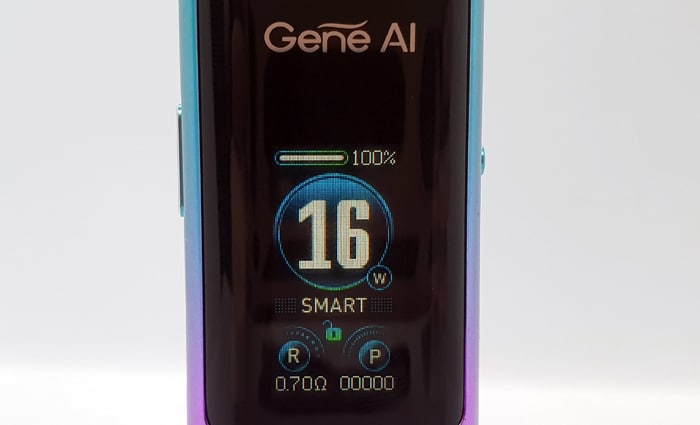
Half of the front is home to the screen panel which is shiny Black plastic with the “Gene AI” logo in Silver. You won’t see the screen until it lights up.
Below the screen area the finish returns to the shiny Magenta and the ARGUS logo is embossed in with a shiny Silver finish.
At the bottom of the rear is the Voopoo logo in Silver.
On the one side is the airflow adjustment slider which is quite tight to move, but this is good as it means it is unlikely to adjust itself in use.
The opposite side houses the clicky fire button and USB Type C port.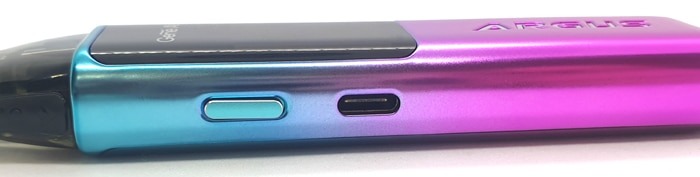
On the base is a rubber pad so this doesn’t scratch the device or surface when stood upright.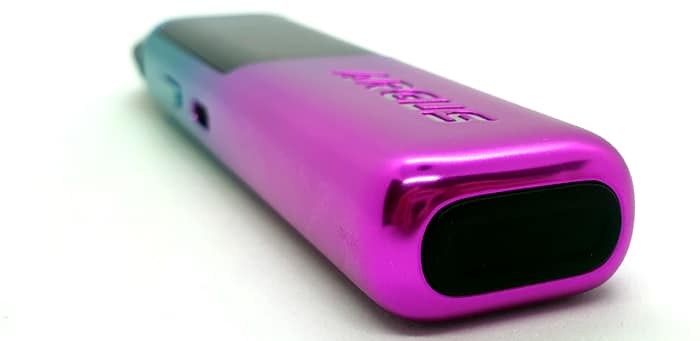
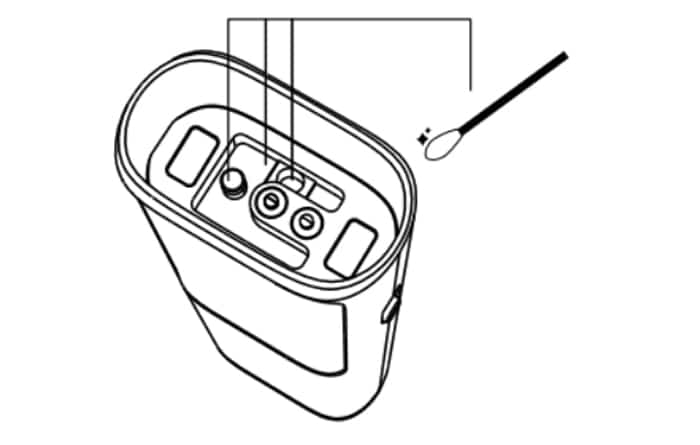
Inside the pod compartment you will find 2 spring loaded contacts and the magnets to secure the pod. The magnets are really strong meaning there is zero wobble to the pod when installed. Despite the strong magnets it is still easy to remove the pod.

I absolutely adore the look of this device and everything screams quality! But the whole thing is a fingerprint magnet – which sadly you can see in some of my photos – sorry!
Screen
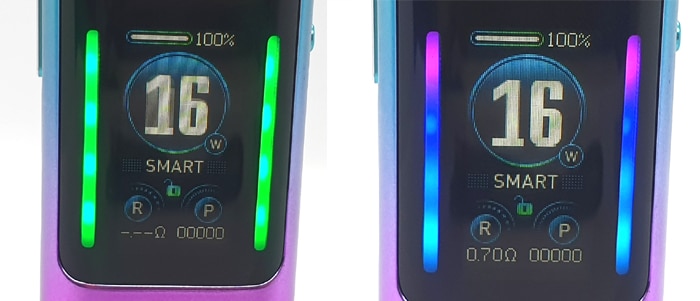
The screen and RGB lights colour theme changes according to which mode is selected.
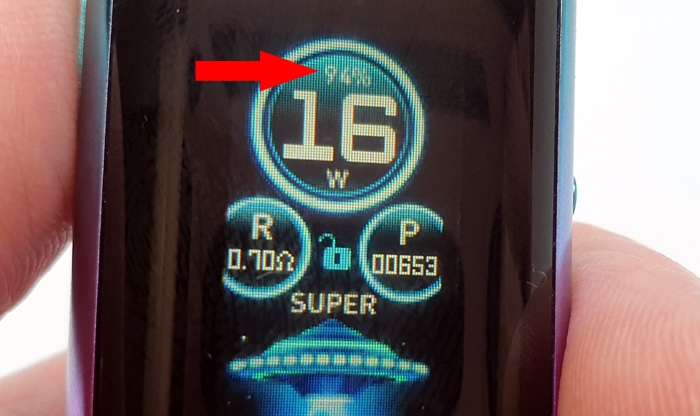
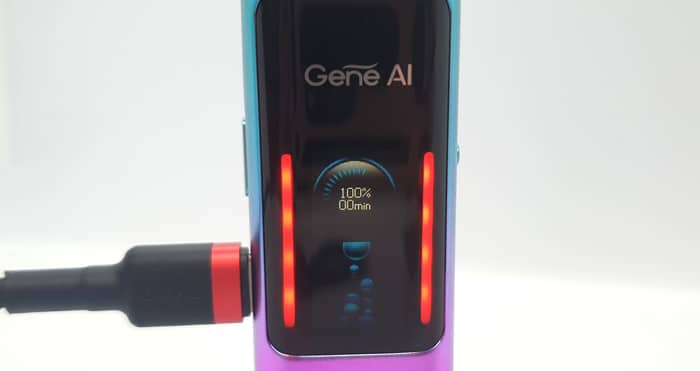
The screen is bright, clear and well laid out. Unfortunately in Super Mode the colours and layout mean it is difficult to see the battery charge remaining. I have marked it in the image below with the Red arrow, but that is zoomed in quite a lot.
At the side of the screen are the RGB indicator lights which you can turn on or off. These change colours and have animated gradients.
When vaping in Smart mode an animated flame graphic appears – I have videoed it below…
This changes to a very cute graphic for ECO mode of fruits being sucked up a straw?
In Super mode you get a UFO animation where the UFO is sucking money up? Crazy but cute!
Also there is a vibration alert to faults and status – such as when inserting the pod.
Argus Top Fill Pod Cartridge
As I still own the previous generation Argus G I have been able to compare the pods.
Both versions are very similar with the first generation (V1) having the side fill port and the new top fill (V2).
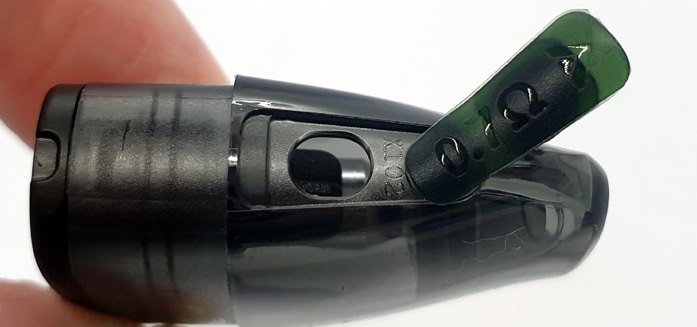
The fill port cover is located on the side of the smooth mouthpiece section. A tiny weeny arrow points you to the bottom part of the cover which you prise up to access the fill port.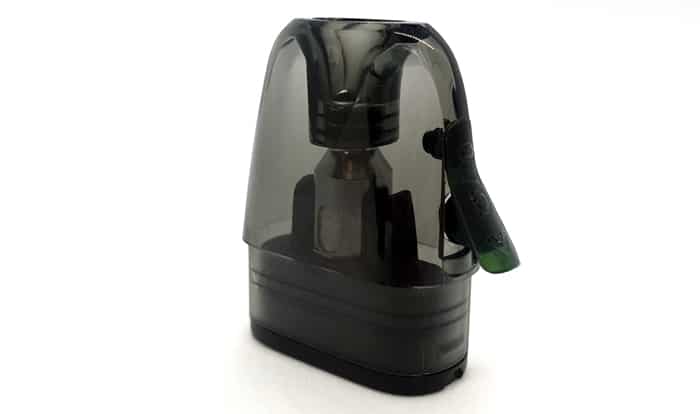
You can also rotate the cover out of the way for ease of filling.
The port measures around 5x4mm in an oval shape and I have had no issues filling with 10ml, 30ml and 50ml bottles.
The whole pod has a Black tint but it is still light enough to see the e-liquid level. Plus when the pod is installed in the mod you can see virtually all of the contents which is very impressive.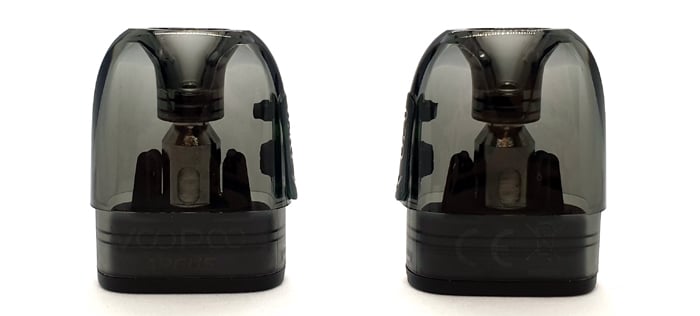
On the lower 1/3 of the pod (the area inside the mod) are the Voopoo logos and Legal logos etched in.
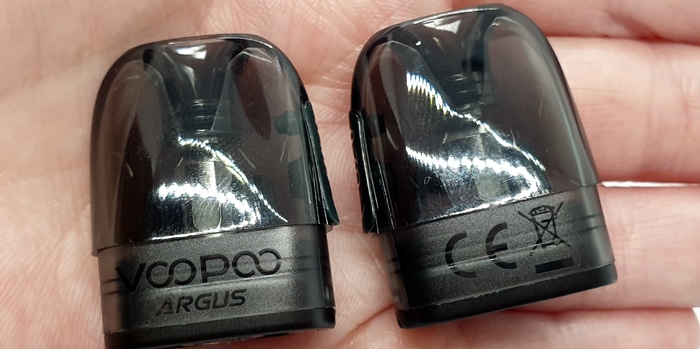
The pod resistance is etched into the fill port cover which is a bit difficult to see – my only real grumble about the pod.
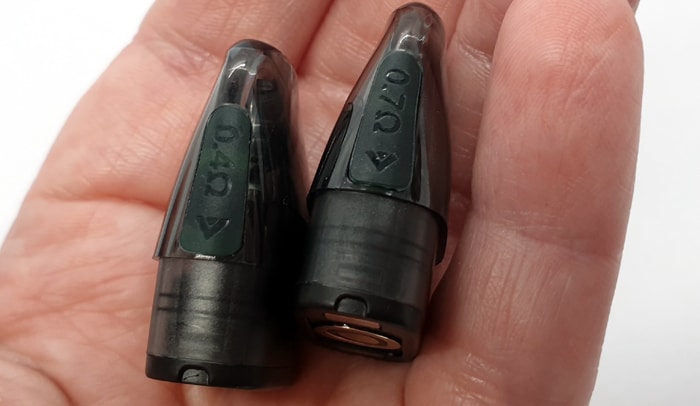
The base houses the two securing magnets and central electrical connector.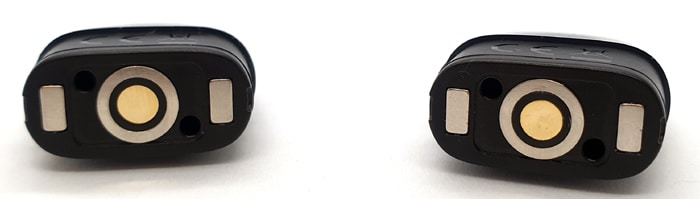
Voopoo Argus G2 Quick Start Guide
This arrives with the 0.4ohm pod installed but you can of course select the 0.7ohm pod from the box. To prevent damage an isolator sticker is applied to the base of the 0.4ohm pod.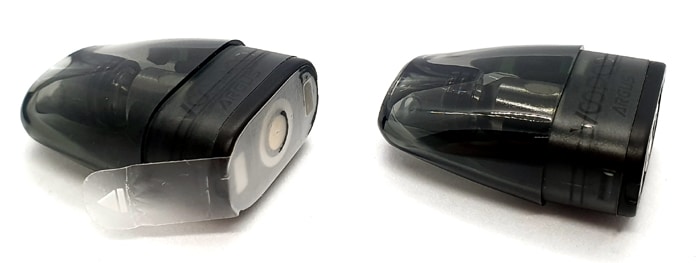
Make sure to fill the pod with e-liquid before removing this sticker. If you don’t and you vape – this will burn the coil out and the pod will be scrap.
So you will need to fill and charge this to get going, but never fear I guide you through all these steps below.
And just so you know where all the parts are, here is a diagram of the device!
Screen
The screen displays plenty of info, the order of the information may change according to mode selected.
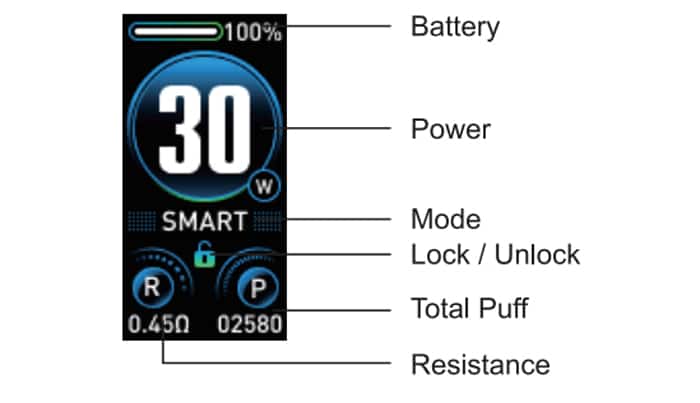
- On the top left is the battery level symbol, when full this is all White as shown above. When empty this will be Black inside, obviously in-between this the graphic will change colour in segments to represent the charge remaining. To the right of this is the percentage of battery charge remaining.
- The large number (Power) tells you the power output which is adjustable between 5 and 30W.
- Next to this is the “W” symbol to denote “Watts” – the power measurement.
- You will then see the mode selected – Smart, Super or Eco.
- Below that is the padlock symbol – this tells you if the fire button is locked or unlocked. The image above shows it locked. When unlocked the top of the padlock will be open.
- On the bottom left is the resistance value. This is the coil or pod resistance and the “Ω” or Ohm symbol which denotes the unit of resistance.
- The other value is the puff counter which counts the number of vapes you take. You can go into the menu to reset this to zero if you want. This is handy to keep track of coil or battery life or if you are just curious how much you vape!
Basic Operation
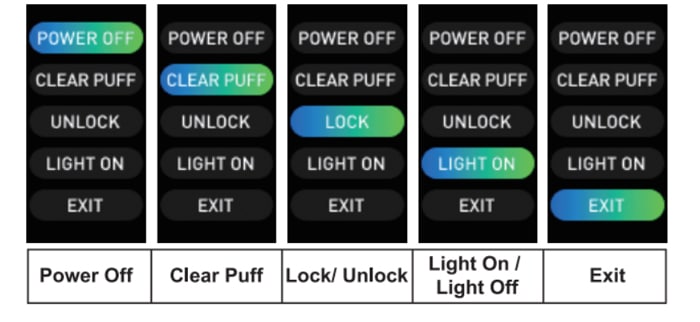
- Enter the menu = Press the fire button 5 times to enter the menu. Short press the button to scroll through the options and long press to select option. Here you can clear the puff counter, turn the RGB light on/off and lock/unlock the fire button. You can enter the menu even when the fire button is locked.
- Power On/Off = press the fire button 5 times to turn on. To turn off press 5 times to enter the menu which has the “Power off” option. See “Menu” above.
- Vaping = Either inhale on the mouthpiece or press the fire button to fire.
- Battery indicator = The screen will show the battery level icon.
- Battery indicator when charging = the screen will display the percentage of charge so far and an approximate charging time left.
- Adjust airflow = move the lever on the side of the device to open and close the airflow to your preference.
- Change mode = press the fire button twice. Long press to confirm the selection. We describe the modes below.
- Adjust output = press the fire button 3 times. The power value will flash. Press the fire button to increase the output and stop when at the level you require. There will be a maximum power depending on the pod installed and after this the power level will return back to 5W and you can keep adjusting.
Modes
Smart Mode will automatically set the best output for the pod installed.
Super Mode is designed to give the best flavour.
Eco Mode will select the output to preserve battery life.
You can still adjust the output in whichever mode is selected.
Protections
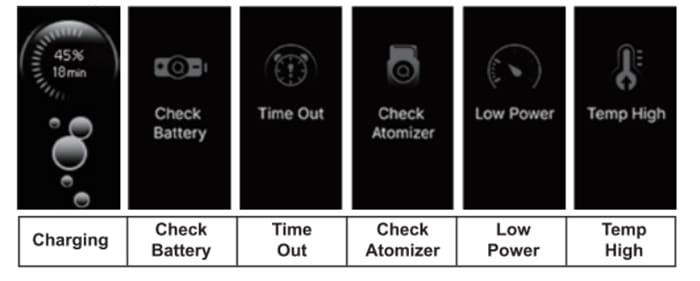
- Low Power / Check Battery – this means the device will cut out soon and needs recharging.
- Check Atomiser – a fault has occurred – clean the base of the pod and the device contacts. If still faulty try a new pod or coil. If this doesn’t fix it you may have a faulty device.
- Time Out – if you vape for longer than 5 seconds the fire will cut out. This is to prevent over heating or if the fire has been triggered accidentally. It should operate as normal on your next vape.
- Temp High – the device is too hot. Leave it to cool.
Also the instructions show you how to clean the contacts – in normal use condensation can occur which may cause issues. Also if there is any leak you will need to clean the contacts.
How To Charge The Battery
The charging rate is specified as 2A.
- Using a USB type C cable, connect the small end into the USB port on the mod.
- Connect the large end of the cable into a suitable USB outlet.
- The screen will display the charging progress – but it does turn off during charging. To wake up the screen briefly press the button.
- When fully charged the screen will show “100% 0 Min”. Again you will need to keep waking up the screen to check the progress.
Whilst charging the screen shows an approximate charging time remaining.
The charging time for me using a 2A charging plug/outlet was 35 minutes – exactly the time estimate shown on the screen when charging began!
How To Fill the Pod
Voopoo recommend keeping the pod around 2/3 full.
You can fill the pod without removing it from the mod, I have removed the pod for the photographs as it is easier to see.
- Lift up and swing the fill port cover out of the way.
- Add e-liquid whilst observing the level through the pod.
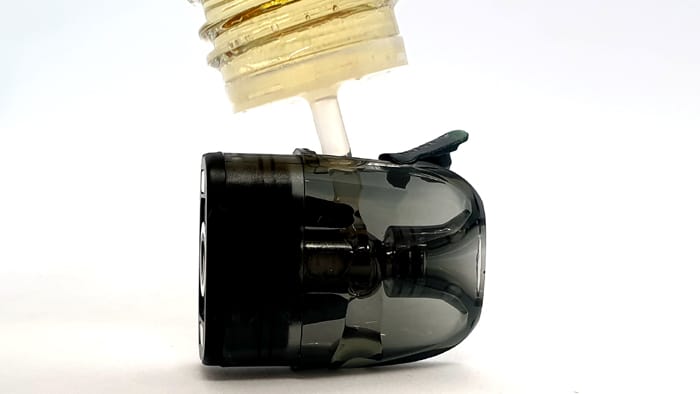
- Close the fill port firmly.
- If this is the first fill leave the pod to stand for 5-10 minutes. Take a few dummy inhales on the mouthpiece before inserting the pod into the mod to help with the e-liquid flow.
How Does the Voopoo Argus G2 Perform?
As there are two different styles of pod included with the kit, I used different VG / PG mixtures for each.
If any of these terms are over your head – have a read of our handy guides below!
- MTL V DTL V RDL – A Guide To Vape Styles
- VG and PG in E-liquid – all you need to know
- Beginners guide to E-liquid
- Nic Salt E-liquid
0.7ohm Argus Top Fill Pod
The recommended power limits are 14-18W.
For this pod, I used my own e-liquid mix which is 50/50 PG/VG made from IVG Bubblegum Concentrate at 20% ratio. This is quite high a flavour ratio as I prefer plenty of flavour, but sadly this means it can be a coil killer sometimes.
I add nic salt to approx 6mg strength.
I tested this pod in all 3 modes – you can find out further in the review how the modes impacted battery life and e-liquid consumption.
At 650 puffs the flavour has not diminished at all!
Smart Mode
In Smart Mode the device selected 16W as the perfect output – so I went with that to start with!
From the very first vape I fell in love!
In fact this replicates my joy using the side fill version of the pod in the Argus G! I loved it. I also gave one of the Argus G kits to a friend who shares my enthusiasm.
So I am very happy to report that the only change to the pod is the fill port! The performance is still epic. Lovely stuff!
The vape is warm and very juicy, my Bubblegum e-liquid is singing with this pod!
This pod is ideal for those who use higher nicotine strengths, but even with my 6mg strength it feels amazing.
ECO Mode
With ECO mode the flavour and vapour output were decreased despite still being set to 16W. This was not my favourite mode as it is quite cool and the flavour and vapour are very muted.
But it is a very smooth vape so might suit those who use high nicotine levels.
Super Mode
I set this at 16W the same as the other modes but it really felt like it was at a higher output! I would say it felt like 18-19W. In this mode I had to take a lot shorter vapes as the vapour was quite warm and also a big throat hit!
The flavour was something special in this mode though.
It was almost too powerful! With my 6mg Nic Salt I actually started feeling nicotine side effects – that’s how much stronger it was than ECO or Smart mode.
0.4ohm Argus Top Fill Pod
The recommended power limits are 18-30W.
For this pod I used the Choppa Vapes Blue Slush e-liquid with a 64% VG / 36% PG ratio. The higher VG ratio is more suited for higher power vaping. Also there is no nicotine added to this e-liquid as I would find it a bit harsh at higher outputs.
As I had already tried out the different user modes with the 0.7ohm pod, I just stuck to Smart mode for this.
The Smart mode automatically set the power to 23W which was fine but it felt like it needed to be a bit warmer! So I went up to 25W which was a big improvement in warmth, vapour and flavour.
Things kept improving at 27W, but 29W was a huge jump in clouds! A surprising amount of vapour and it still wasn’t too warm to vape comfortably. It still felt very smooth.
At 30W I felt this e-liquid come alive and this was my preferred setting. It may be different for other flavour profiles, but this sweet syrupy e-liquid is perfectly suited to the highest output.
The flavour was not as sharp and bright as I was getting with the 0.7ohm pod – but I am using a different flavour e-liquid so that might be the cause.
I would suggest only use nicotine strengths of 10mg maximum with this pod as it does have quite a throat hit as it is running at a higher power. If you want to use stronger nicotine e-liquid I would recommend the 0.7ohm or 1.2ohm pods.
Airflow
I will rate the airflow on a scale of 0-10. 0 being fully closed and 10 being breathing fresh air!
With both pods the fully open airflow I would say this is around 5. Ideal for those who like a loose MTL or good RDL vape. Fully closed there is a tiny amount of airflow at around 0.5 so again ideal for those who like a tight MTL vape too!
I found with both pods I used them at the fully open airflow setting for the best flavour and vapour.
Mod Performance
The auto draw firing is super quick even on the widest airflow settings.
But the most impressive thing about this mod is the power regulation versus battery charge. Even when the screen showed the charge was at 0% with the 0.7ohm pod, I was still getting a 7/10 vape performance! Some vapes start dropping in output at around the 10% charge remaining point. This has the best output stability I have found yet in a pod kit.
There was a big difference in output between the modes – ECO being quite muted, Smart being perfect and Super being a bit too strong. All had their benefits and were worth inclusion.
I really love the GENE.AI chipset here, even little details such as the time estimate when charging was super accurate!
Leaks
Not a single dribble or condensation – excellent!
Battery Life
This is not a figure you can accurately predict. There are so many variables such as the user mode, power level, pod resistance and your own vaping habits which will all impact battery life.
However I tried this in various scenarios to give you a guide. In all the scenarios I had the RGB lights switched on and it is worth noting I have the 2ml pod capacity.
Smart Mode
With the 0.7ohm pod in Smart mode at 16W I got 6 hours and 226 puffs. I refilled the pod 4 times in this period. Which is pretty good going!
With the 0.4ohm pod I got 195 puffs, 3 refills and 5.5 hours of vaping.
ECO Mode
In ECO mode with the 0.7ohm pod at 16W I got 6 hours and 192 puffs. The puff count is less than with Smart mode? However I was taking long puffs as the output was quite muted so perhaps that has affected the puff count.
Also this mode required 4 refills to one battery charge – the same as Smart mode – so no improvement on e-liquid consumption either?
All in all I was not very impressed with the reduction in output as it did not improve the battery life or e-liquid consumption.
Super Mode
In Super Mode with the 0.7ohm pod I got 228 puffs and 7 hours of vaping.
Bizarrely this seemed to be the most efficient on e-liquid (3 refills) and battery life.
I think because this feels a lot more powerful I was taking much shorter vapes as it was getting quite warm – despite only being set to 16W the same as the other two modes!
Pros
- Absolutely stunning design
- Beautiful bright clear screen
- Love the RGB lights – which you can turn off in the main menu
- Vibration alert is useful for those who have sight issues
- Excellent airflow adjustment from tight MTL to a great RDL!
- Beautiful flavour and vapour
- Practical and very well made
- Compatible with all the Argus pod range including the replaceable coil versions too!
- Very cute animations on the display when vaping
- Kit includes 2 pods, lanyard and USB cable
- Power regulation is spot on, even at 1% charge remaining!
- 35 minute charging time – the estimated charging time remaining on the screen was accurate too
- No leaks or condensation
- Significant difference in output between the 3 user modes
- Can lock the fire button and use auto draw only
- I like there being a fire button as a back up in case the auto draw system fails – which I have had on pod kits in the past
Cons
- Pod resistance is etched into the fill port cover and it is hard to see.
- To turn off you need to enter the menu
- Only one button to make adjustments which can be a bit fiddly but does work OK
- Screen turns off when charging – so you have to prompt it to light up with the button
- ECO mode significantly reduced performance without a noticeable difference in battery or e-liquid consumption?
- In Super mode the screen theme makes it difficult to see battery level clearly
Final Review Verdict
The aesthetics of this kit are incredible, you could show this to anyone and they would be impressed with the screen and the sparkly finish. I really really love how it looks.
But is it just style over substance? No not at all.
The big screen looks pretty yes, but it is laid out beautifully and the cute animations when vaping really made me smile. The RGB lights and vibration alerts add another level of interaction.
For this version the output has increased – which is ideal as you can now get 0.4ohm pods which were not available before.
Both of the included pods offer a wide range of airflow from a super tight MTL up to a very comfortable RDL. Plus the versatility of being compatible with fixed coil and replaceable pods gives you plenty of options.
What an absolute beauty this is from Voopoo – just look at the huge list of “pros” above.
This is ideal for a newbie or more advanced vaper! A newbie can just leave it set on “Smart mode” and the mod will do all the power adjustment automatically – please don’t let all the technology put you off. A more advanced vaper will enjoy the different modes and the ability to adjust the output.
For the price it is even better. This competes with all the best pod kits on the market and is now in my top 3 pod kits – the OXVA Xlim’s, Uwell Caliburn range and now the Voopoo Argus G2! Buy any of those 3 and you will get the best performance for a reasonable price.
If you want a great looking, versatile and flavour chucking pod kit – you may have found it with the Voopoo Argus G2 – it is that good! In fact I am buying another – in the pretty Iris Blue colour plus some more of the excellent 0.7ohm pods!
Let me know your thoughts on the Voopoo Argus G2 in the comments below!


