I have in for review one of the sexiest pod kits I have seen in a long time – the Innokin Klypse Mecha.
Innokin knock out some epic vape gear and this is part of the Klypse range, in addition to the original Klypse Pod Kit and the Klypse Zip.
I have been a fan of a lot of Innokin kits – especially their starter kits – with beauties such as the Arcfire and the Endura range being ones I always recommend.
What Can We Expect From The Innokin Klypse Mecha Pod Kit?
What does this new addition to the Klypse range have to offer?
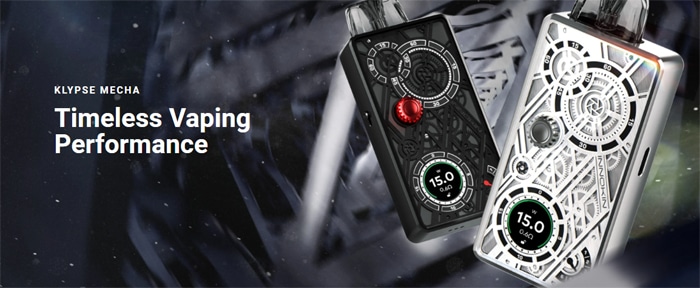
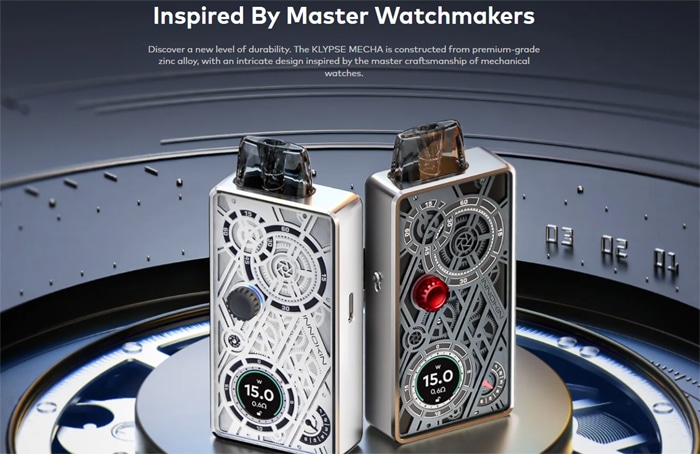
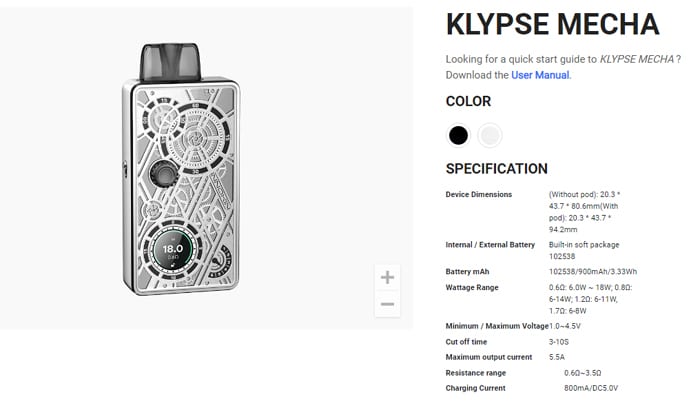
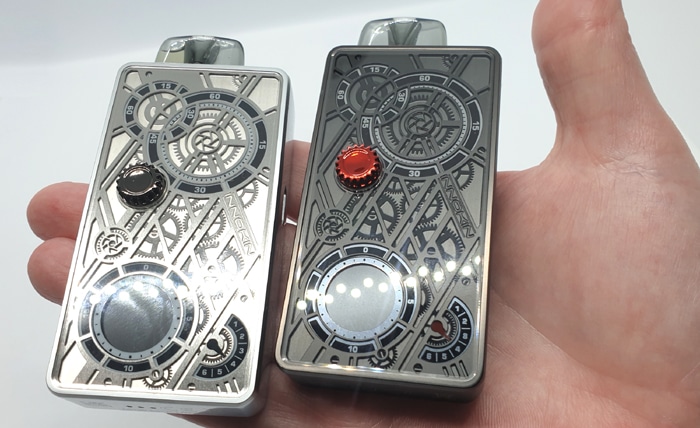
According to Innokin the design was inspired by Master Watchmakers and is built from premium-grade Zinc Alloy.
Inside the device is a 900mAh battery which is recharged using the USB Type C port at 0.8A.
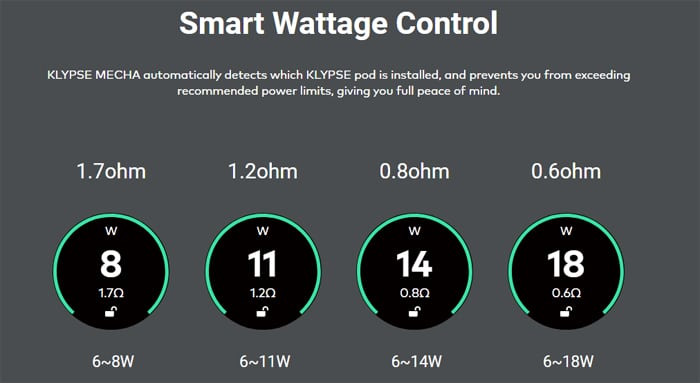
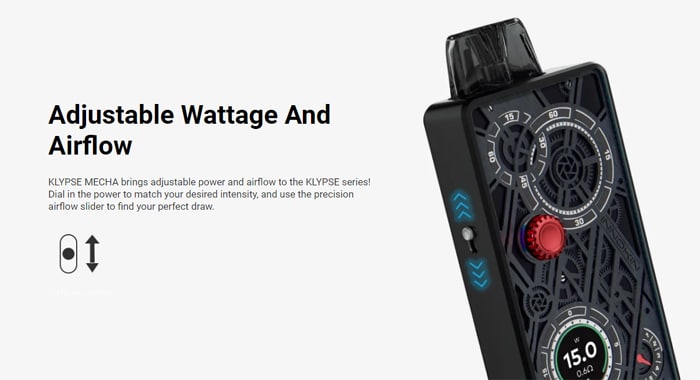
The output is adjustable and it offers Smart (device automatically selects output according to the pod installed) Variable Wattage and Variable Voltage options. The device also has a limit on the adjustment to make sure you do not go over the recommended power limits which could burn out your coil.
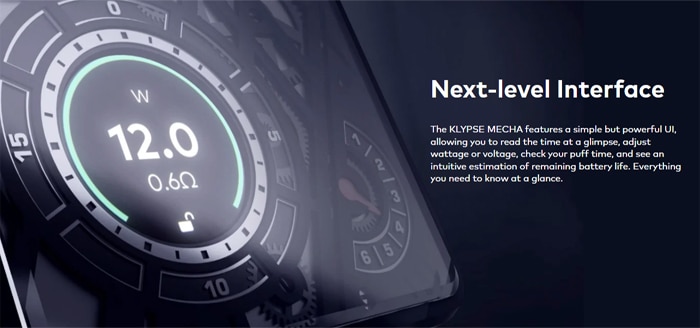
You can see all of your data and adjustments on the circular colour OLED screen.
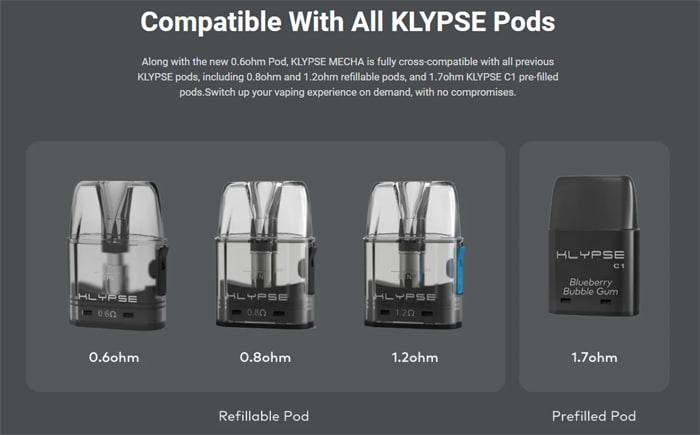
This is compatible with all the previous Klypse pods, including the pre-filled versions. You get the 0.6ohm and 1.2ohm included in the kit. Pop over to the Innokin Klypse Zip review to see some of the pre-filled pods in action.
Also you can adjust the incoming airflow to your preference.
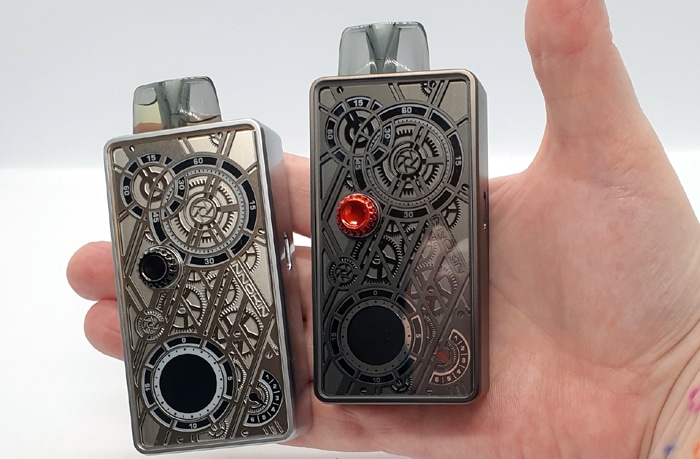
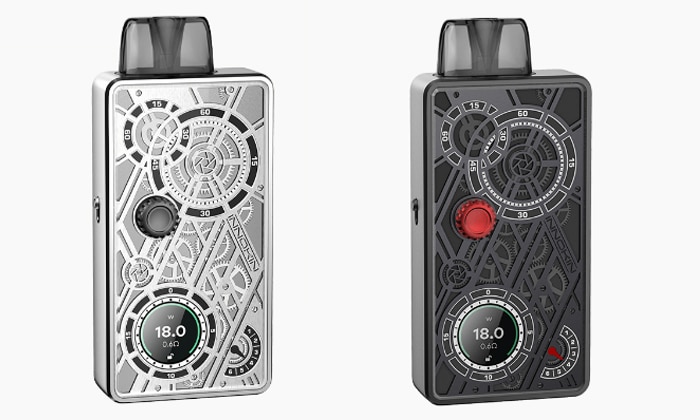
There are 2 colour options to choose from: Stardust Silver and Moonshadow Ink.
Thank you to Innokin for sending these over for review purposes and I will report back honestly on my findings of the devices in my possession!
Inside the Box
- Innokin Klypse Mecha Device
- 0.6ohm Klypse pod
- 1.2ohm Klypse Pod
- USB Type C cable
- User manual

Innokin Klypse Mecha Pod Kit Specs
- Size: 94.2×42.7x17mm
- Output: 6-18W / 1-4.5V
- Battery: 900mAh (internal)
- User Modes: Smart, Variable Wattage, Variable Voltage
- Display: Circular OLED screen
- Resistance range: 0.5-3.5ohm
- E-liquid capacity: 2ml
- USB Type C – 0.8A charge rate
- Pods: Refillable fixed coils
- Compatible with: Innokin Klypse pods – refillable and pre-filled
- Side fill port
- Rotating button for adjustments
- Adjustable airflow
- Adjustable cut off time
- Draw activated
Innokin Klypse Mecha Pod Kit Design and Build Quality
I received both colours of the kit.

I have to say the packaging is absolutely stunning! It is like unveiling a new premium piece of technology!
You cut the seal and open the box from the side, on the inside of the lid is an inscription about the design.
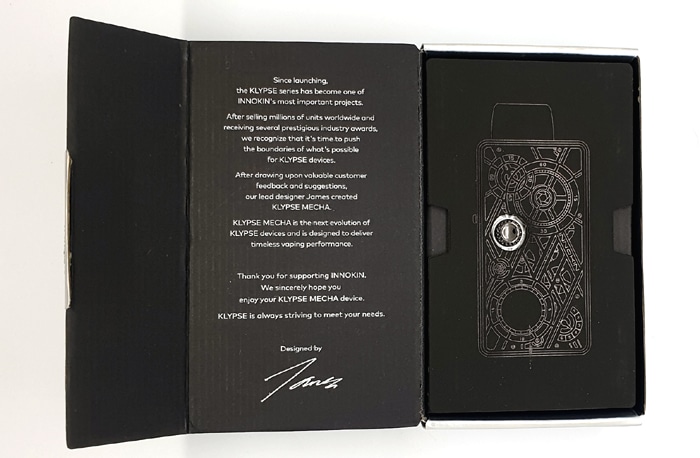
Then a piece of matte Black thick board is sat on top of the device with the rotating adjustment button poking through an embossed image of the mod.
Lift up this board and the beauty of this mod is revealed!
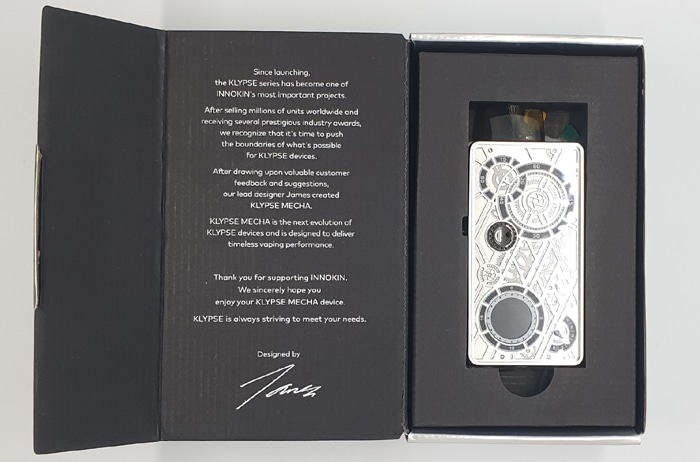
Lift up the tray where the mod sits and you will find another box containing the instructions, USB cable and the spare pod.
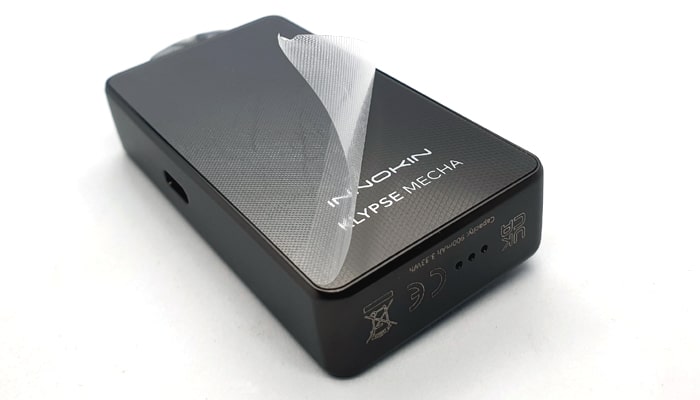
You get a protective cover on the rear of the mod which is similar to that you would find on the screen of a mobile phone and it peels off easily.
Also the base of the installed pod has an isolator sticker to help prevent accidental firing in transit.
Plus the packaging is super environmentally friendly being recyclable cardboard. The only item which is not recyclable is the plastic protection sticker on the rear of the mod.
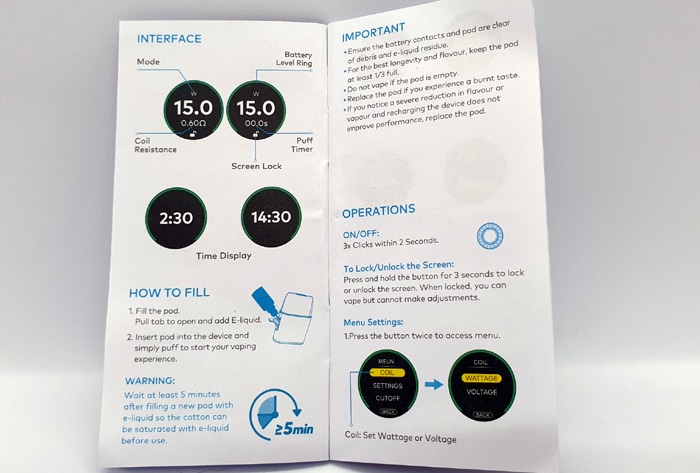
The instructions are ace and tell you everything you would need to know! You can also download a digital version here – ideal if (like me) you find it easier to zoom in!
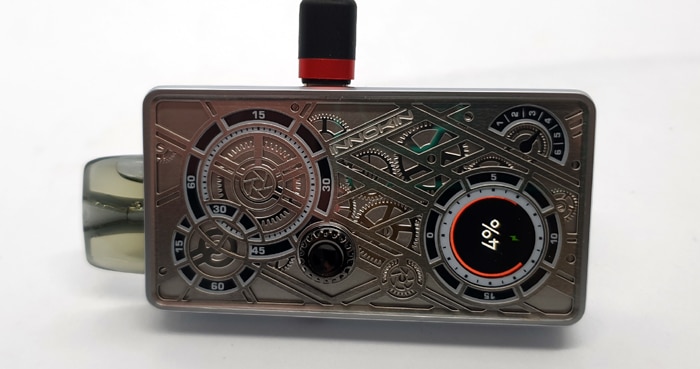
Innokin Klypse Mecha Mod
As I have already stated – this is bloody stunning!
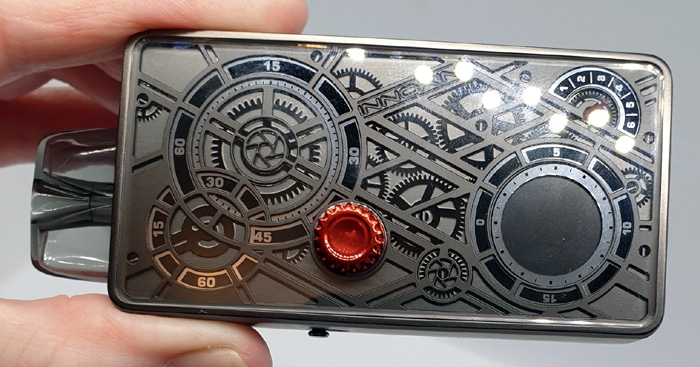
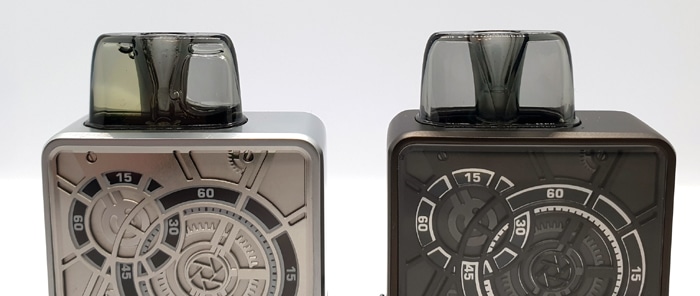
The front face has a “Steam Punk” style – with different metal layers depicting cogs and components you would find in watches or clocks. Different layers have different finishes too, some are matte, some have a mirror finish and some are designed like dials with Black backgrounds and White text.
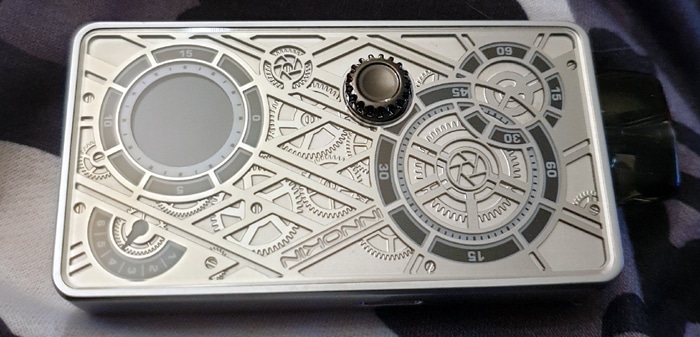
To add to this stunning design – this has a clear plastic panel covering which makes the layers look even deeper. I love this effect!
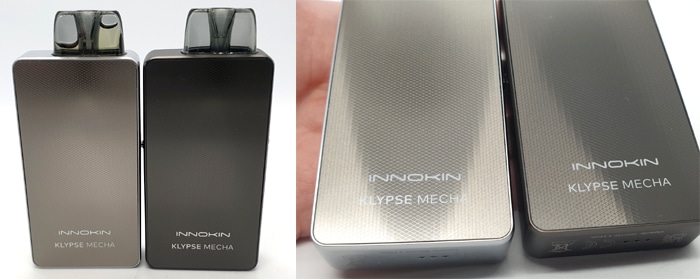
On the rear of the device is another panel which has an almost holographic appearance. Although it looks textured it is completely smooth.
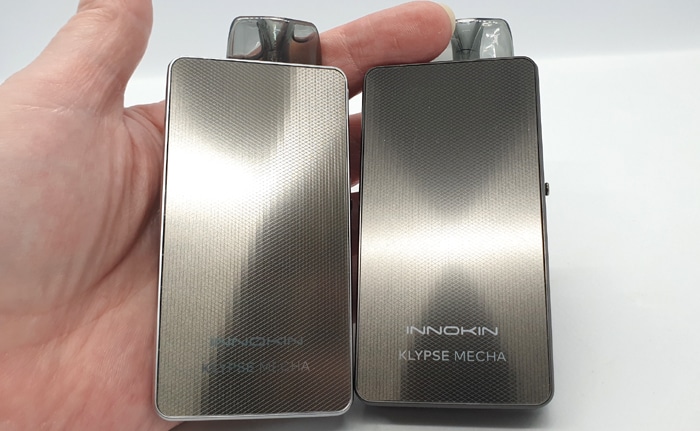
At the base of the rear the “Innokin” and “Klypse Mecha” text is etched in.
Around the sides and base of the mod is a metal shell, this has a matte finish and feels very smooth. However where this casing meets the rear panel it has a slight sharp edge.

Looking at the front of the device, the left side features the airflow slider which only protrudes around 3mm. It has a bit of resistance to movement but it is not tight to move either. I can’t imagine it would adjust itself unless you got the knob caught on something.
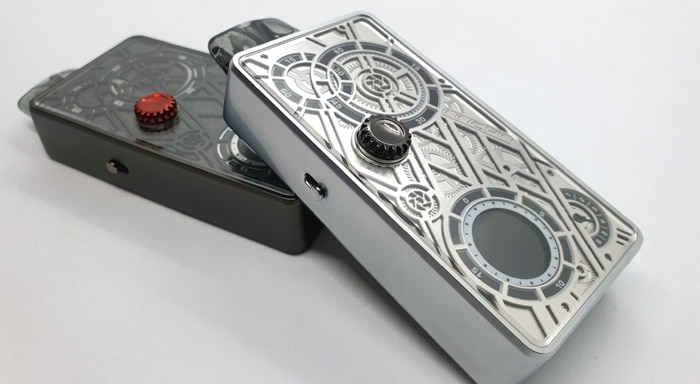
On the right side is the USB Type C port which is well recessed to help prevent any damage to the contacts.
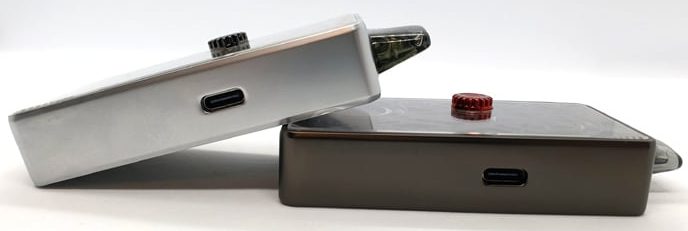
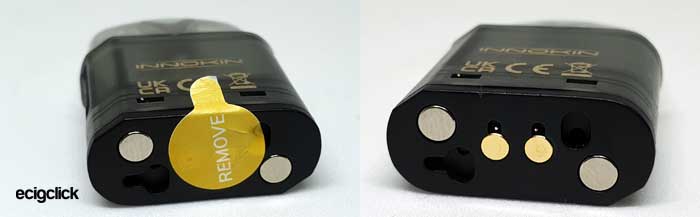
On the mod base you will find 3 venting holes, the required legal logos and the battery capacity etched in.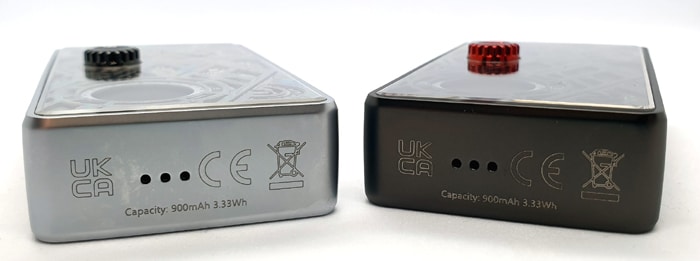
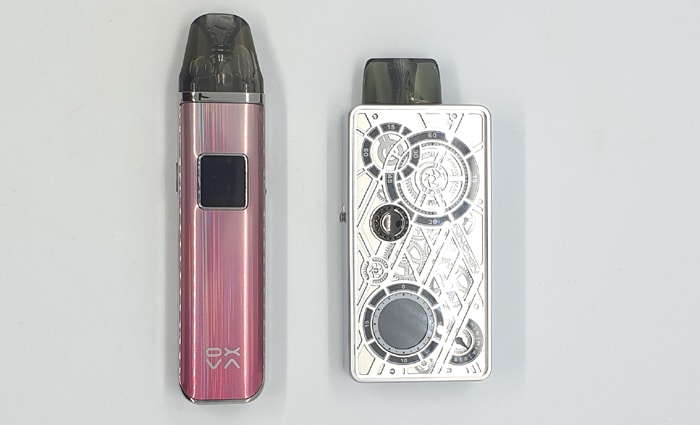
I am a bit confused as to the size of this, it only has a 900mAh battery. But look at the picture below where I have compared it to the OXVA Xlim Pro which has a larger battery of 1000mAh. Yet the Mecha looks a lot bigger?
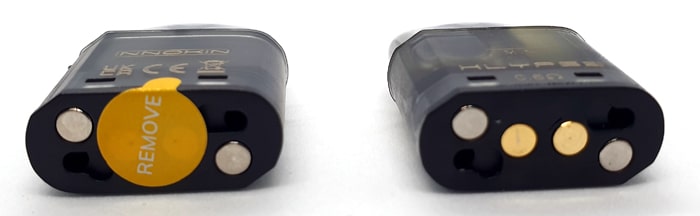
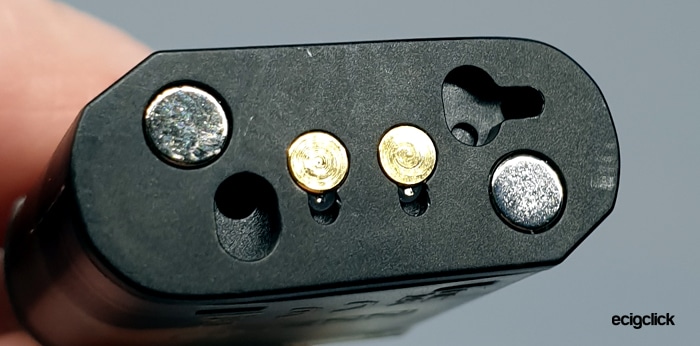
The pod port is quite deep – if you need to clean the contacts you will need to use a Cotton Bud or similar. Inside you will find 2 spring loaded contacts and 2 magnets.
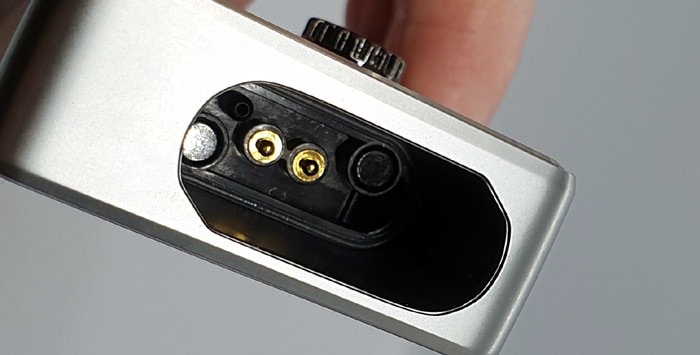
The port is shaped to match the pod – an elongated oval with a chamfer on each side. You can install the pod either way around.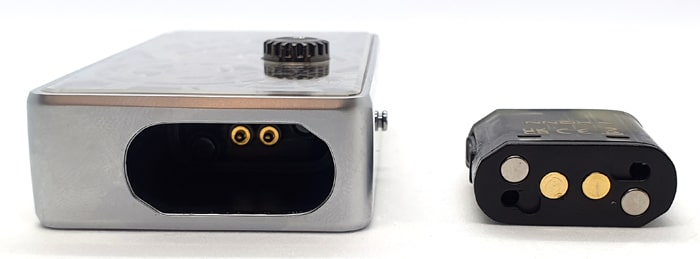
If you slightly insert the pod into the mod, the strength of the magnet will snap it into position, but it is easy to remove by pulling the pod against the magnetic resistance.
With the pod installed you can see the top 3rd clearly, so I found if I tip the device upside down I can see the e-liquid level easily. However you can’t see the minimum marking.
Workface
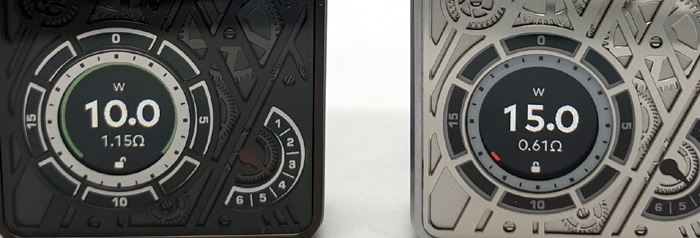
On the front of the mod you will find a circular OLED screen and the button.
The screen is around 15mm in diameter and the edge displays a ring which changes colour and size to inform of the battery capacity remaining.
At the top of the screen the “W” or “V” symbol denotes whether you have the Variable Wattage (W) or Variable Voltage (V) mode enabled.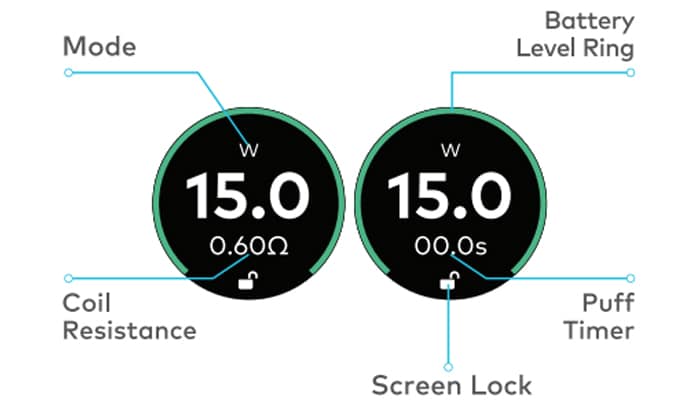
Below that the output level is displayed.
Underneath you will see the coil resistance followed by the Ω (ohm) symbol which specifies the unit of resistance.
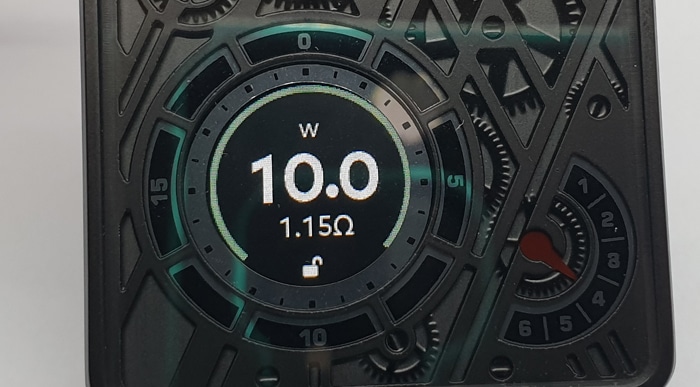
Then at the base of the screen is the padlock icon, which shows if the adjustment is locked or unlocked.
After vaping the screen will stay on and then default to the clock display briefly. You simply press the button to wake the screen up again. You can also adjust how long the screen stays on – I cover that in the Basic Operation section.
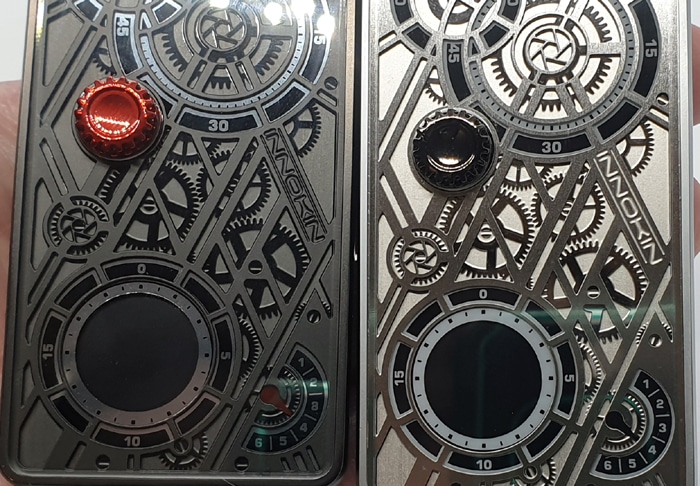
The button is in the shape of a cog to match the overall aesthetic. It is nice and clicky and responsive. You can rotate this button to make adjustments too. Again this works well and is responsive but it can be hard to grip sometimes – that may just be me and my dodgy hands though!
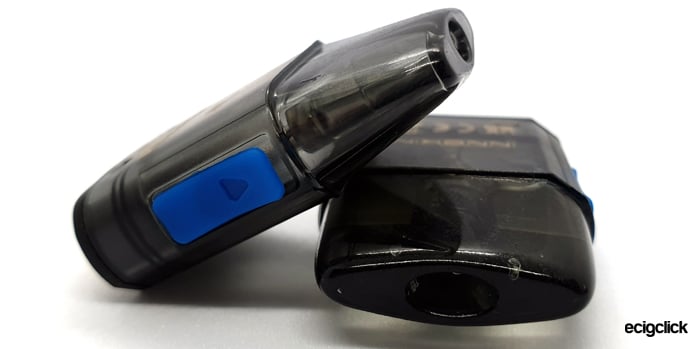
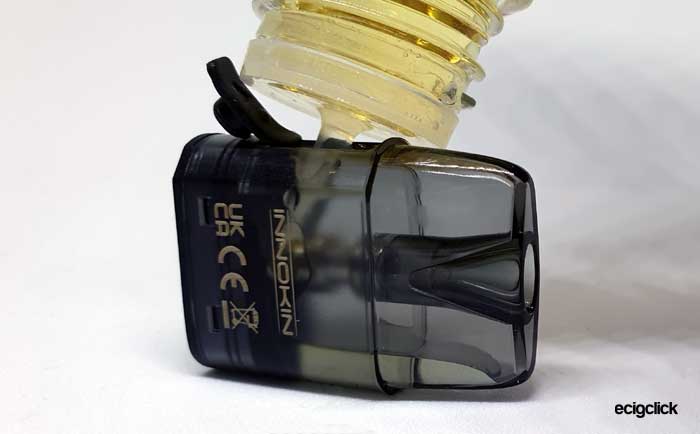
Innokin Klypse Pod
On the base of the pod are 2 contacts, 2 magnets and some airflow holes so you can install the pod either way around in the device.
This has a tint to it but the e-liquid level is clear to see, sadly 2/3 of the pod is concealed in the mod body when installed. There is a “minimum” e-liquid level mark but you have to remove the pod to see this.
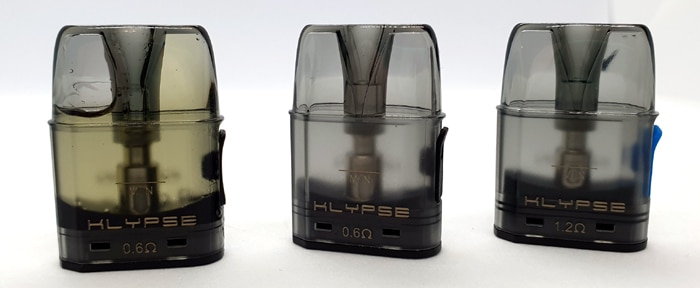
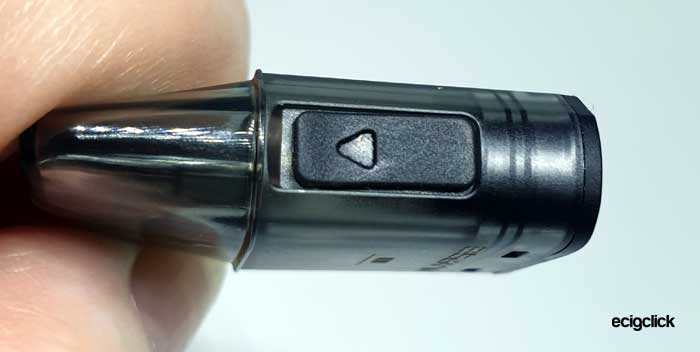
On the front of the pod is the “Klypse” text and the rear of the pod has the Innokin logo and legal markings.
The mouthpiece is kind of a thin flat “Duck-bill” style – but not as chunky as most mouthpieces in this style.
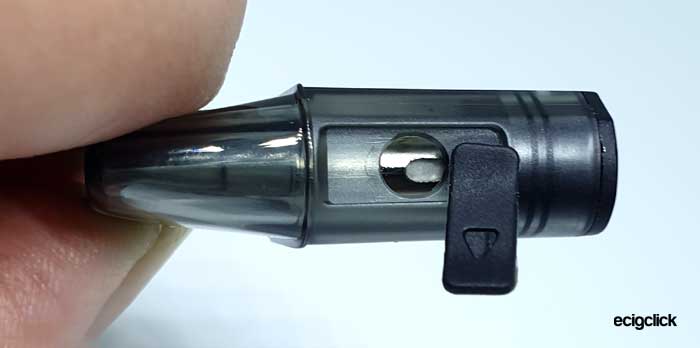
The fill port is located on the side with a lift up cover which is pretty easy to lift thankfully. Plus you can turn to cover around rather than have to hold it out of the way.
Being around 4mm in diameter the fill port hole has not posed any filling issues so far for me. But I do recommend turning the pod upside down when you fill.
Quick Start Guide
The pod has an isolating sticker on the base so once you have filled the pod remove this.
Charge up, fill the pod and off you go! I will tell you all the steps to get started below!
Basic Operation
- Power On/Off = Press the button 3 times.
- Vaping = inhale on the mouthpiece to trigger the auto fire.
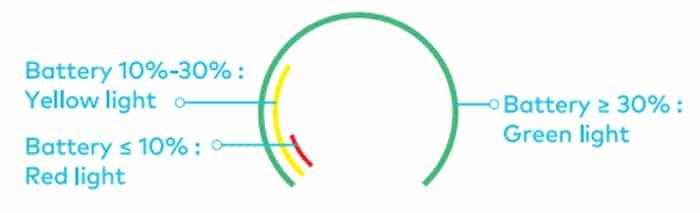
- Battery indicator = A ring around the outer edge of the screen changes colour according to the battery charge remaining. Green = over 30% charged, Yellow = 10-30% charged and Red = less than 10% charge.

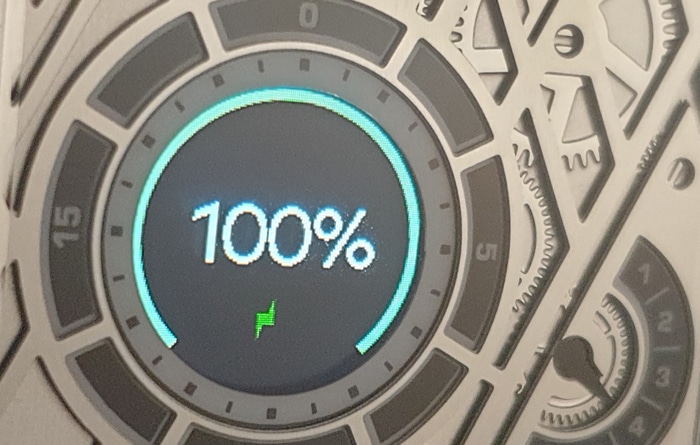
- Battery indicator when charging = The screen will display a Lightning Bolt icon, the percentage of charge plus a coloured ring in the battery indication colours whilst charging. When fully charged the screen will display “100%”.
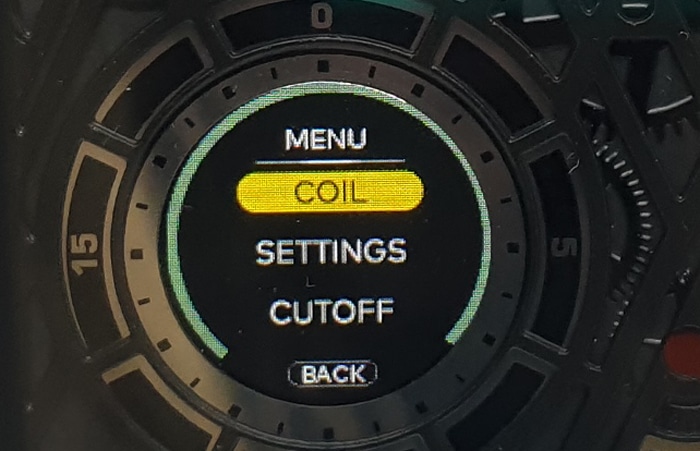
- Enter the menu = Press the button twice – rotate the button to scroll through the options. When you want to select an option press and hold the fire button.

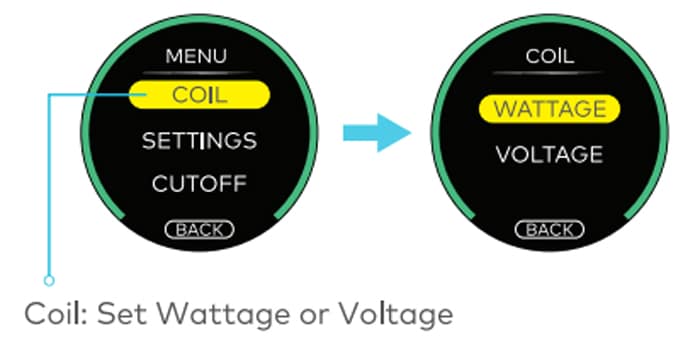
- Change output mode = Enter the menu and select “coil” – this gives you the option of “Wattage” or “Voltage”. Select the option you want and hold the fire button.

- Adjust the output = When you install a pod the device will automatically set the optimum output (Smart Mode). However you can adjust this. Unlock the screen (if locked) and hold down the fire button until the power value flashes. Rotate the button to select the required output. Leave device alone and it will return to the home screen.
- Adjust the airflow = Move the slider up to restrict the airflow and down to open it.

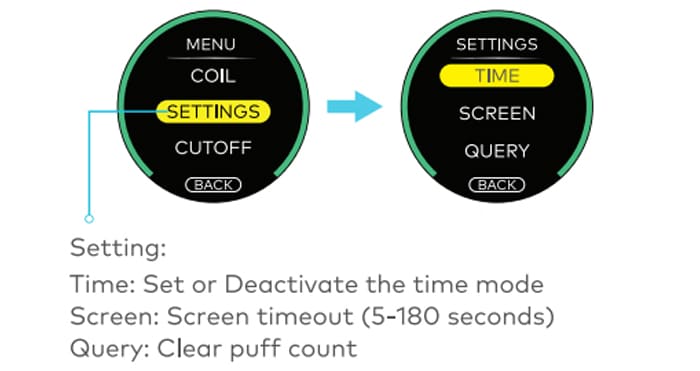
Left = fully closed, Right = fully open - View / Clear puff counter = Enter the menu and select “Settings” and scroll down and select “Query”. You can then select “clear” to clear the counter, or “back” to exit.

- Lock / Unlock adjustment = Press and hold the button down until the padlock symbol at the bottom of the screen shows locked or unlocked. You cannot adjust the output when locked, but the auto draw vaping still is active.
- Set the clock = Enter the menu and select “Settings” and scroll down and select “Time”. Choose from “Set” to set the correct time, or “Deactivate” to turn off the clock.
- Adjust screen turn off time = Enter the menu and select “Settings” and “Screen” and you can adjust the length of time the screen stays turned on when not in use.
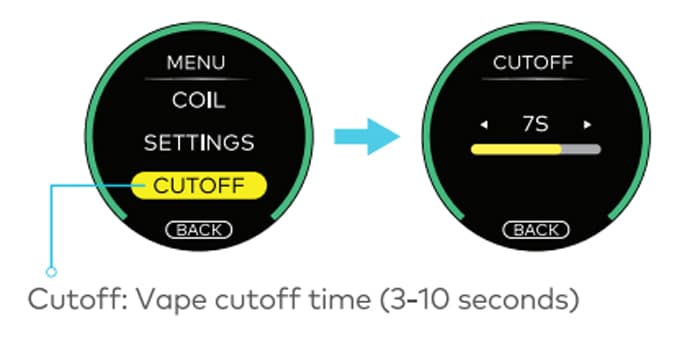
- Adjust puff length cut off time = Enter the menu and select “Cutoff” and scroll to adjust the puff length in seconds from 3 to 10 seconds.

Protections

- Low battery – The screen will display “Low Volt” and the device will not operate until charged.
- Check coil – If the coil resistance is above 3.5ohms or there is an open circuit, the screen will display “Check Coil”. Replace the pod, clean all the contacts. If the fault still occurs the device may be faulty.
- Coil Low – If the coil resistance is below 0.5ohm, the screen will display “Coil Low”. Replace the pod, clean all the contacts. If the fault still occurs the device may be faulty.
- Coil Short – If there is a short circuit the screen will display “Coil Short”. Replace the pod, clean all the contacts. If the fault still occurs the device may be faulty.
- Time Out – If you exceed the specified cut off time for vaping, the fire will cut out. You can adjust this time as described in the Basic Operation section above. Once the fire has cut out, you can simply vape again to continue.
- High Temp – If the circuit board overheats, the screen will display “High Temp”. Wait for the device to cool down and start vaping as normal.
How To Charge The Battery
The charging rate is specified as 0.8A.
- Using the included USB type C cable, connect the small end into the USB port on the mod.

- Connect the large end of the cable into a suitable USB outlet.
- The screen will display the percentage of charge plus a coloured ring in the battery indication colours whilst charging. When fully charged the screen will display “100%”.

The charging time for me was between 1 hour and 1 hour 10 minutes.
How To Fill the Pod
Innokin recommend keeping the pod at least 1/3 full at all times to prevent coil damage – so keep an eye on this! You will have to remove the pod to view the liquid level when it drops below the mod port.
There is a minimum level marked on the side of the pod.
- Remove the pod from the mod.
- Lift up the cover of the fill port and add e-liquid through the port.

- Watch the e-liquid level through the clear side of the pod.

- Replace the fill port cover firmly.
- If this is the first fill allow the pod to stand for 10-15 mins to allow the e-liquid to soak into the coil. This is called Priming and is a very important step. If not fully primed you could burn the coil out and your throat lining in the process!
How Does the Innokin Klypse Mecha Pod Kit Perform?
I used my own e-liquid mix which is 50/50 PG/VG made from IVG Bubblegum Concentrate at 20% ratio. This is quite high a flavour ratio as I prefer plenty of flavour, but sadly this means it can be a coil killer sometimes.
I add nic salt to approx 6mg strength.
If any of these terms are over your head – have a read of our handy guides below!
- MTL V DTL – A Guide To Vape Styles
- VG and PG in E-liquid – all you need to know
- Beginners guide to E-liquid
- Nic Salt E-liquid
0.6ohm Pod Performance
The first few vapes were a bit of a let-down – however please persevere as by the time you have vaped 1ml of e-liquid the flavour will kick in beautifully!
The device suggested 15W for this pod and to be honest I found this the best setting!
Whilst it is not on par flavour wise with the OXVA Xlim, it is still pretty bloody good!
I can taste all my e-liquid flavour, there is a good throat hit and a decent amount of vapour considering I am only using a 50/50 e-liquid.
Just for sh*ts and giggles I tried some 70/30 e-liquid in here too, the Ruthless Energy Drank.
I have run 2 pod fulls of the 70/30 through here and it had no issues wicking the thicker e-liquid at all.
The flavour was great and it really helped to bring out the sweeter elements of the e-liquid, plus I was chucking out a thicker vapour cloud too!
Turning the power up to 16W made this e-liquid really shine but it did start to feel on the verge of a dry hit so I continued at the suggested 15W.
So far I have refilled this pod 9 times and the flavour is still great, no deterioration as yet!
1.2ohm Pod Performance
This is the same pod which was supplied with the Innokin Klypse Zip pod kit – and at the time I didn’t really enjoy it. It felt weak and underpowered.
However the joy this time is that I can turn up the power as the Klypse Mecha has variable wattage!
The output for the Klypse Zip with this pod was 10W, I am running it at 11W in the Innokin Klypse Mecha and it has really woken the pod up! Sadly the device will not let you go any higher than 11W with the 1.2ohm pod – this is to prevent you accidentally burning the coil out.
It is still the smoother more gentle of the two pods but the flavour is so much better – even with just 1 extra Watt of power!
This pod is ideal for those who use higher nicotine strengths – i.e. over 10mg as it will make sure the vapour is calm.
If you want a strong throat hit, I would recommend the 0.8ohm (available separately) or 0.6ohm pods.
I found this performed best with the airflow in the mid setting.
After 6 refills this pod is still performing well with no dip in flavour!
Airflow
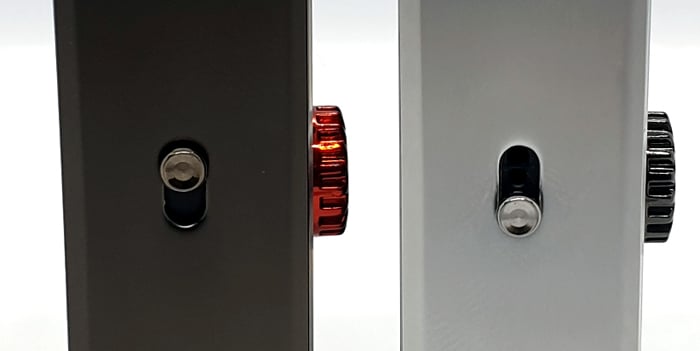
Strangely the airflow was different between the two mods I received??
The airflow was tighter on the Silver version than the Black version – which confused me no end as I was using the 0.6ohm pod in the Silver and the 1.2ohm pod in the Black! To test I swapped the pods between both devices and found the difference.
I use an imaginary scale to gauge the airflow – 0 is fully closed and 10 is like breathing fresh air.
For the Black kit – the 0.6ohm and 1.2ohm pods are around 1.5 with the airflow fully closed and 5 fully open.
For the Silver kit – the 0.6ohm and 1.2ohm pods were 1 fully closed and 5 fully open.
As you can see when fully open the airflow on both kits and both pods were the same. But when fully closed the Black kit had slightly less restriction?
This range is excellent for MTL vapers and might just satisfy a RDL vaper.
Mod Performance
I had a couple of miss-fires when I was inhaling and the mod did not fire. Also when this happened it would sometimes fire itself after I had stopped inhaling. If you do get this and get worried, simply pull the pod out to stop it firing. There were no leaks or e-liquid in the pod compartment so this might be an issue with the sensor?
It didn’t happen often – about 6 or 7 times in all the time I was using these kits – but it is worth mentioning.
This did happen on both kits – so it is not just a faulty mod.
The rest of the time the auto draw was pretty quick.
Another concerning issue was the fact that when the device was sat idle on my table, the screen would randomly light up – no idea why this was happening.
Although I love having the clock, it ended up being useless as it was slow and would not keep the correct time!
Again all these issues were present on both of the mods I was using.
I found the performance was stable right until the Red indicator was showing on the battery display, which is less than 10% charge left. The output felt weak at this point but that is normal just before the battery conks out.
Battery Life
As always this is down to your own vaping habits, pod installed and output selected. But to give you a guide…
With the 0.6ohm pod I got between 4 and 5.5 hours vaping, around 165 puffs and 2 refills per battery charge.
With the 1.2ohm pod I got between 5 and 7 hours vaping – 2 to 3 refills. The puff counts per charge varied from 198 to 278!
I am a very heavy vaper so those who vape less frequently or take shorter puffs will find the charge will last longer.
Pros
- The most stunning pod kit I have seen in a long time
- Compatible with refillable and pre-filled Innokin Klypse pods
- Excellent packaging and instructions
- Adjustable airflow and output to tailor the vape to your own preference
- Cute animation when charging
- Device is super robust and well built
- No leaks
- Easy to fill
- Screen is good size, bright and clear
- Good airflow adjustment range suitable for MTL and semi RDL vapers
- Great flavour from both pods
Cons
- Slow charging – only 0.8A – when a lot of pod kits are 2A
- Puff counter is not displayed – you have to go through menu to view it
- User interface is a bit strange – holding the button down sometimes can skip through the menu further than you want.
- Sharp edge where the body and rear cover meet
- The clock does not keep accurate time – it is slow
- Quite a large device considering it only has a 900mAh battery – it is much larger than some pod kits with a similar capacity?
- Had instances of miss-firing or self-firing on both mods, there were no leaks or e-liquid in the pod compartment.
- Airflow when fully closed was not consistent between both devices?
- It can be a bit hard to grip the button when rotating it
Final Review Verdict
This is the most stunning pod kit I have seen in a very long time.
The vaping experience was in general great and it has some lovely features such as the airflow and output adjustment.
There are sadly a few issues…
The build quality score suffered due to sharp edges on the rear of the mod, weird miss-firing / firing on its own, difference in airflow restriction between both mods, the clock not keeping the time accurately and it is pretty slow to charge at the 0.8A charge rate – most pod kits have 2A charging nowadays.
Ease of use suffered a drop in points as the user interface is not the best. You have to press and hold the button to select or enter menu’s but sometimes it skips a step further than you wanted to go. Plus the button is a bit fiddly to grip and you have to turn it each time to make an adjustment or scroll.
Also the puff counter is not displayed, you have to enter a menu to view it.
The methods of adjustment and entering menus is not really intuitive, you have to learn how long to press the button and hold it, but if you hold it too long it selects something on the next screen you don’t want it to!
Finally it is a bit of a chunky device, compared to other pod kits with a similar or even larger battery capacity – this looks big. But it is very rugged and feels like it will be long lasting.
Innokin very nearly nailed it with the design here, but there are some issues which need attention.
If you can live with these niggles you should enjoy looking at and vaping on this kit a lot. Please Innokin I beg you to rectify the issues above as it is so close to perfection! You have the basics right – the flavour and styling!


 The Limits?")
